Use the Resources Front Desk Dashboard
Last updated: October 8, 2026
The desk dashboard at /ops/resources is the front desk's working screen: today's queue of pickups, returns, and room bookings, plus one search box that finds a person, an item, or a reservation by scan or by typing. It sits beside Mailroom in the operations portal and needs the Operate the resource desk permission; anyone without it is refused.
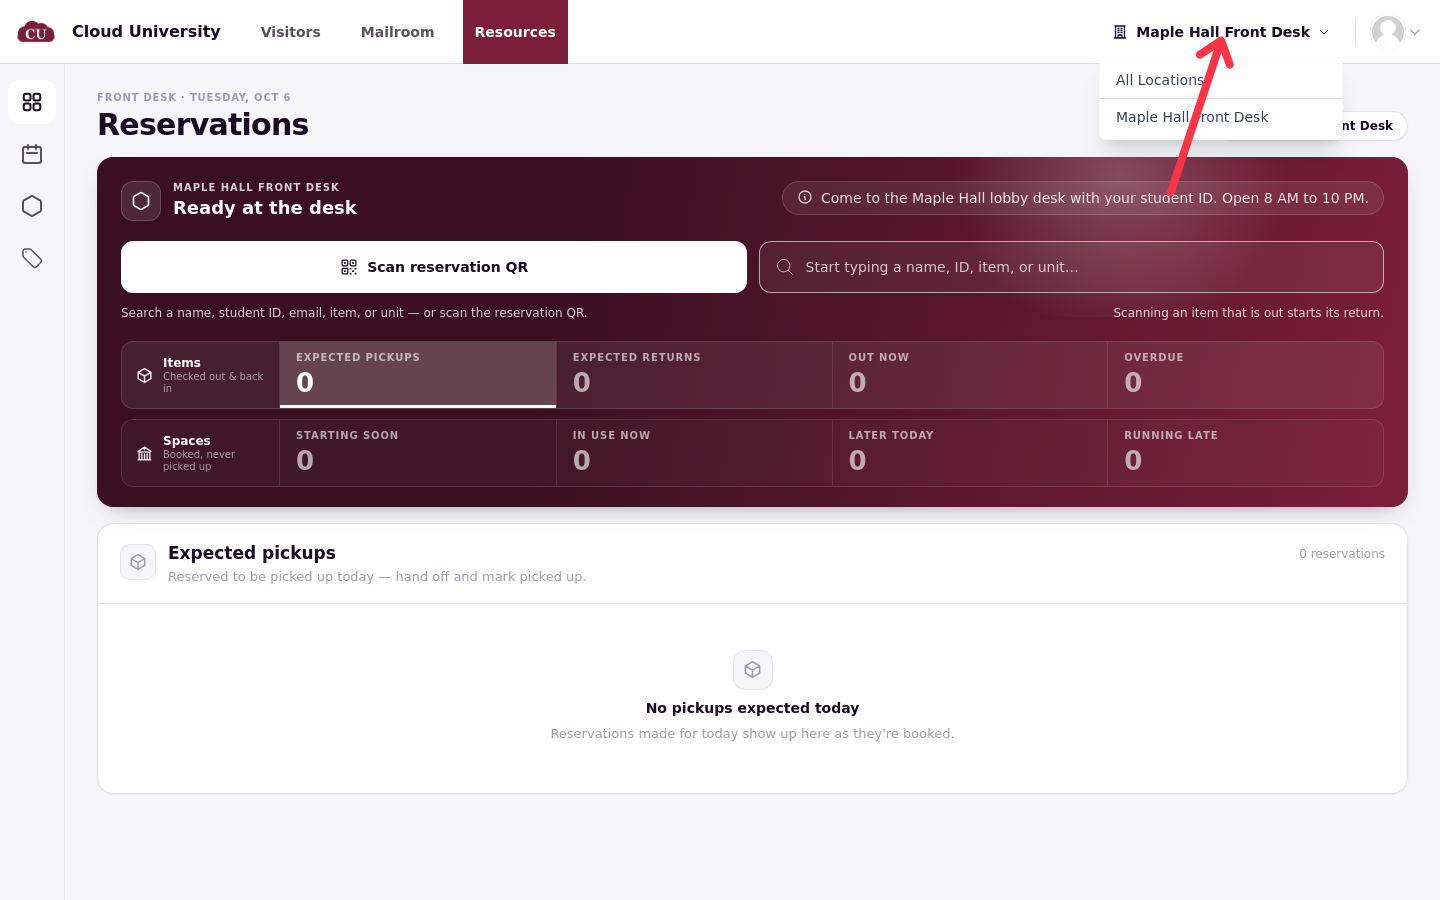
Choose your desk
On arrival the screen asks you to Choose a location. Pick your desk, or choose All locations to also include items that are not tied to a desk. What the desk shows can also include loans held by its building's residents when that setting is on in Resource Settings. Reservations are not widened by this setting.
Read the two tracks
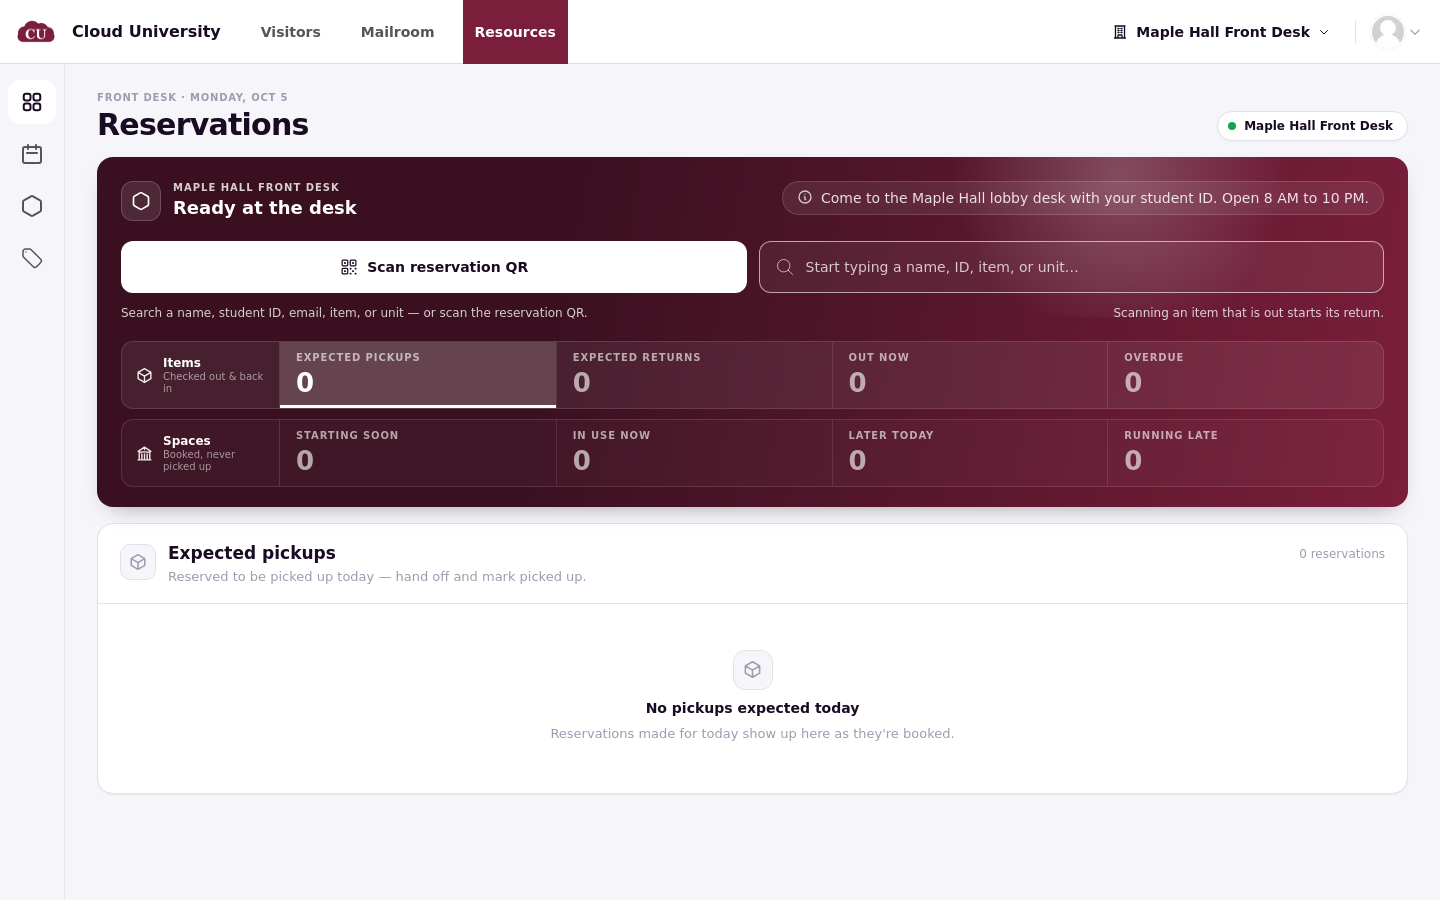
Items and rooms run on separate tracks because they behave differently.
The items track follows the hand-over loop: Expected pickups, Expected returns, Out now, and Overdue. A walk-up loan lands in Out now the moment it is picked up, and moves to Overdue once it passes its due time.
The rooms track follows the clock instead, because rooms are never picked up or returned: Starting soon, In use now, Later today, and Running late. A room booking that is under way shows Open booking, which opens the booking rather than starting a hand-over; rooms never show a Pickup action.
Find a person or an item
The search box is the desk's fastest tool: type a name, student ID, email, item, or unit code, or use the scan control beside it to read a code. Searching a person brings up their card so you can start a pickup or return; searching a unit code brings up the item itself. The desk never needs the admin area for a normal loan: search, pick, and act.
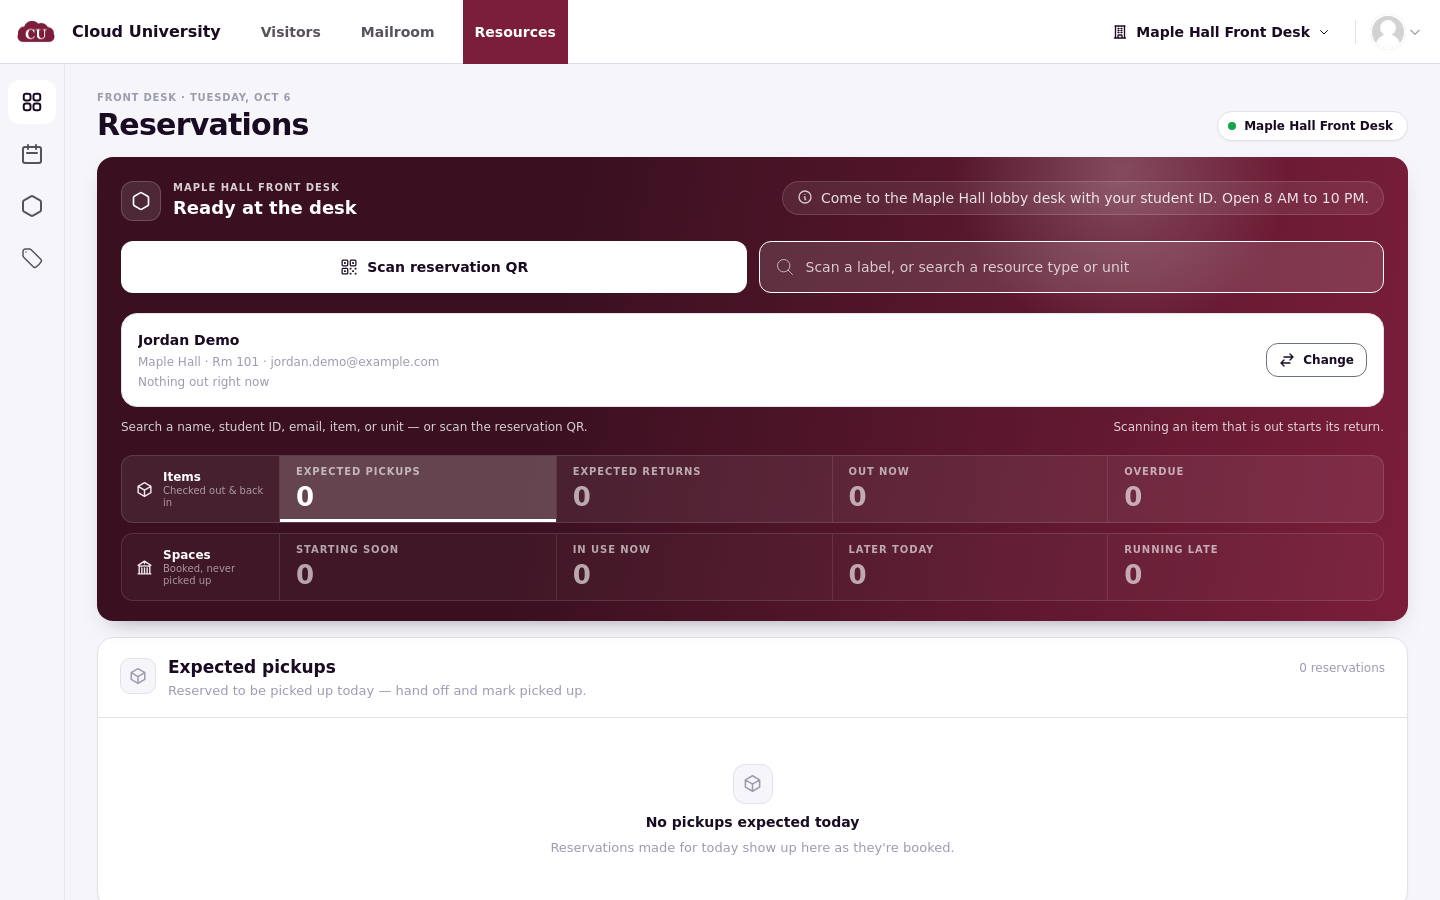
The card shows the person's building, room, email, and what they have out, so you can confirm you have the right student before anything moves.
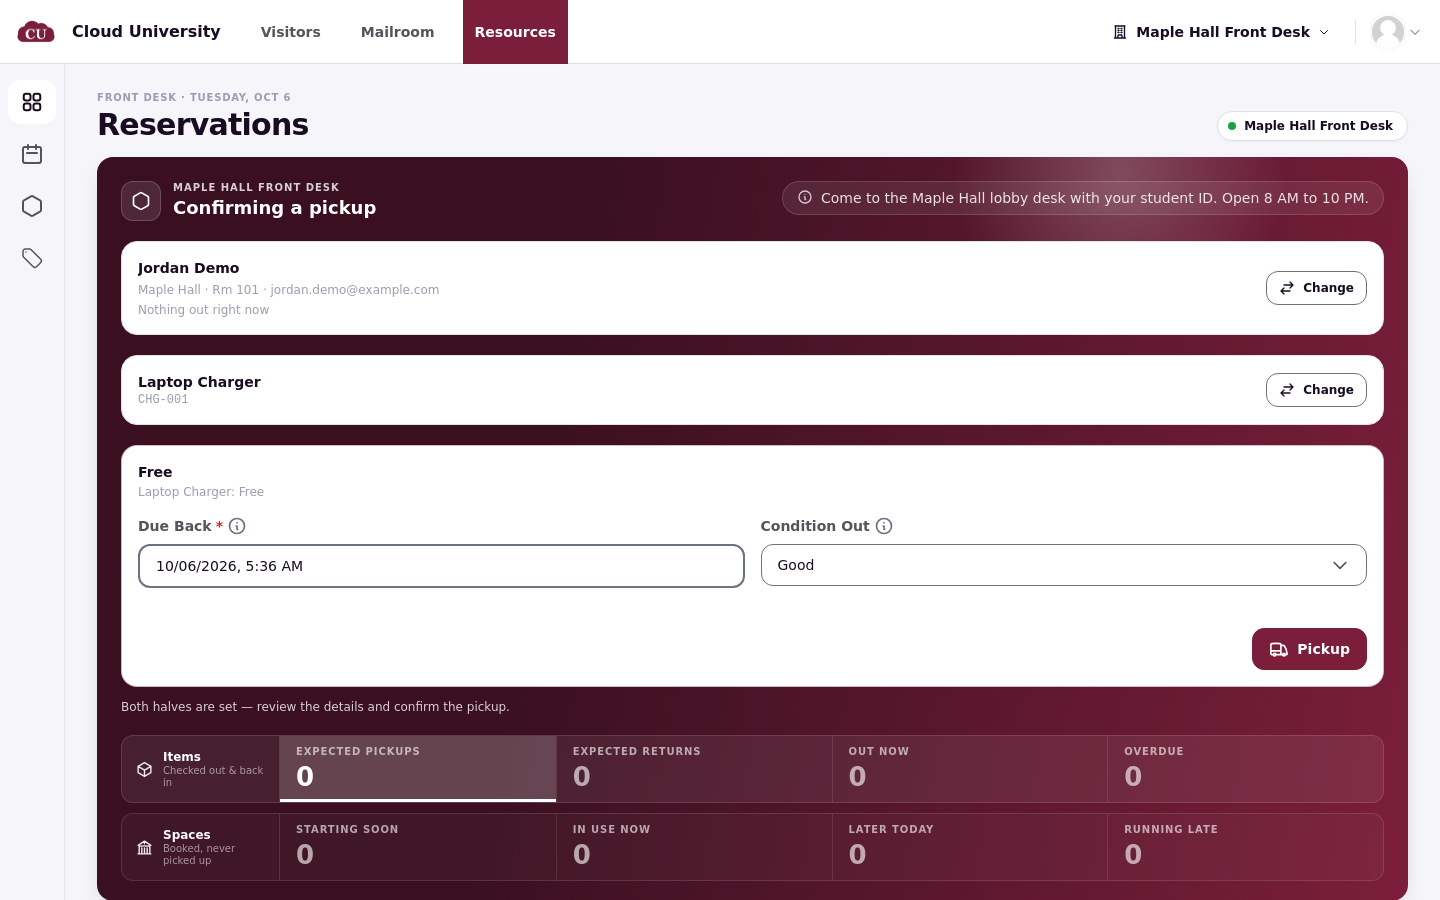
Choosing a pickup for a unit opens the Confirming a pickup screen for that person and item, where the loan's details are set before you confirm.
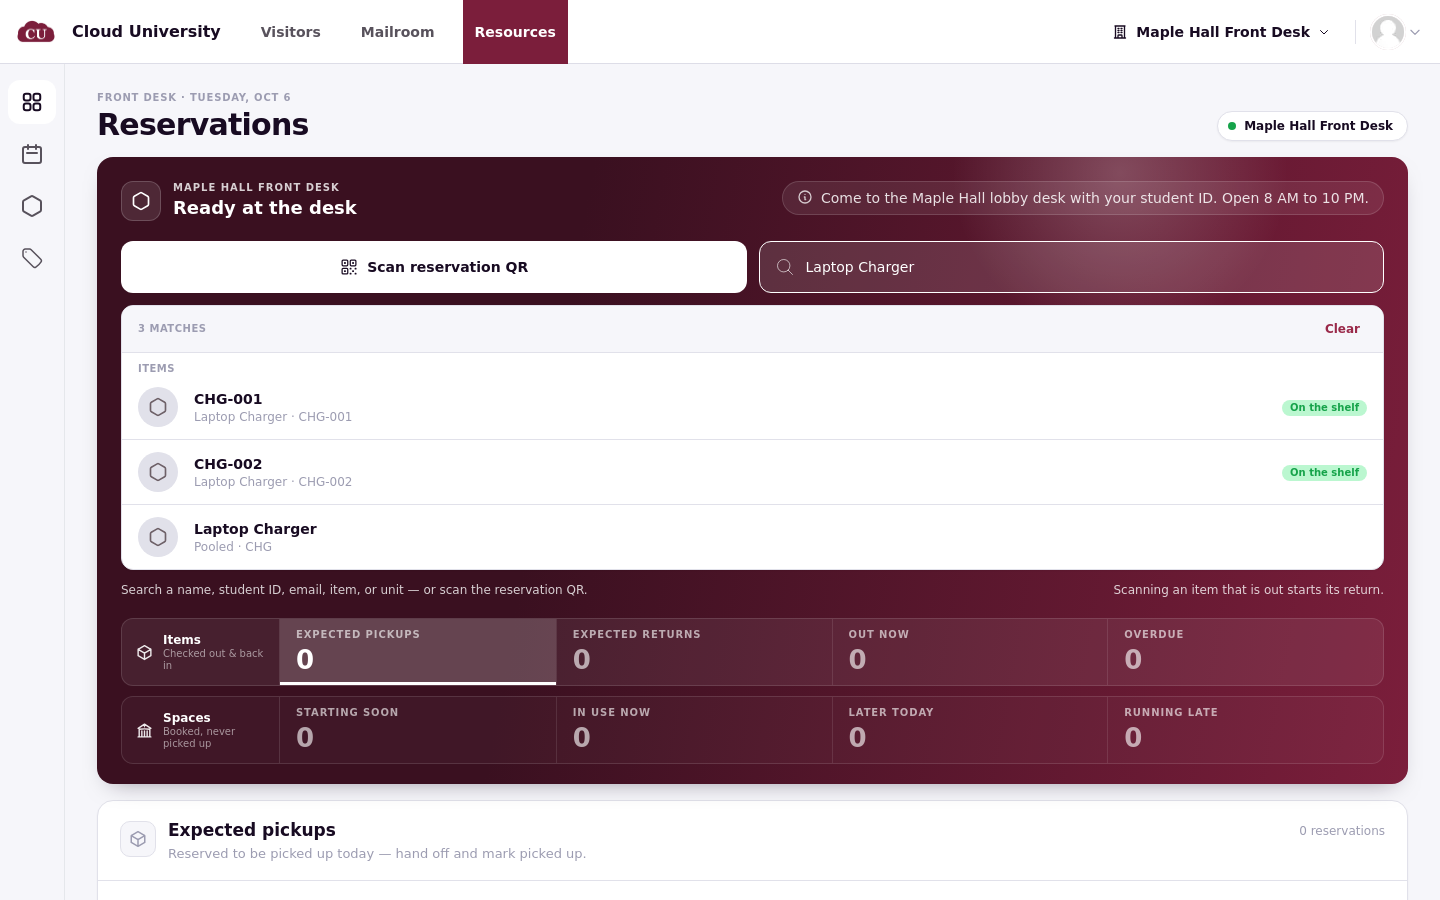
Searching a unit code or an item's name skips the person entirely: matches come back per unit, each with its current state such as On the shelf.
The rail
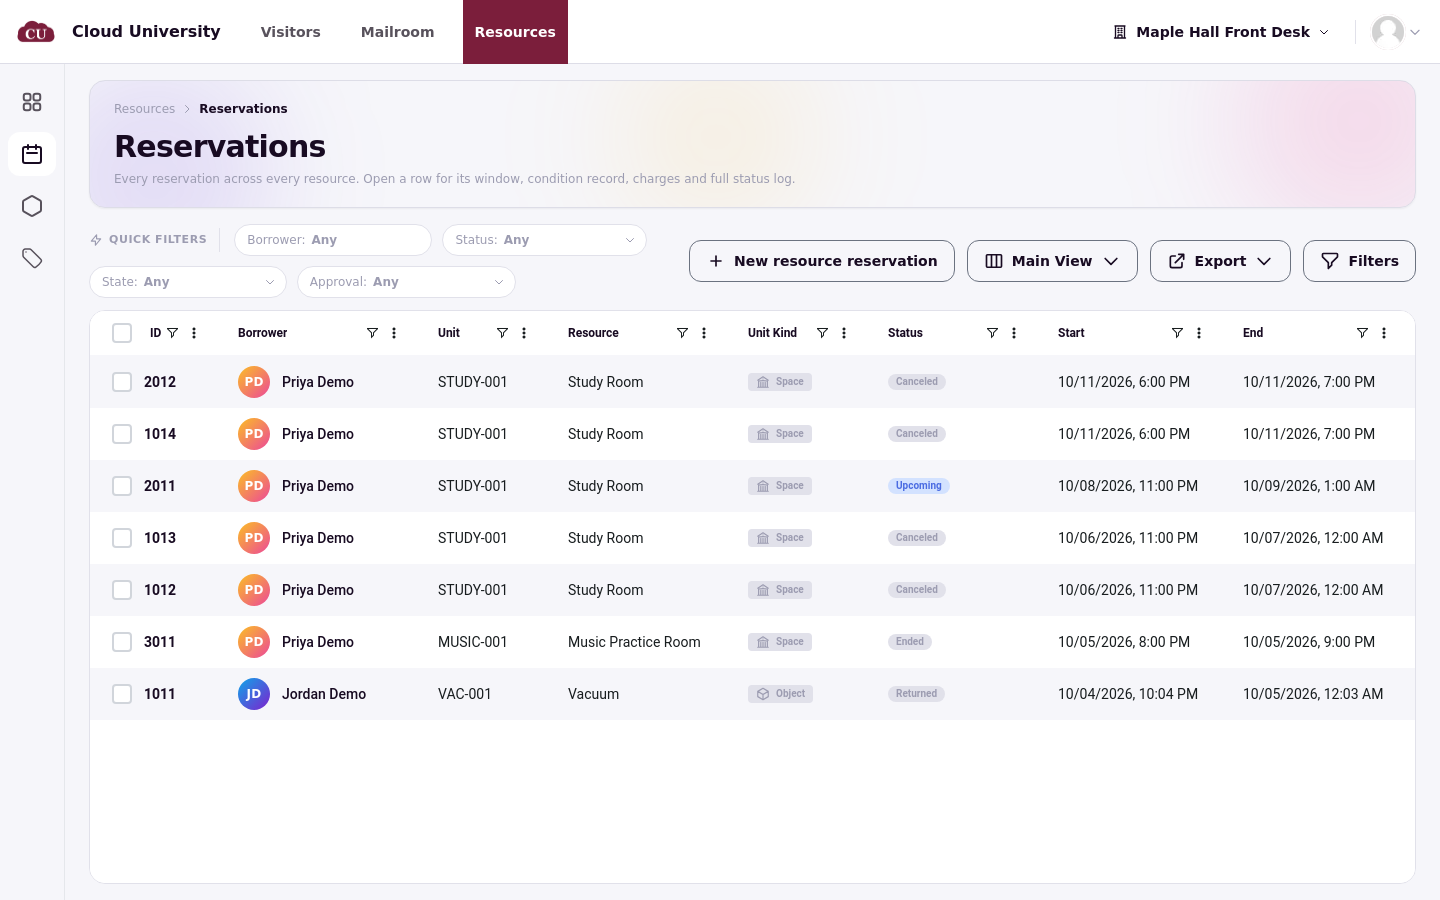
A rail on the side links the desk's pages: Dashboard, Reservations, Units, and Resource Types. Reservations supports operational actions at the desk, with row and bulk actions including check-out and check-in where permitted. Catalog changes happen in the admin area, not here.
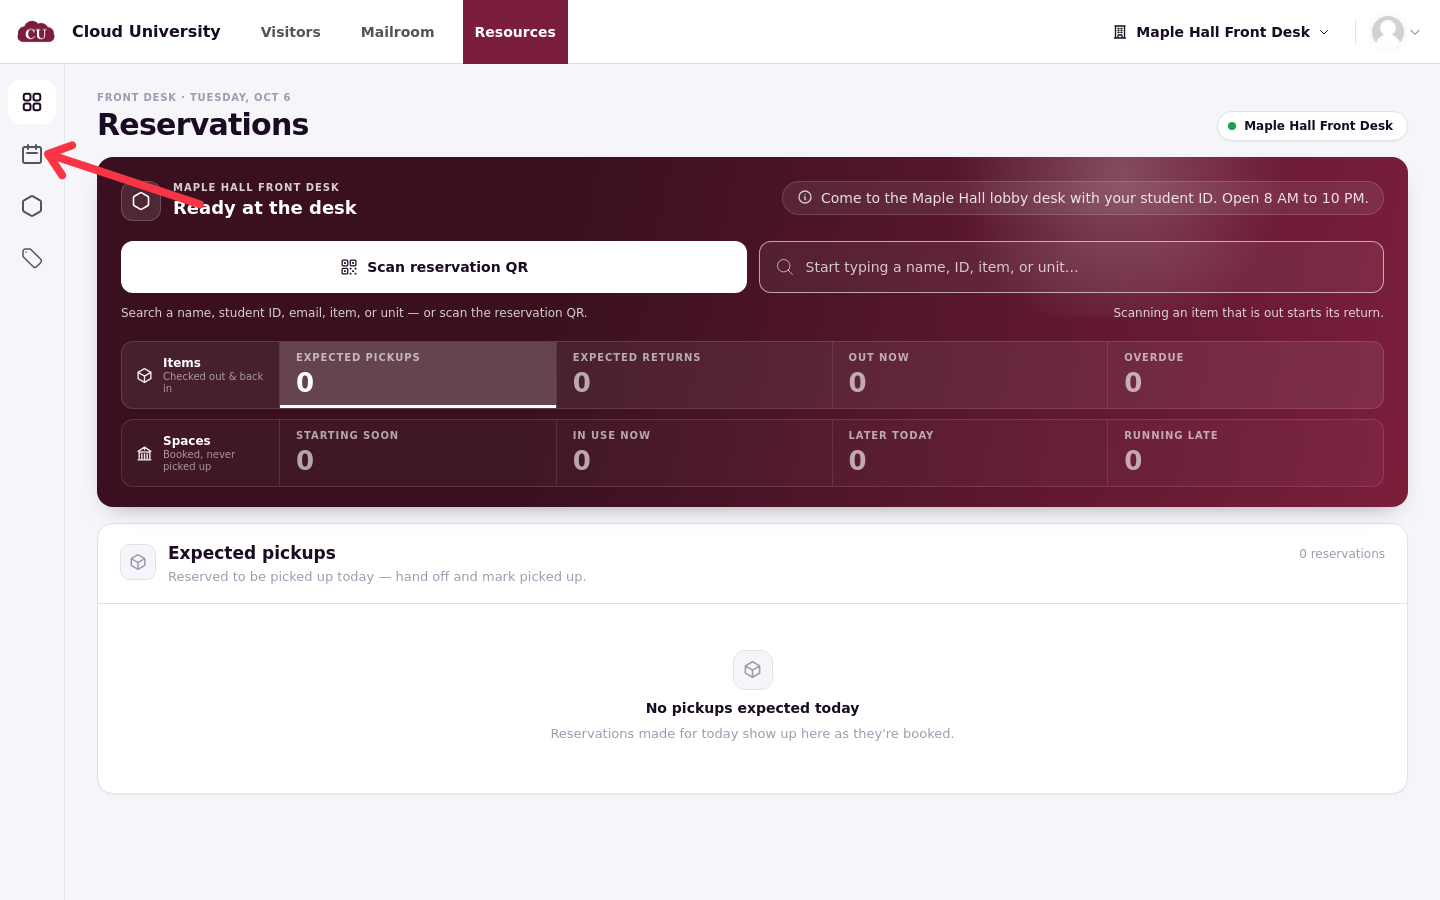
Each rail page opens in the same desk view. Reservations shows the booking list with its quick filters, and the same row and bulk actions, including check-out and check-in where permitted, are available here.
Verify your access by opening /ops/resources and choosing your desk: the queue tabs and the search box should load. Signed-in users need the Operate the resource desk permission; a refusal or redirect can also mean you are not signed in, or that the Resources feature is disabled.