How to Create a New Role
Last updated: August 28, 2026
Admin roles define what actions team members can perform in the Housing.Cloud admin portal. Each role groups permissions together, making it easier to manage access for different staff responsibilities without assigning permissions one at a time.
Creating a new role is useful when your existing roles don't match a specific job function on your team, such as a desk attendant who needs limited access to check-in workflows but shouldn't edit building settings or view billing data.
Only users with the manage admins permission can create or edit roles. If you don't see Setup → Roles & Permissions in your sidebar, contact your administrator to request access.
Access the roles list
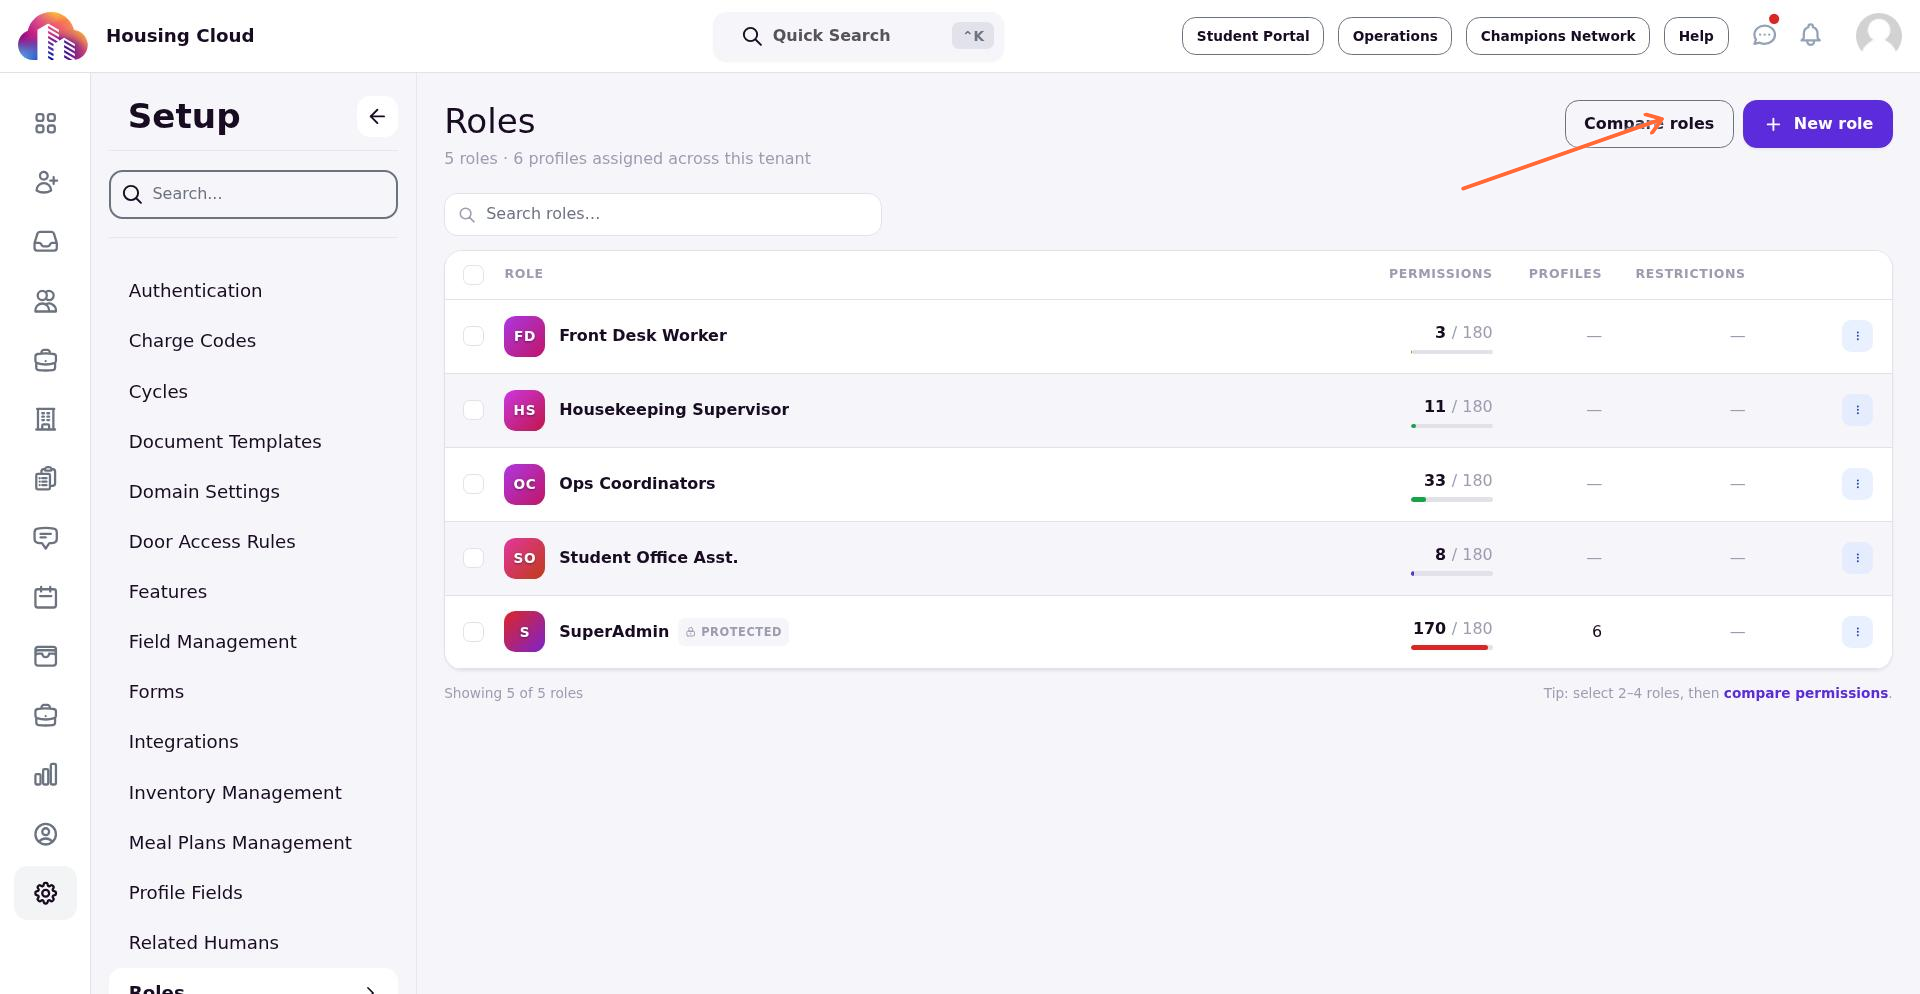
Navigate to Setup in the sidebar and select Roles & Permissions. The system displays a list of all existing roles in your environment, including default roles provided by Housing.Cloud and any custom roles your team has created.
Open the role editor
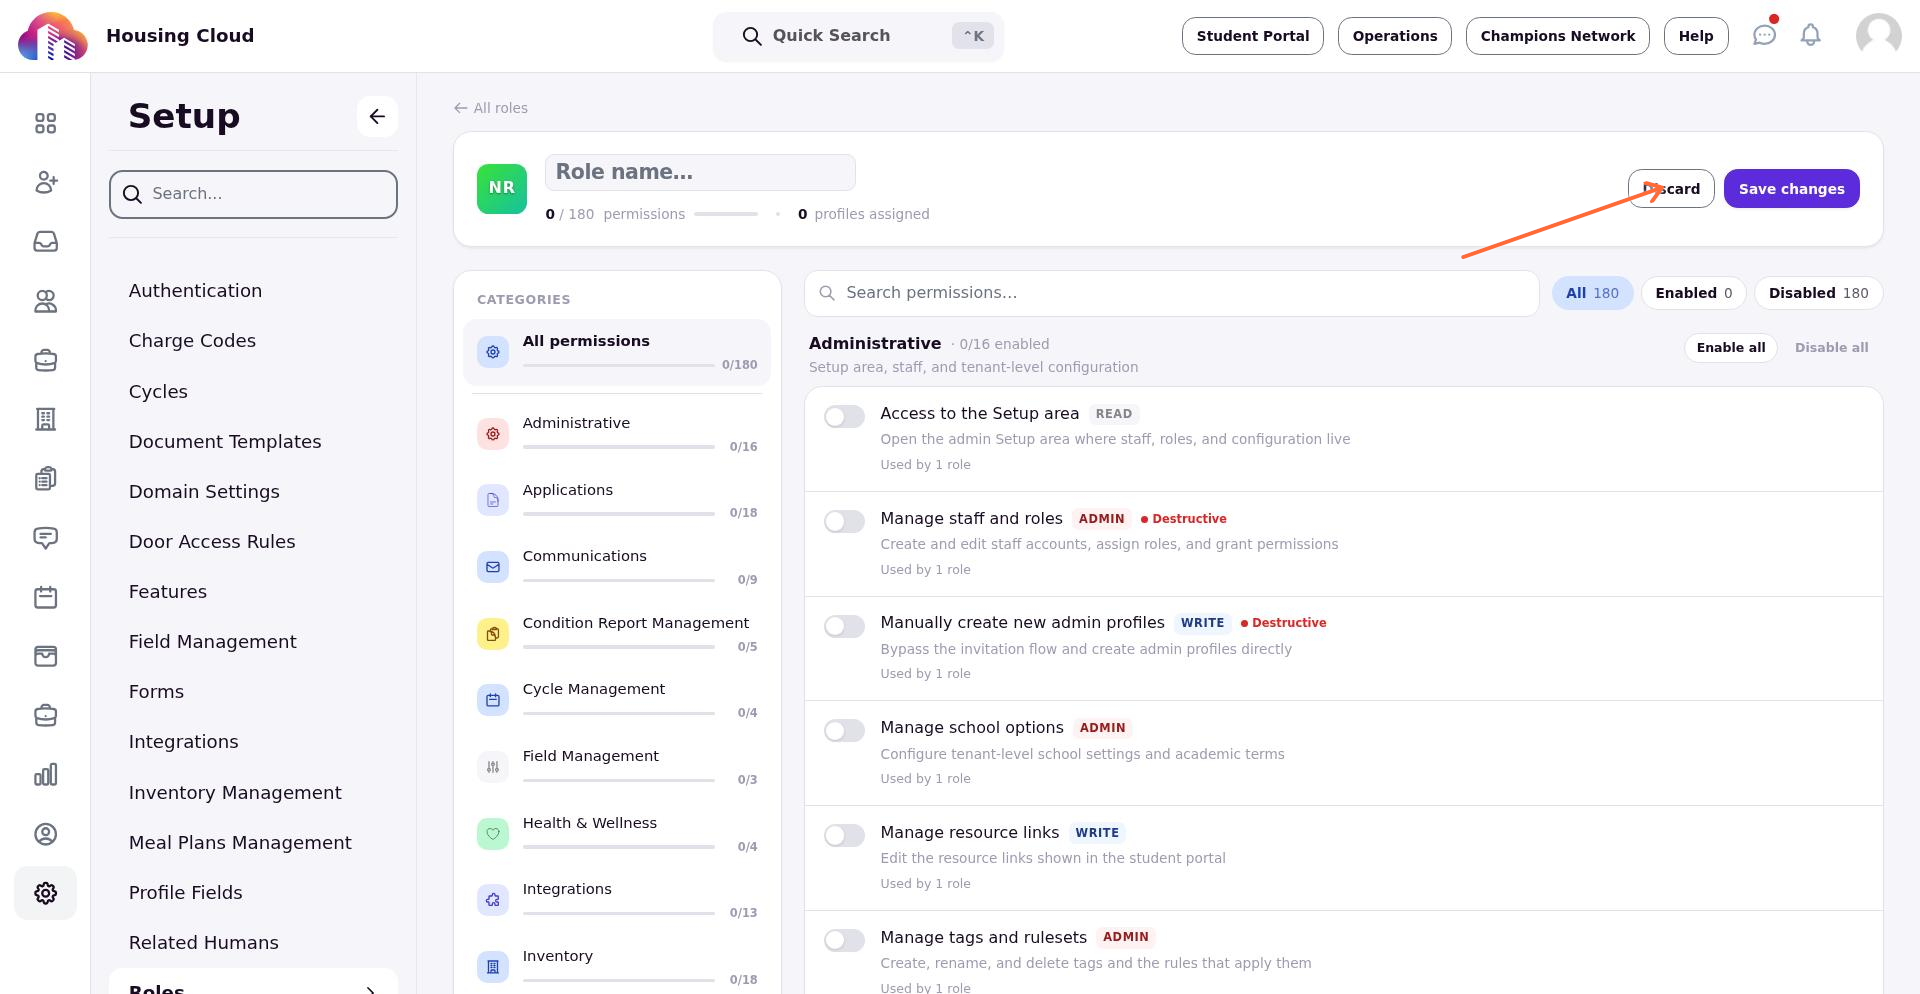
Click New role to open the role editor. The editor opens with an empty role template, ready for you to define the role name and select permissions.
The system initializes the new role with no permissions assigned. This prevents incomplete roles from being saved accidentally—each role must have at least a name before it can be created.
Define the role name
Enter a descriptive name in the Role name field. Choose a name that reflects the job function or responsibility level, such as "Desk Attendant," "Housing Coordinator," or "Billing Administrator."
The name appears in role lists and assignment menus throughout the admin portal, so clarity helps other administrators understand what access the role provides.
The system validates that the name is not blank. If you attempt to save without entering a name, the system displays an error: Name cannot be blank.
Select permissions
The permission grid displays available permissions organized by category. Categories are listed alphabetically and show only permissions available to your organization based on feature gates.
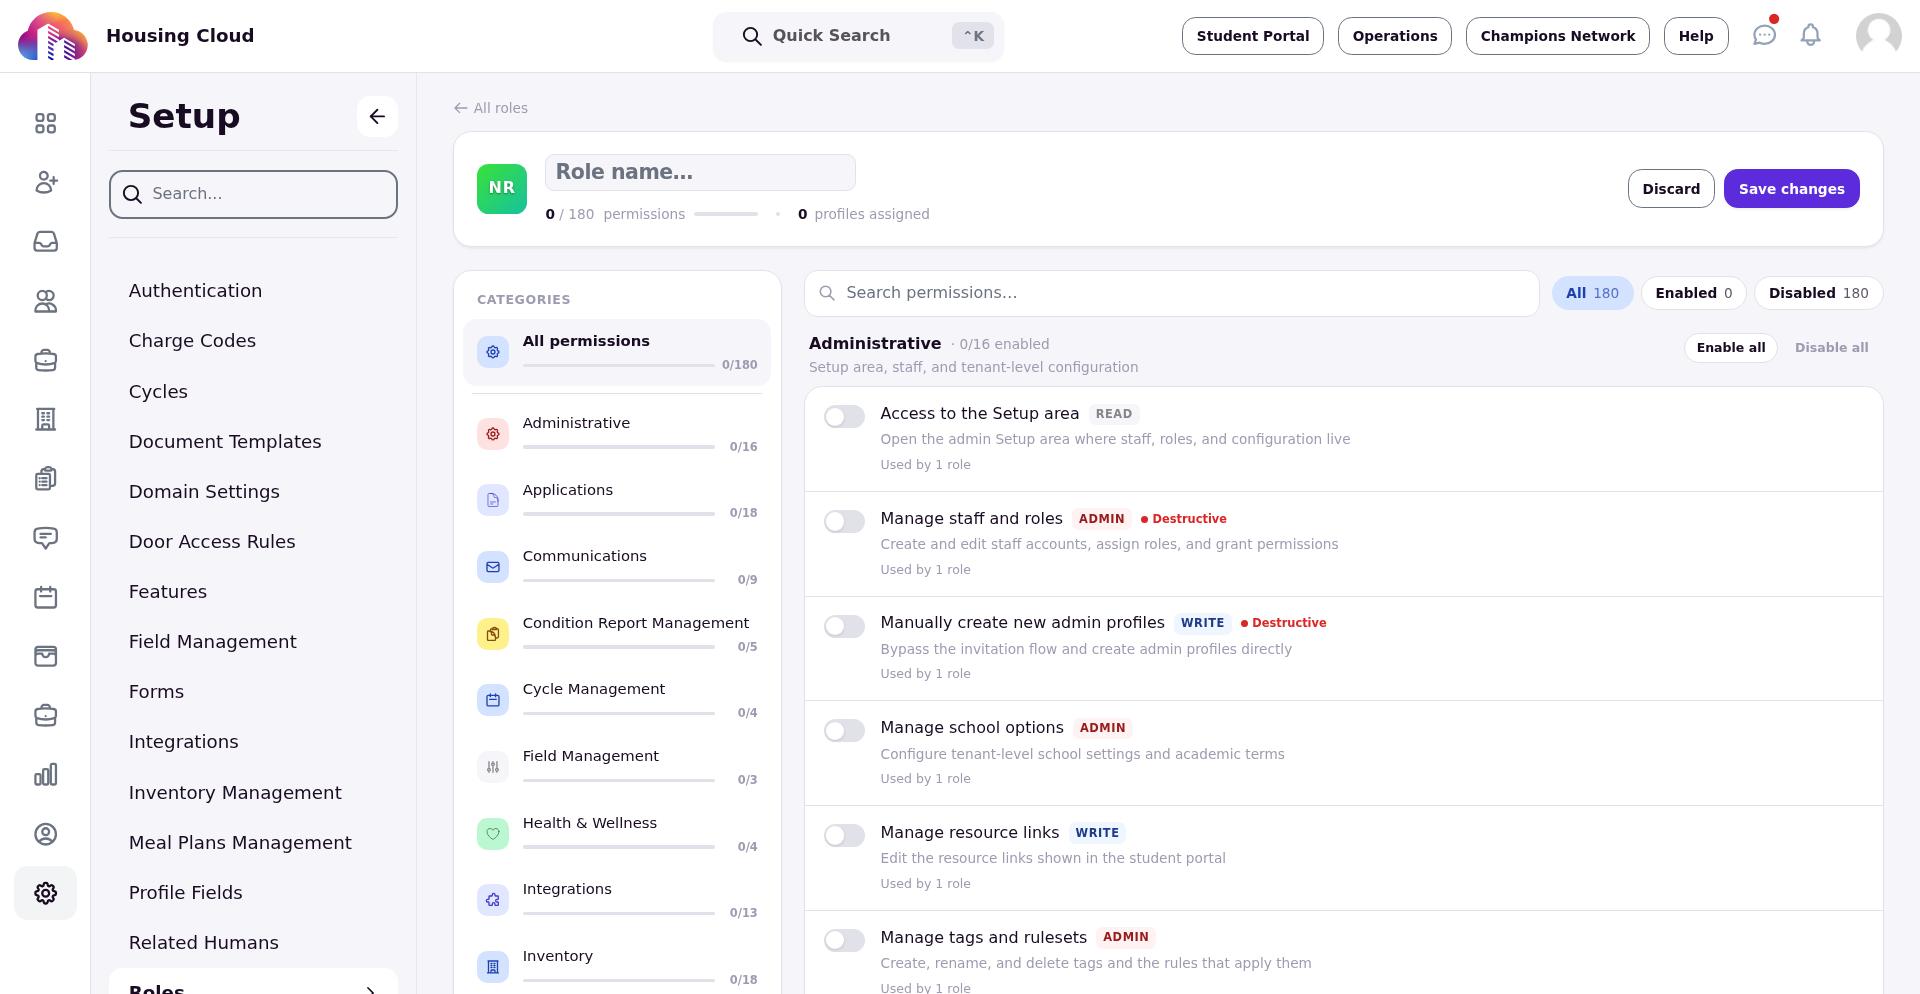
Toggle permissions on or off to define what users with this role can access. The system tracks dependencies between permissions—some permissions automatically enable related lower-level permissions when selected.
As you toggle permissions, the role editor updates the permission list in real time. You can scroll through categories to review all options before saving.
Configure restricted profile fields (optional)
If your organization has the role-based profile field access feature enabled, the editor shows a Restricted Profile Fields section. This allows you to control which student or staff profile fields users with this role can view or edit.
Click Edit Restrictions to open the field restriction modal. Select which fields should be restricted for this role. Restricted fields remain hidden or read-only for users assigned to the role, depending on your configuration.
This feature is optional and appears only when enabled for your organization. Most roles don't require field-level restrictions.
Save the role
Click Save changes to create the role. The system validates the role name and stores the new role in your environment.
If an error occurs during save, the system displays Error saving data. Review your entries and try again. Common causes include network issues or session timeouts.
To discard your changes without creating the role, click Discard. The system returns you to the roles list without saving.
After creating the role
The new role appears in the roles list immediately after saving. You can now assign the role to admin users through the Admin Users section in Setup.
The role remains available for editing or deletion. Changes to role permissions affect all users assigned to that role, so review permission selections carefully before assigning the role to team members.
Compare existing roles
Before creating a new role, you may want to review how existing roles differ in their permissions. The Compare roles feature displays a side-by-side view of permissions across multiple roles, helping you identify whether an existing role already meets your needs or what permissions to include in a new role.
Click Compare roles from the roles list. The system opens a comparison view showing all roles in your environment with their permissions displayed in a matrix.
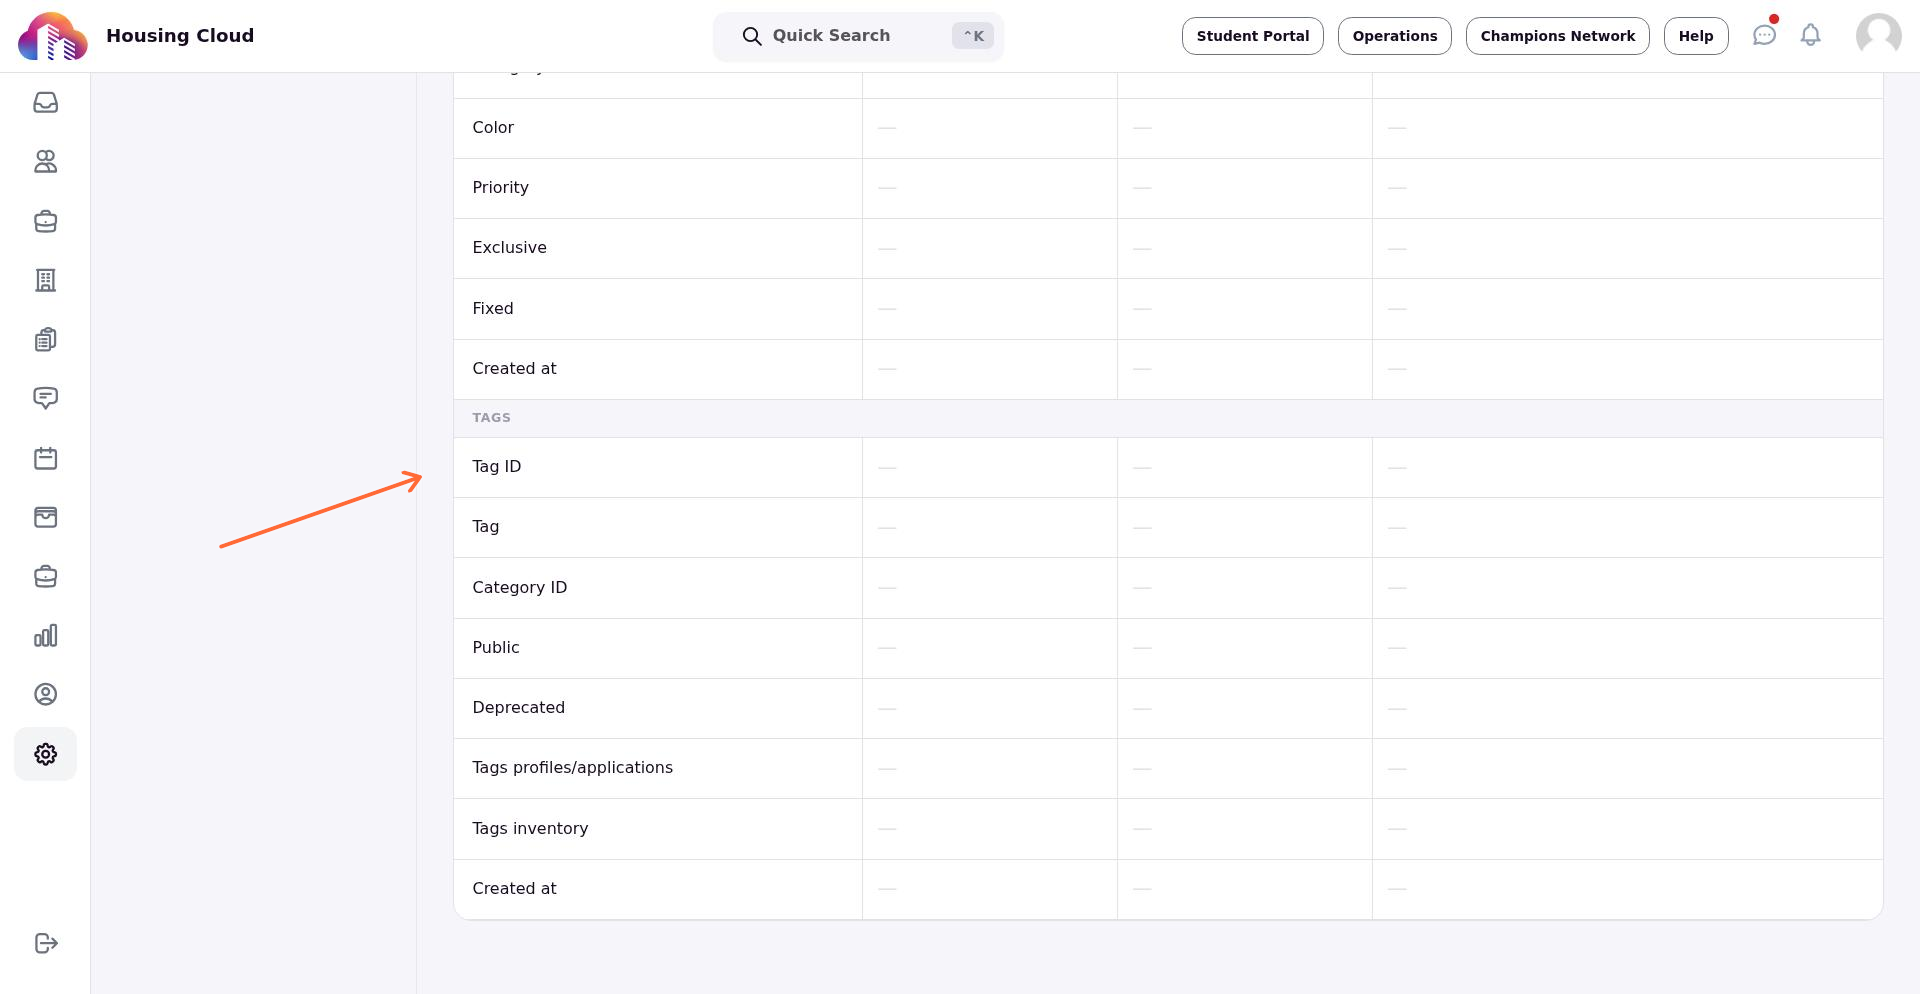
The permission matrix lists each permission category and individual permissions. Checkmarks indicate the permission is granted for that role, while dashes indicate it is not included. This visual comparison helps you spot gaps or overlaps between roles at a glance.
You can scroll through the full list of permissions to compare all categories. Use this view to plan your new role's permissions by referencing similar existing roles and adjusting as needed.
For more information on navigating the admin portal, see Navigating the Admin Portal or Getting Started with the Housing.Cloud Admin Portal.