Add Units and Print QR Labels
Last updated: October 8, 2026
Units are the physical copies behind a resource type: the one vacuum, the six umbrellas, the study room itself. A type cannot be reserved until it has at least one unit, so this is the step that puts the catalog on the shelf. Open Resource Units from the admin menu's Resources section and click New resource unit.
Before you start
You need the Manage resource catalog permission.
The resource type must already exist.
Label stock and, optionally, a label printer should be set in Resource Settings under Printed labels.
Create units
In the new-units form, pick the Resource type, leave the Location on the type's default unless this batch lives elsewhere, and set How many units to create. Serial numbers are optional: paste one per line (or comma-separated) to give units serials, and any extra units beyond the serials you listed are created without one. Submitting creates the batch, and the button names the count, such as creating two units at once.
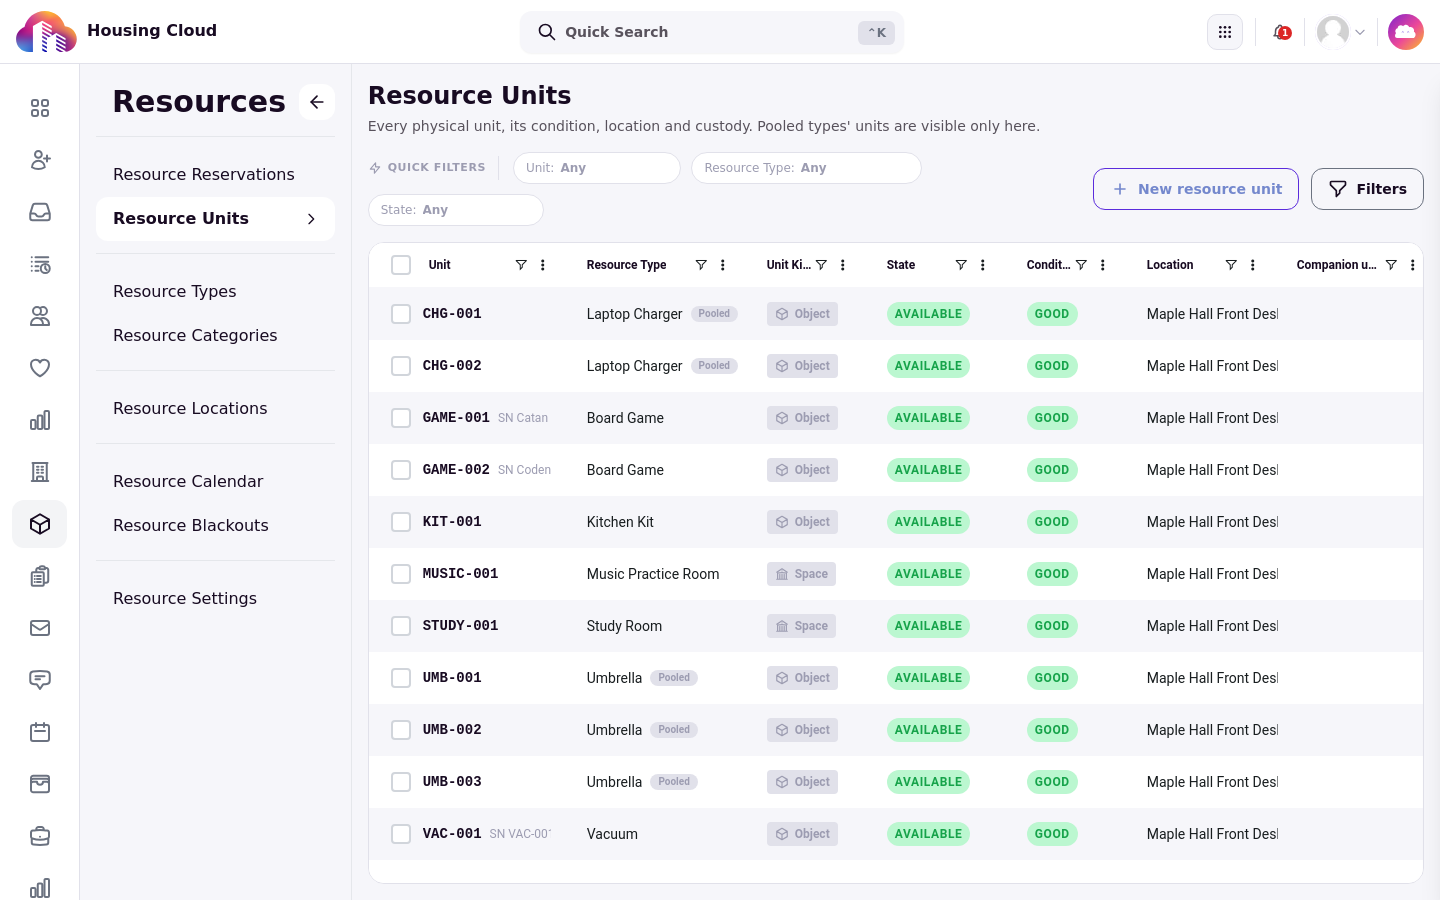
Unit codes are generated from the type's ID prefix and numbered in order, so a vacuum type with the prefix VAC gets VAC-001, then VAC-002. The Units grid lists every unit with its type, kind, state, condition, location, and who currently has it reserved. Pooled types work differently: their units appear only on this page, because the desk lends pooled resources by quantity rather than handing out a specific copy, and the system may still allocate and track individual units behind the pool through child loans.
Print QR labels
Select a unit's row, open the selection actions menu, and click Print labels. A dialog asks which label stock is loaded, taken from Resource Settings, and which printer to use; the school can remember the setup for next time. Printing produces a preview of the QR labels, one per unit, sized for the stock you chose. The desk scans these labels to verify units at pickup and return, so label every unit before it goes into service.
Work with a single unit
Click a unit code to open its page. It shows the unit's overview, any billing overrides, photos, notes, companions, its loan history, blackouts that cover it, and an activity trail. The actions menu on the page holds the desk-side tools: printing the label, viewing the QR code, and taking the unit out of service.
Take a unit out of service
When a unit breaks, use Take out of service and give a reason. The unit stops being offered to borrowers until someone uses Return to service to bring it back. This is the difference between a vacuum that is lent out and a vacuum that exists but cannot be borrowed.
Verify the setup on the Units grid: each new unit should show its code, its type, an Available state, and its location. Then test the full loop at the desk by following Lend and Take Back Items at the Desk.