Ask Cloudy to Build a Filter
Last updated: October 8, 2026
The "Ask Cloudy to build a filter" box in a table's filter panel turns a plain-English description into filter conditions. Cloudy fills the conditions in; you check them and press "Apply filters" yourself.
At Maple Hall… Sam needs the residents in Maple Hall who moved in this term, and would rather not build three conditions by hand.
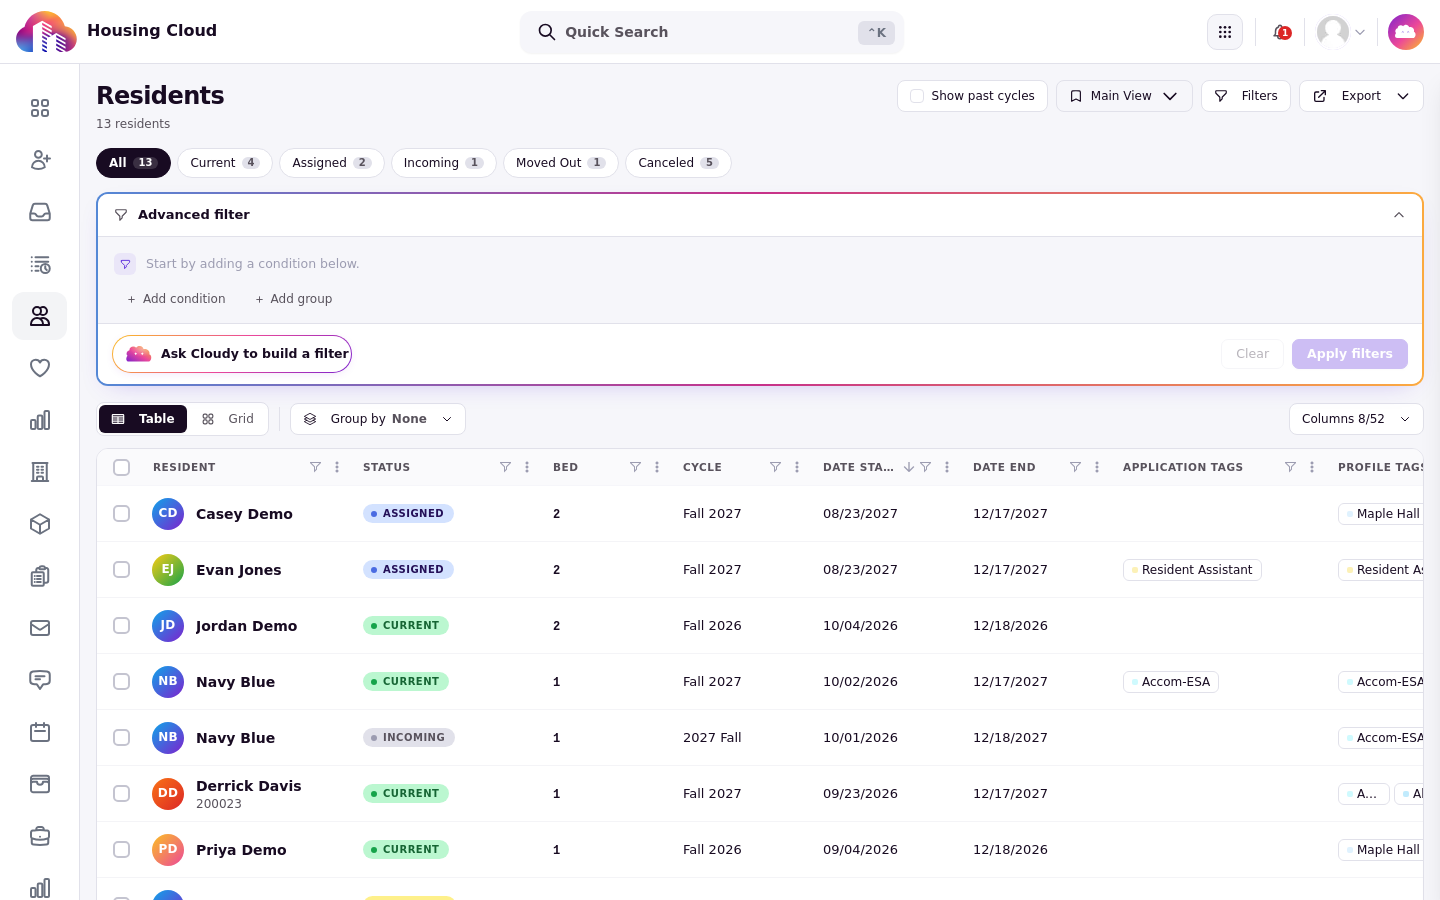
The filter panel with the "Ask Cloudy to build a filter" box.
Describe the filter
Open the filter panel on the Residents table or another table that uses the newer filter panel. Click "Ask Cloudy to build a filter", type your description in "Describe your filter in natural language…", and press Enter. Press Esc to close the box.
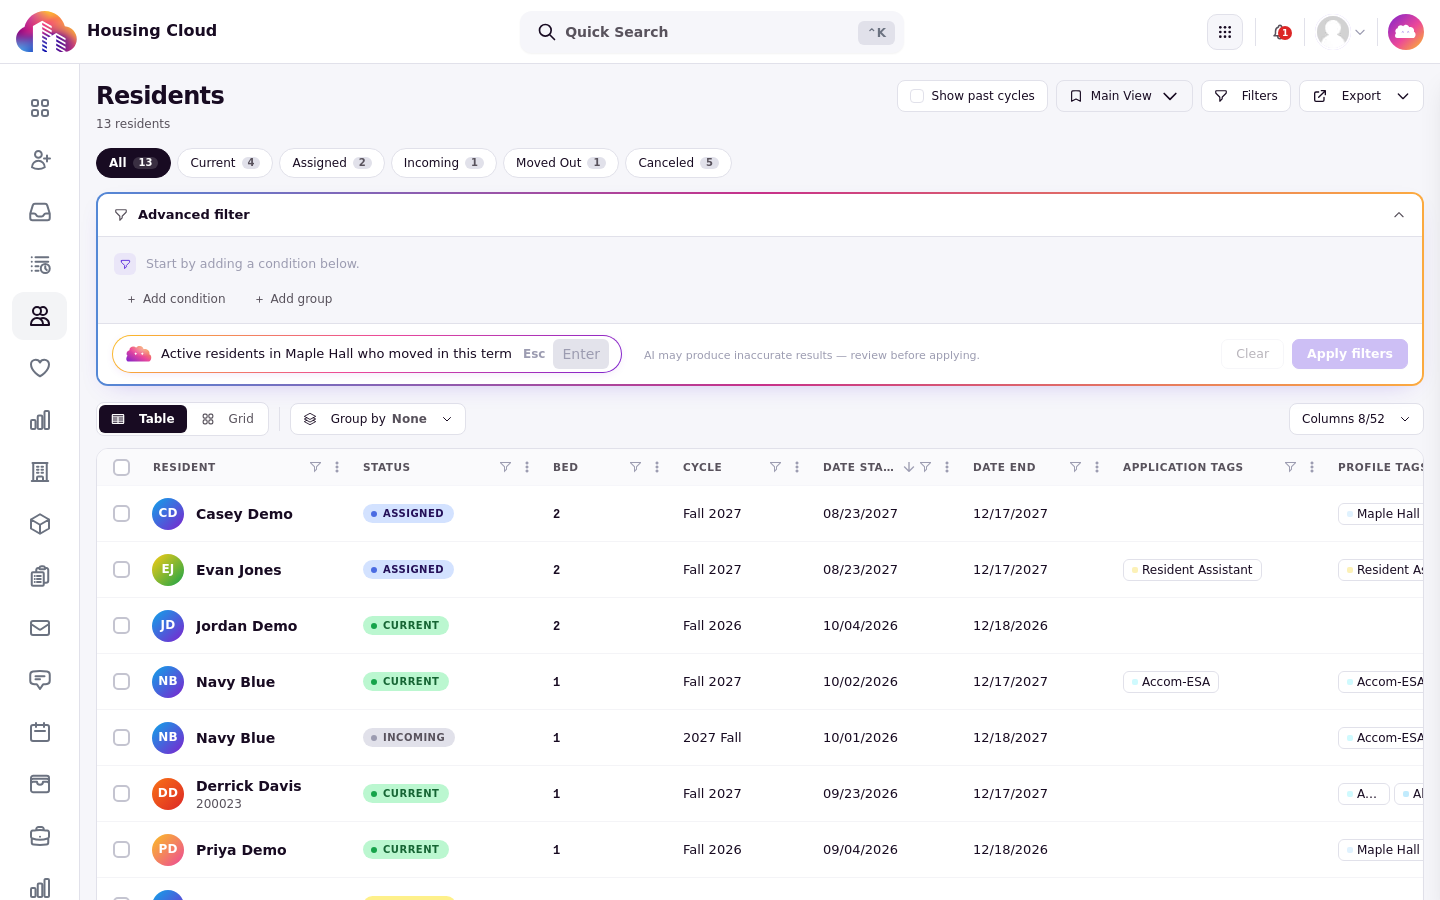
Describe the filter in plain English; press Enter to send it.
Check the conditions
Cloudy fills in condition rows in the panel. Nothing is applied until you press "Apply filters". Check every condition: the field, the operator and the value.
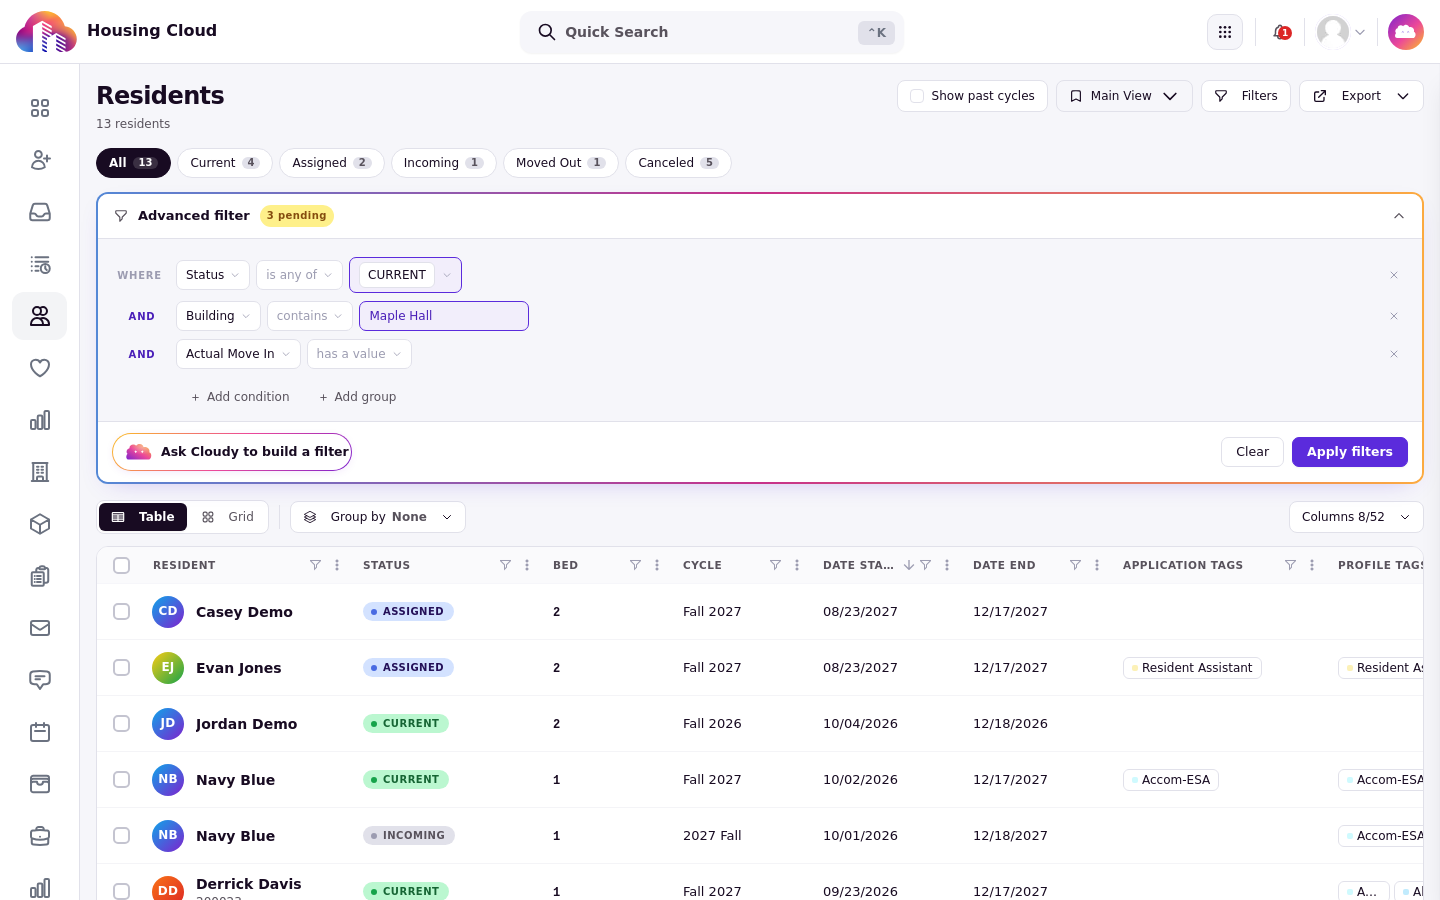
Cloudy filled in three conditions: current status, building, and a move-in date. "Apply filters" is still a separate step.
Edit or try again
Edit any condition by hand if it isn't quite right, or describe the filter again in different words.
If Cloudy can't build it
Cloudy shows "Failed to generate filter. Try rephrasing your query." Rephrase the request and try again.
After you apply
The table shows only the rows that match, and you can clear the filters again at any time. The result is a normal table view; nothing is saved or changed on the records.
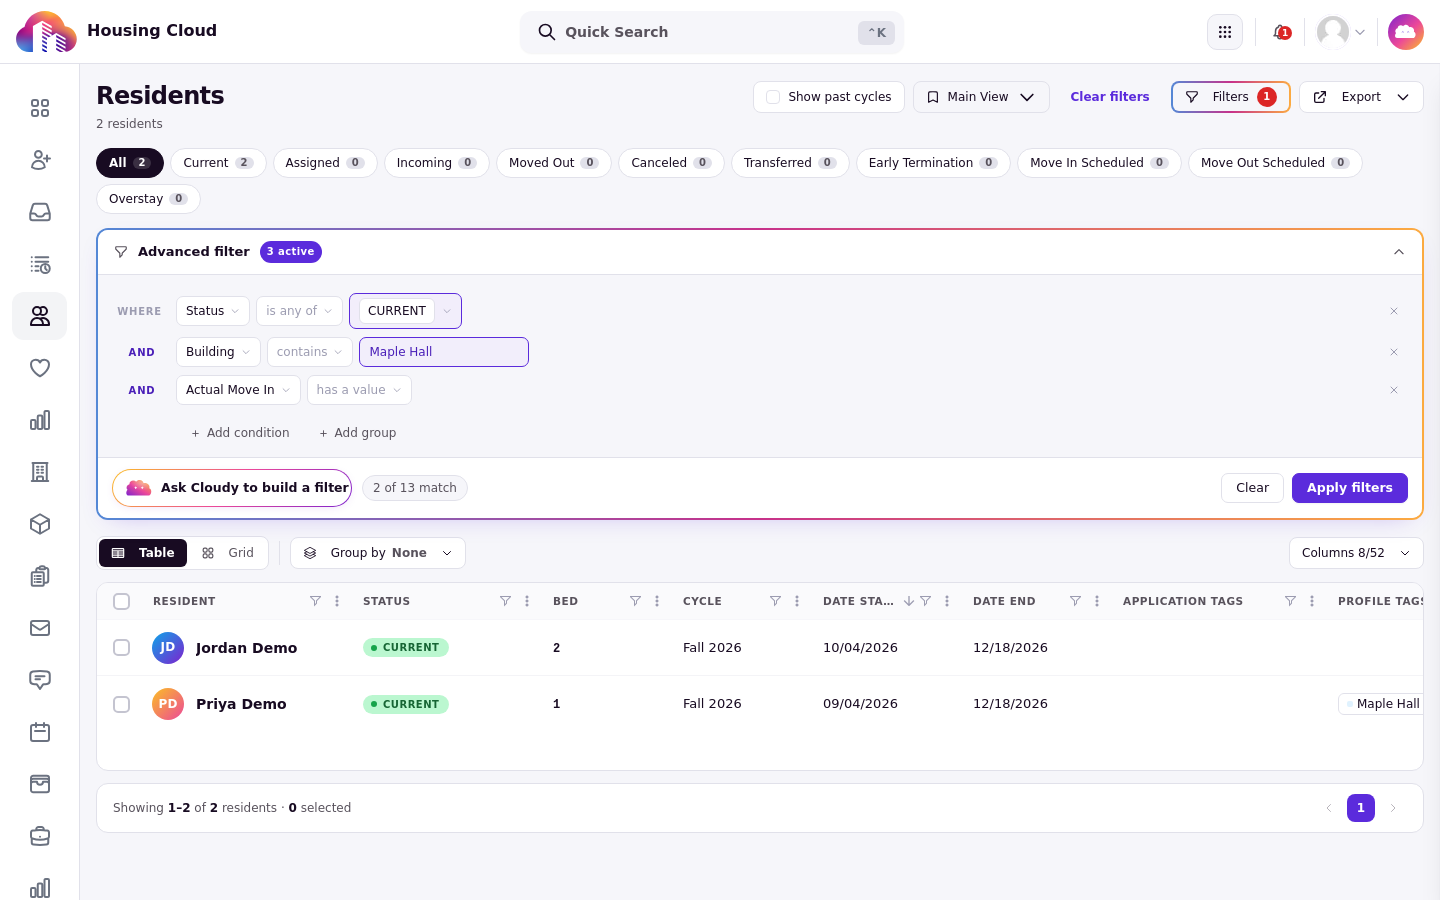
After "Apply filters", the table shows only the matching residents. (This run matched 2 of 13 residents.)
Good to know
This article covers the Residents table. The Applications table isn't covered here yet.