Post a Job: Details, Dates and Who Can See It
Last updated: October 8, 2026
At Maple Hall… two of the three openings are simple: an application and a decision. Jordan Lee posts the front-desk job, and Pat Nguyen's summer conference job goes up with Pat Nguyen as owner.
Posting a job creates the opening in Recruitment, the student staff hiring module. Open Jobs in the Recruitment sidebar and click Add Job, or use the Create New Job shortcut in Quick Search: a New Job wizard opens with three steps, Job Details, Job Dates and Workflow Stages. This walkthrough covers all three steps, from a single-stage job to one with interview rounds.
Before you start
Recruitment is switched on for your school.
A role with the Create, edit, and manage job postings permission.
The application form the job's stage will use, and the feedback form reviewers will fill, both built in Recruitment under Forms.
Profile tags for the students who should see the job, created under Setup and then Tags, if you plan to limit visibility.
Names for the reviewers and conductors you will assign. They can be any admin, and they need no special role: being assigned to a step is what gives them access to their own items.
Open the New Job wizard
Recruitment lives in the admin sidebar: open it, select Jobs, then click Add Job. Quick Search also offers a Create New Job shortcut that opens the wizard directly.
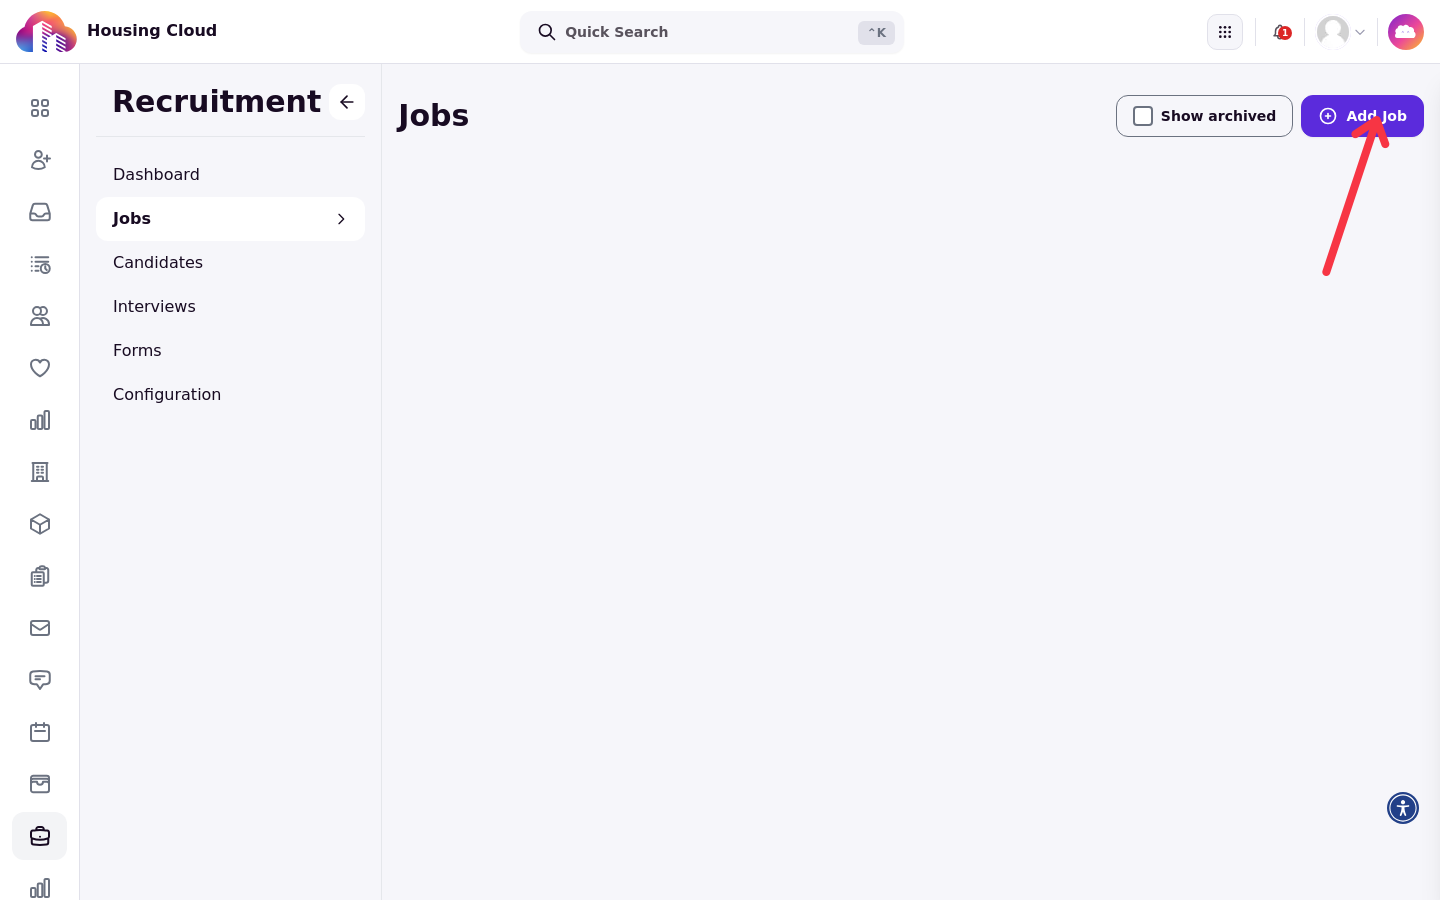
The New Job wizard shows its three steps in a rail on the left. Work through them in order and finish with Create Job.
Job details
The details on this step are what students read on the job's posting, so fill them the way you want them to appear. Four fields are required: Job Title, Department, Time Commitment and at least one Job Owners. Job owners receive the Offer Accepted and Offer Declined notifications for their job and can manage that job's candidates without extra permissions.
Everything else on the step is optional and appears to students only when filled: Compensation, Total Positions To Be Filled, Work Location, Job Description, Eligibility Criteria, Required Documents, Selection Process, Training Requirements, Work Authorization, Accessibility, Benefits and How to make inquiries.
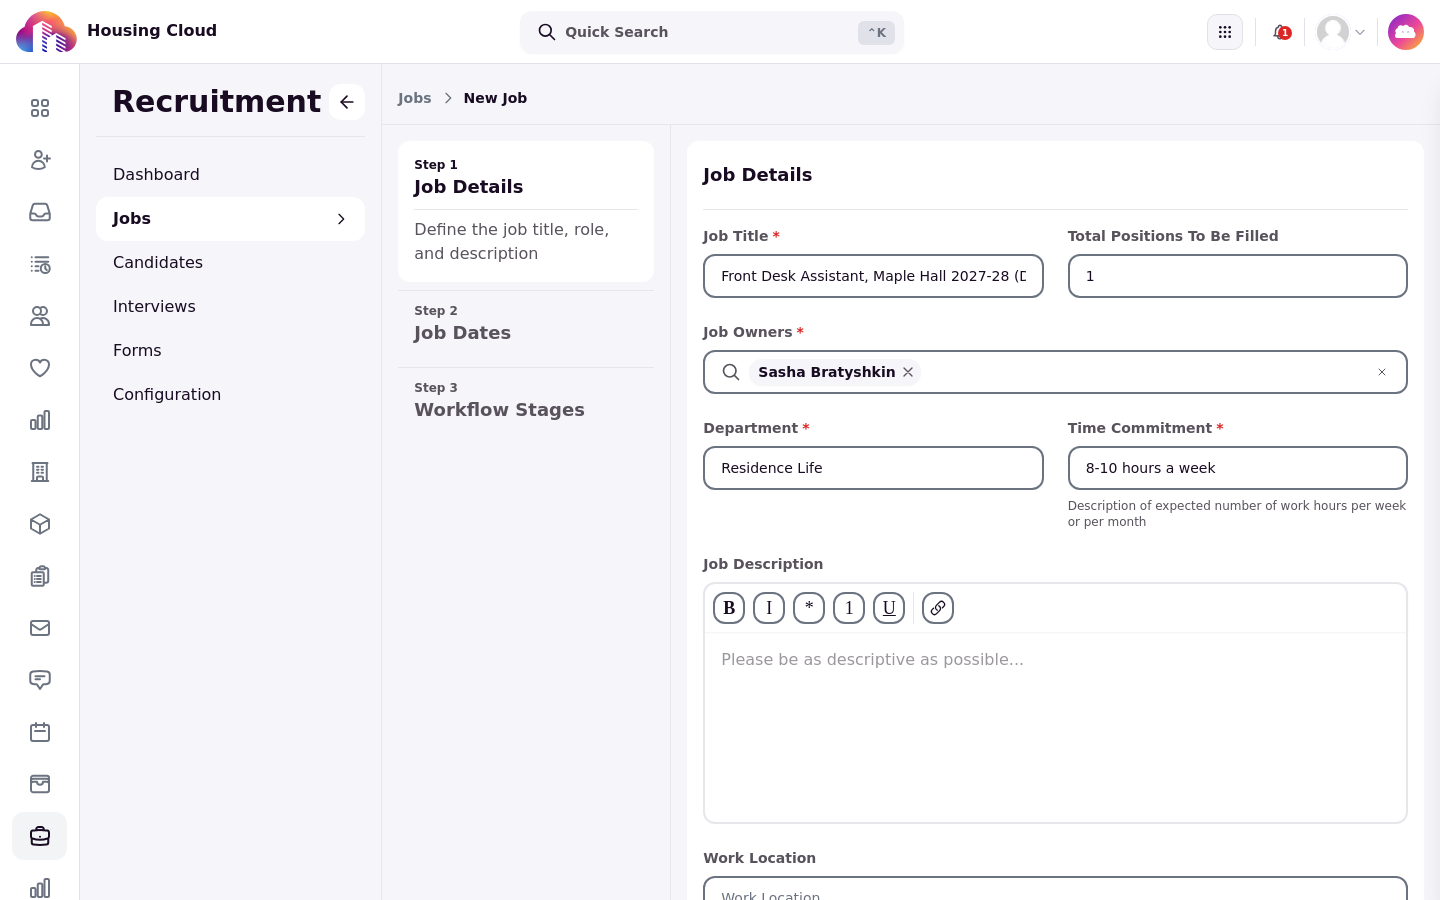
Applicability tags
Applicability Tags decide who can find the job. A student must have every tag listed to see the posting and apply, so one tag can keep a posting visible only to the group you choose. With no tags, every signed-in student sees the job. Jobs appear only on the portal's Jobs pages to signed-in students; there is no public posting for people outside the school.
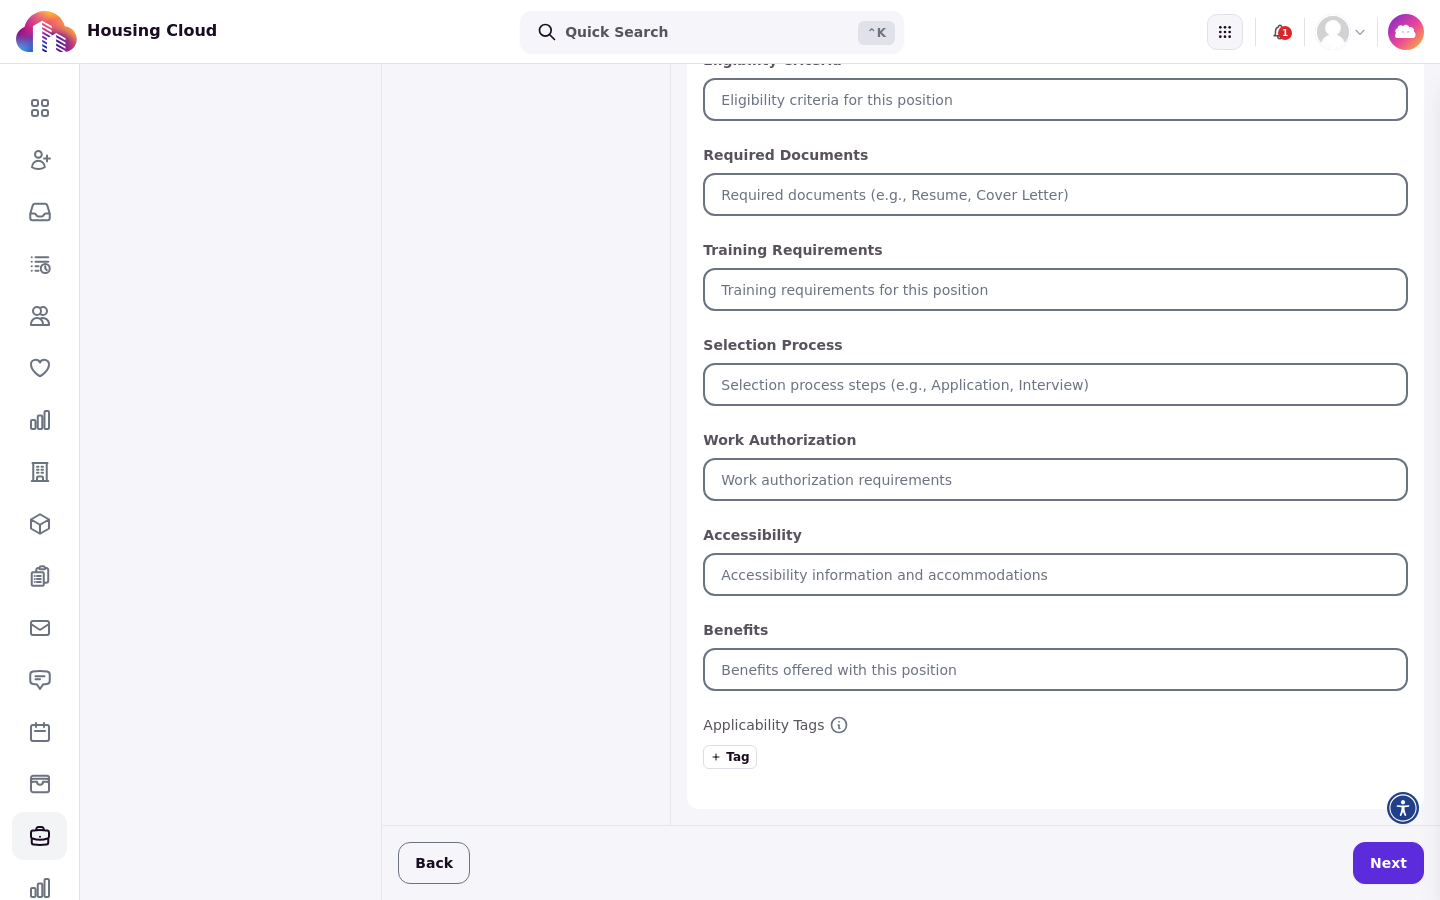
Job dates
The second step sets four date ranges, and each one controls something different. Job Application Dates control when the Apply button works. Job Posting Publication Dates control when the job is listed on the portal. Employment Dates set the job's working period; tick This job is on-going for roles without an end date. Hiring Decision Expected By Date is an optional target date for making the hiring decision.
The first workflow stage
Stages run in the order you add them, and a job that only needs an application and a decision needs just one. A candidate moves from one stage to the next when someone on the hiring team clicks Continue to Next Stage on the candidate's application. A stage is where the candidate is in the workflow, not the same thing as the application status, which is the label your team sets separately.
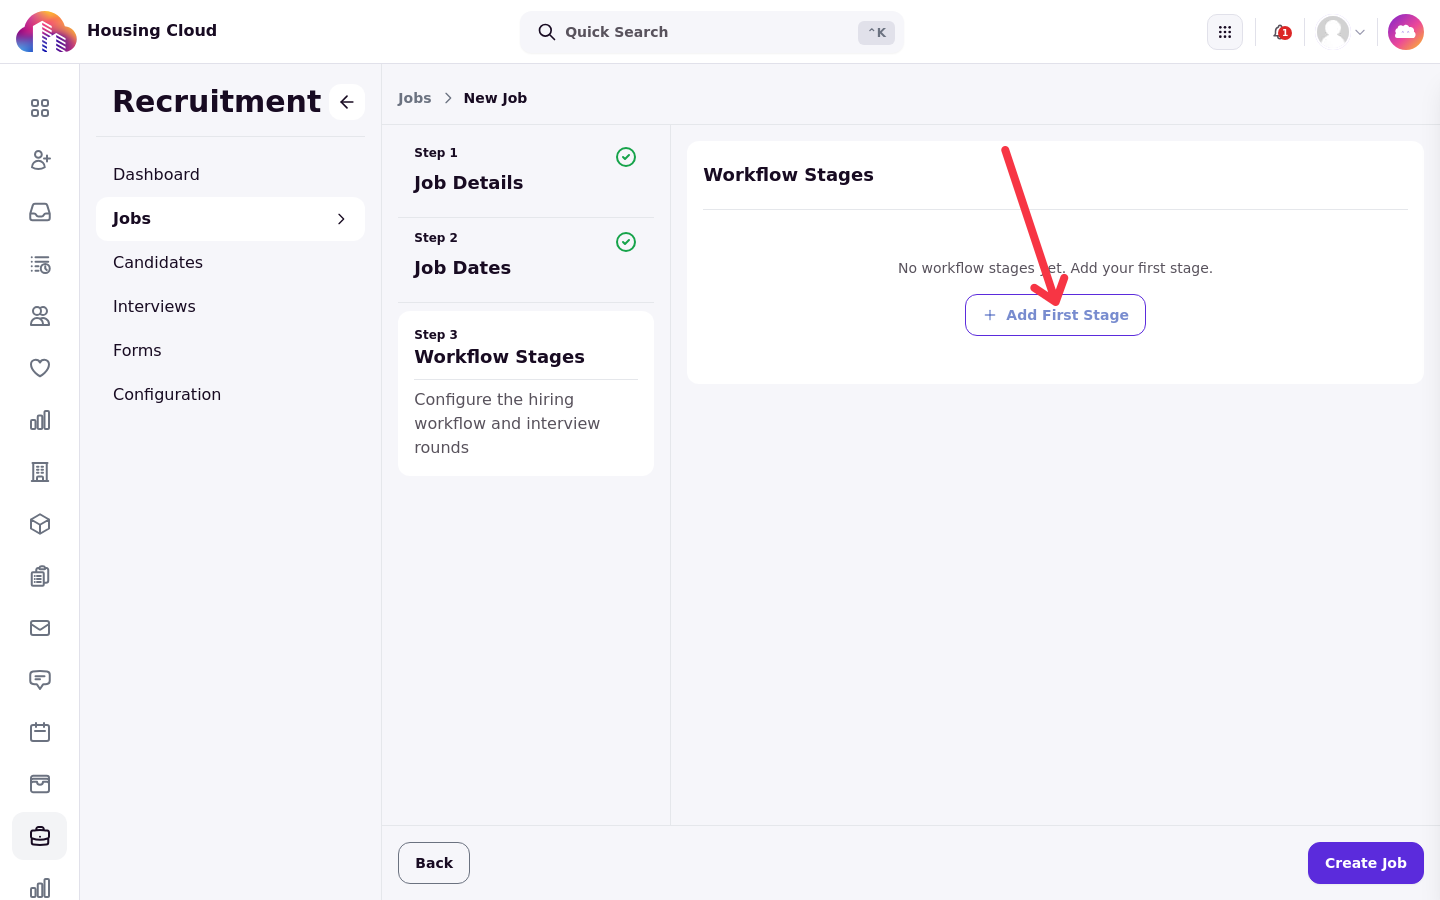
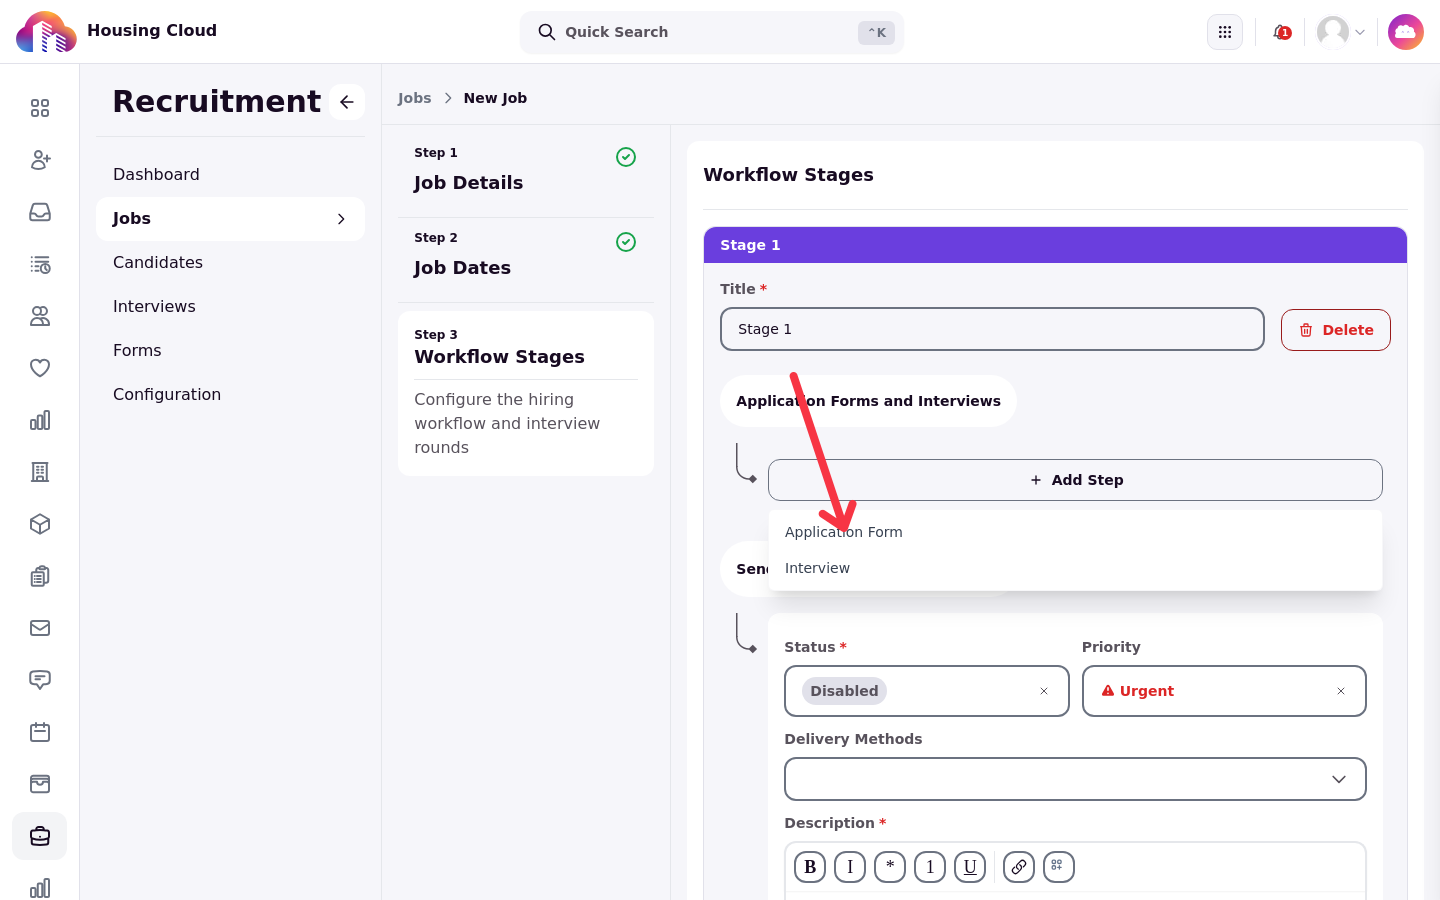
Click Add First Stage and the stage appears immediately, ready for its steps: Add Step opens the menu of step types, an Application Form step or an Interview step. An Application Form step collects answers and routes them to reviewers; an Interview step creates a round of bookable appointments with its own conductors, feedback form and schedule.
The Application Form step takes a Step Title, the required Application Form Template found by searching your forms, Reviewers, who can be any admin, and a Feedback Form Template, the form reviewers fill when they score the application, usually a short review form with a disposition. Only an assigned reviewer can submit feedback on an application, even an admin with every permission.
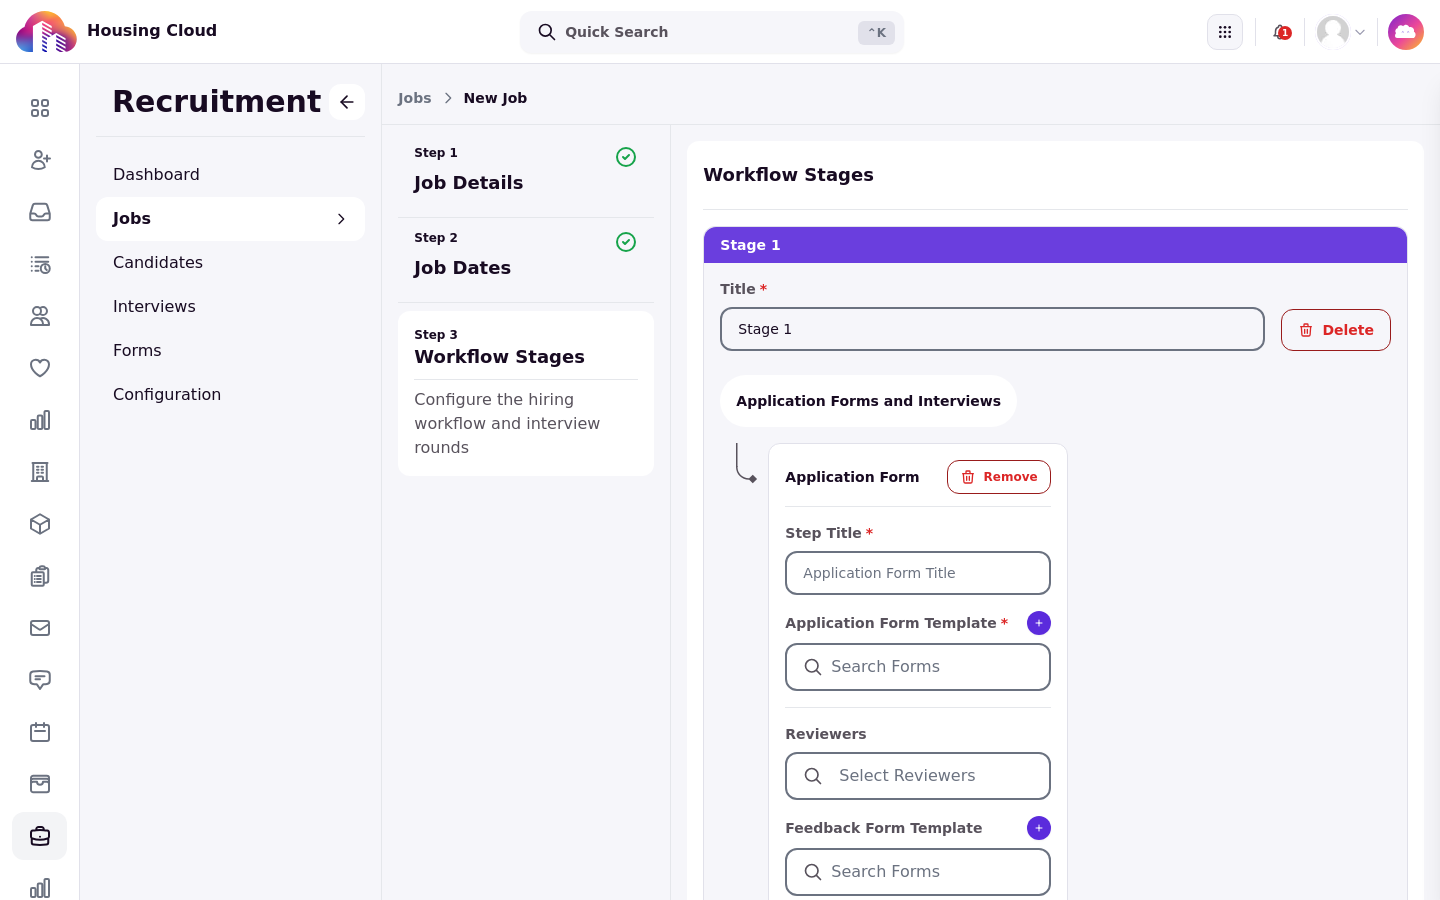
A form you plan to attach can be built ahead of time under Forms or created inline from the add button beside the field, which opens the new form in a separate tab.
Forms attached to a job are published automatically when the job is created, so forms you attach in the wizard need no separate Publish action.
Add an interview step
Click Add Step and choose Interview to add a round of bookable appointments inside the stage. Step Title labels the round everywhere it appears. Type is Individual, Group or Round robin, and Mode is In Person or Remote. Default Conductors are the admins who run the interviews, and Default Instructions tell candidates what to expect. The round's Feedback Form Template is the form conductors complete after each interview.
The round's Phase Date Interval, duration and bookable hours are set in Schedule Settings.
Maple Hall's group round is In Person, 60 minutes, conducted by Jordan Lee and Alex Moreno. Its final interview is Individual and Remote, 30 minutes, with Jordan Lee as the only conductor.
Set the weekly hours that slots come from
Open Schedule Settings on the interview step. The scheduling settings hold the Phase Date Interval, the window bookings can fall in, so a round whose interval ends on March 14 offers no slots after that date, and the Duration of each appointment, offered in 15 minutes, 30 minutes, 45 minutes, 1 hour and 2 hours.
Under Available Hours, use Add New Interval to enter the weekly hours that candidates and admins can book; the first interval starts as 09:00–17:00, and each new one starts where the previous ends. Booking slots are generated from the round's date range, its duration and these hours. Maple Hall's group round offers weekdays from 13:00 to 15:00, and each 60-minute slot fits up to four candidates.
Choose how booking works
Allow Self-Scheduling lets candidates pick their own time in the portal once they move into the round. Allow Rescheduling lets them move a booked time themselves; it requires self-scheduling, and turning self-scheduling off also turns rescheduling off. With self-scheduling off, admins book each candidate from the candidate's page, the way Maple Hall runs its final interviews.
Allow Multiple Interviews Per Slot lets several candidates book the same time block, with Maximum Interviews Per Slot capping how many. Everyone who books into a shared slot still gets their own interview record and their own feedback to complete.
Notify candidates when they move into a stage
Each stage has its own Send Notification to Candidate setting, which starts disabled. When it is enabled, moving a candidate into the stage sends them a message: choose the status (Enabled, Disabled, or Muted until the Mute Until date), the priority, the delivery methods and the message text. Priority runs from Urgent to Low, delivery can be In App, Email or both, and the message supports merge fields such as the job title and the stage name. The default message is Your application for {{jobTitle}} has progressed to {{stepName}}.
Create the job
With the stage in place, click Create Job at the bottom of the wizard. The job and the forms it uses publish immediately.
There is no draft state and no way to duplicate a job. Use Job Posting Publication Dates and Applicability Tags to control who sees a posting, and create next year's job fresh, reusing the same forms.
After you create the job
After Create Job, the wizard returns to the Jobs list instead of opening the new job; open the job from there to work on it. It appears on the student Jobs board for every signed-in student who has the job's applicability tags. The interview rounds you built are listed on the Recruitment Interviews page. You can change details, dates and stages later from the job page's Edit menu. To check what students will see, open the portal's Jobs pages as a student who matches the tags.
Edit a round later
A round can be changed after the job is live. Go to the Recruitment Interviews page, open the round's menu and choose Edit. The edit page changes the round's title, conductors, default type and mode, instructions, date range, duration, available hours and scheduling toggles; it is also where a remote round gets its Default Link, offered as Zoom, Google Meet, Microsoft Teams or a generic URL. The round's feedback form is shown on this page but cannot be changed there.