Create and Manage Custom Profile Fields
Last updated: August 28, 2026
Custom profile fields let you collect institution-specific student data beyond the standard profile set in Housing.Cloud. You define the field name, display name, type, visibility, and whether students can edit it. Once saved, fields appear on student profiles according to the visibility settings you choose.
Open the Profile Fields editor
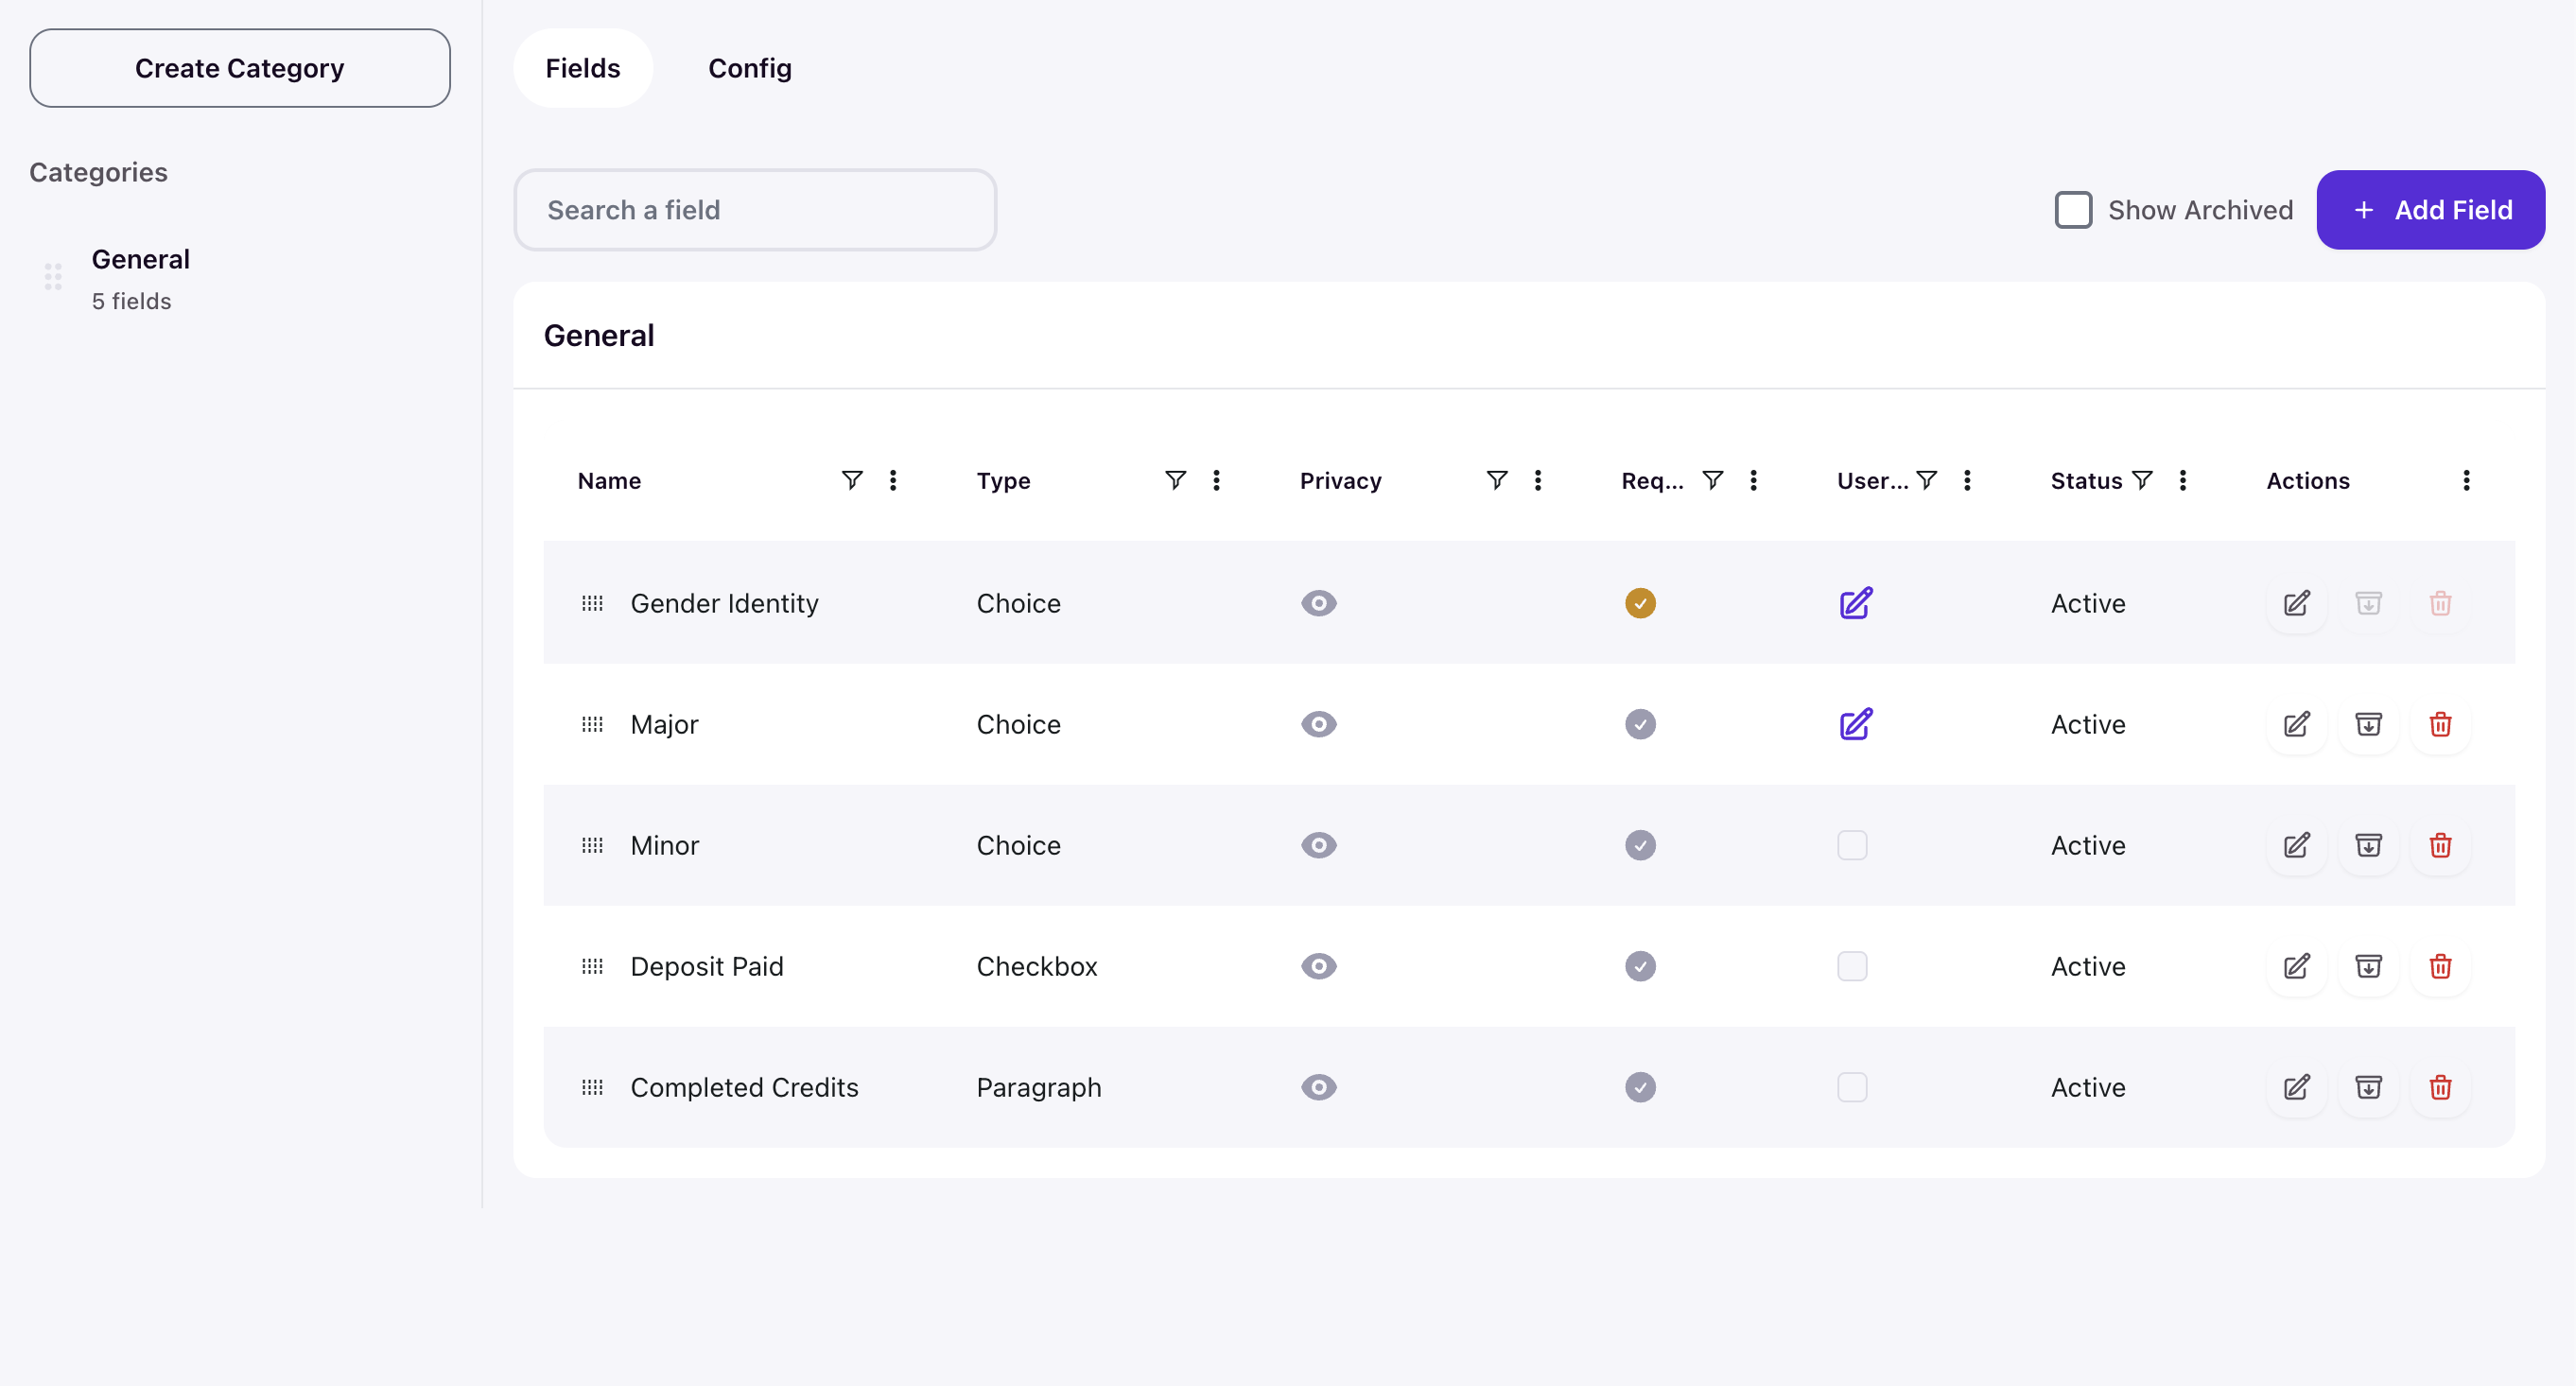
Go to Setup → Profile Fields and open the Fields tab. The left sidebar shows your field categories, including General for uncategorized fields. The main panel lists the fields in the selected category, with columns for name, display name, type, privacy, required status, editability, and status.
Create a new field
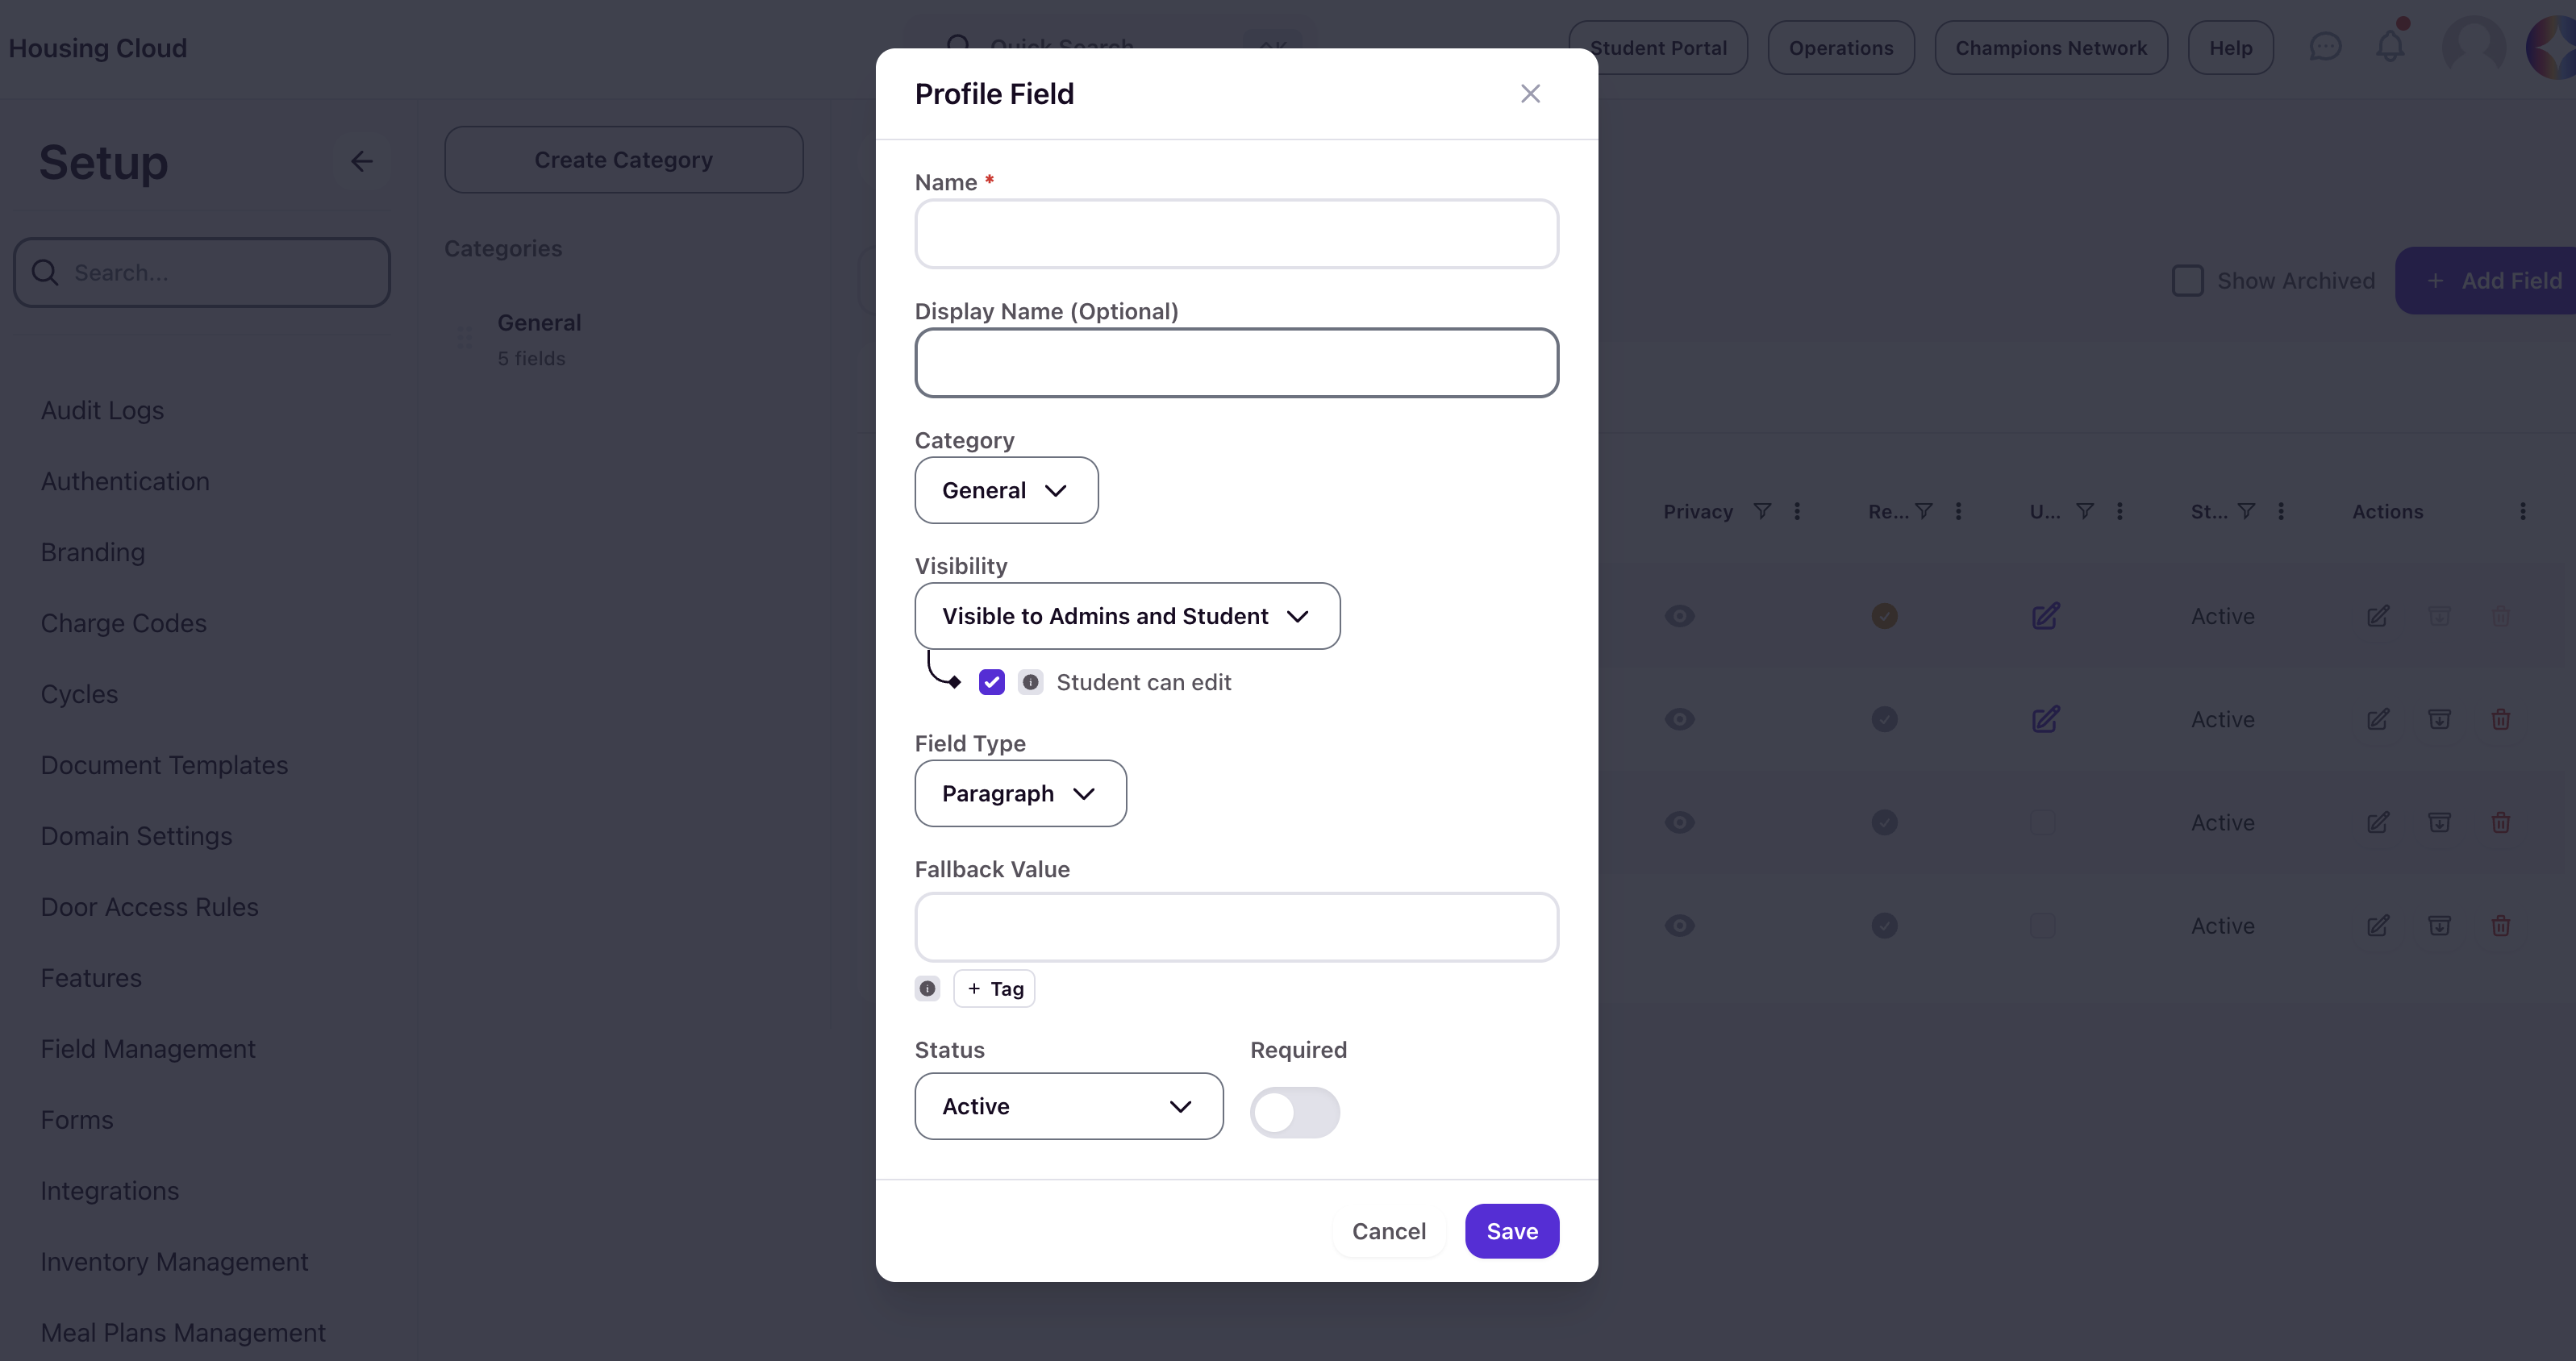
Click + Add Field in the upper right. The Profile Field modal opens.
Configure the field
Name and display name
Enter the Name and Display Name for the field:
- Name — The internal identifier. If you are connecting this field to data coming from your SIS, the Name must match the SIS column header exactly, character for character. A mismatch will prevent the data from populating correctly during import or sync.
-
Display Name — The user-friendly label that students and staff see on profiles and forms.
Category
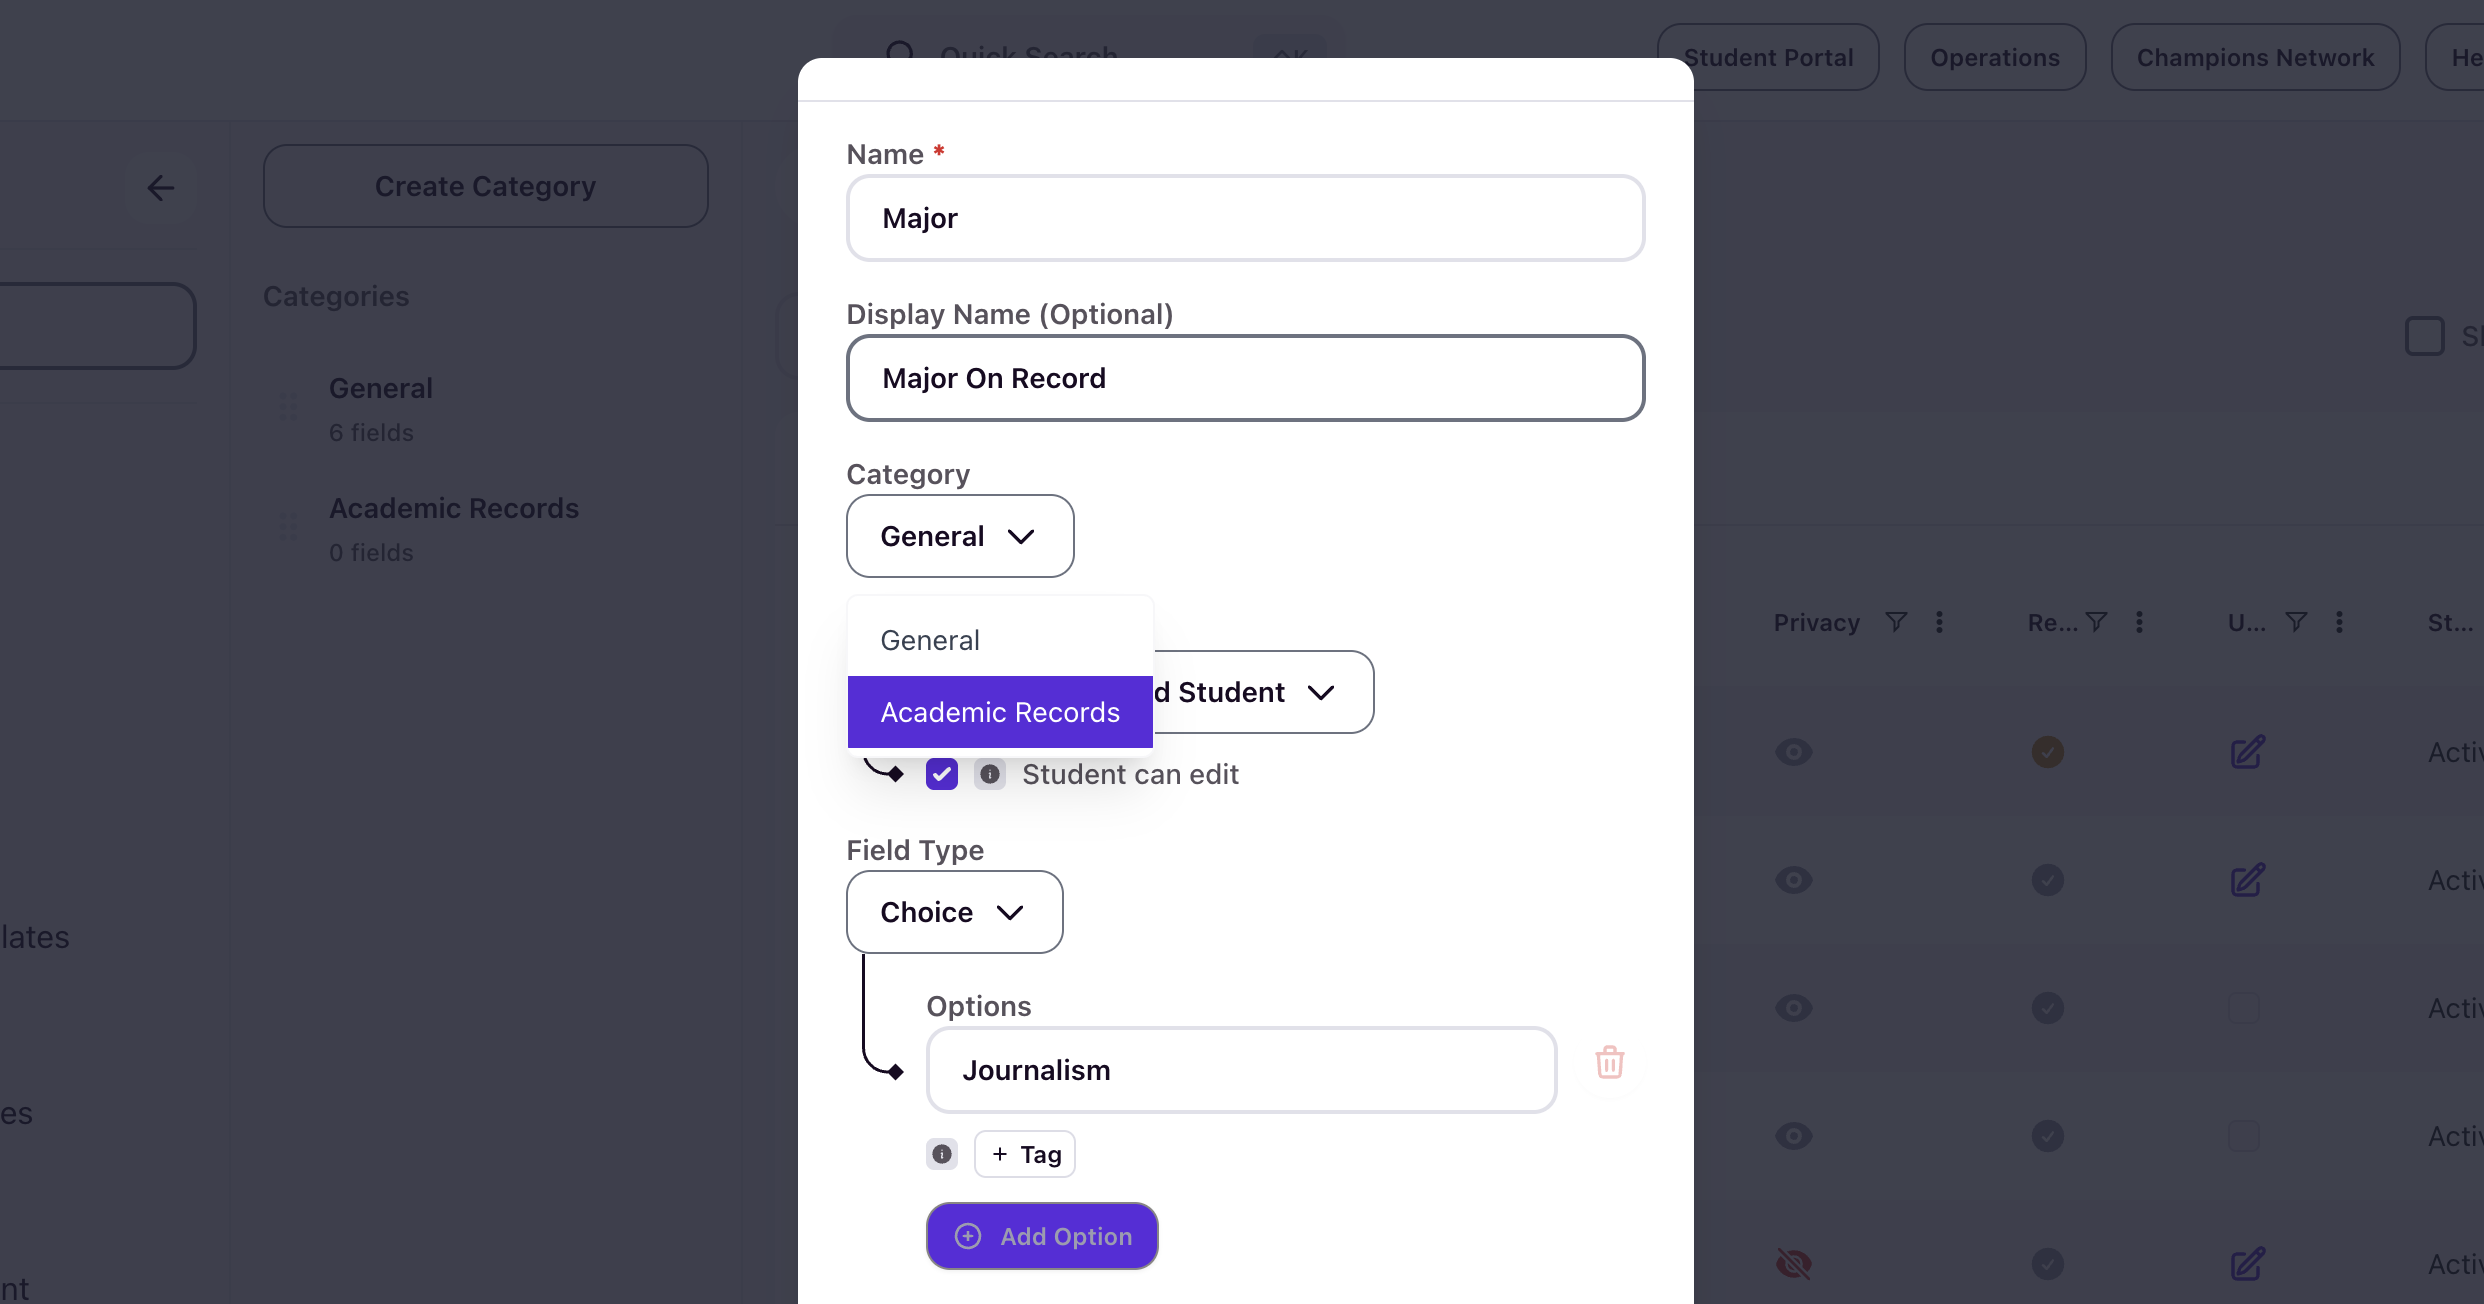
Select a Category from the dropdown. Categories group related fields together. Fields without a category are placed in General. On student profiles, fields appear grouped under their category name as section headers.
Field type
Select the Field Type that matches the data you want to collect:
- Line — A single line of text
- Paragraph — Multiple lines of text
- Choice — A single selection from predefined options
- Checkbox — One or more selections from predefined options
- Number — A numeric value
- Number Range — A numeric range with start and end limits
- Social networks — Social network identifiers
Choice, checkbox, and number range fields require additional configuration:
- Choice and Checkbox fields need one or more Options. Each option must be unique.
- Number Range fields need at least one range with a start limit and an end limit. The end limit must be larger than the start limit.
Privacy
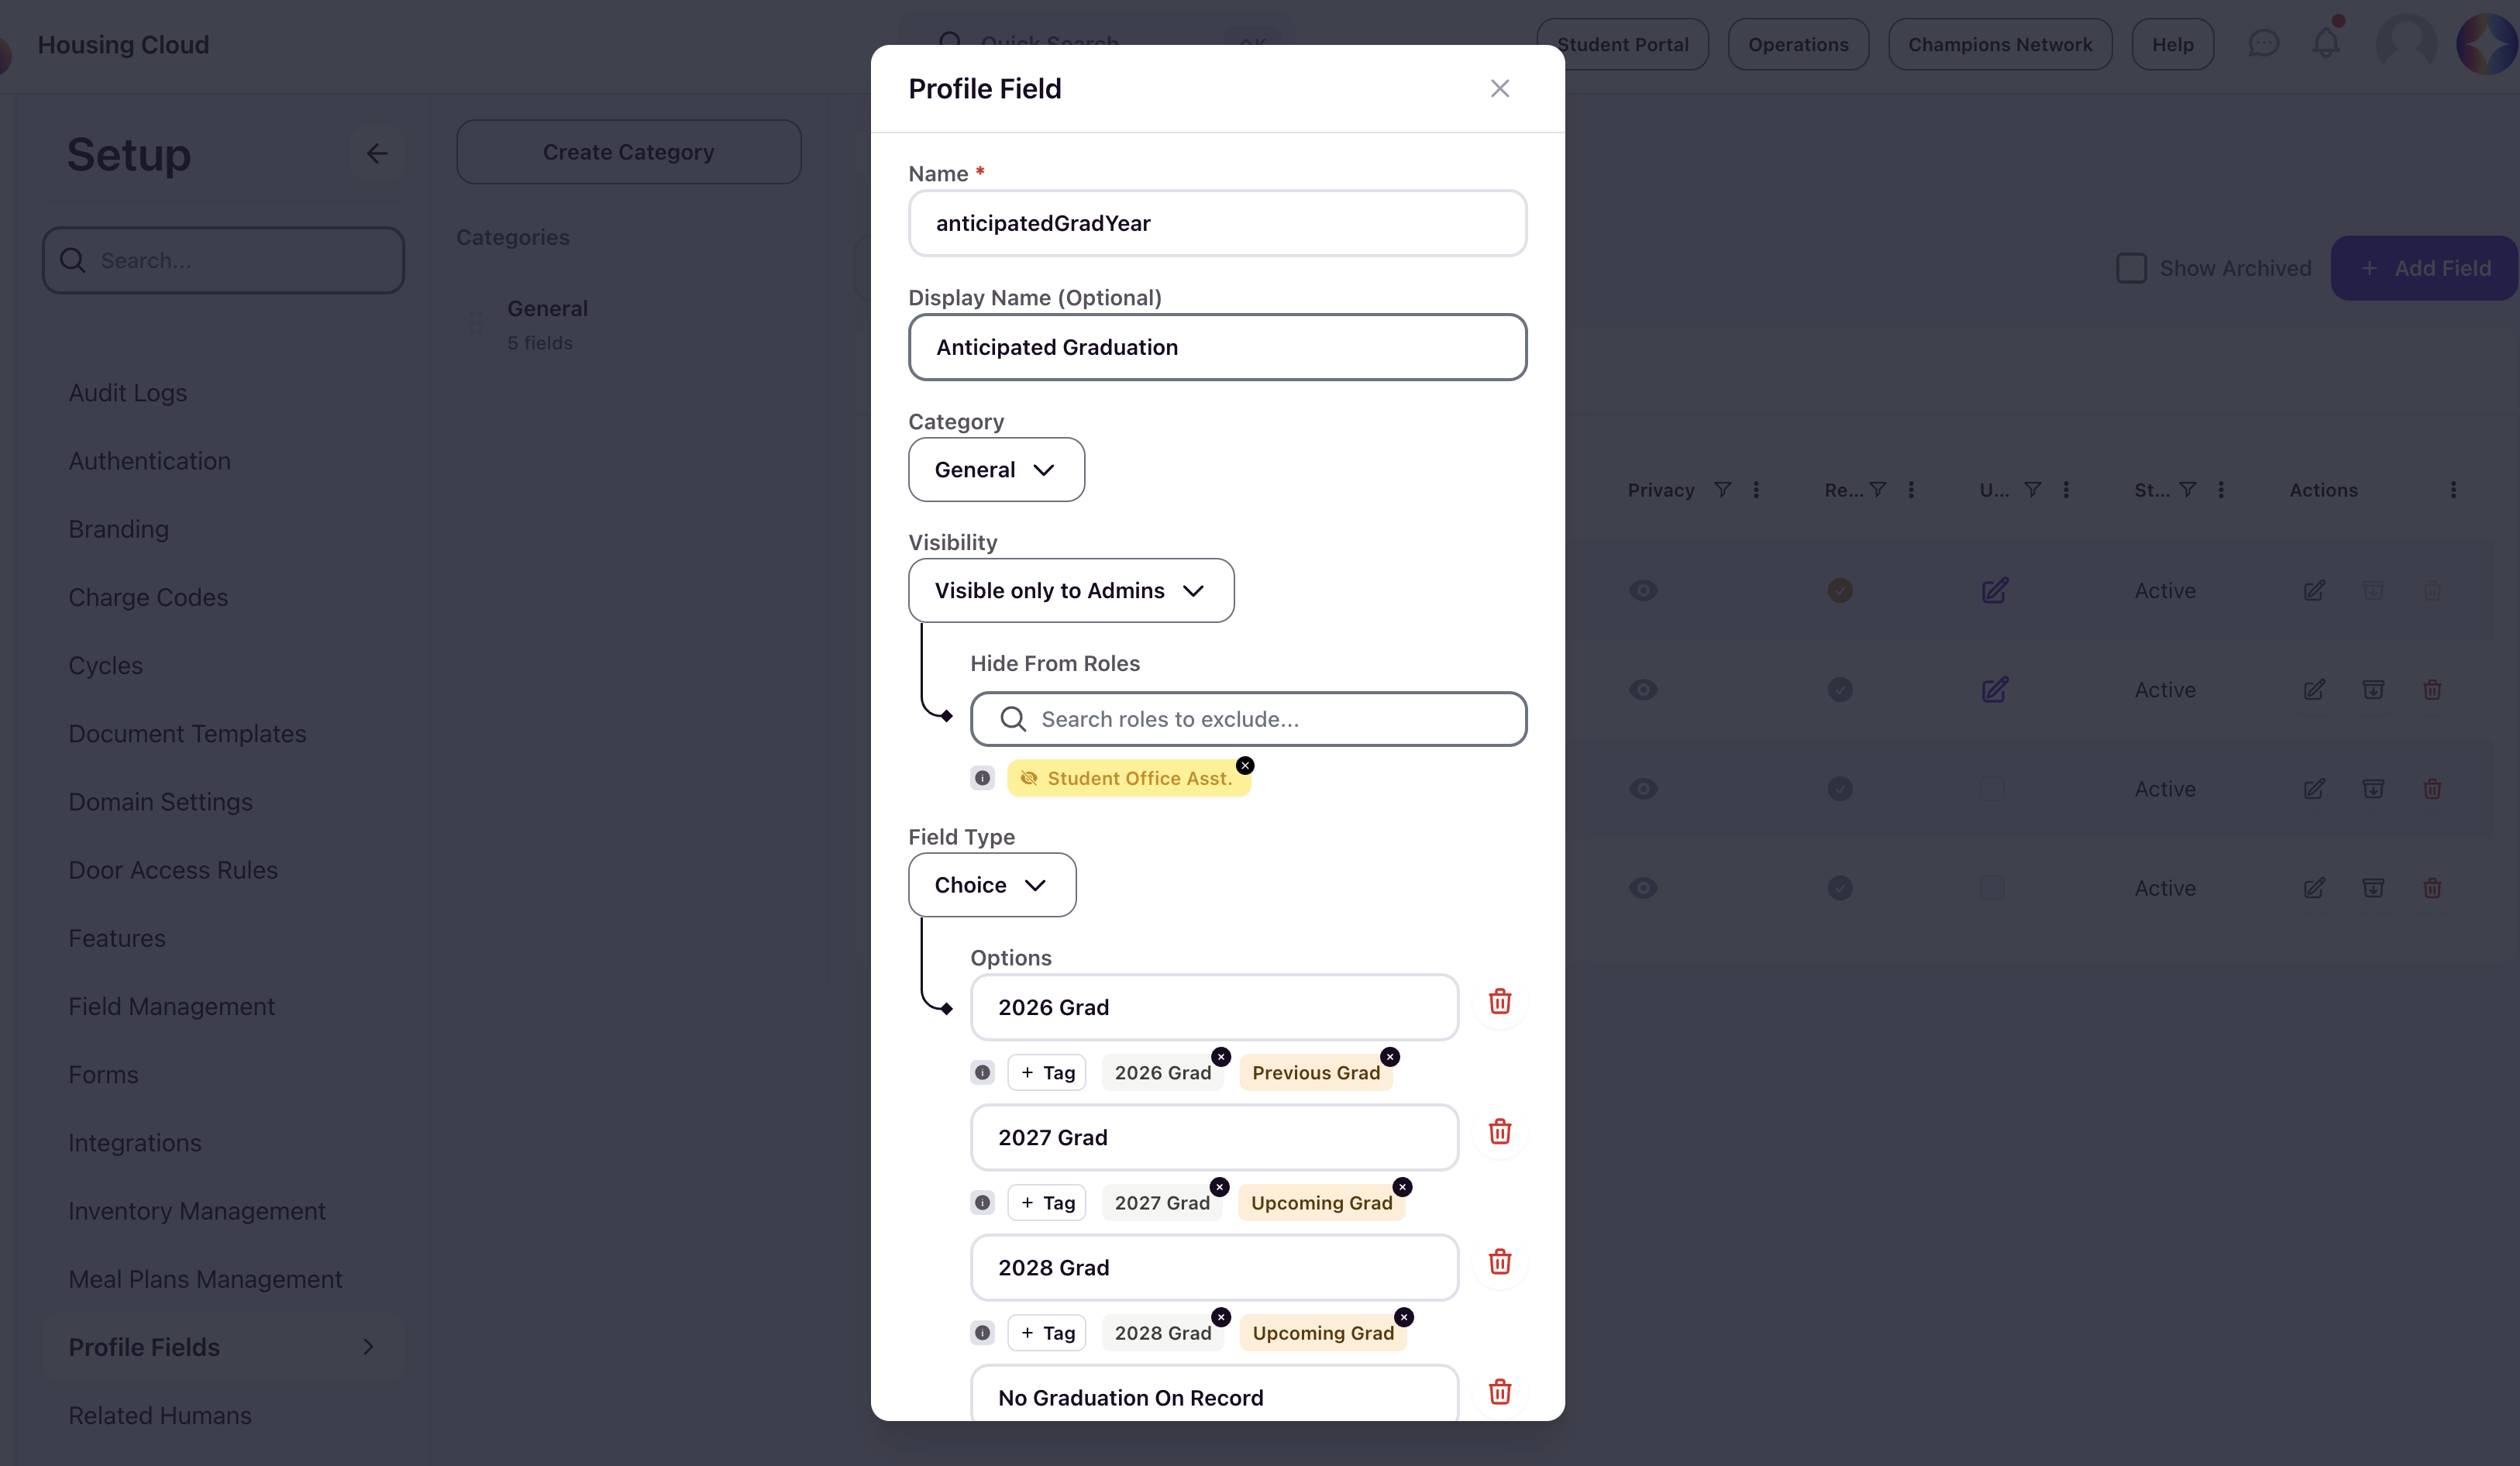
Set Visibility to control who can see the field:
- Visible only to Admins — Only housing administrators can view this field
- Visible to Admins and Student — Visible to the student on their profile
- Public — Visible without login
Student can edit
When visibility is set to Visible to Admins and Student or Public, the Student can edit checkbox appears. Turn this off for SIS-sourced data that should remain read-only.
Hide from roles
For admin-only fields, use Hide From Roles to exclude the field from specific staff views.
Required
Mark the field Required if students must complete it before proceeding. Required fields are enforced during the profile confirmation and application flows.
Status
Set Status to Active or Archived. Archived fields are hidden from students and do not appear in current workflows.
Assign tags to options
For choice and checkbox fields, click + Tag next to an option to assign tags that apply when a student has that option selected. You can assign multiple tags to a single choice. When the student's profile reflects that option, all associated tags are automatically applied. When the option changes, those tags are removed and replaced with the tags tied to the new option.
Set a fallback value
Use the Fallback Value setting to assign Tags to automatically apply when fallback value is used. This is the tag that applies when a student's value does not match any of the predefined options, or when the field is blank. The fallback tag also becomes available in rulesets and matching logic.
Save the field
Click Save to store the field. The system confirms with a Field saved message and the field appears in the Profile Fields list according to the status and visibility settings you configured.
Organize fields with categories
Categories are an admin organization layer that also affects how fields appear on student profiles. Fields in the same category are grouped together under the category name.
Create a category
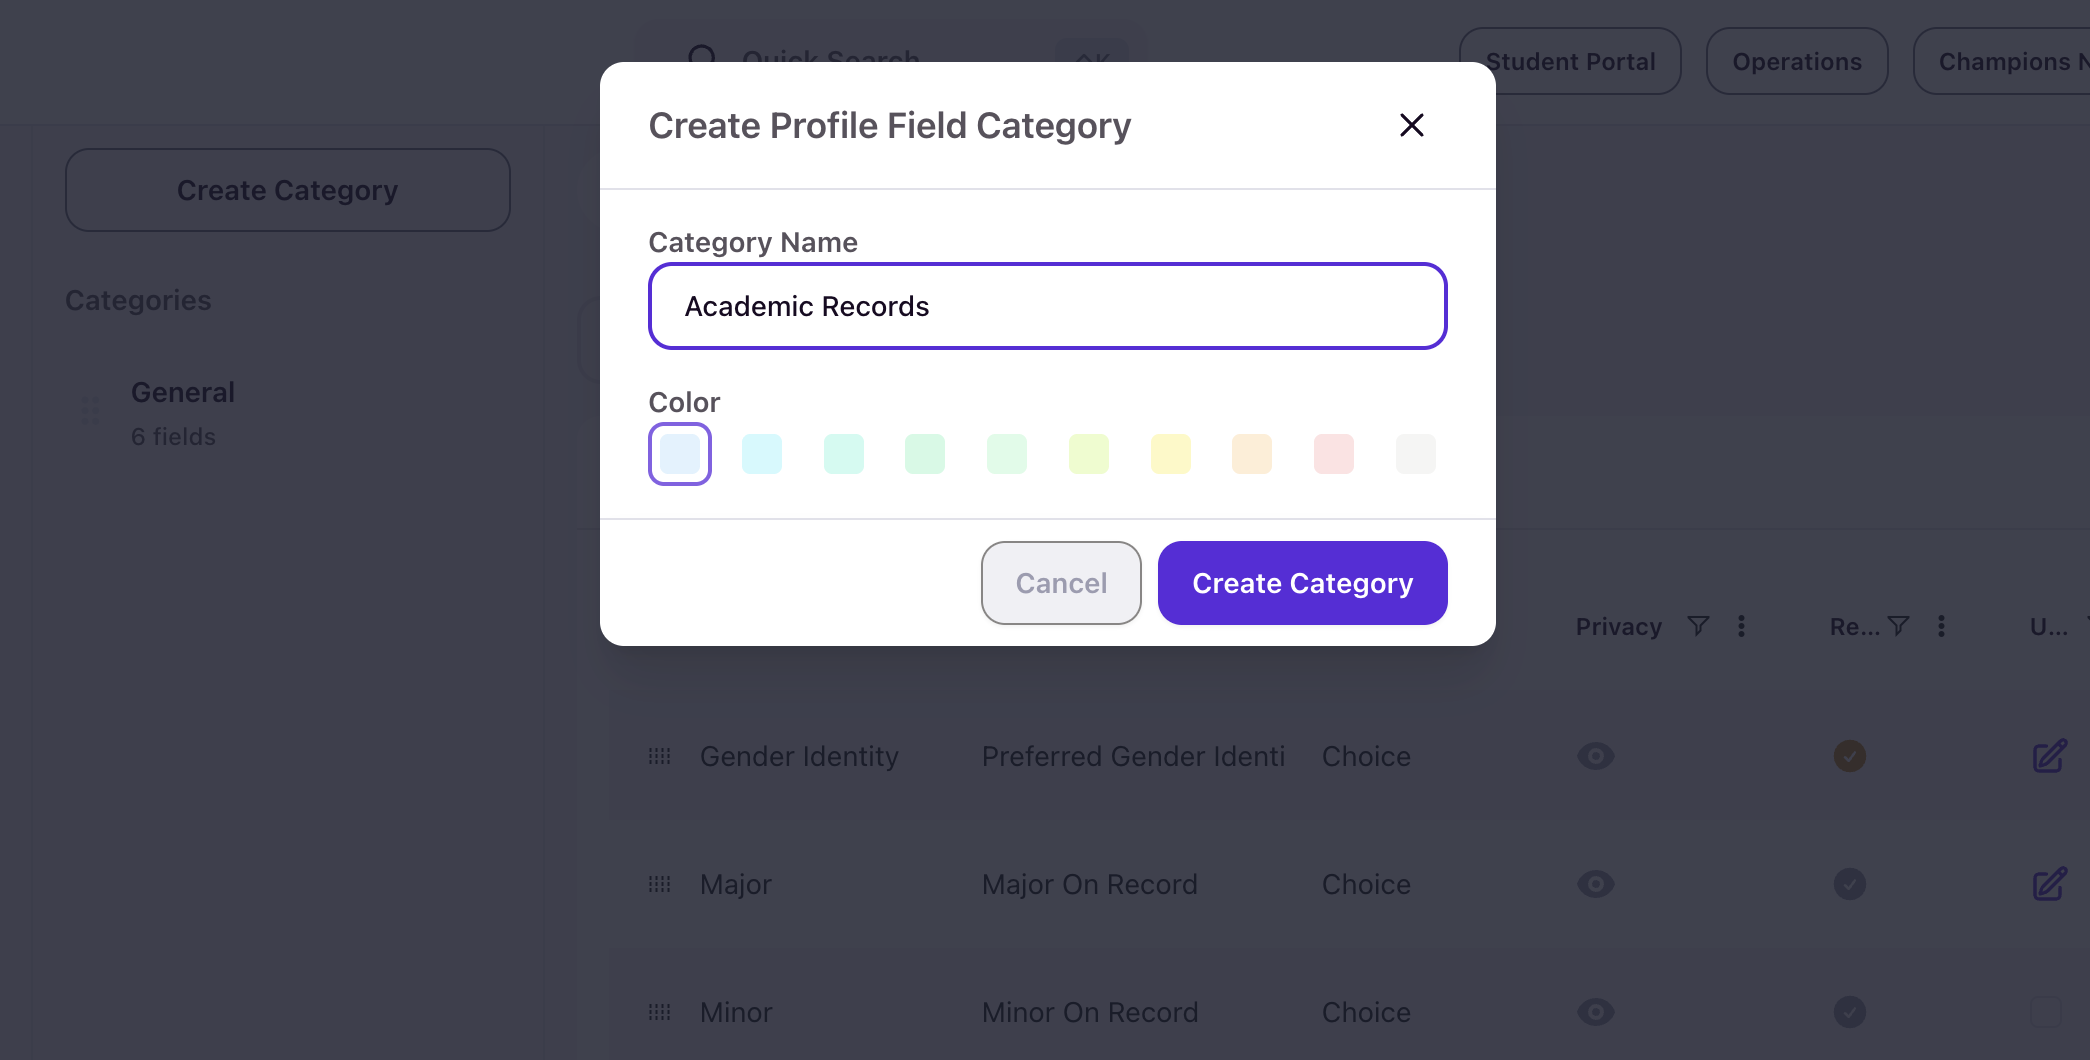
Click Create Category in the left sidebar. Enter a Category Name and select a color. The category immediately appears in the sidebar, ready for fields to be assigned to it.
Assign fields to a category
When creating or editing a field, use the Category dropdown to move it from General into a custom category. Fields left in General appear under the General section on student profiles.
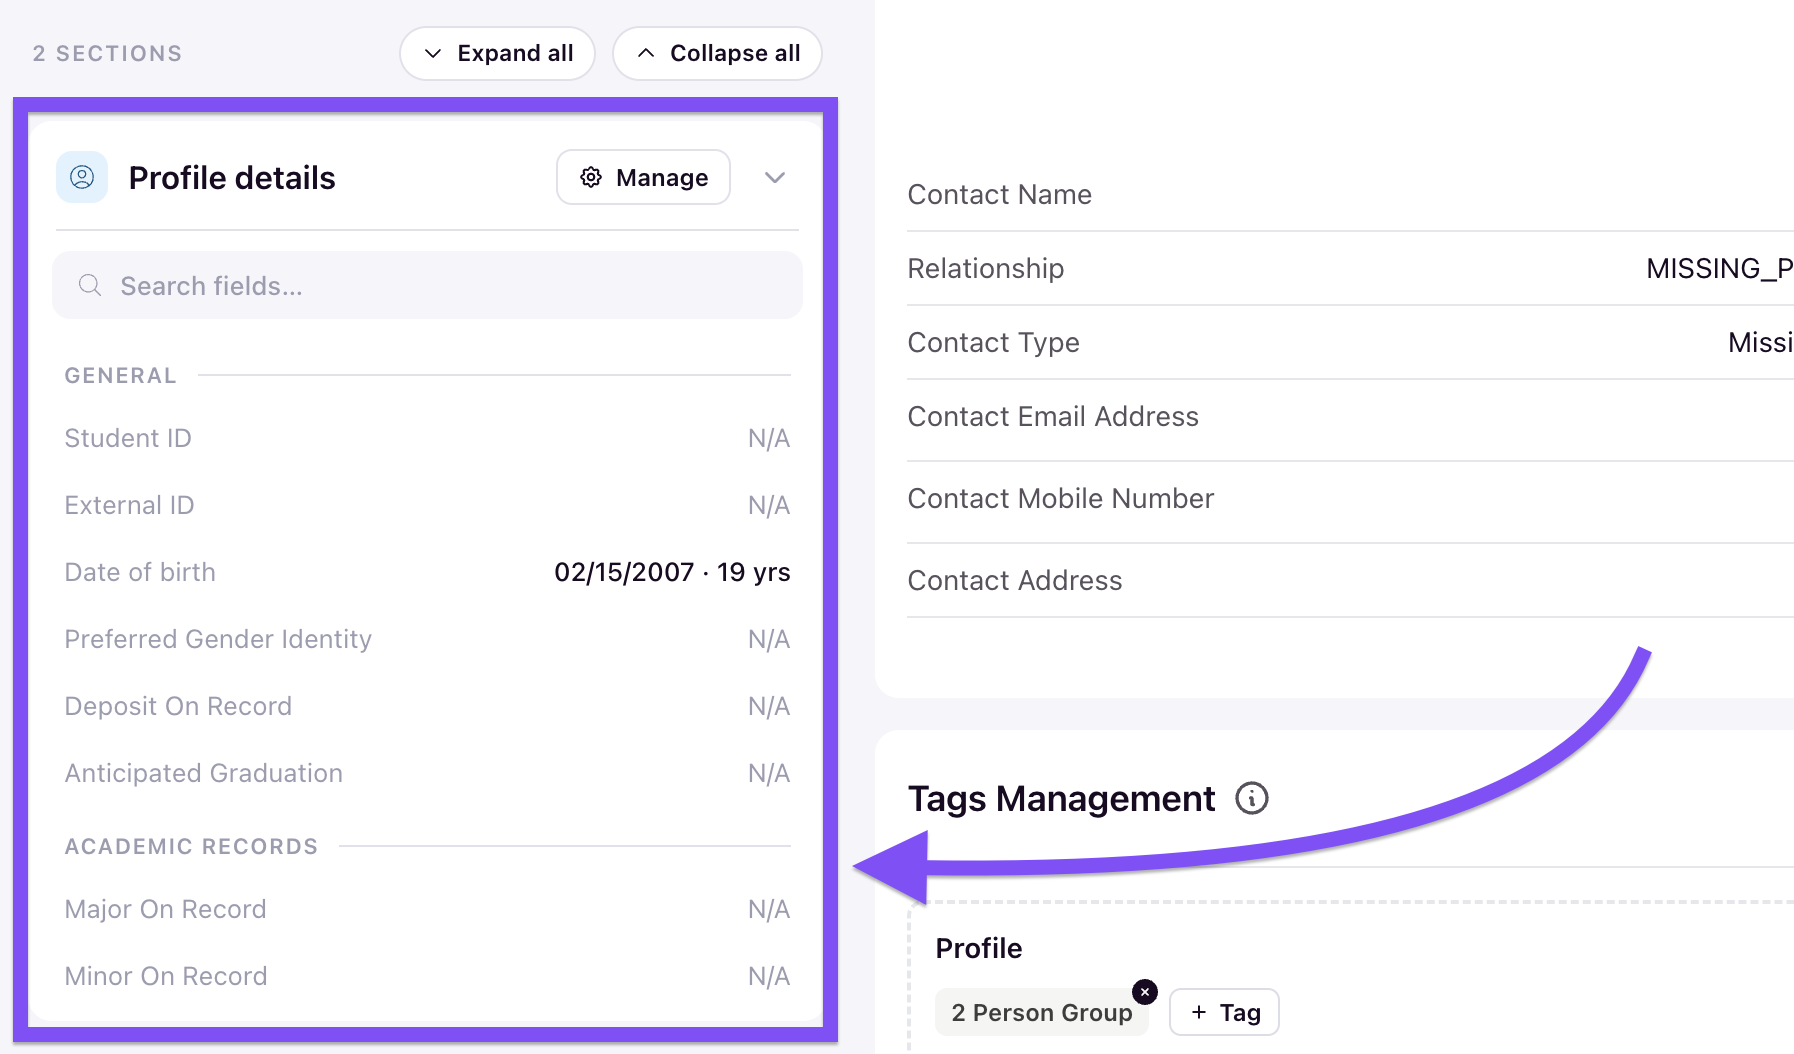
How categories appear on profiles
On student profiles, custom fields are grouped under their category name as section headers. For example, fields assigned to an Academic Records category appear under an ACADEMIC RECORDS section, while fields in General appear under GENERAL.
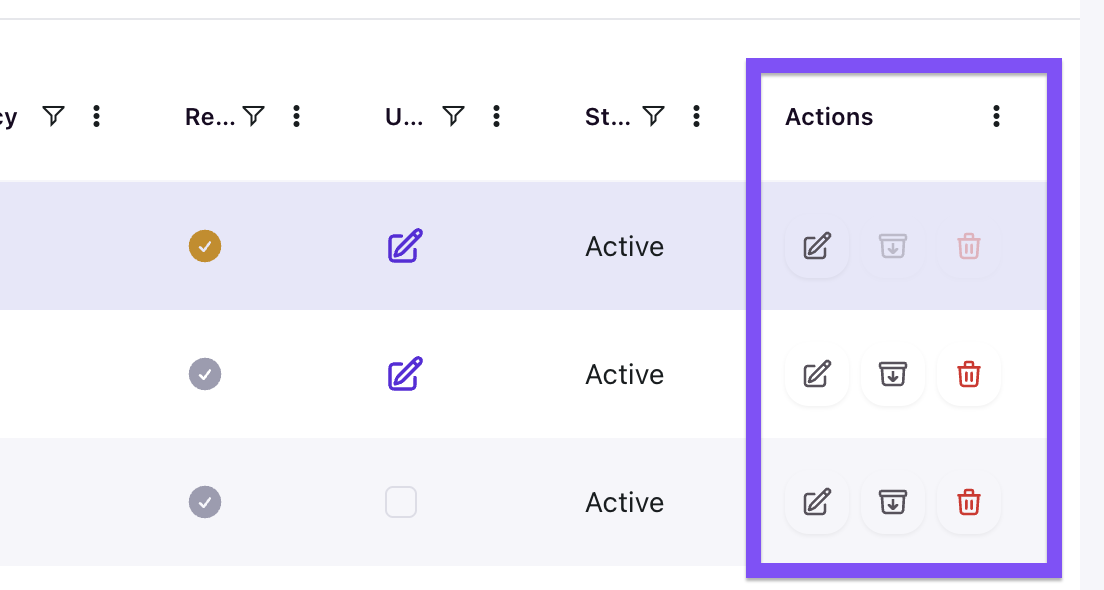
Manage existing fields
From the Profile Fields list, you can perform the following actions on any field:
- Edit field — Open the editor to change the configuration, add options, or adjust tags
- Archive field — Hide the field from students and workflows without deleting data
- Unarchive field — Restore an archived field to active use
- Delete field — Remove the field permanently. Deleting requires a reason and cannot be undone
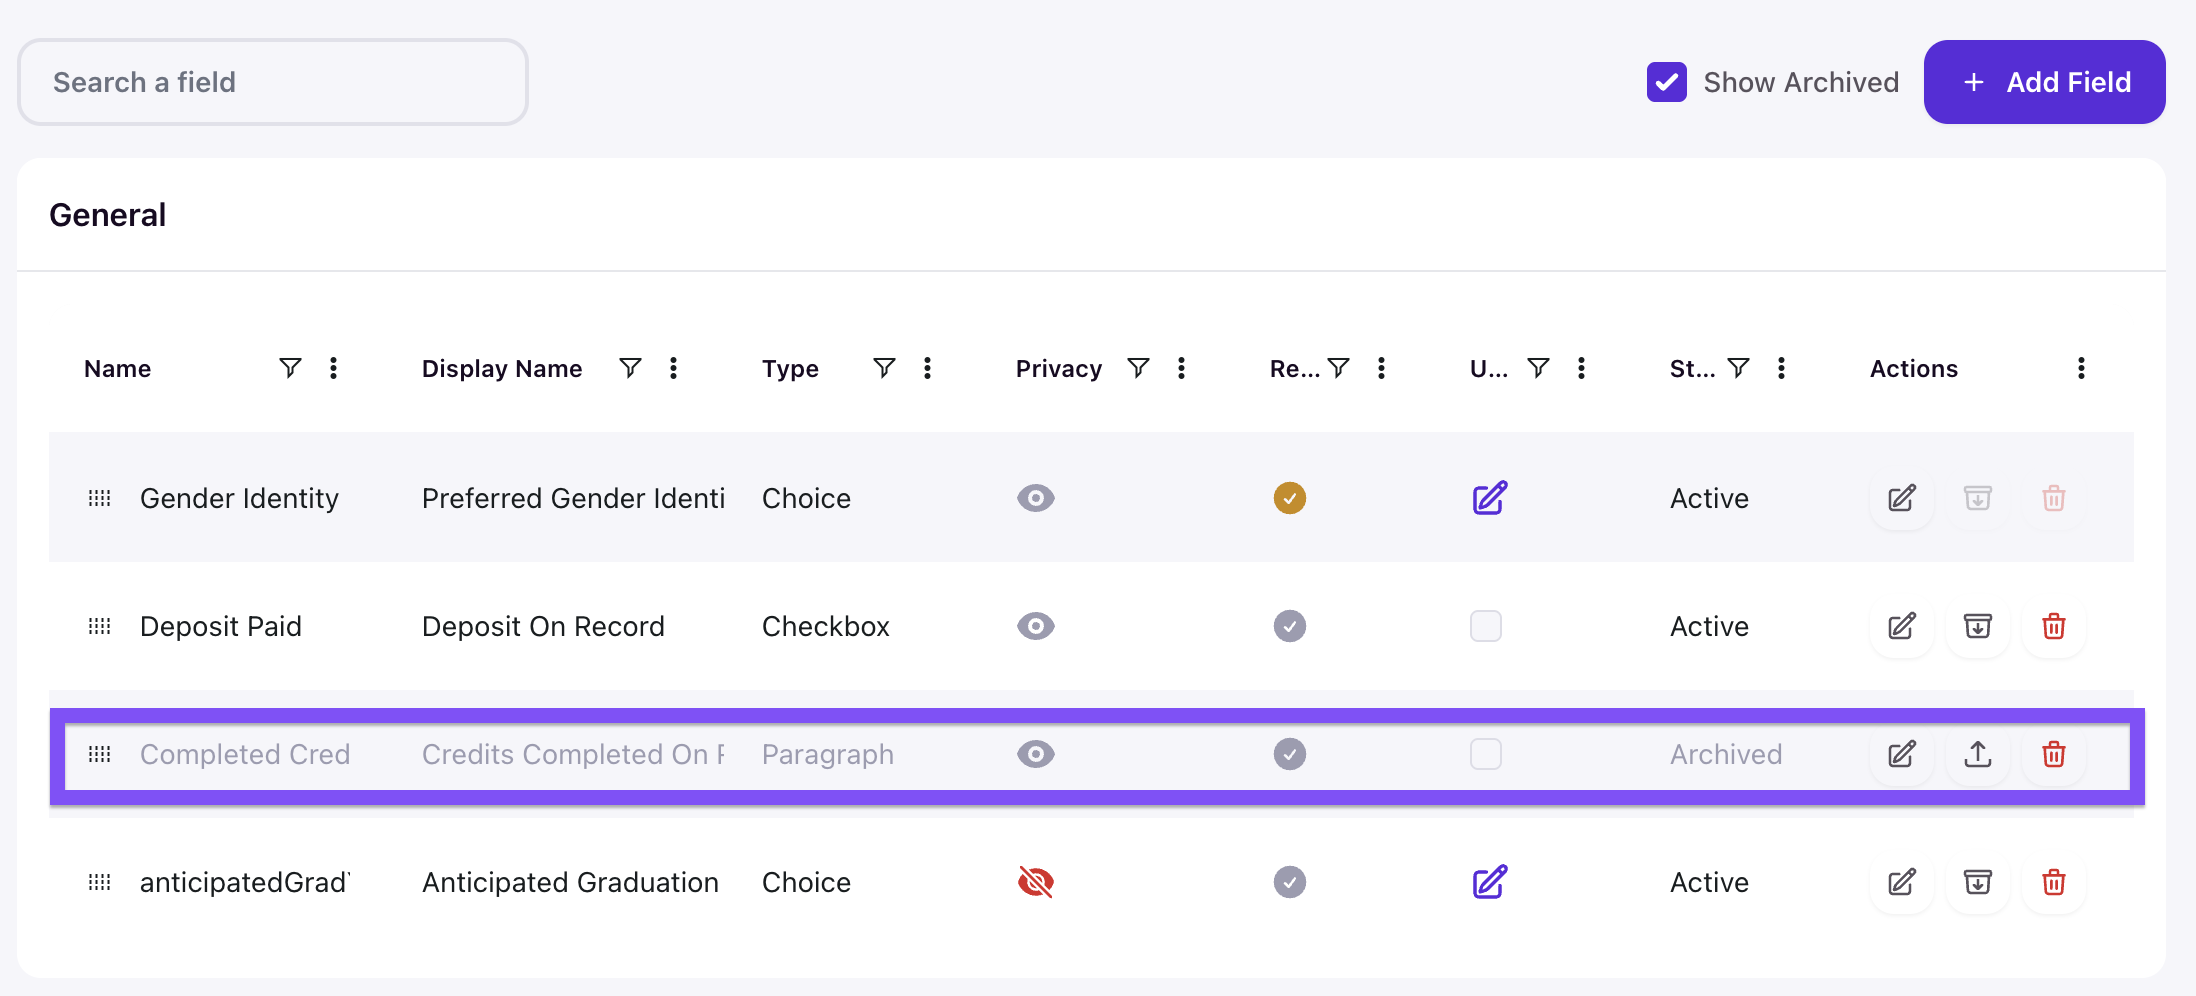
Check Show Archived to display archived fields in the list. Archived fields are highlighted so you can distinguish them from active fields.
Avoid changing a field's type after it has been in use. Switching from one type to another mid-cycle can cause existing data to stop displaying correctly. If a type change is necessary, contact your Housing.Cloud account team before proceeding.
Reorder fields or categories
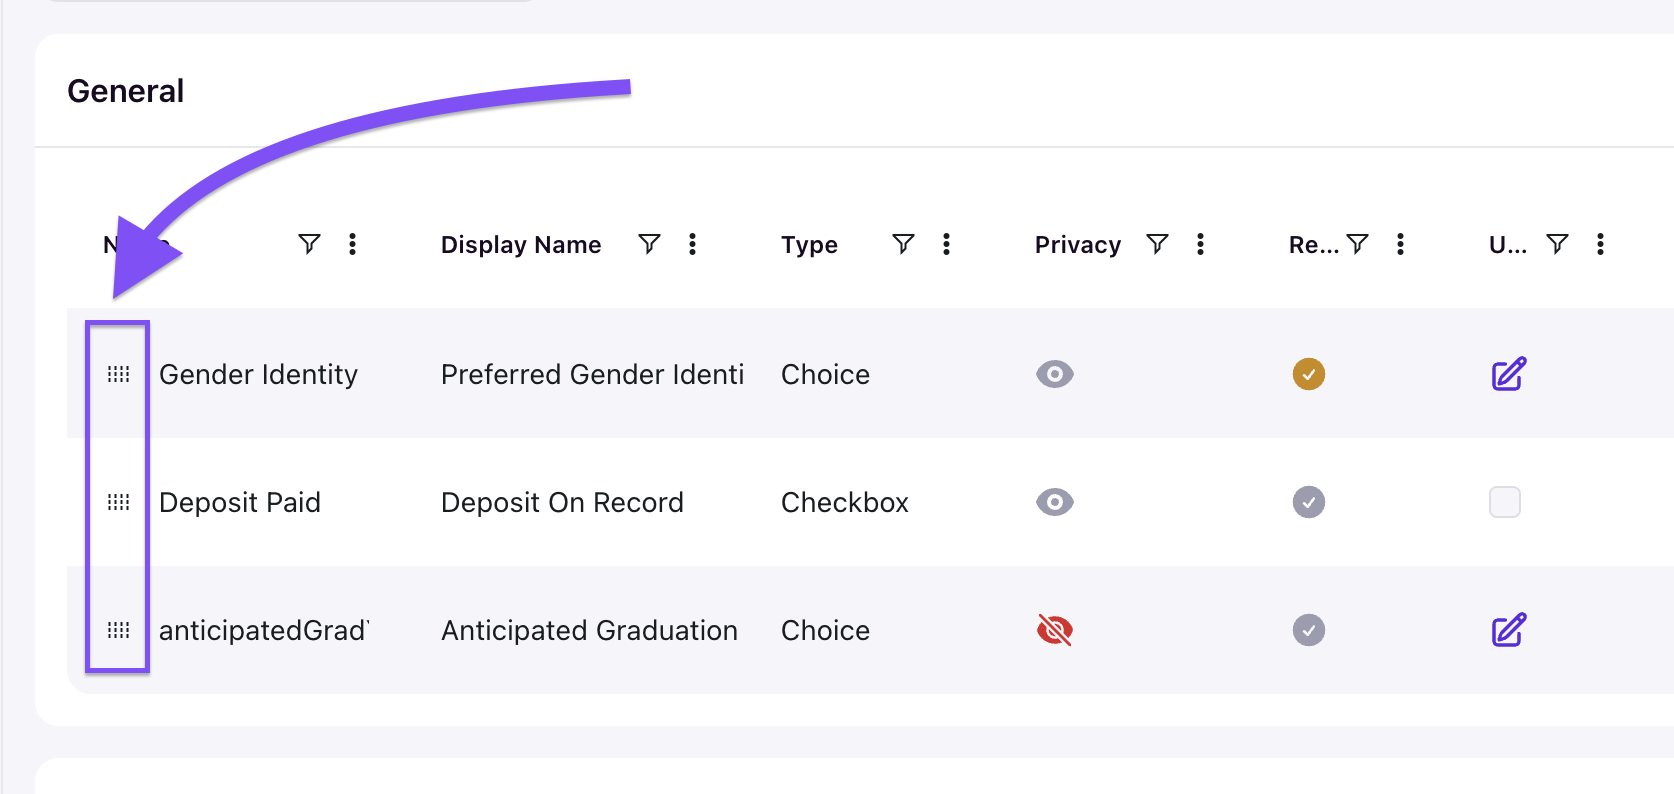
Drag categories in the left sidebar to change their order. This controls the order in which the field or category appears on student profiles.
SIS integration notes
If you populate custom profile fields through a SIS integration or import, the Name you give the field must match the SIS column header exactly, character for character. Use the Display Name to present the field in plain language to students and staff.
Also confirm the following before building your fields:
- Date values must match the expected format exactly
- Incoming choice values must match one of the predefined options precisely; unmatched values will not populate on the student's profile
- Review a sample export from your SIS before creating fields to avoid missing options
Most institutions keep SIS-sourced fields visible but not editable so students can see the data but cannot change it.