Manage Scheduled Billing Occurrences
Last updated: October 2, 2026
Each scheduled billing charge on a student account is called an occurrence. A billing schedule generates them automatically, and they post on their scheduled dates without any action from you. You step in only when a specific charge needs something different: posting it early, waiving it, or changing its amount or date.
Choose one of the following paths to quickly jump to the details related to a billing schedule.
One student's charges on a plan
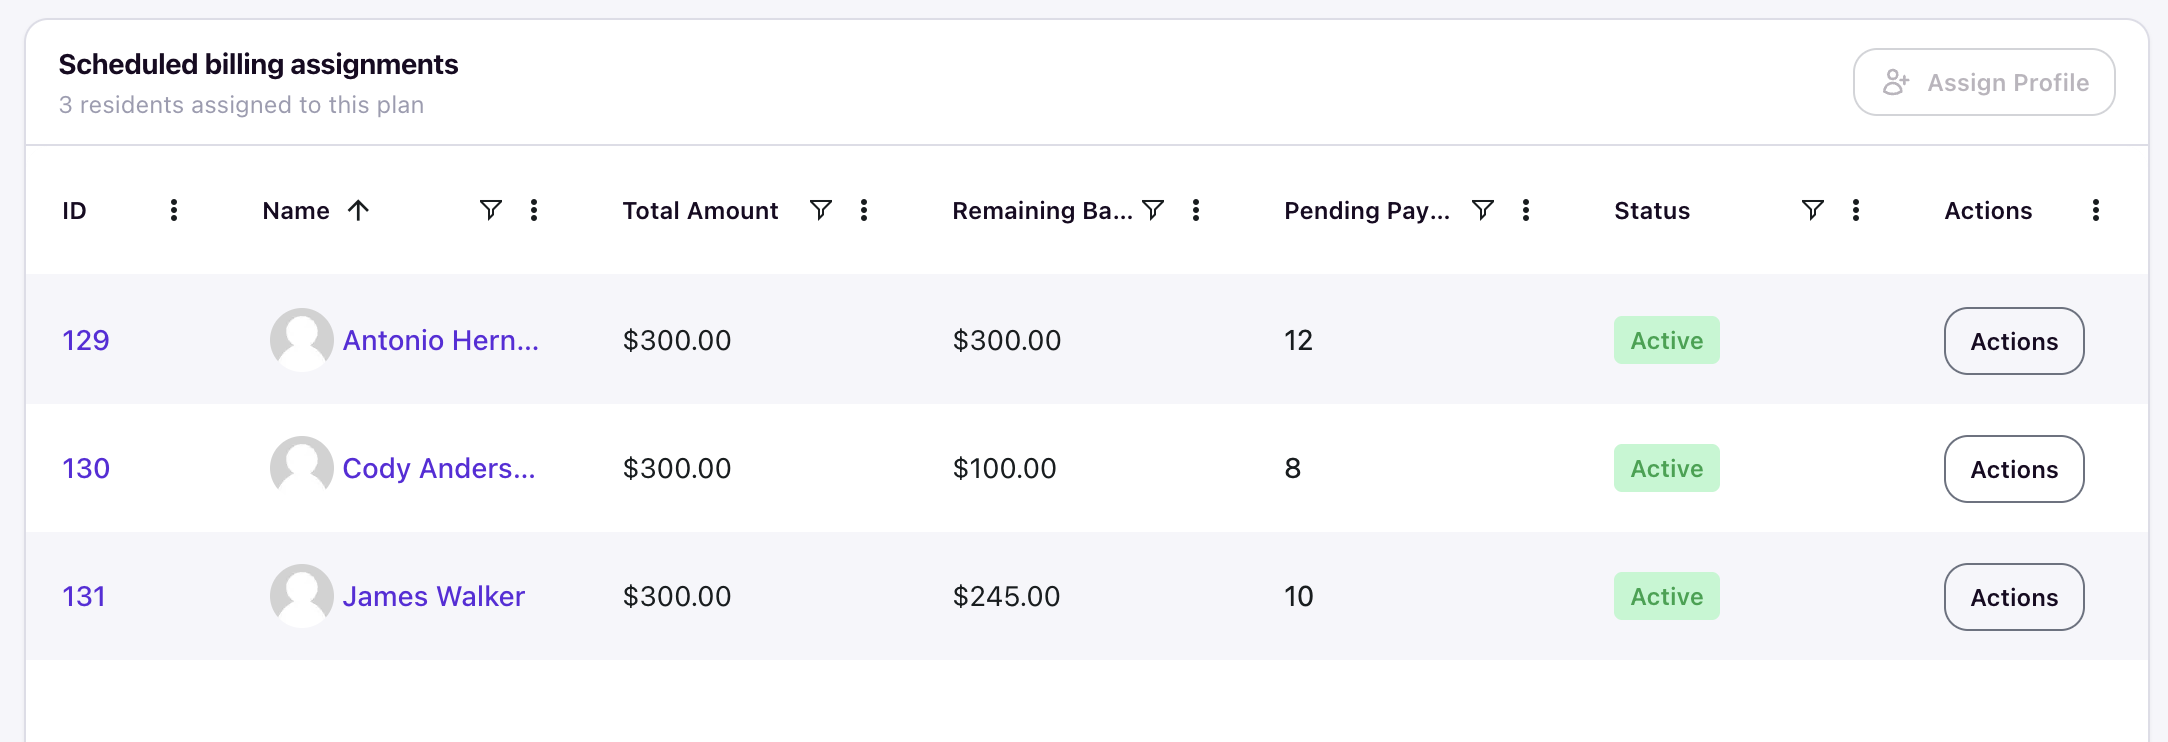
Open the schedule from the Billing Schedules tab and click the resident in the assignments table.
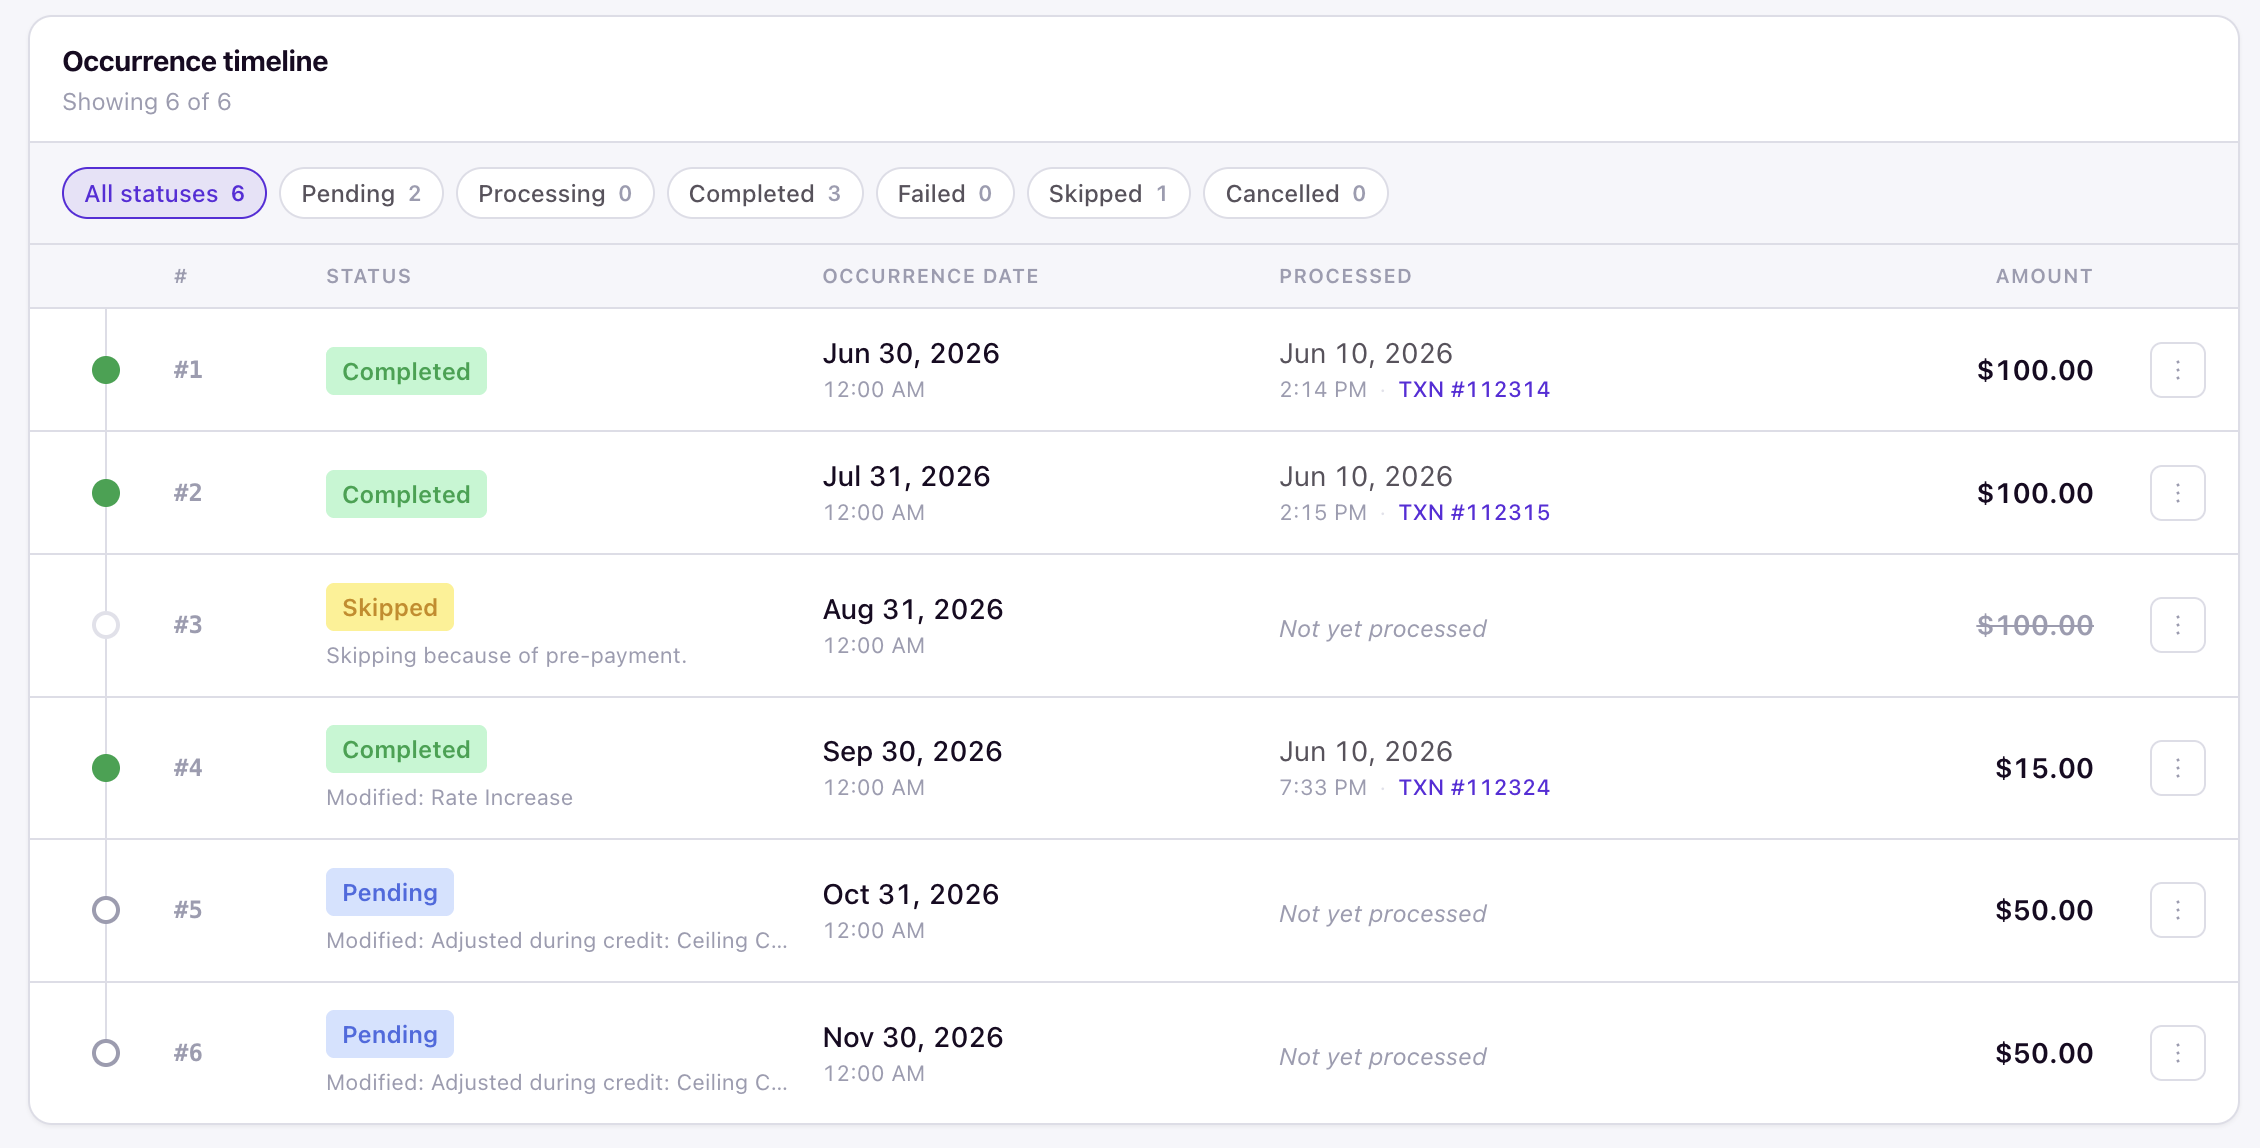
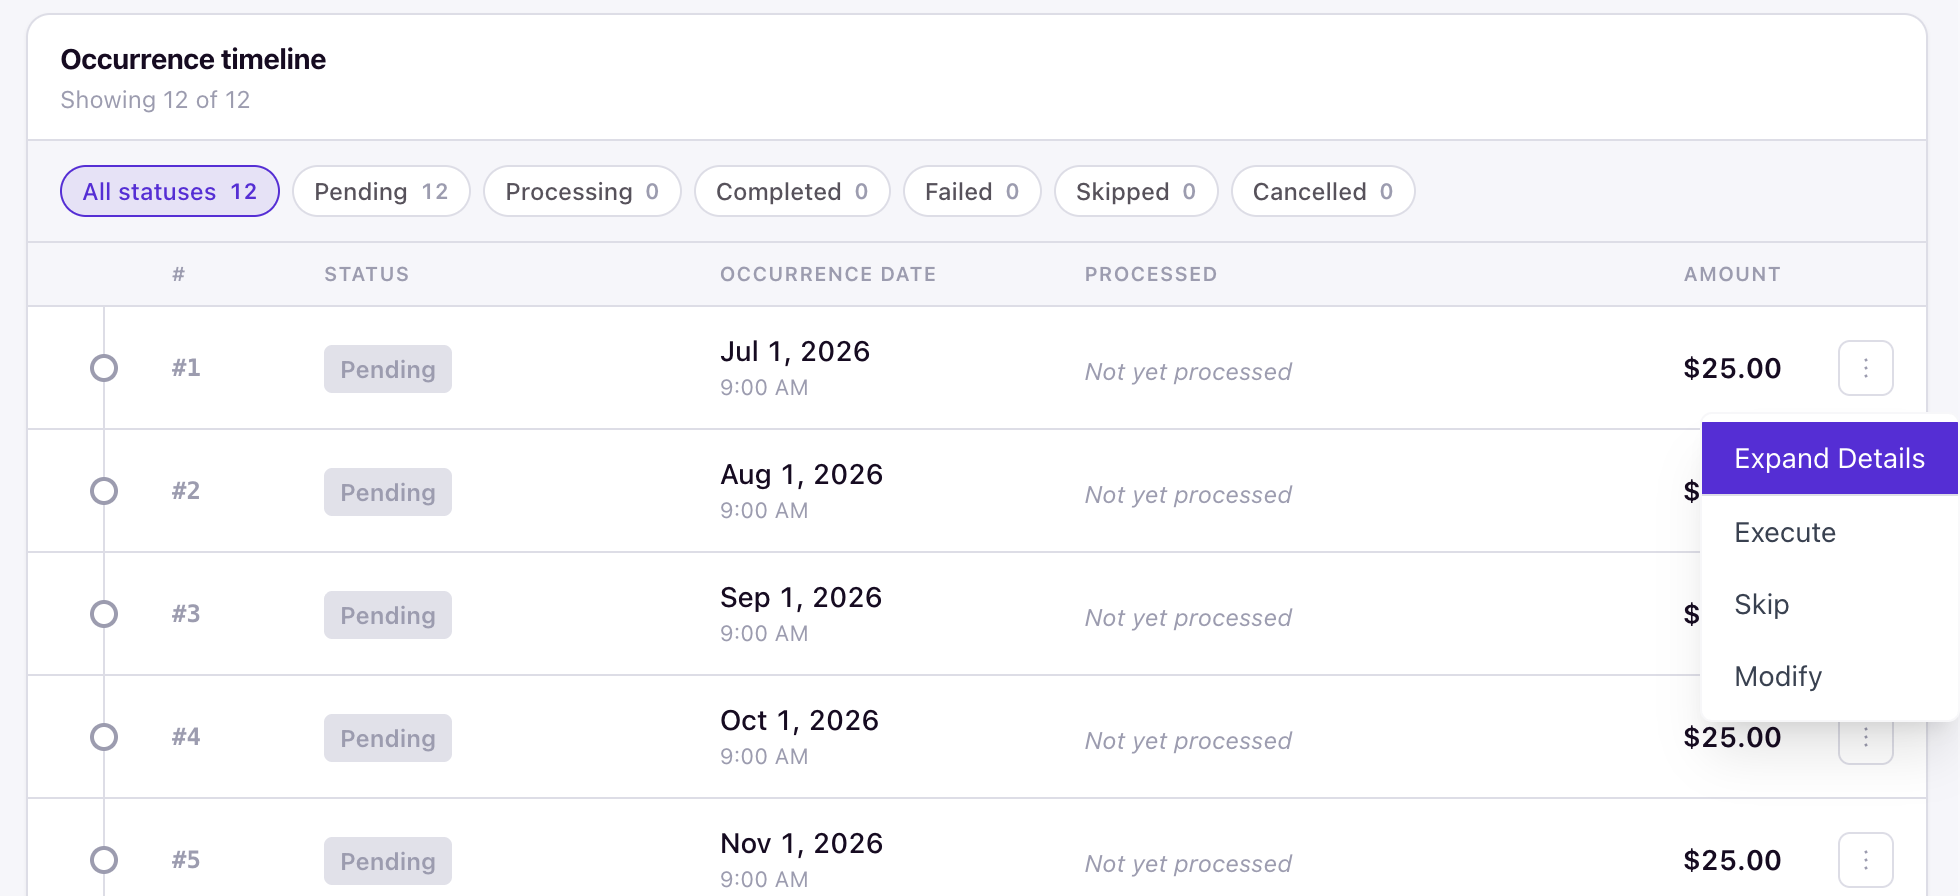
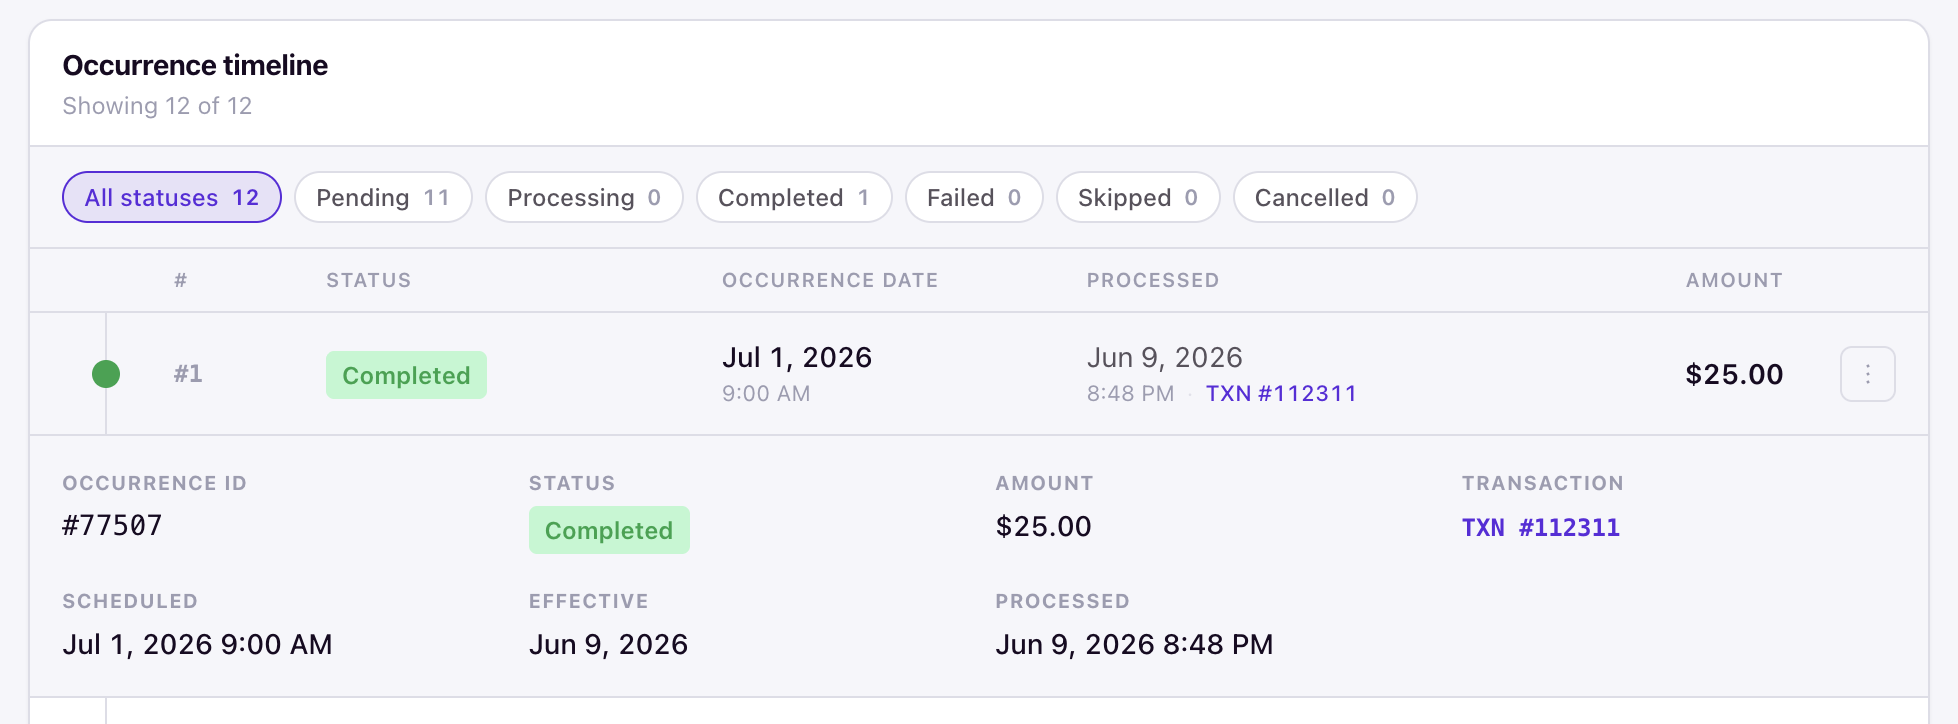
Their assignment page shows the Occurrence timeline — every charge for that student, with filter chips for each status and columns for #, Status, Occurrence Date, Processed, and Amount.
All occurrences for a single schedule
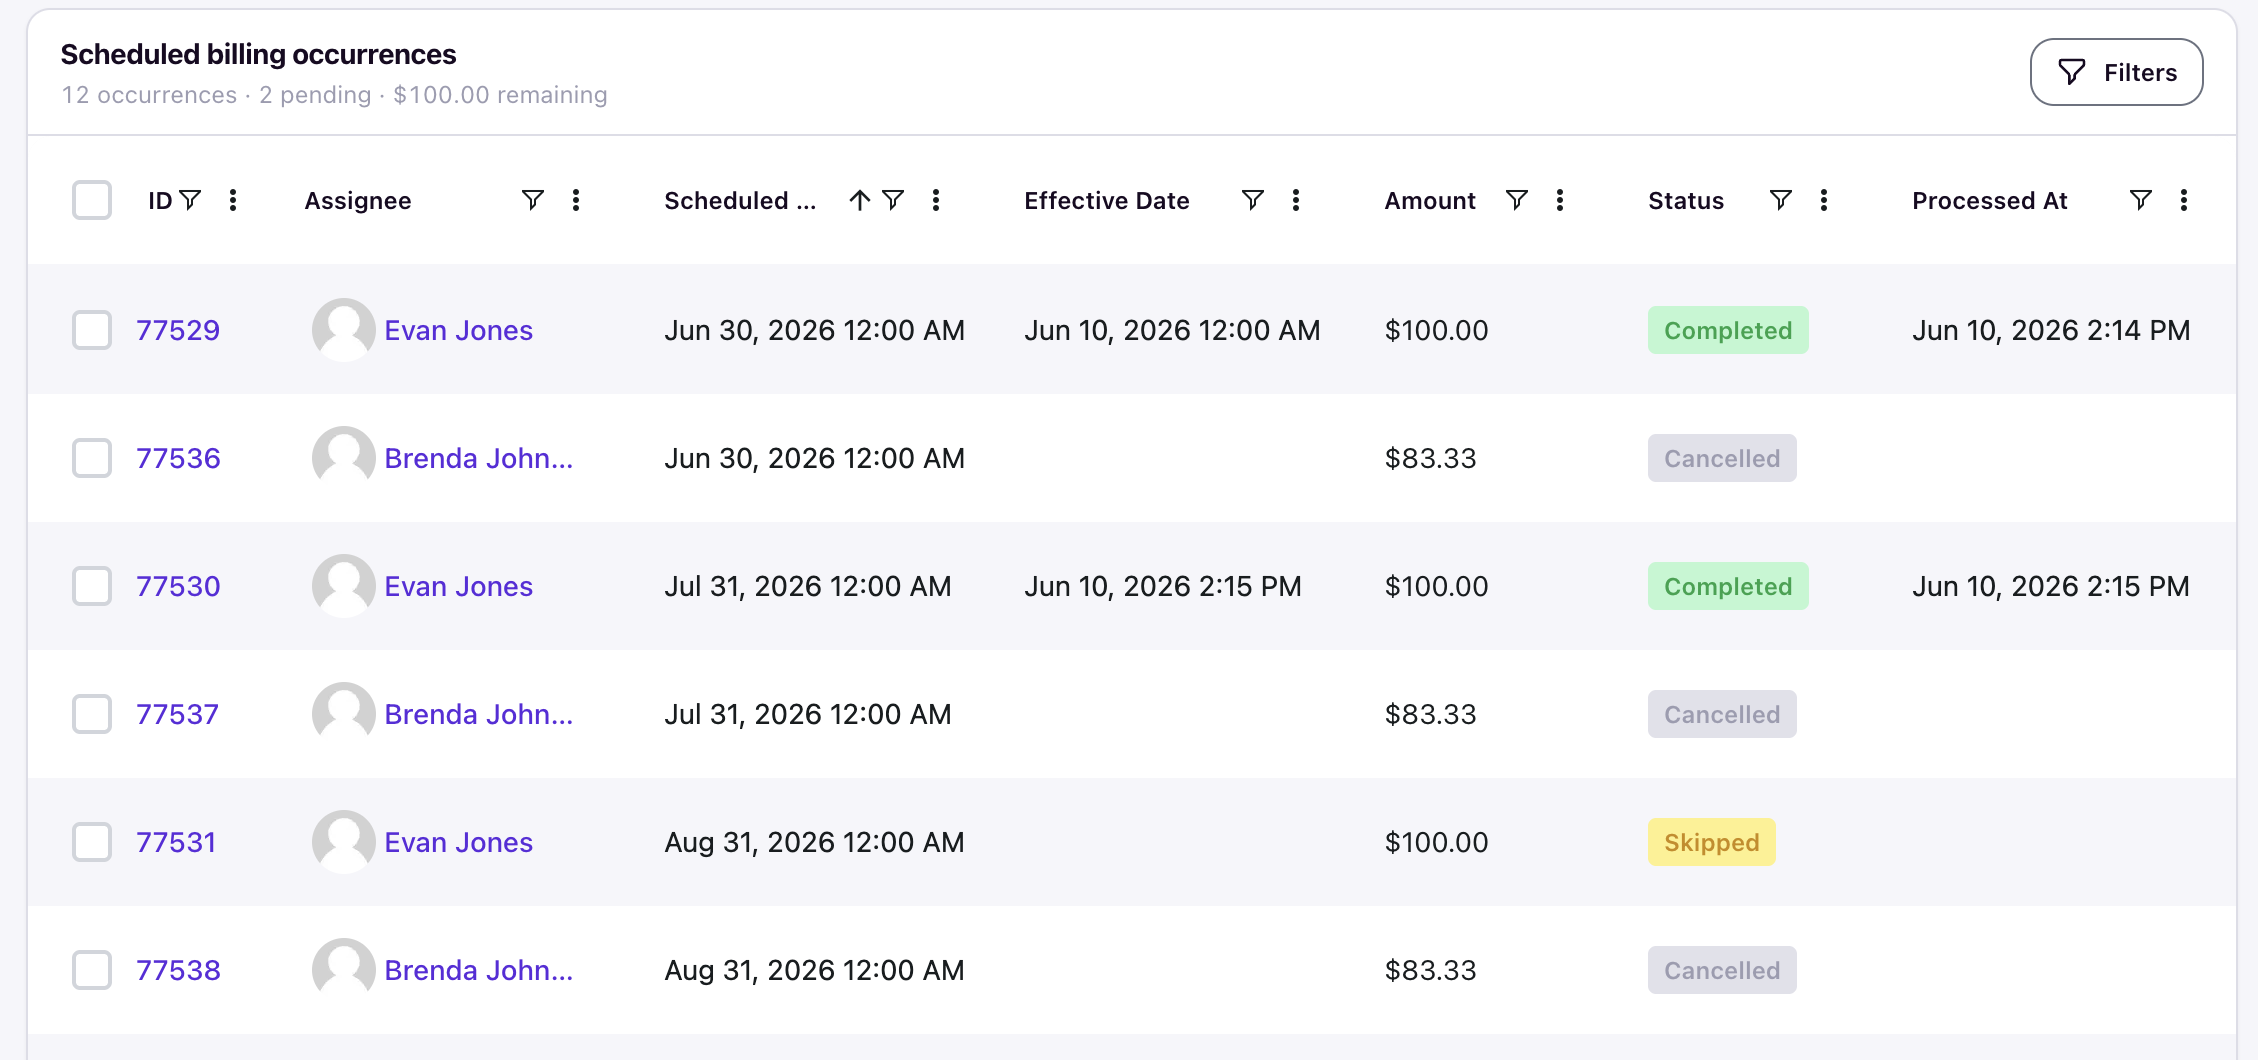
Locate all occurrences for a single schedule under the schedules detail view.
Starting from the student instead
Open the Scheduled Billing card on the student's profile and select the assignment — it leads to the same timeline.
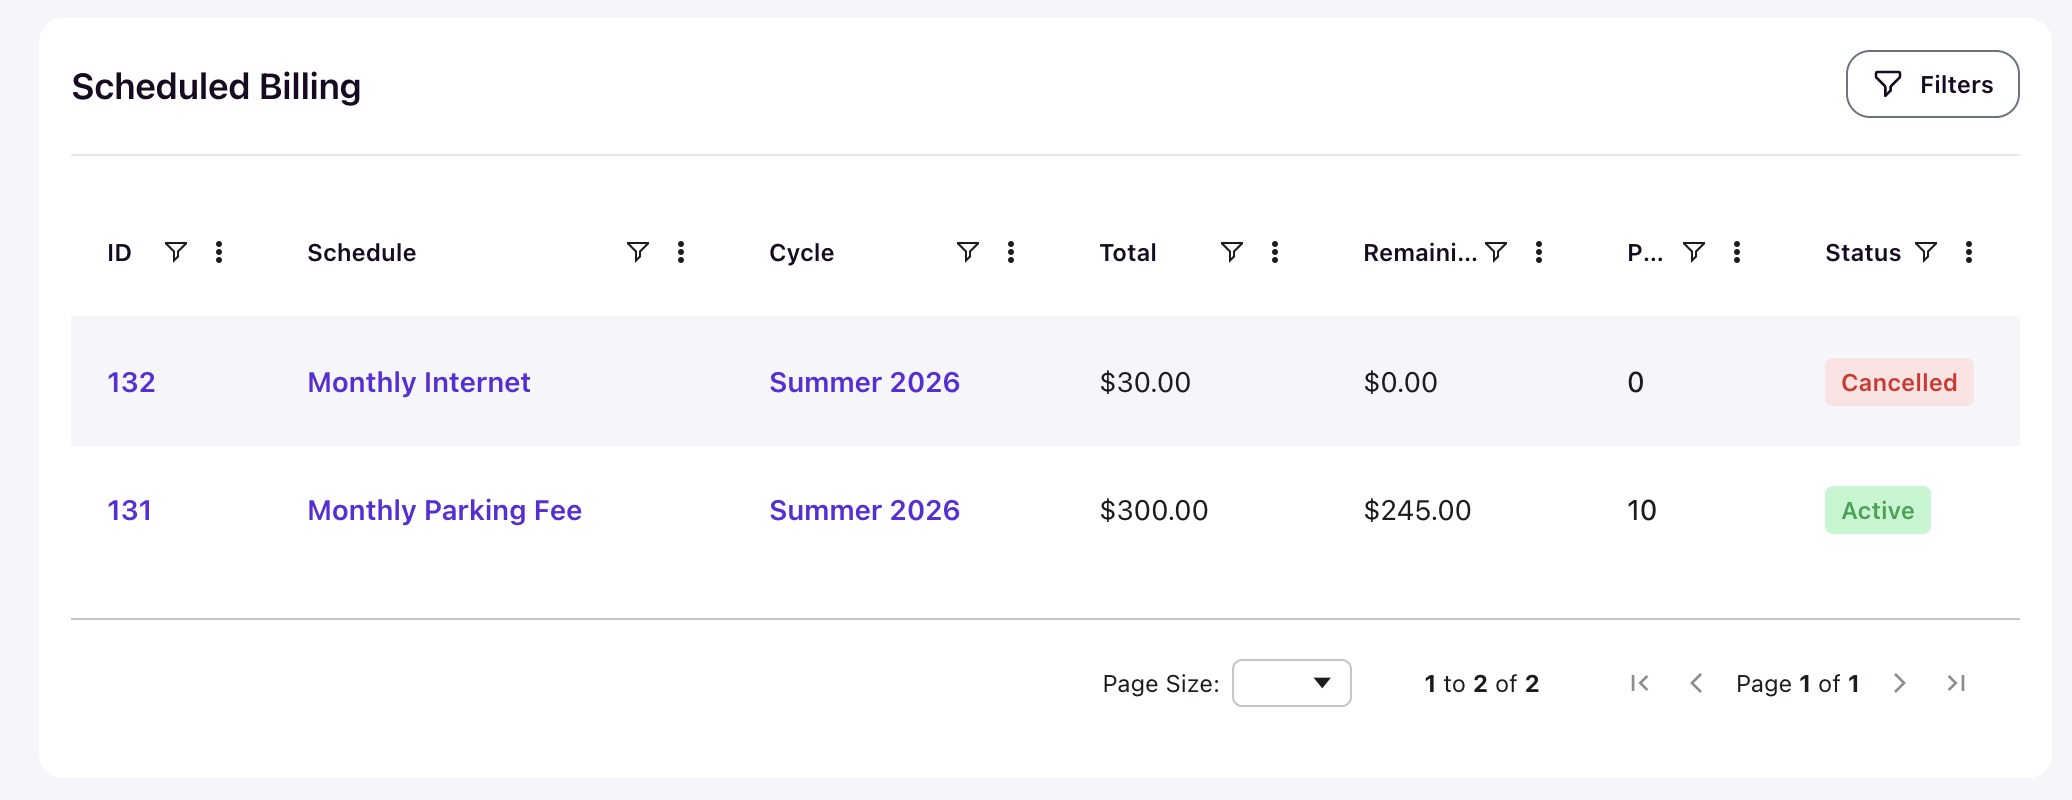
Every charge across all schedules
The Occurrences tab at the top of the Billing Schedules workspace lists all occurrences system-wide, filterable by status — useful for sweeping for Failed or Pending charges regardless of plan.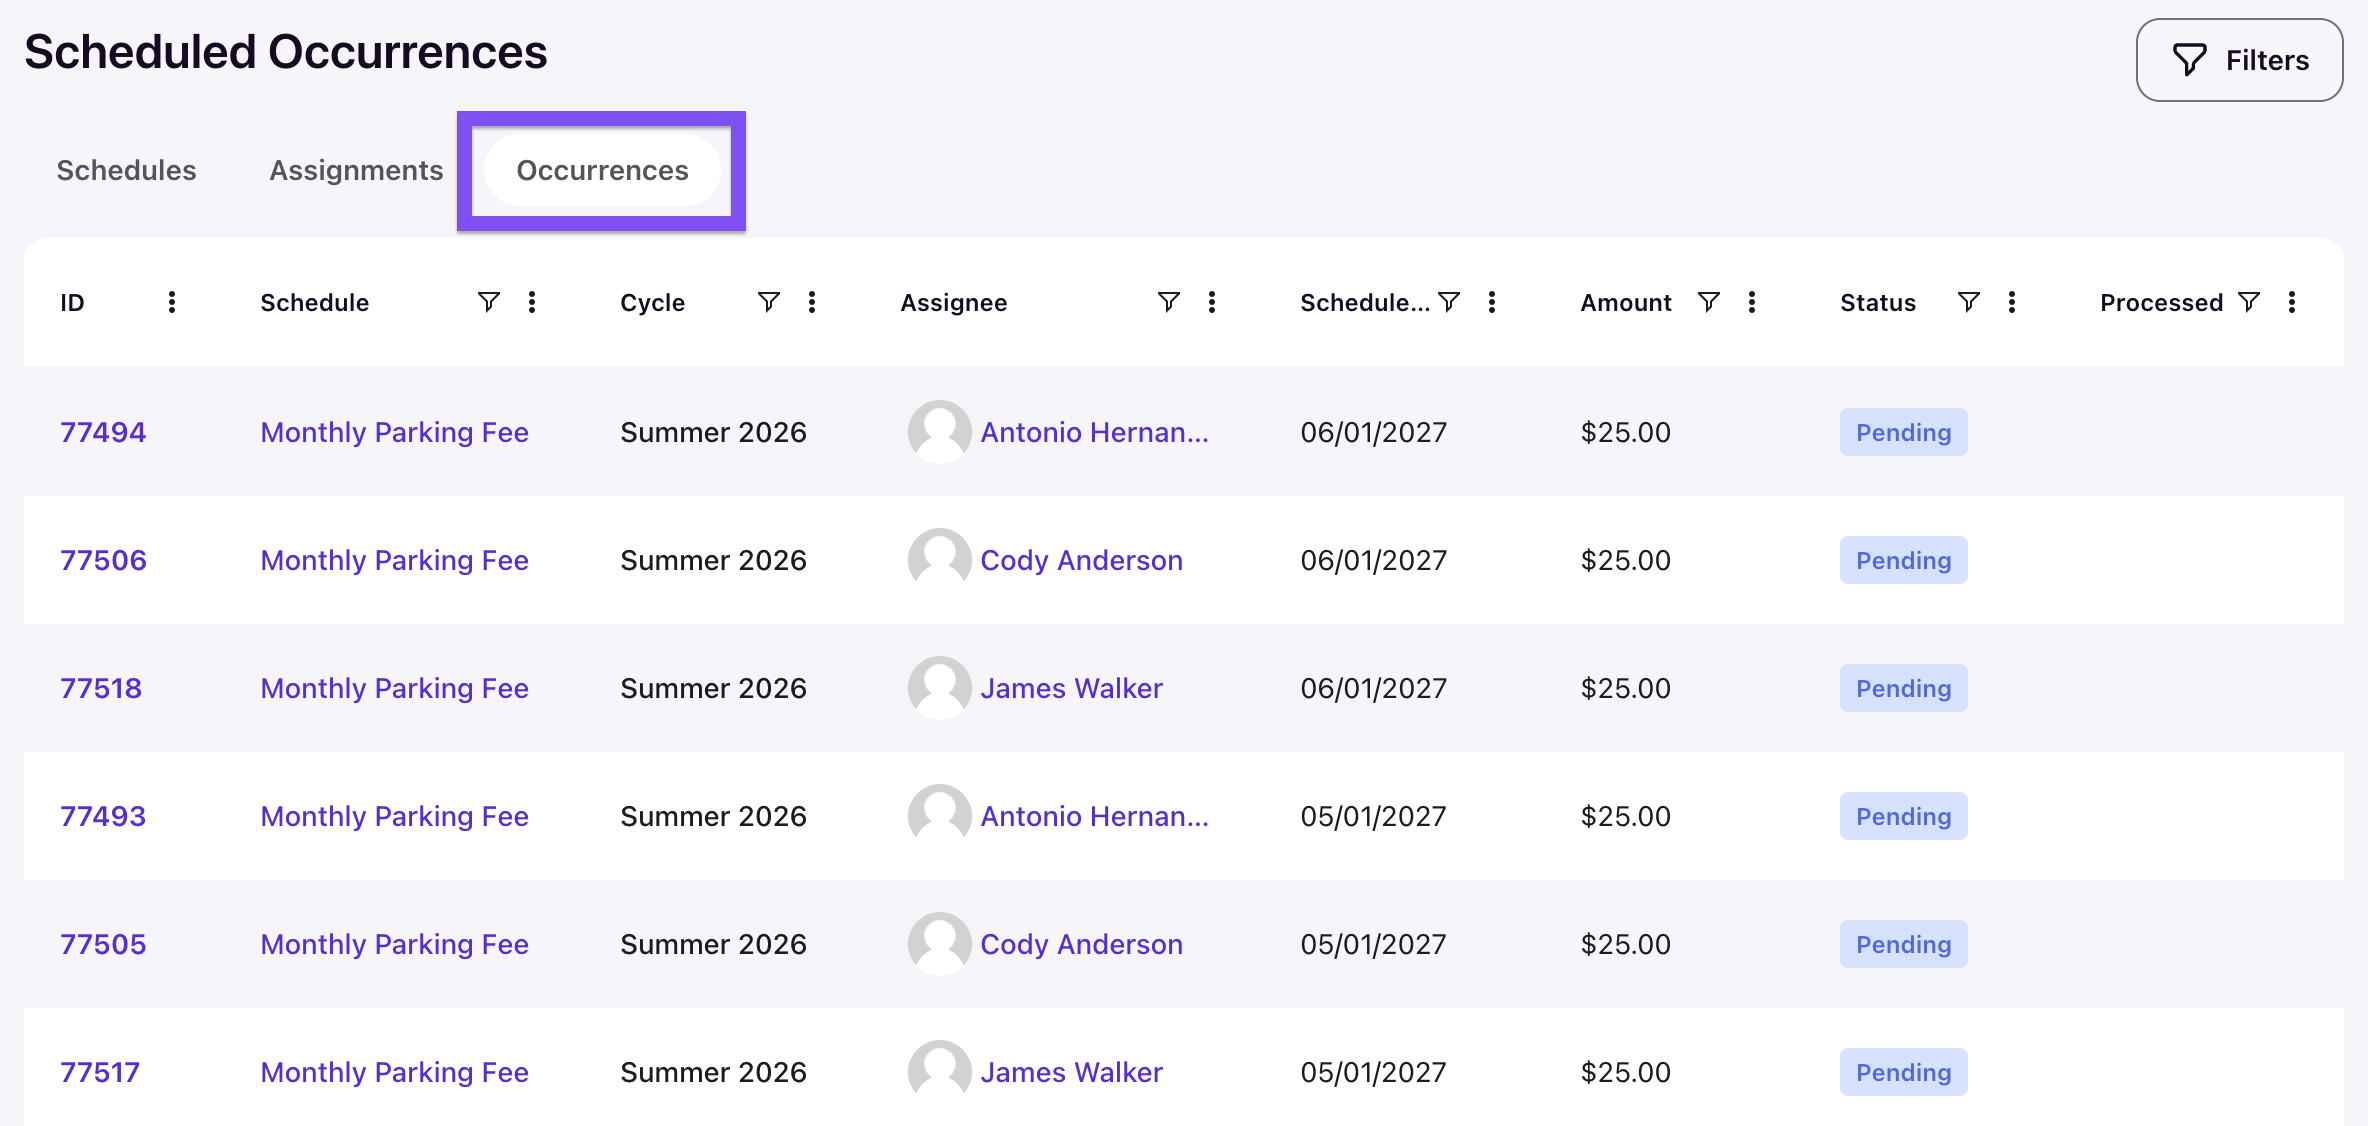
Occurrence statuses
Statuses help quickly identify the lifecycle of an occurence.
| Status | What it means |
|---|---|
| Pending | Scheduled but not yet posted to the student account. |
| Processing | Currently being posted. |
| Completed | Successfully posted. The occurrence links to the resulting transaction (TXN #). |
| Failed | Attempted but encountered an error. |
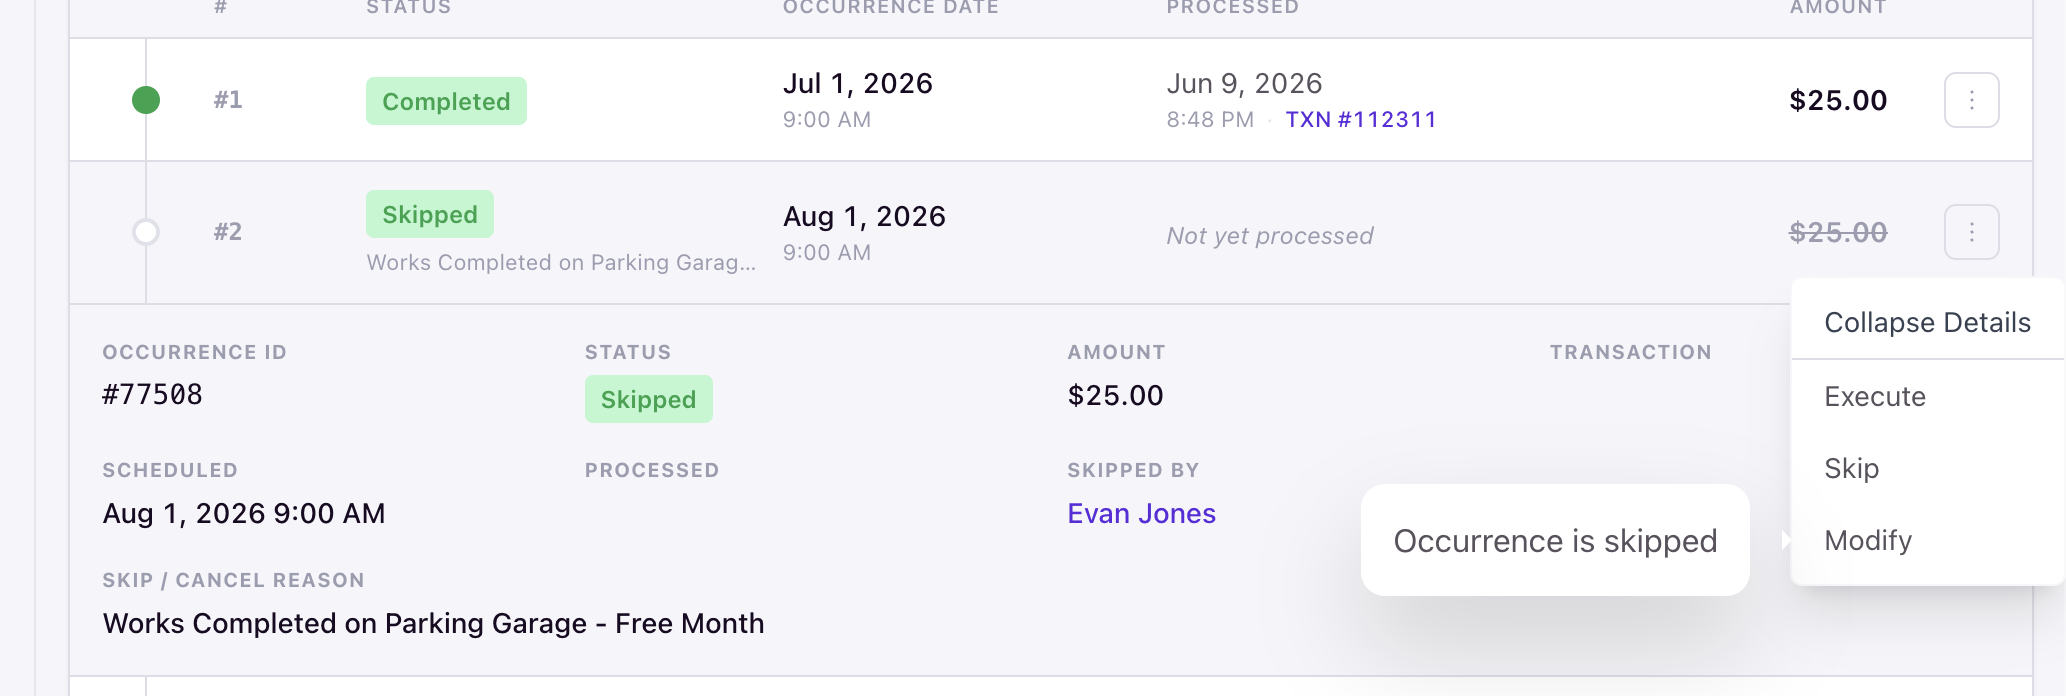
| Skipped | Waived by an admin, or cancelled through the Apply Credit wizard. The charge will not post. |
| Cancelled | The student's schedule assignment was cancelled. The charge will not post. |
See a charge's full details
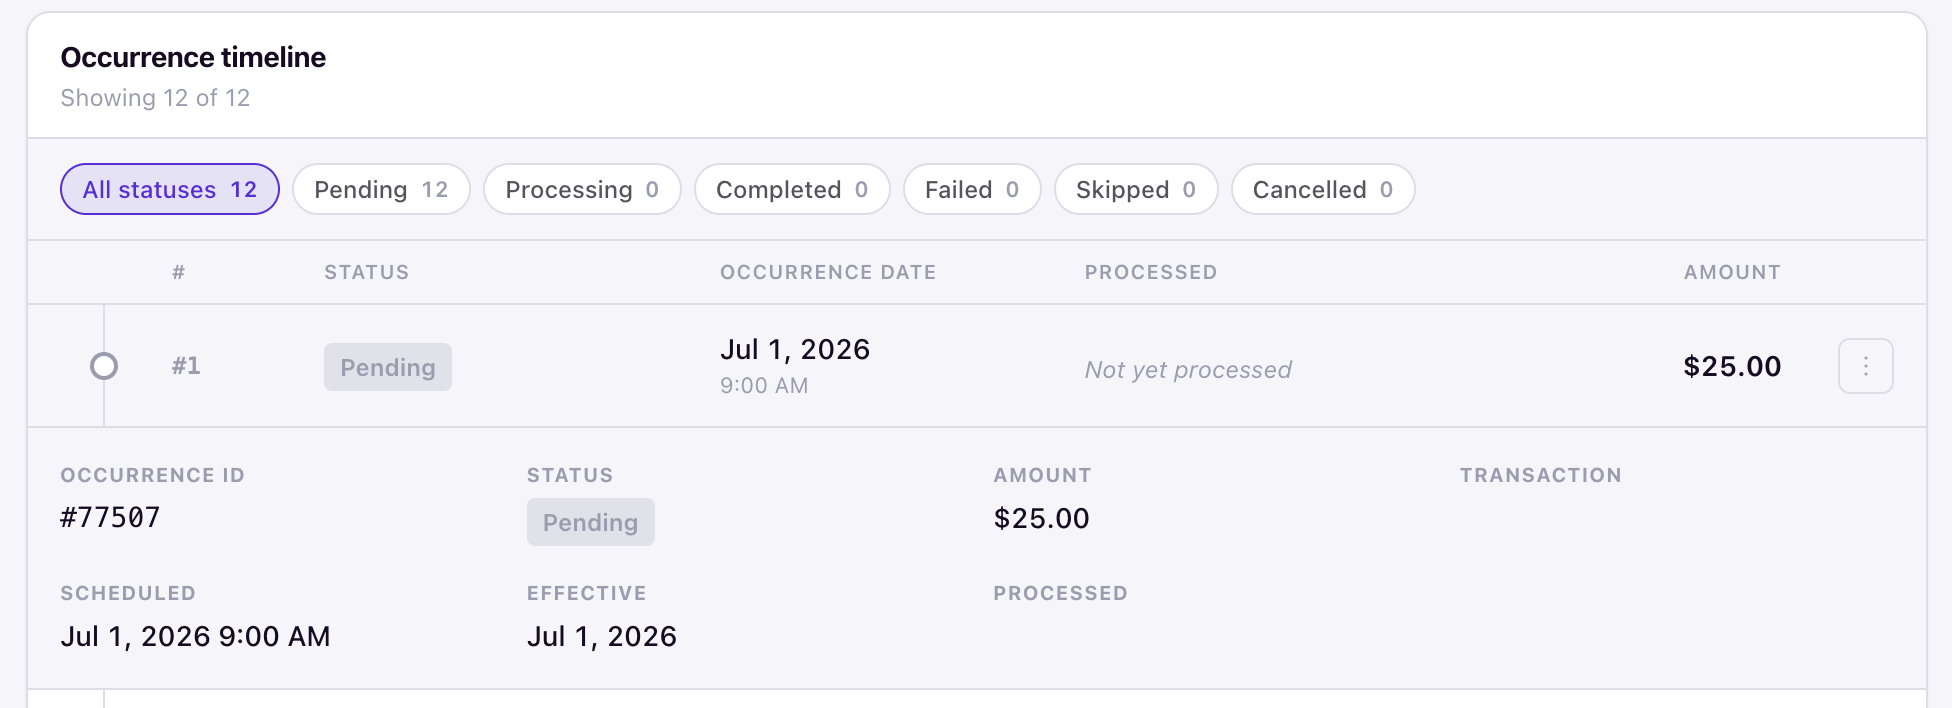
Open the row menu (⋯) on any occurrence and select Expand Details. The same row menu holds the three actions below. Actions are available on pending occurrences only.
See the Occurrence ID, status, amount, linked transaction, scheduled date, effective date, and processed timestamp.
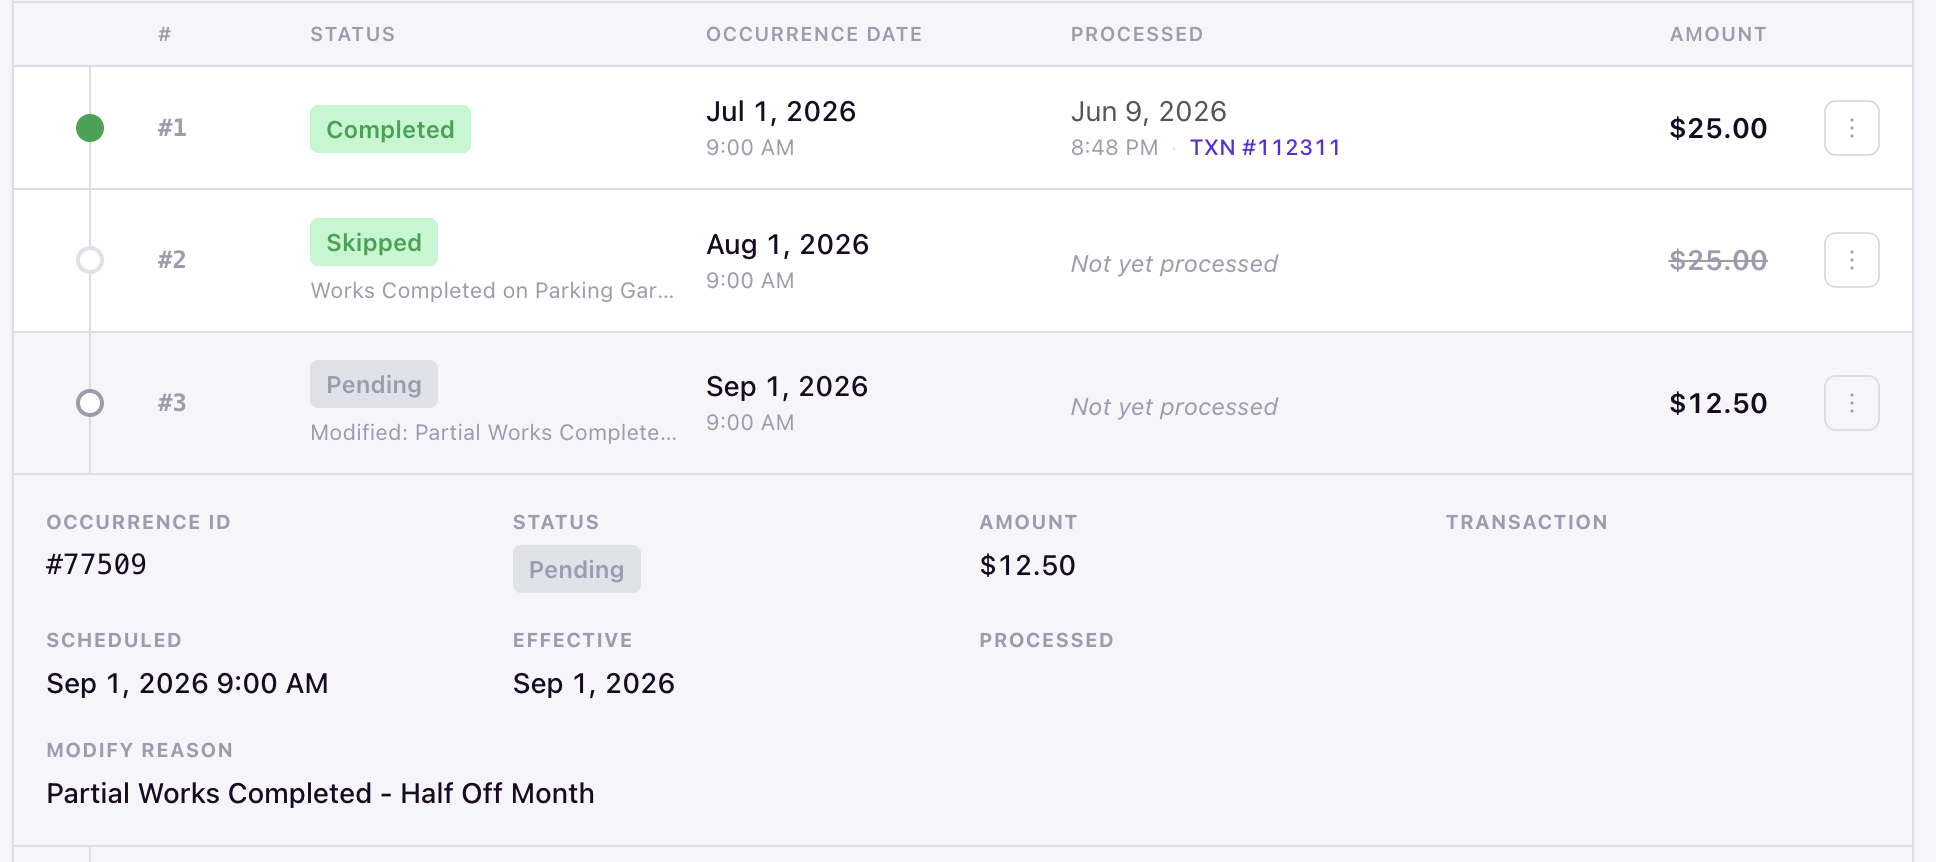
Skipped occurrences also show Skipped By and the Skip/Cancel Reason; modified occurrences show the modification reason.
Post a charge now (Execute)
Use Execute to post a charge immediately instead of waiting for its scheduled date.
Select Execute from the row menu. The Execute Occurrence dialog warns that a charge will be created immediately. Confirm or adjust the Effective Date.
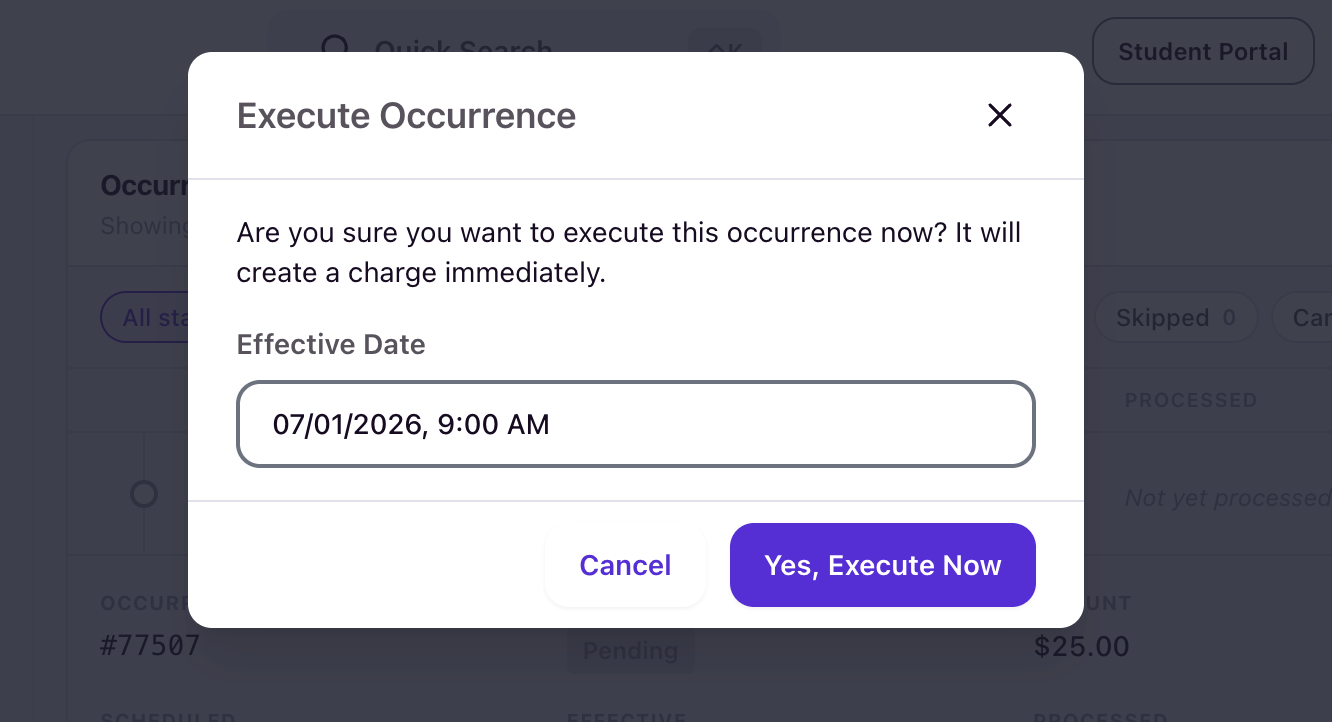
Click Yes, Execute Now. The occurrence changes to Completed, records the processed timestamp, and links to the new transaction on the student's ledger.
Skip an occurrence
Use Skip when a specific charge should not post for a particular period, such as a one-time waiver. Skipping cannot be undone.
Select Skip from the row menu.
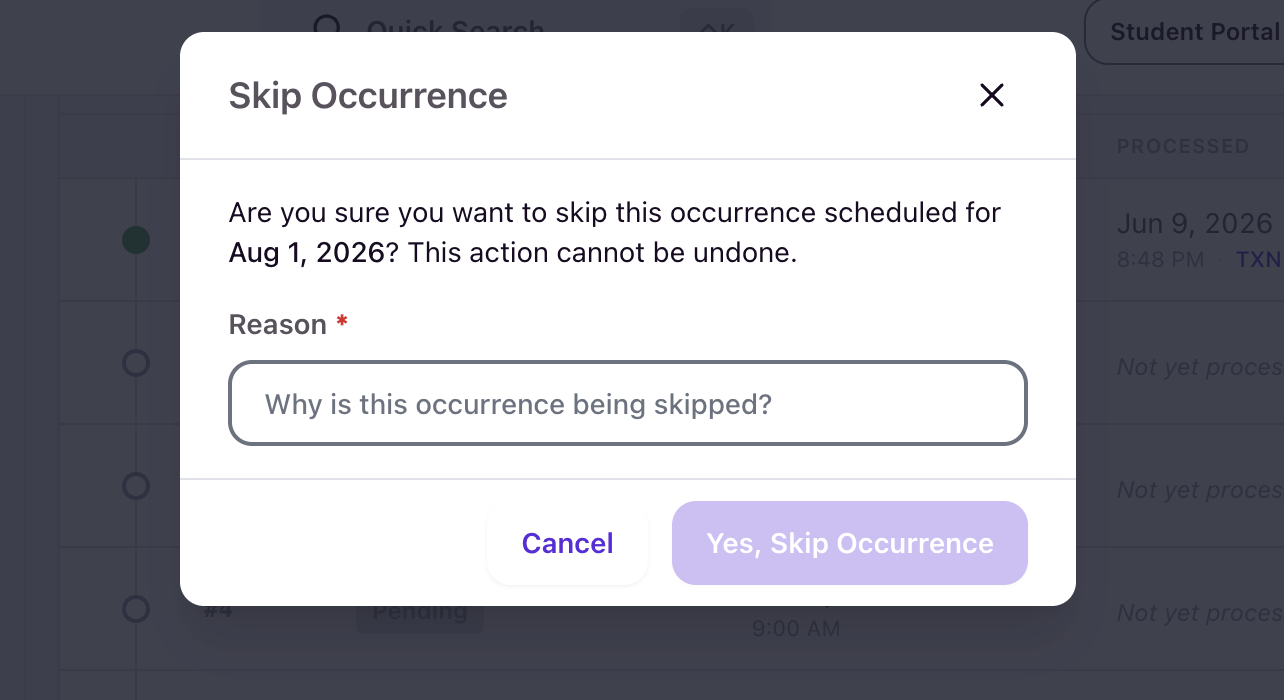
Enter a Reason and click Yes, Skip Occurrence. The status changes to Skipped, the amount displays struck through, and the reason appears on the timeline.
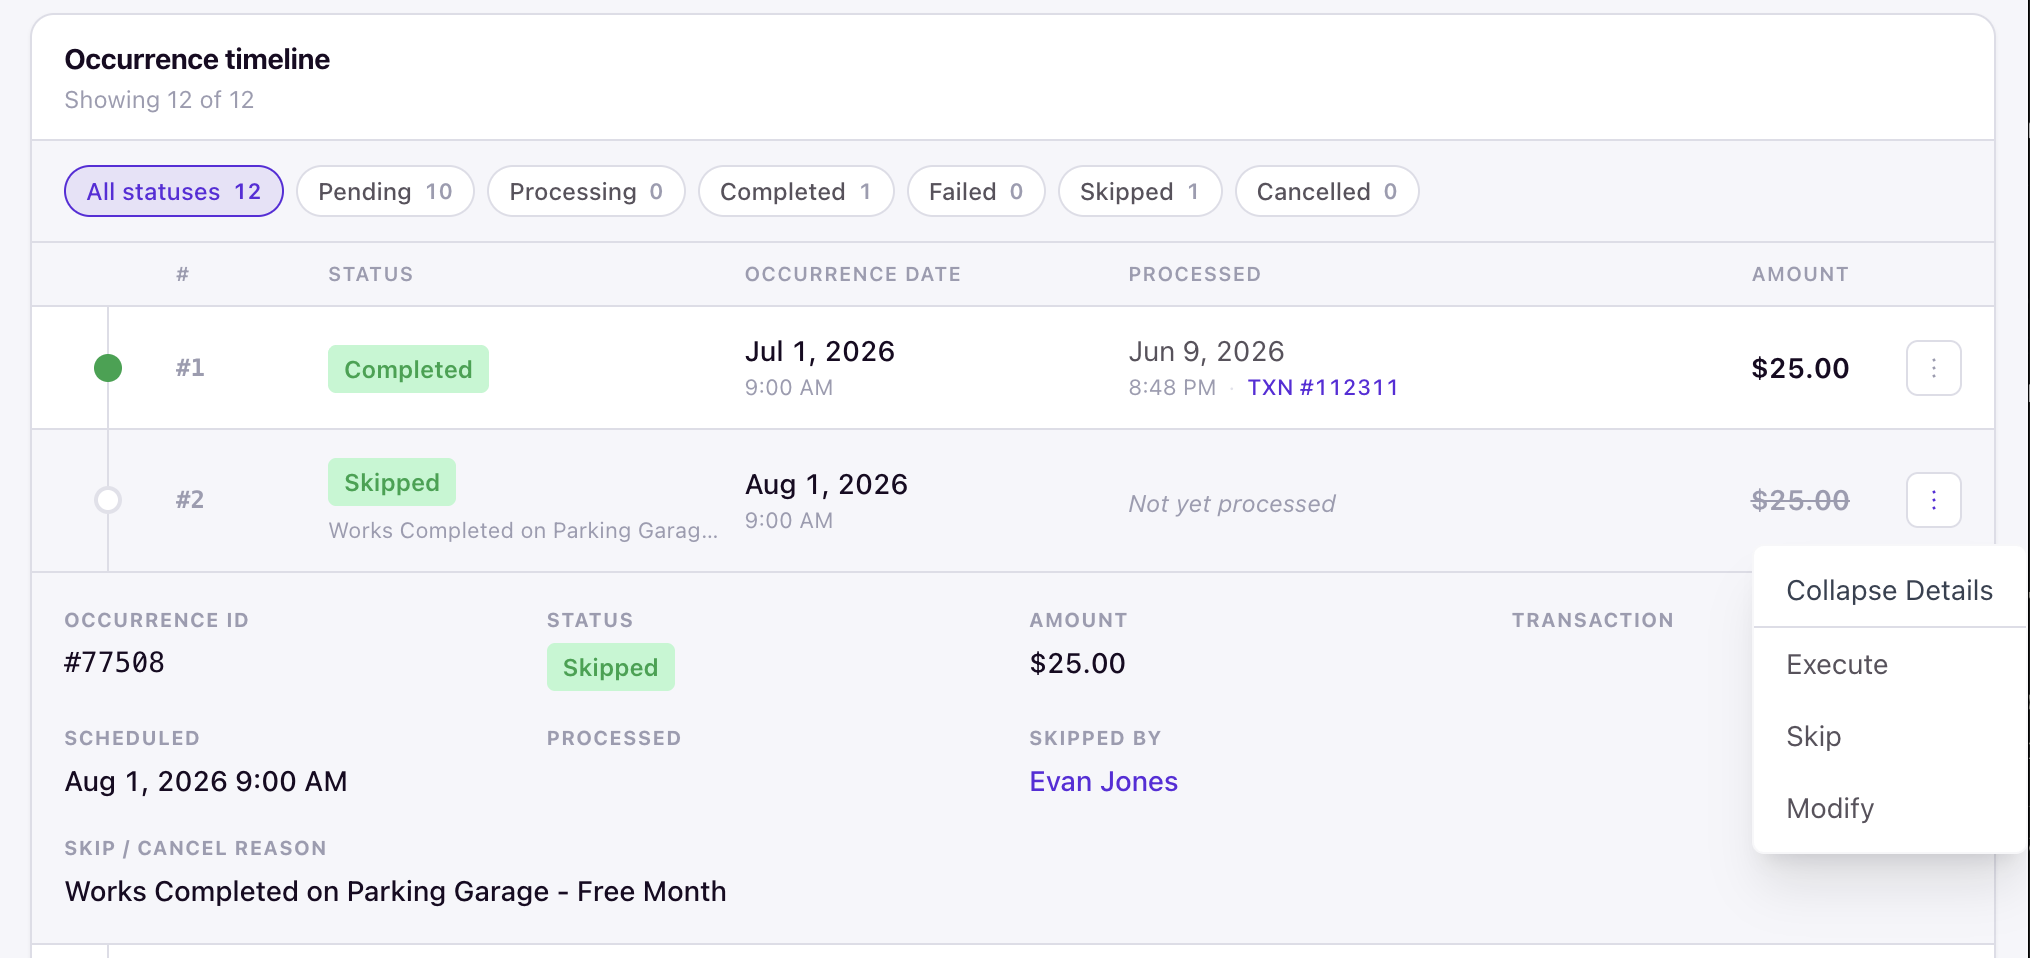
Note the money effect: skipped amounts count toward the assignment's completed total, reducing the remaining balance — the charge is settled, not postponed.
Change a charge's amount or date (Modify)
Select Modify from the row menu. Update the Amount ($), Scheduled Date, or Effective Date as needed. Enter a Reason For Modification — required.
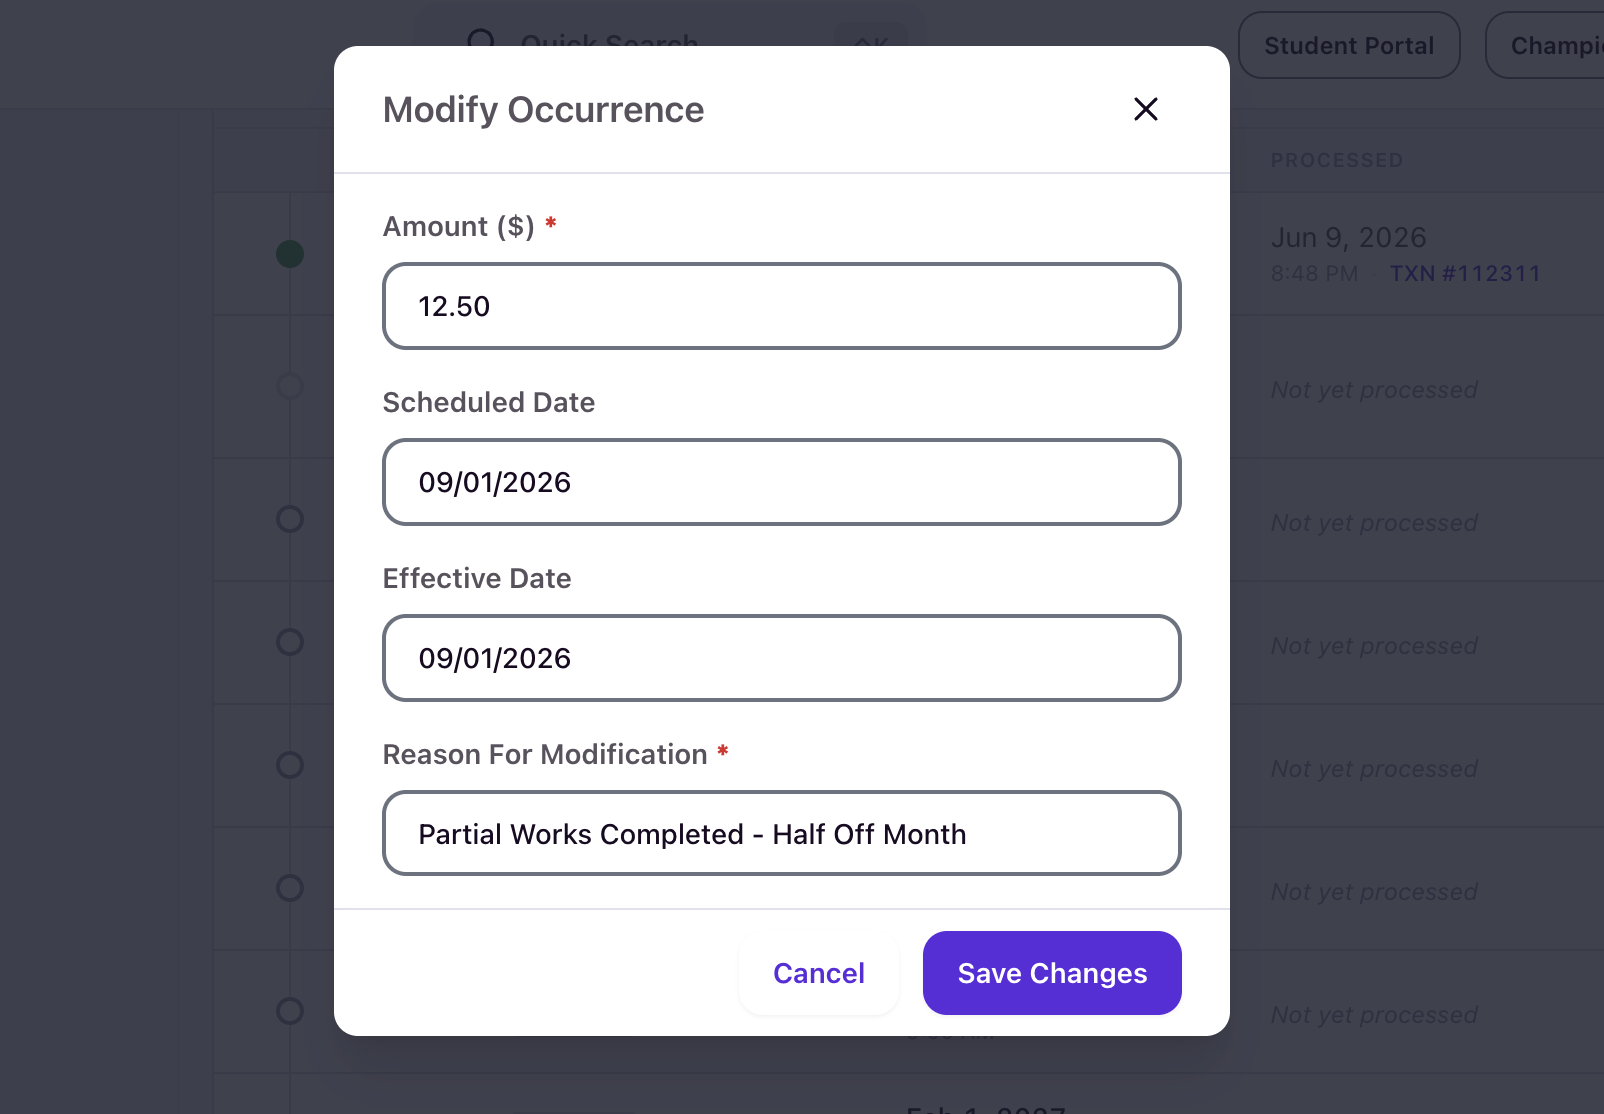
Click Save Changes. The updated amount appears on the timeline with a "Modified" note, and the reason is stored in the occurrence's details.
After you act
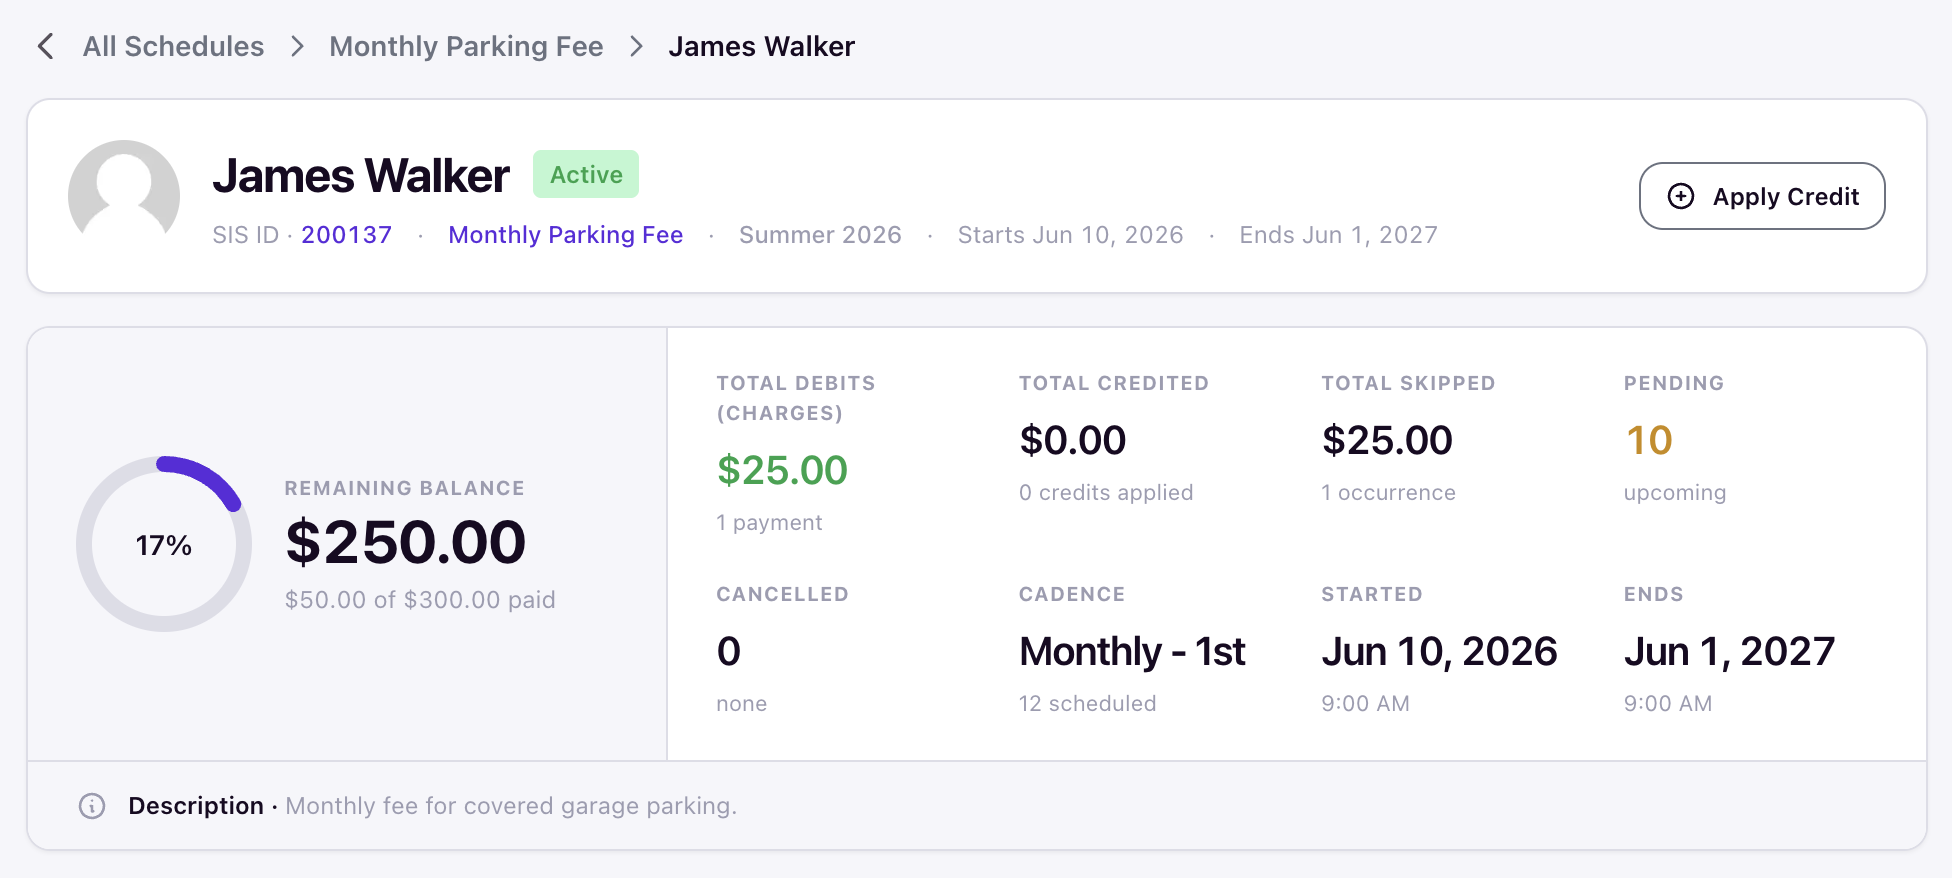
The timeline updates immediately: completed rows show the processed timestamp and a TXN link, skipped rows show the reason with the amount struck through, and modified rows show the new amount with its reason. The assignment's summary panel (remaining balance, total debits, total skipped, pending count) updates to match.