Assign a Billing Schedule to a Student
Last updated: August 28, 2026
A billing schedule defines a recurring charge, but it does not bill anyone until it is assigned. Assigning a schedule connects the template to a specific student profile so the system can generate that student's individual occurrences and track how much has been billed and how much remains.
Before you begin
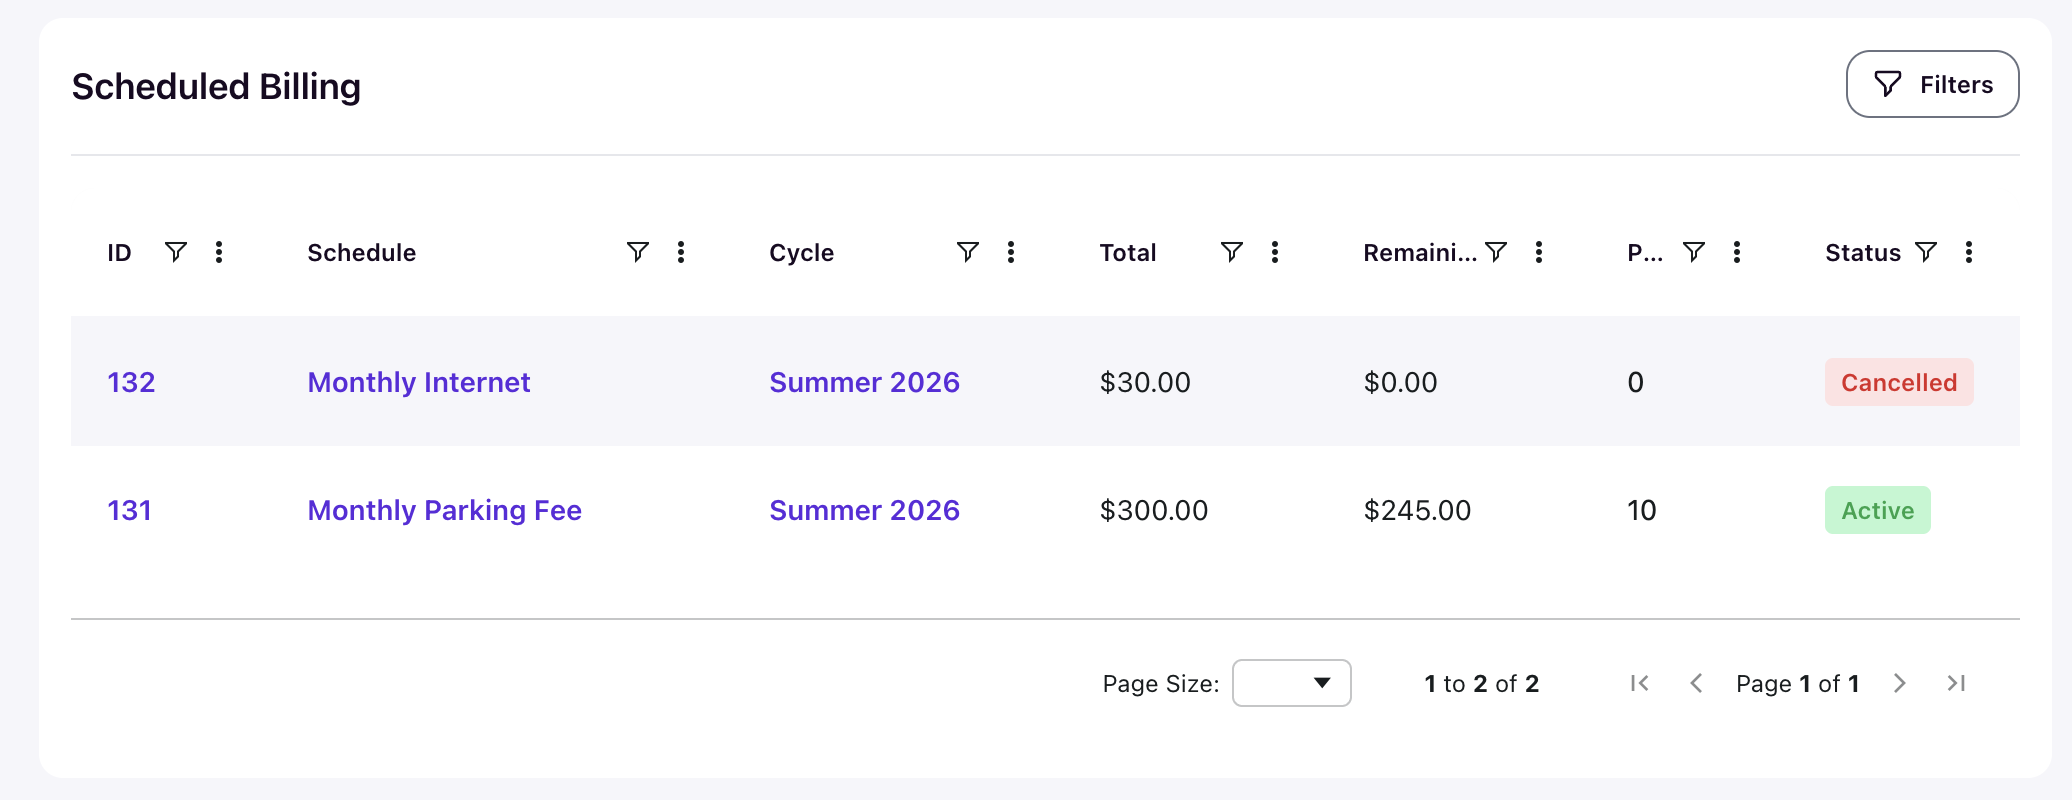
Confirm the billing schedule already exists. If it does not, create it from the Billing Schedules tab first.
A student can be assigned to the same schedule only once. If an assignment already exists, the system blocks the duplicate and shows "Profile is already assigned to this schedule."
Assign a schedule to a student
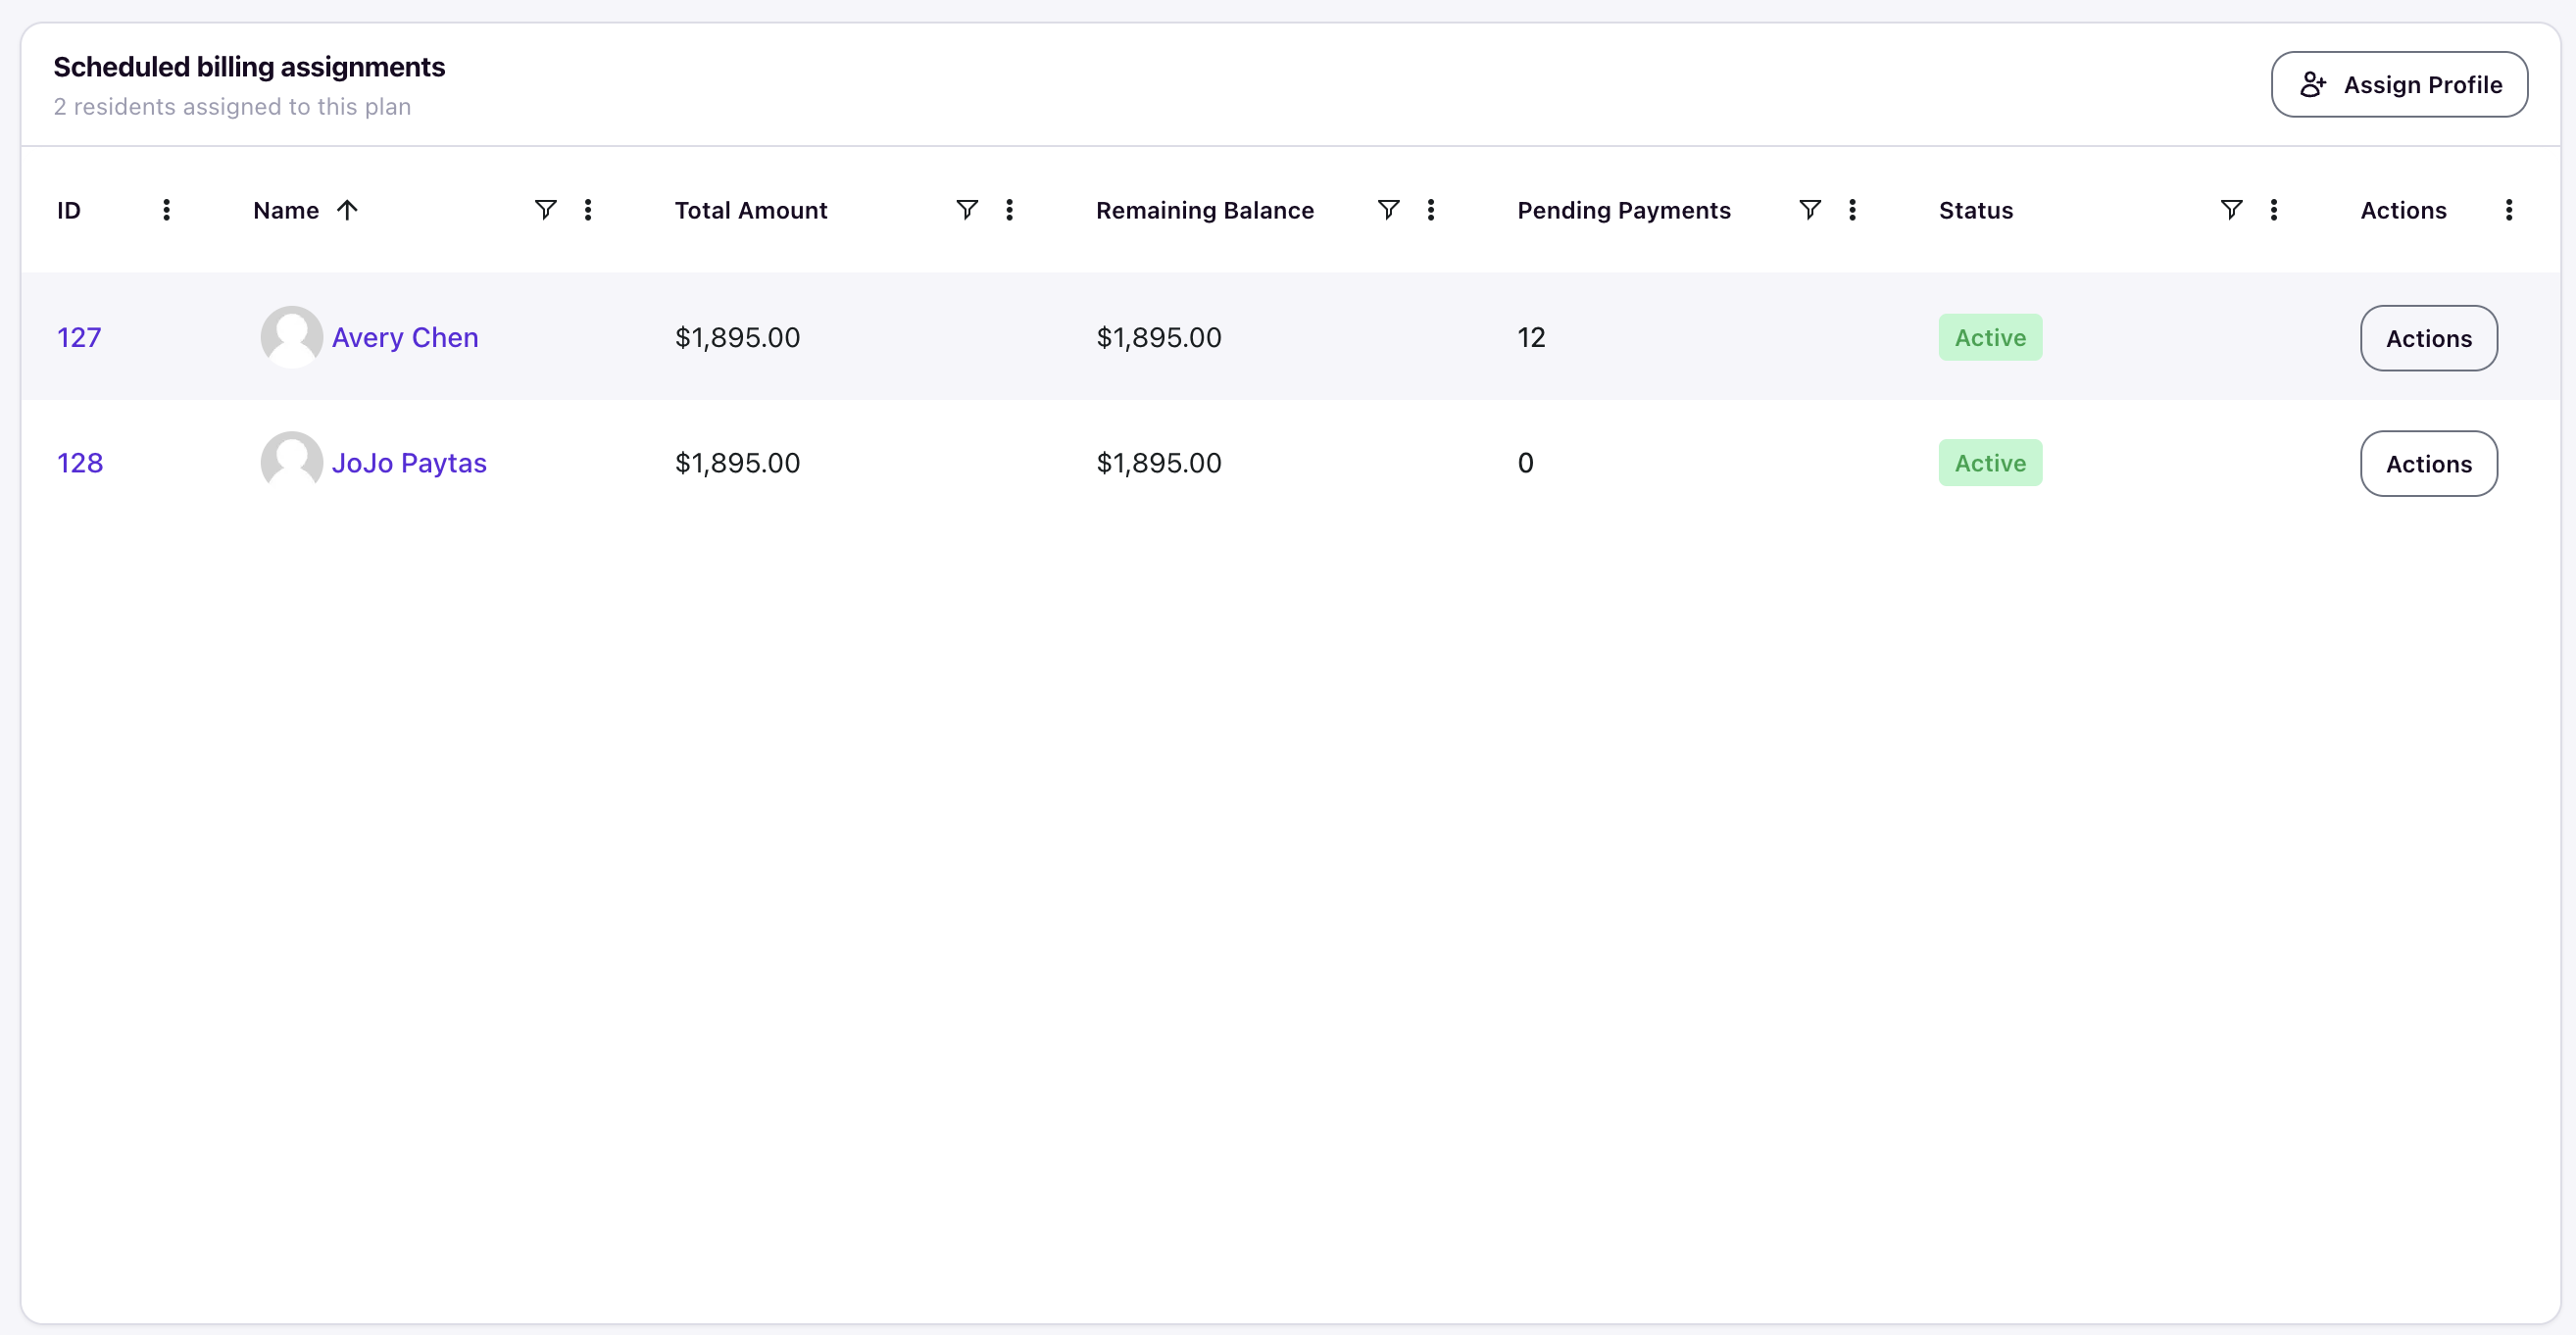
Open the schedule from the Billing Schedules tab and scroll to the Scheduled billing assignments section, which shows how many residents are assigned to the plan. Click Assign Profile.
A modal opens with three fields:
- Profile — search for and select the student.
- Total For This Profile ($) — defaults to the schedule's total amount. You can override it to bill this student a different total; their occurrence amounts adjust accordingly.
- Description — pre-filled from the schedule; edit it to record context specific to this assignment.
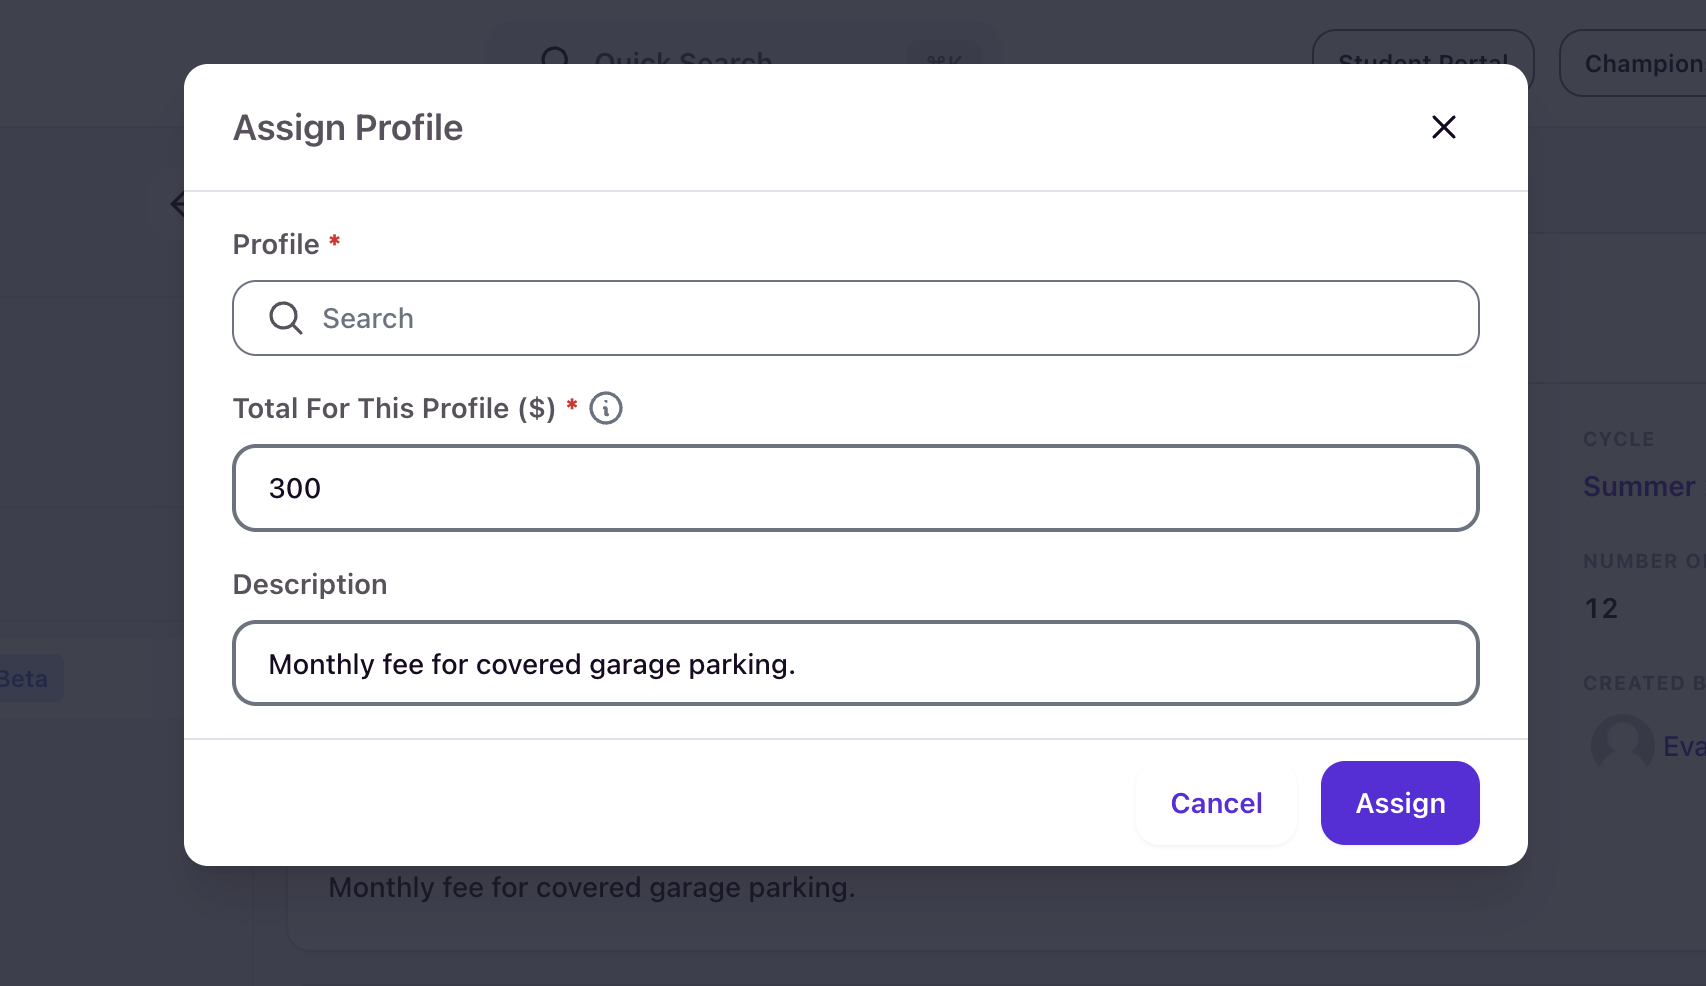
Click Assign to confirm. The student appears in the assignments table with their total amount, remaining balance, pending payment count, and an Active status.
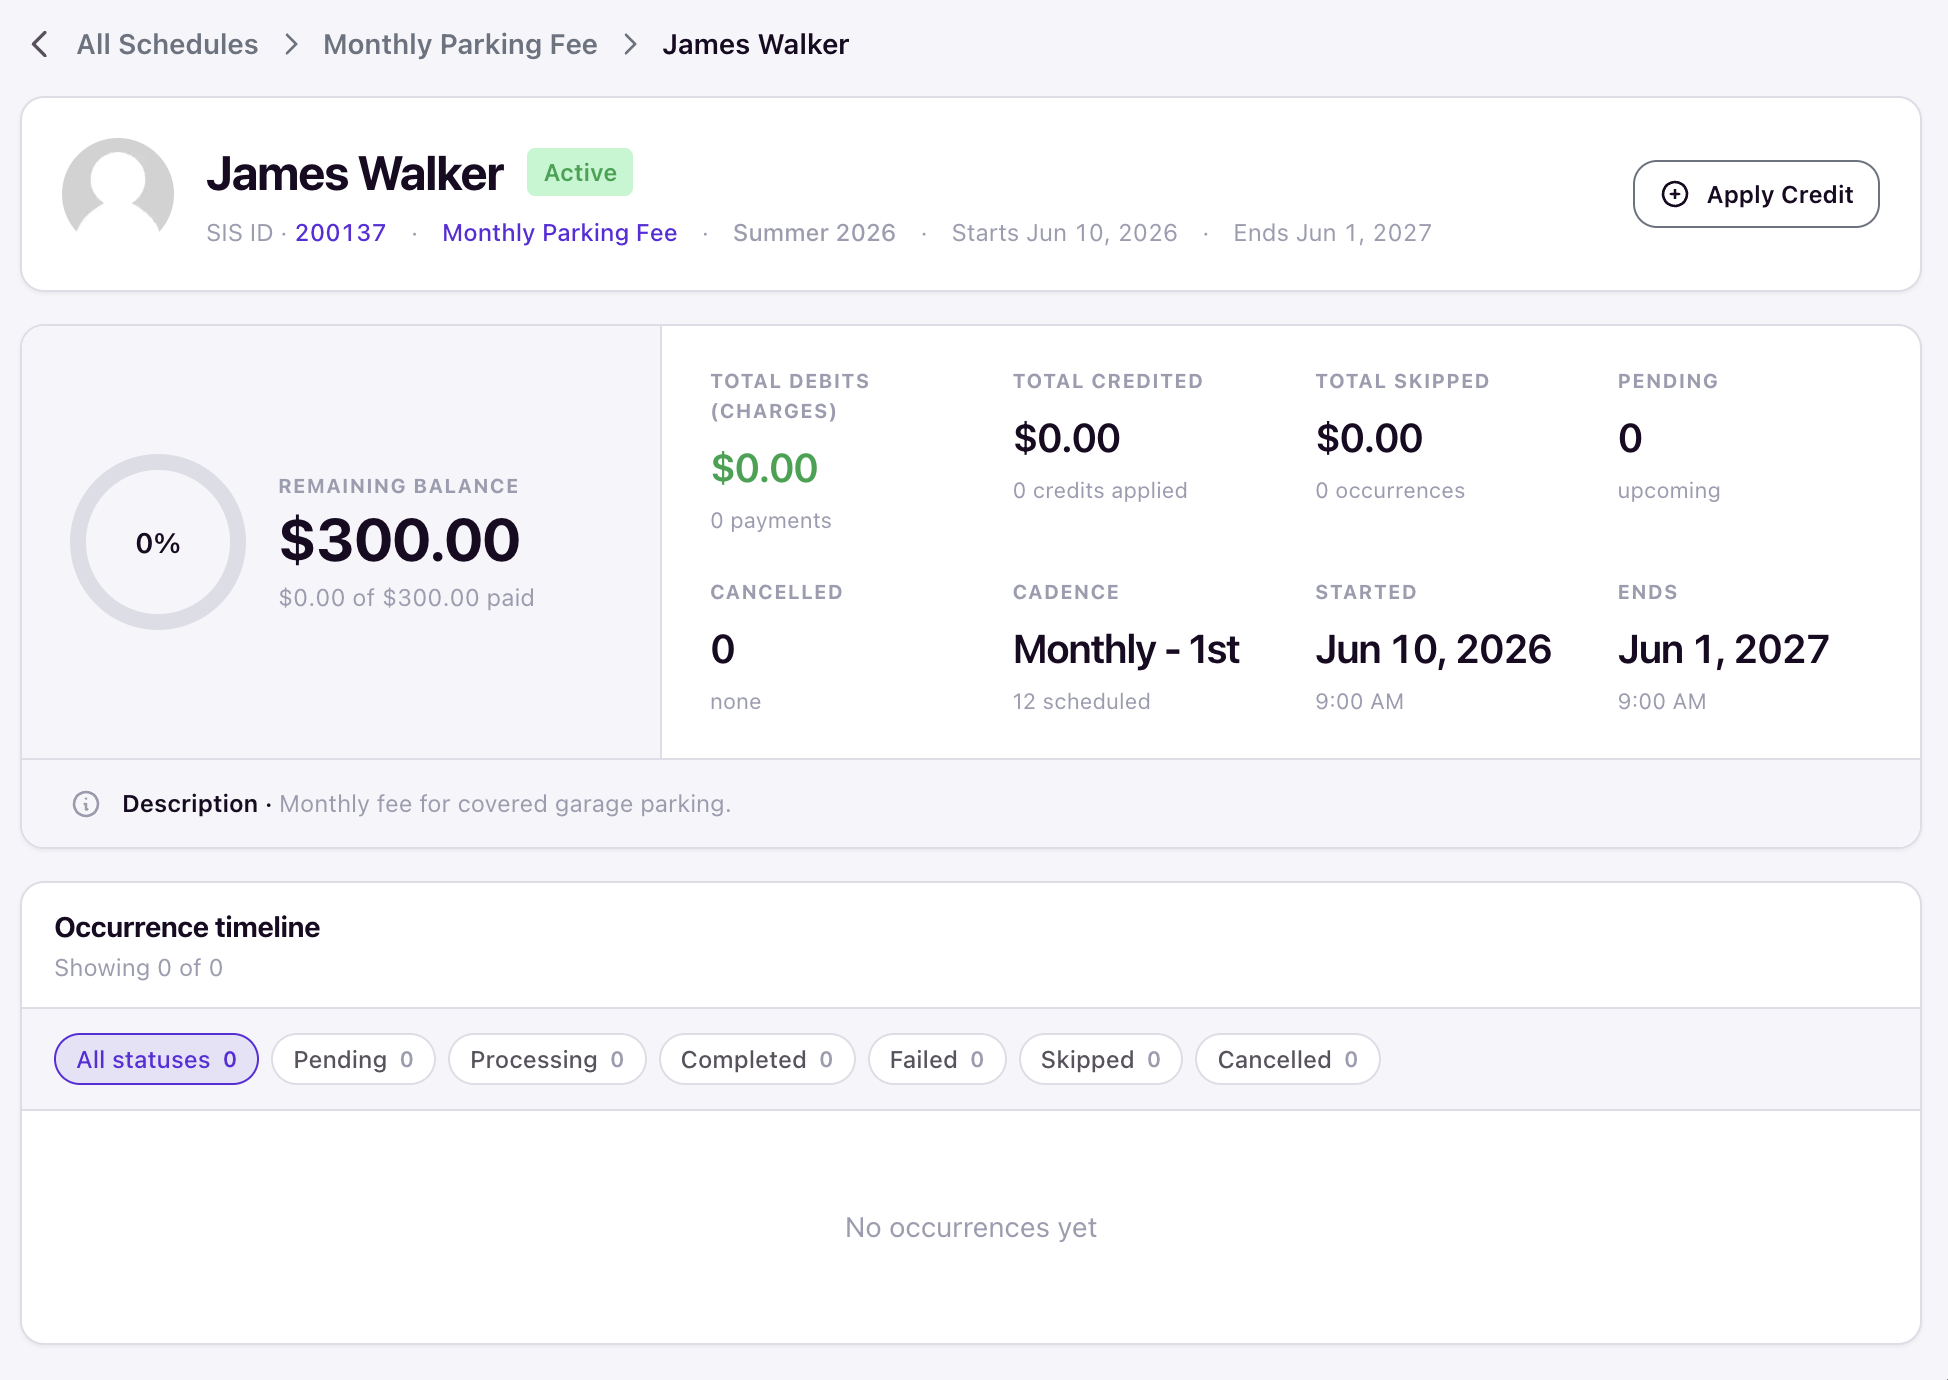
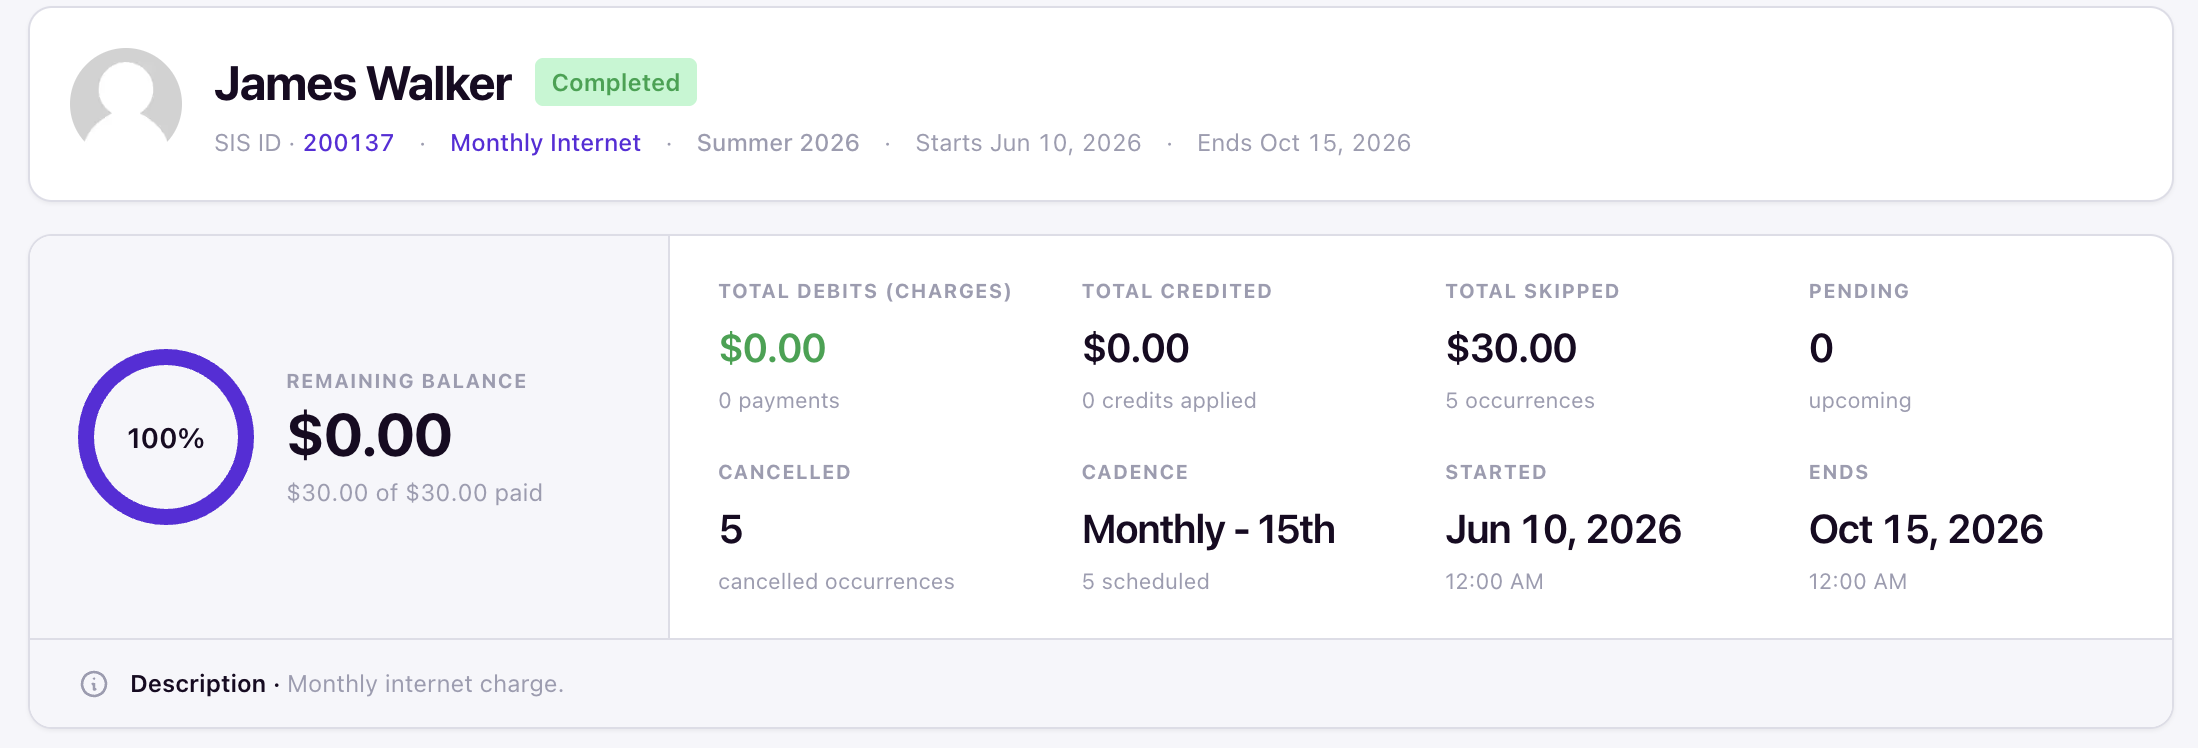
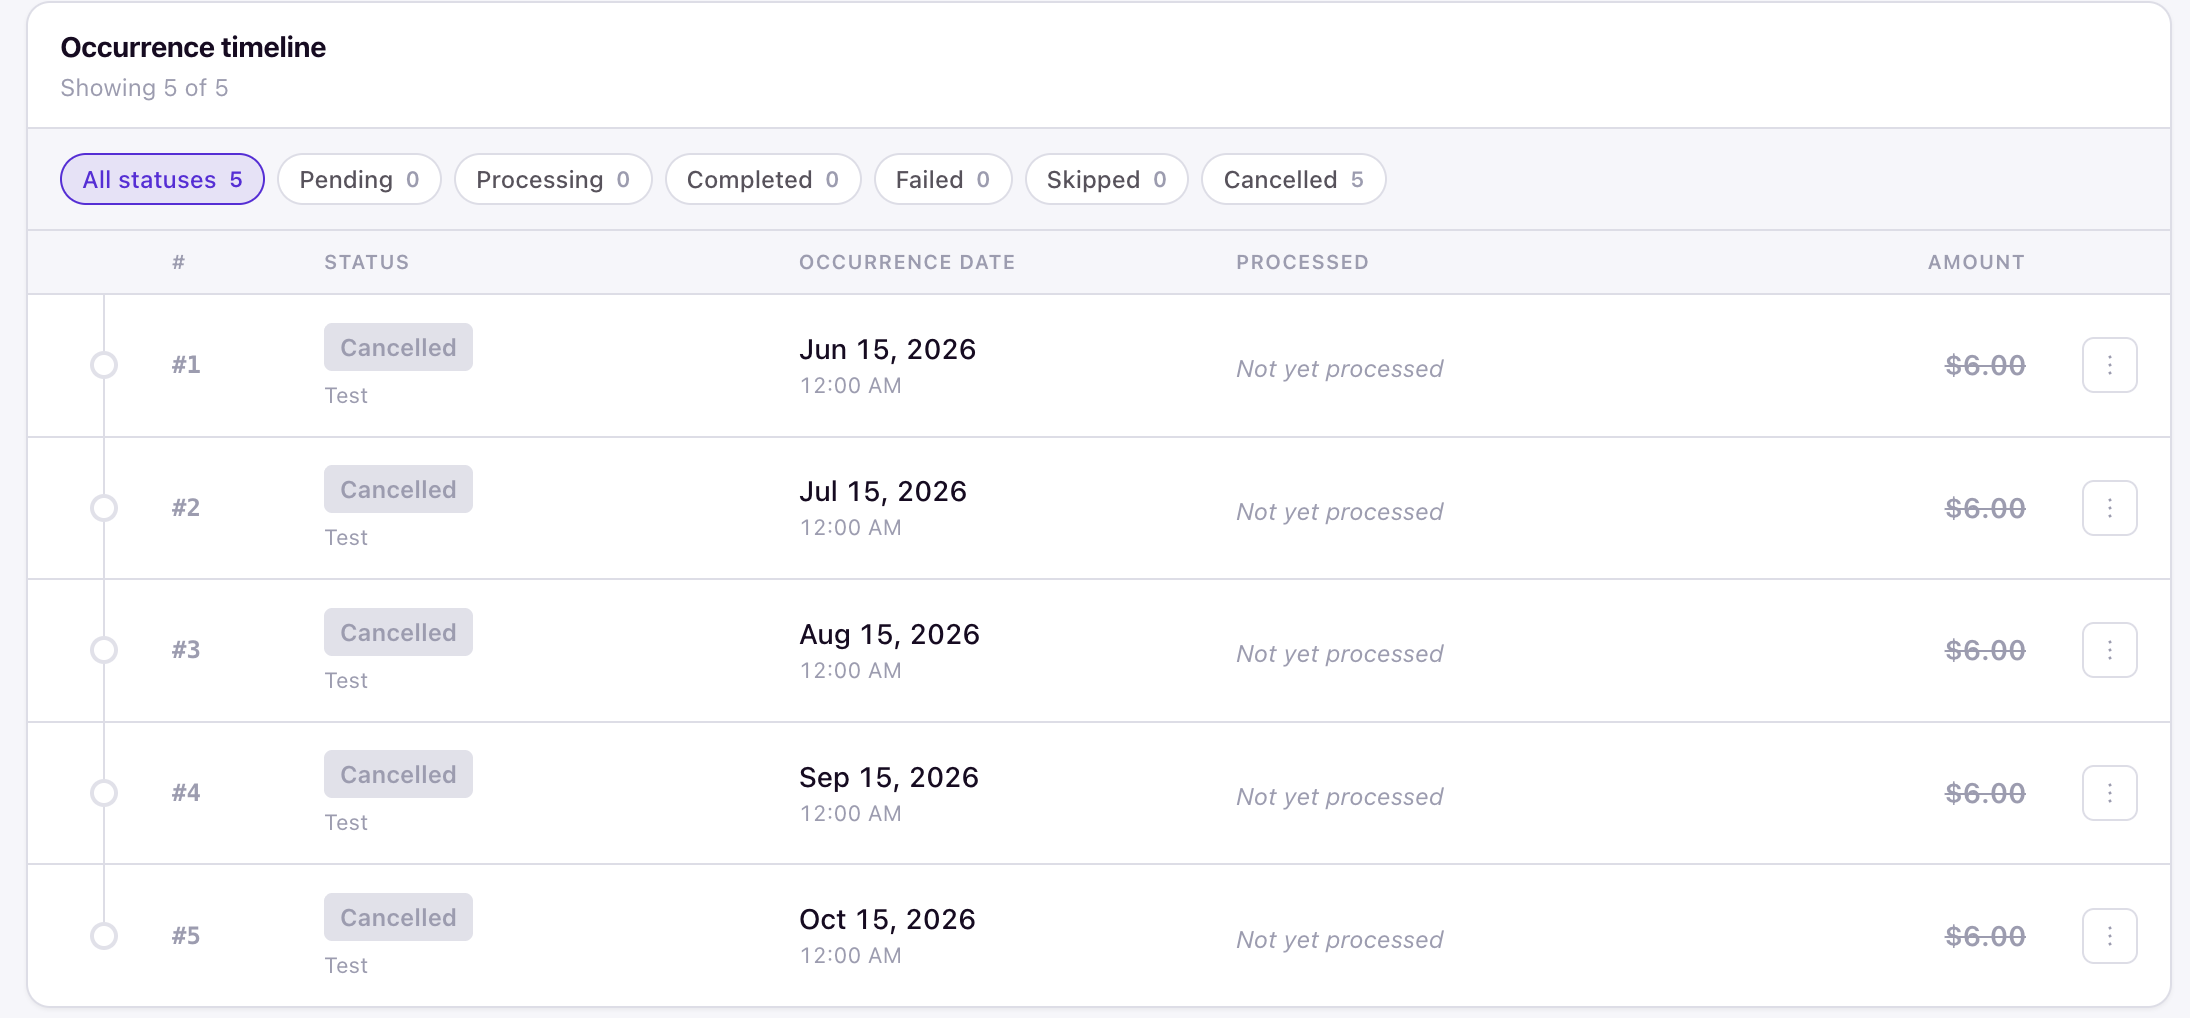
Click a resident's row schedule ID to open their assignment detail page, which shows a remaining-balance progress ring, totals for charges, credits, and skips, the cadence and date range, and the full Occurrence timeline for that student.
Cancel an assignment
Cancelling an assignment stops future billing for that student under the selected schedule. In the schedule's assignments table, open the Actions menu on the student's row and select Cancel Assignment. Confirm when prompted.
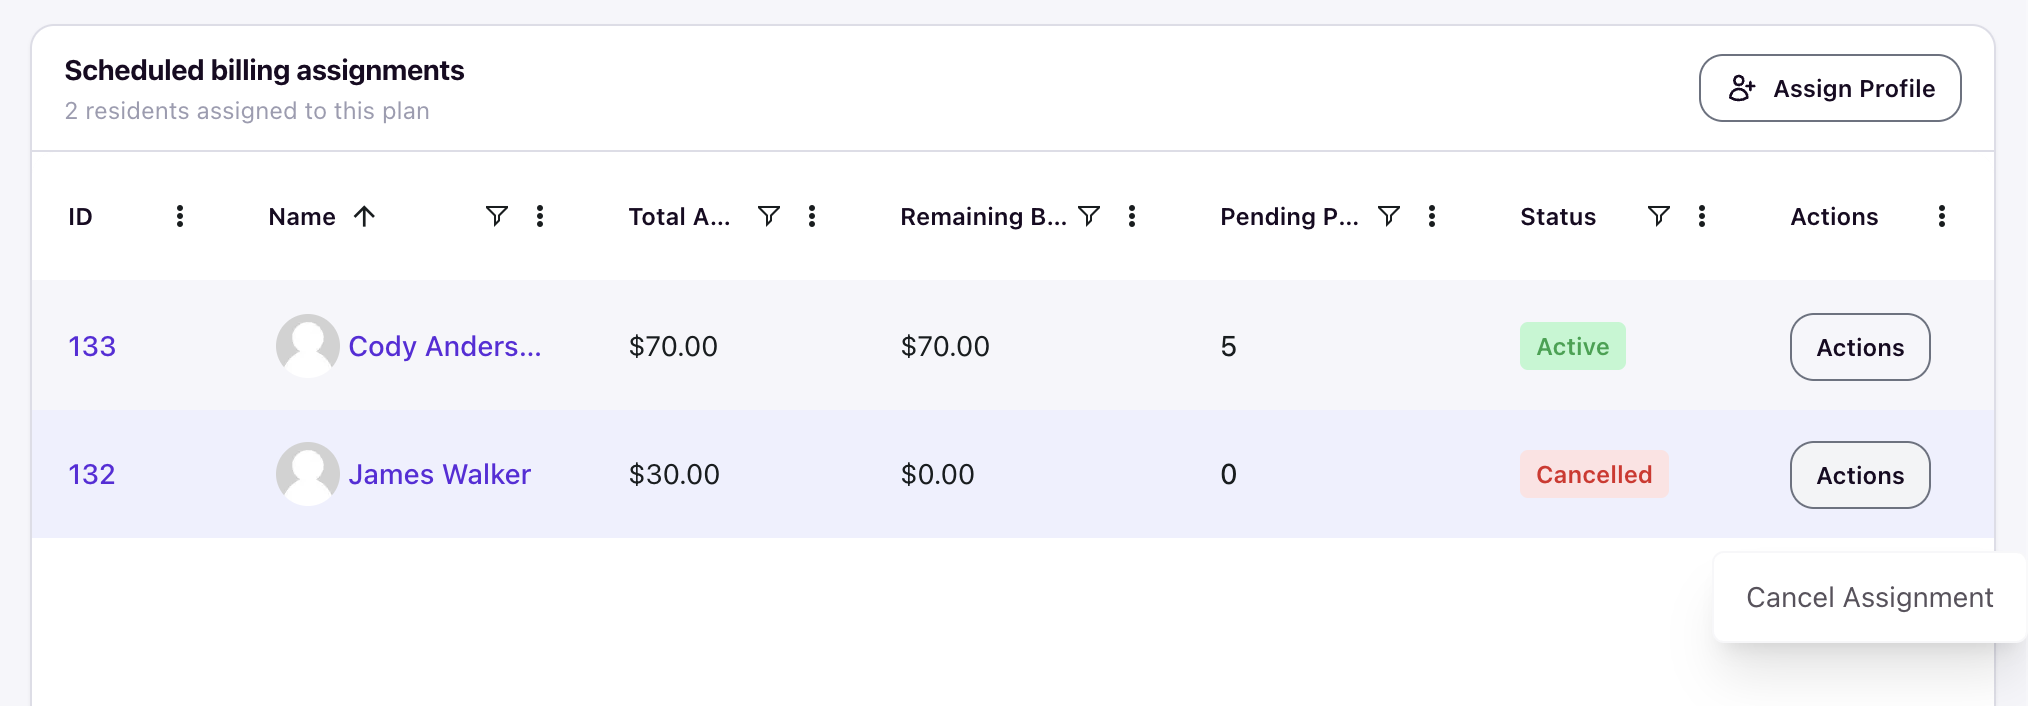
The assignment's status changes to Cancelled, its pending occurrences are cancelled, and its remaining balance drops to $0.00 with 0 pending payments. The cancellation is recorded on the student's Timeline as "Scheduled plan assignment cancelled."
Occurrences that have already been processed are not reversed — if you need to reverse a posted charge, handle it through the student's finance or balance view separately.
What to expect after assigning
The system generates the student's occurrences on the next daily run and processes them automatically every six hours. You can monitor the assignment from the schedule's assignments table, the Assignments tab in the Billing Schedules workspace, or the Scheduled Billing card on the student's profile and balance detail view.