Create and manage charge codes
Last updated: August 28, 2026
A charge code is a reusable billing template that defines the details of a specific fee or charge you apply to students. Rather than entering fee details manually each time you post a transaction, you configure a charge code once and reference it whenever that charge is needed.
Each charge code stores a name, a default amount, an accounting code, and a refund accounting code. The accounting code tells your financial system where to record revenue when the charge is posted. The refund accounting code specifies where to record the offset when a refund is issued. Keeping these values on the charge code itself ensures consistency across every transaction that uses it.
Navigate to charge codes
Go to Setup › Charge Codes. The page has two tabs: Primary Charges and Coattail Charges. The Primary Charges tab shows all standalone charge codes.
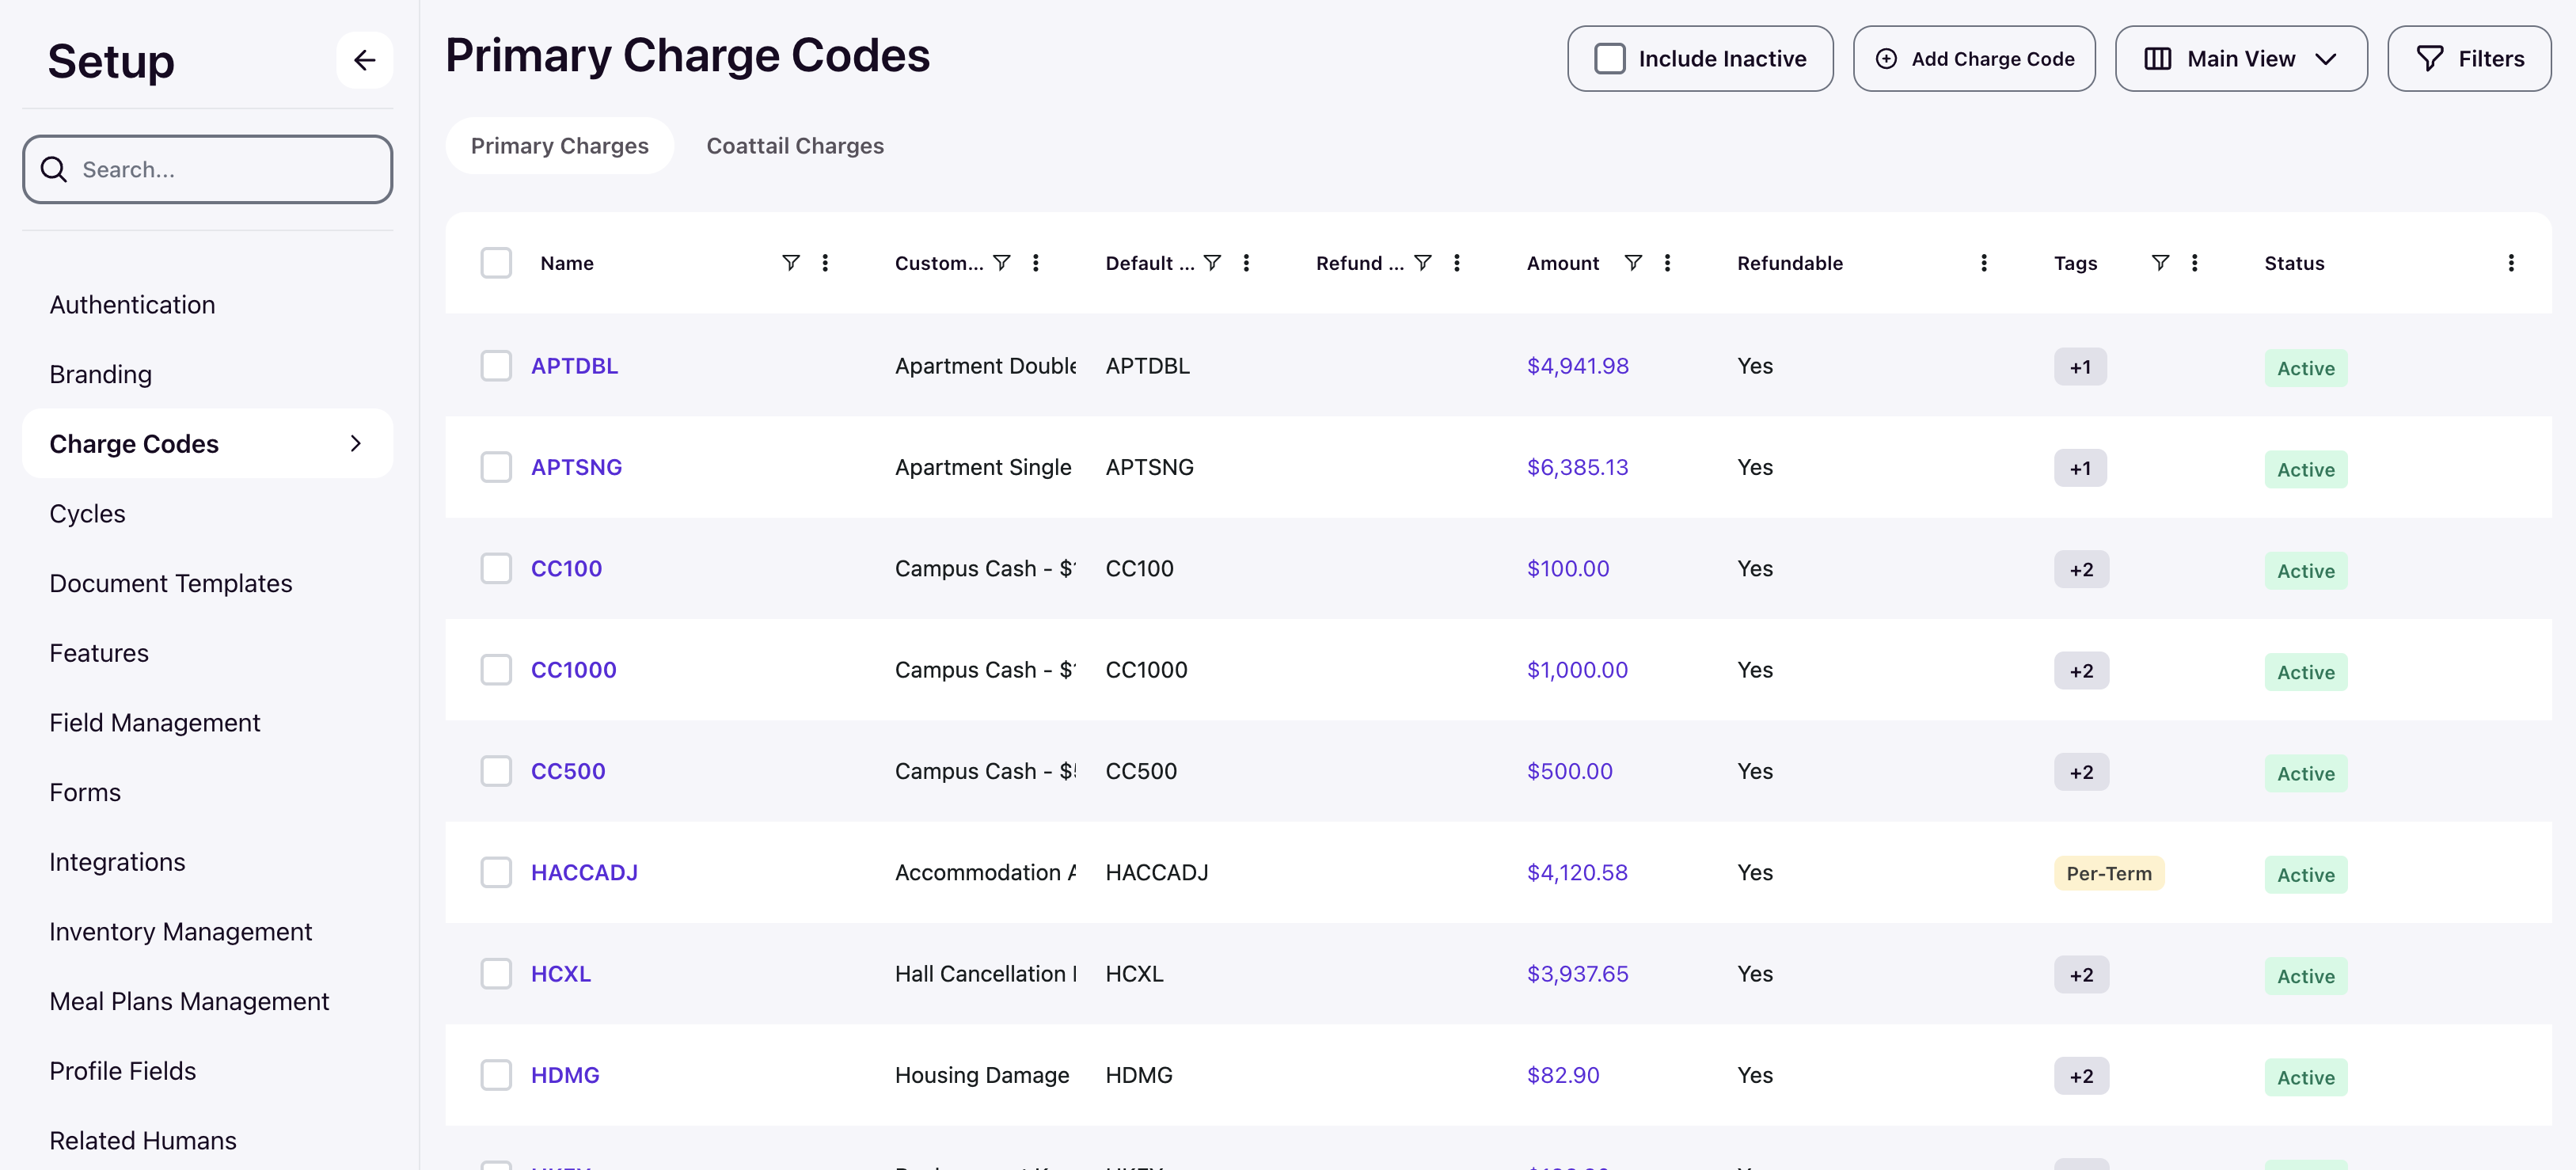
Note: Use the Include Inactive toggle to show inactive charge codes in the list.
Create a charge code
On the Primary Charges tab, click Add Charge Code. The form contains the following fields:
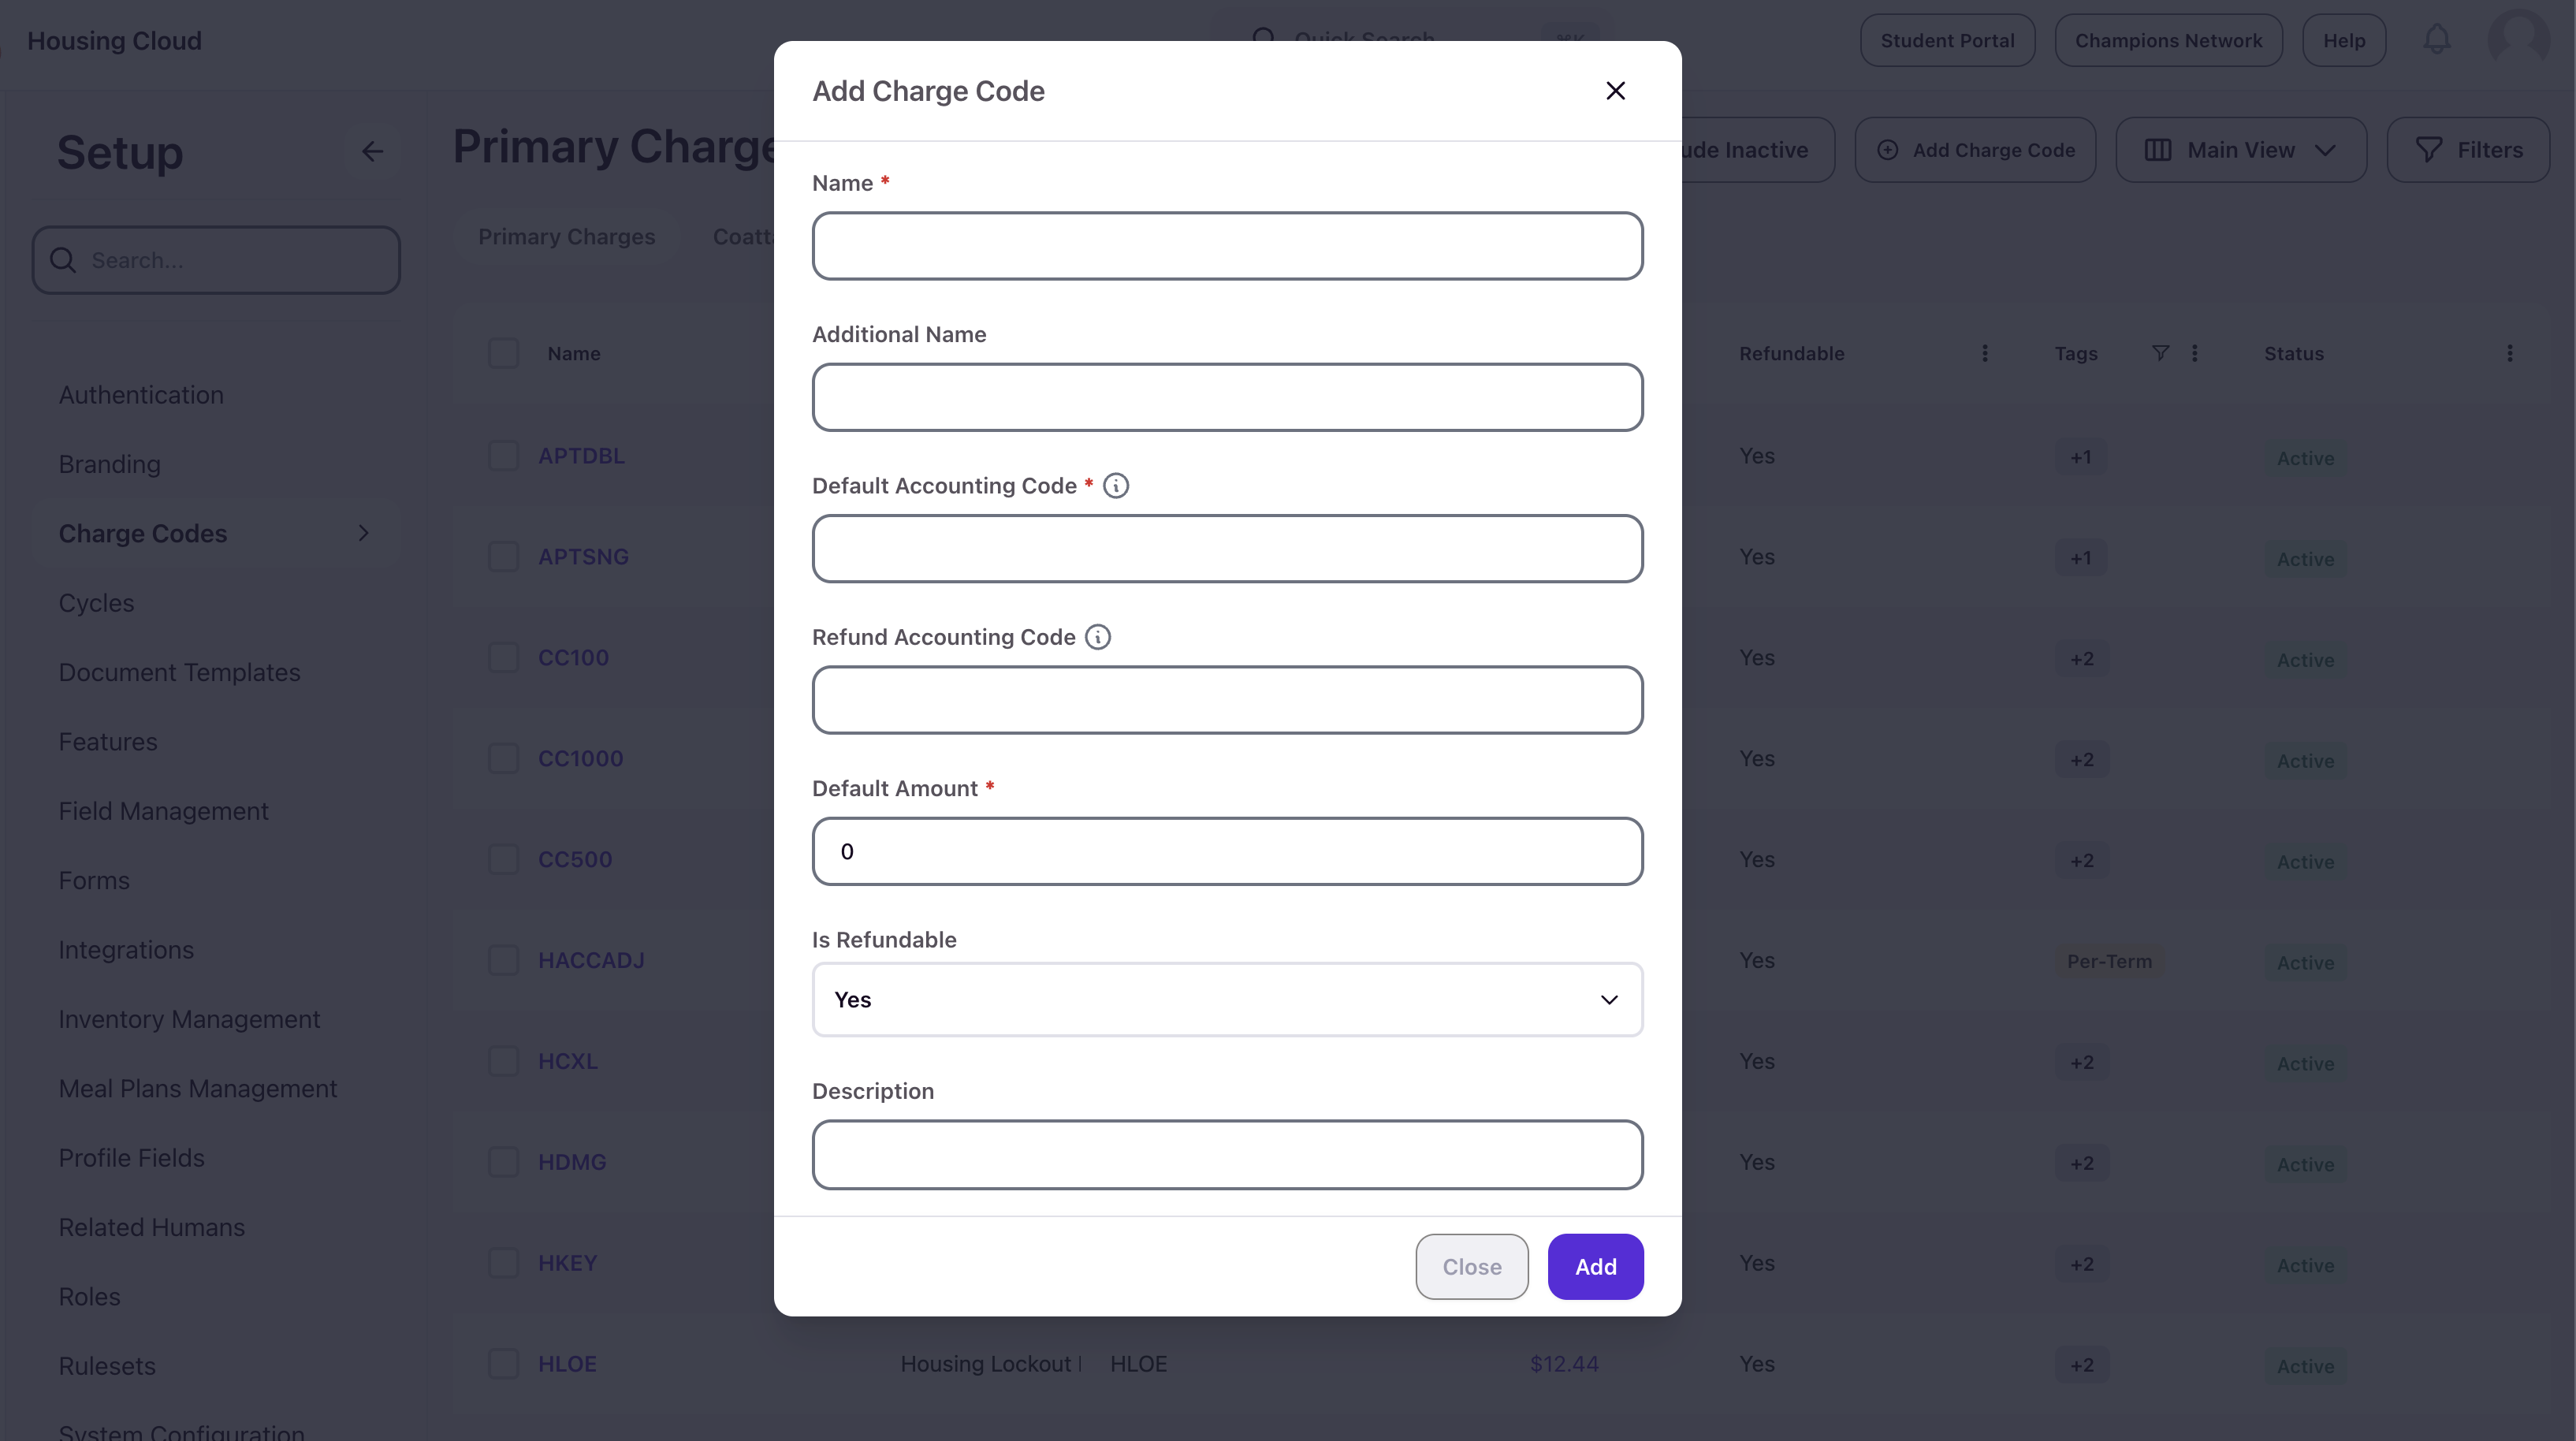
- Name — The system identifier for the charge code. Required. Must be unique.
- Additional Name — An optional display name for the charge.
- Default Accounting Code — The ledger code where revenue from this charge is recorded. Required.
- Refund Accounting Code — The ledger code used when this charge is refunded.
- Default Amount — The standard dollar value applied when this code is used. Required.
- Is Refundable — A dropdown set to Yes or No. This controls whether transactions using this charge code can be processed through the standard issue refund workflow. If you set this to No, any transaction posted with this charge code is flagged as ineligible for refunds. To reverse a non-refundable charge, you must post an offsetting debit or credit directly against the student's account instead of using the issue refund flow.
- Description — Optional text explaining what the charge covers.
Click Add to save the charge code. New charge codes are created with a status of Deactivated. You must activate a charge code before it can be used in transactions.
Review a charge code
Select a charge code from the list to open its detail page. The summary panel shows the default amount, default accounting code, refund accounting code, and refundable status. The details section also displays the custom name, description, external ID, SIS sync status, and any tags.
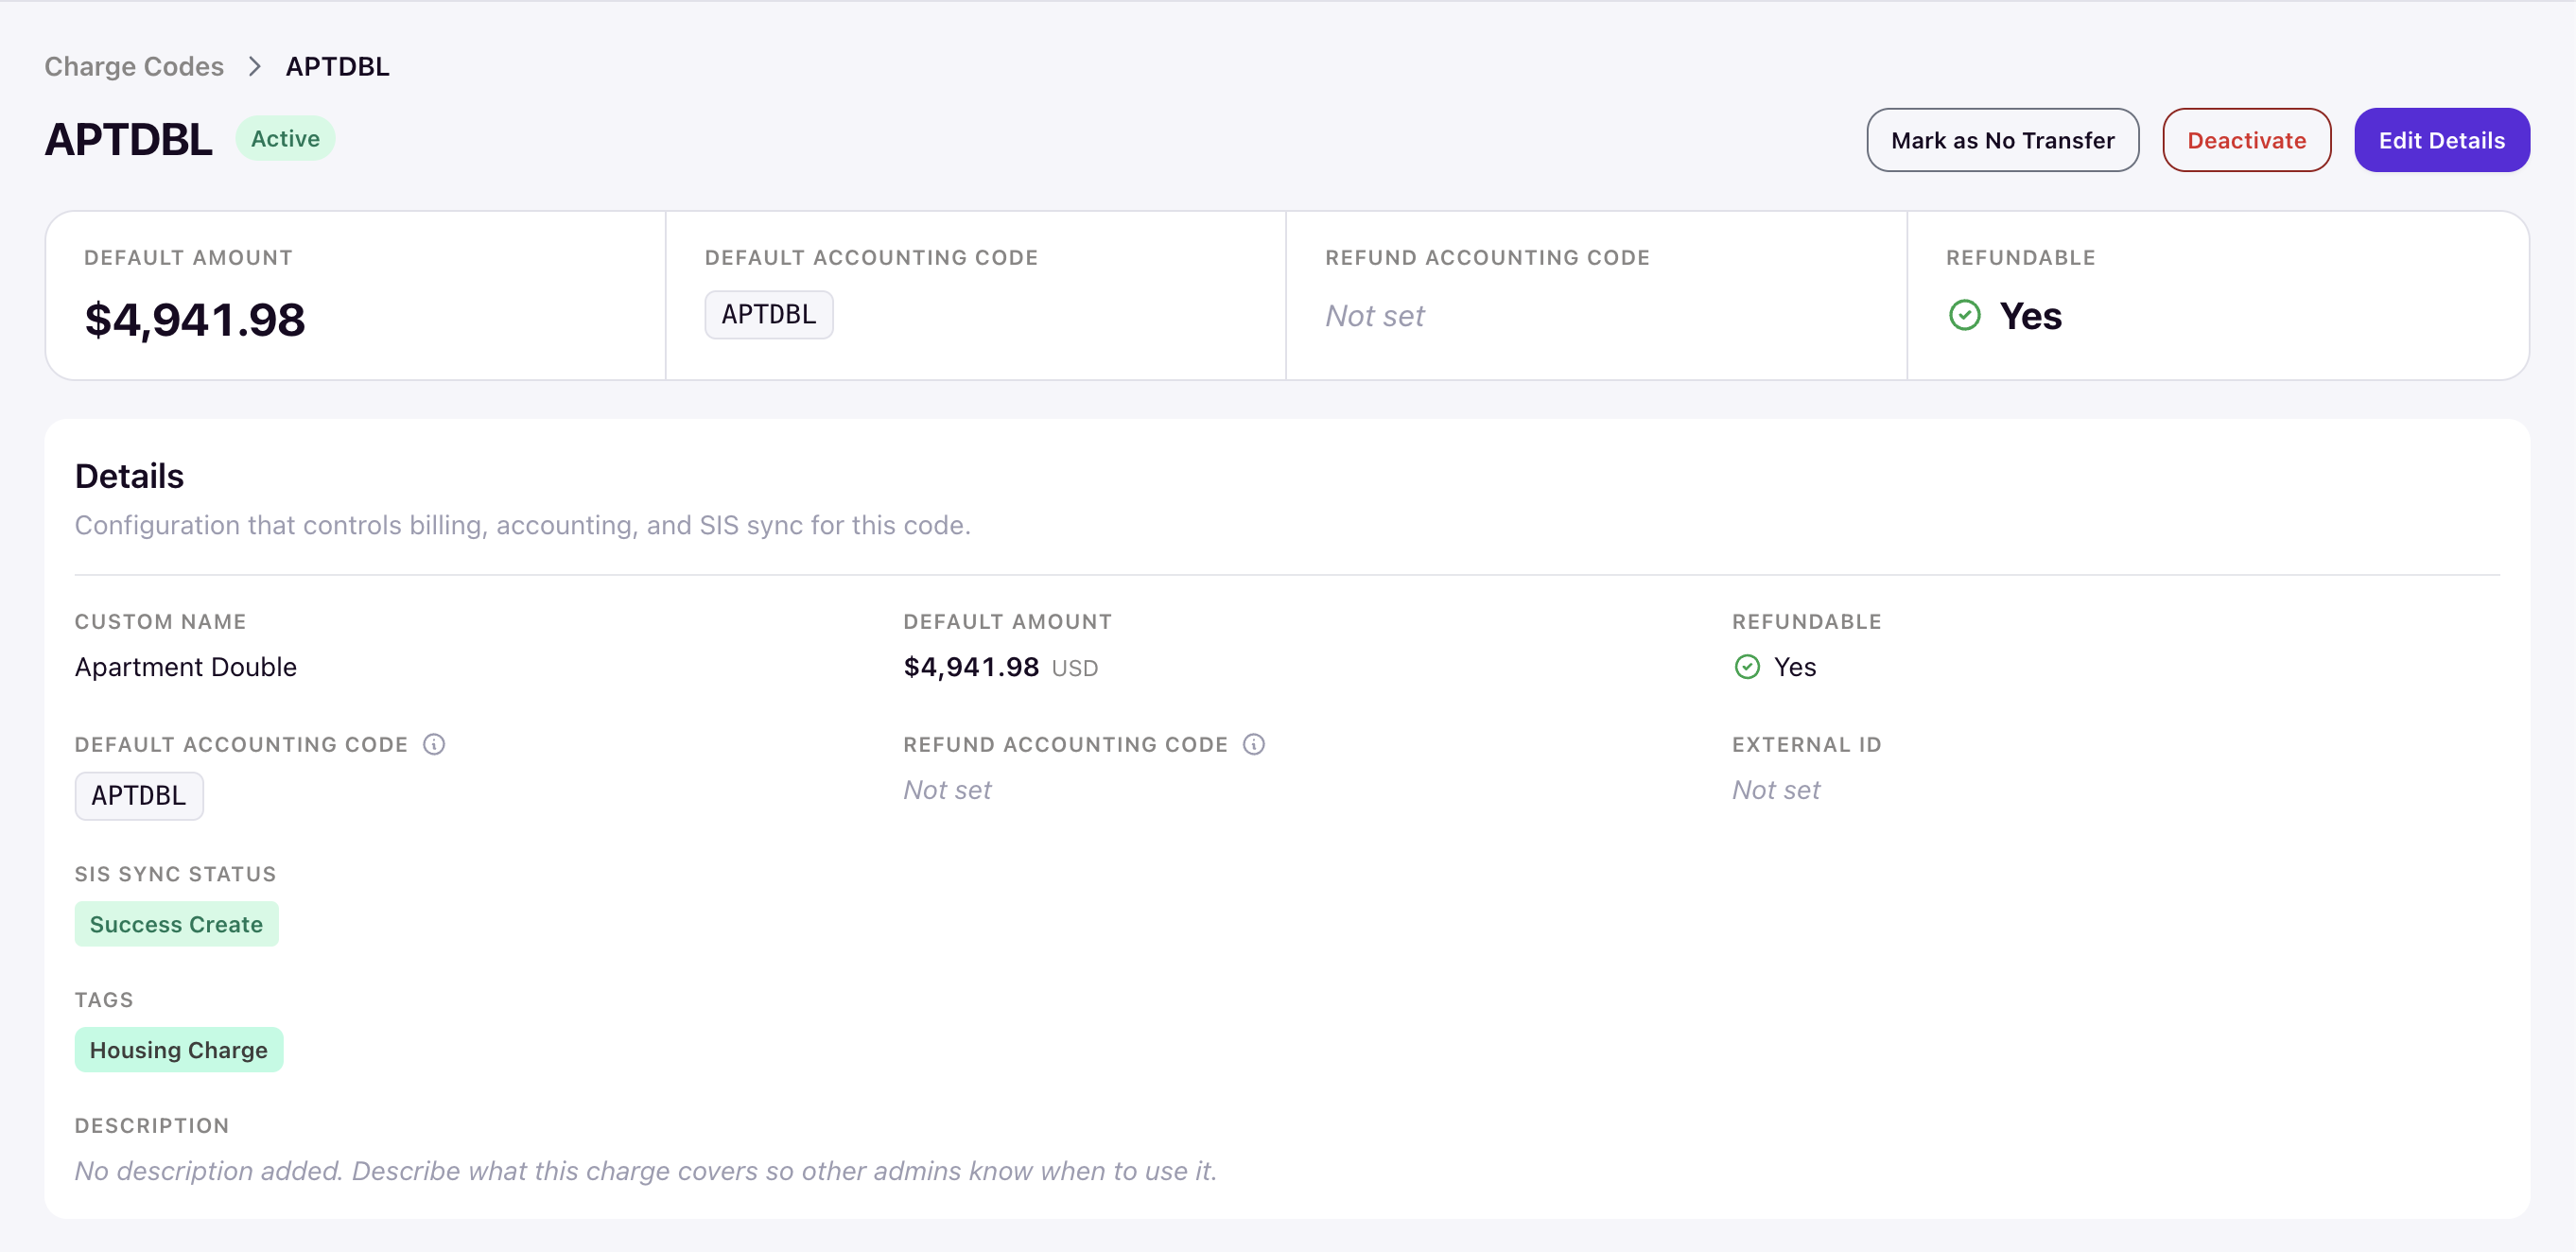
On the detail page, you can perform three actions:
- Mark as No Transfer — Prevents the charge from syncing to your SIS. Use this for charges managed entirely within Housing Cloud, such as camps and conferences fees or winter session charges that are not configured in your SIS.
- Activate / Deactivate — Toggles the charge code between active and inactive states. Activate charge codes you need to use immediately. Deactivate historical charge codes when you no longer need them while preserving the record for data validation and reporting. You cannot delete a charge code once it has been created.
- Edit Details — Opens the charge code edit form.
Edit a charge code
Open the charge code detail page and click Edit Details. Changes to a charge code's default amount apply to future transactions using that code. They do not retroactively update transactions that have already been posted.
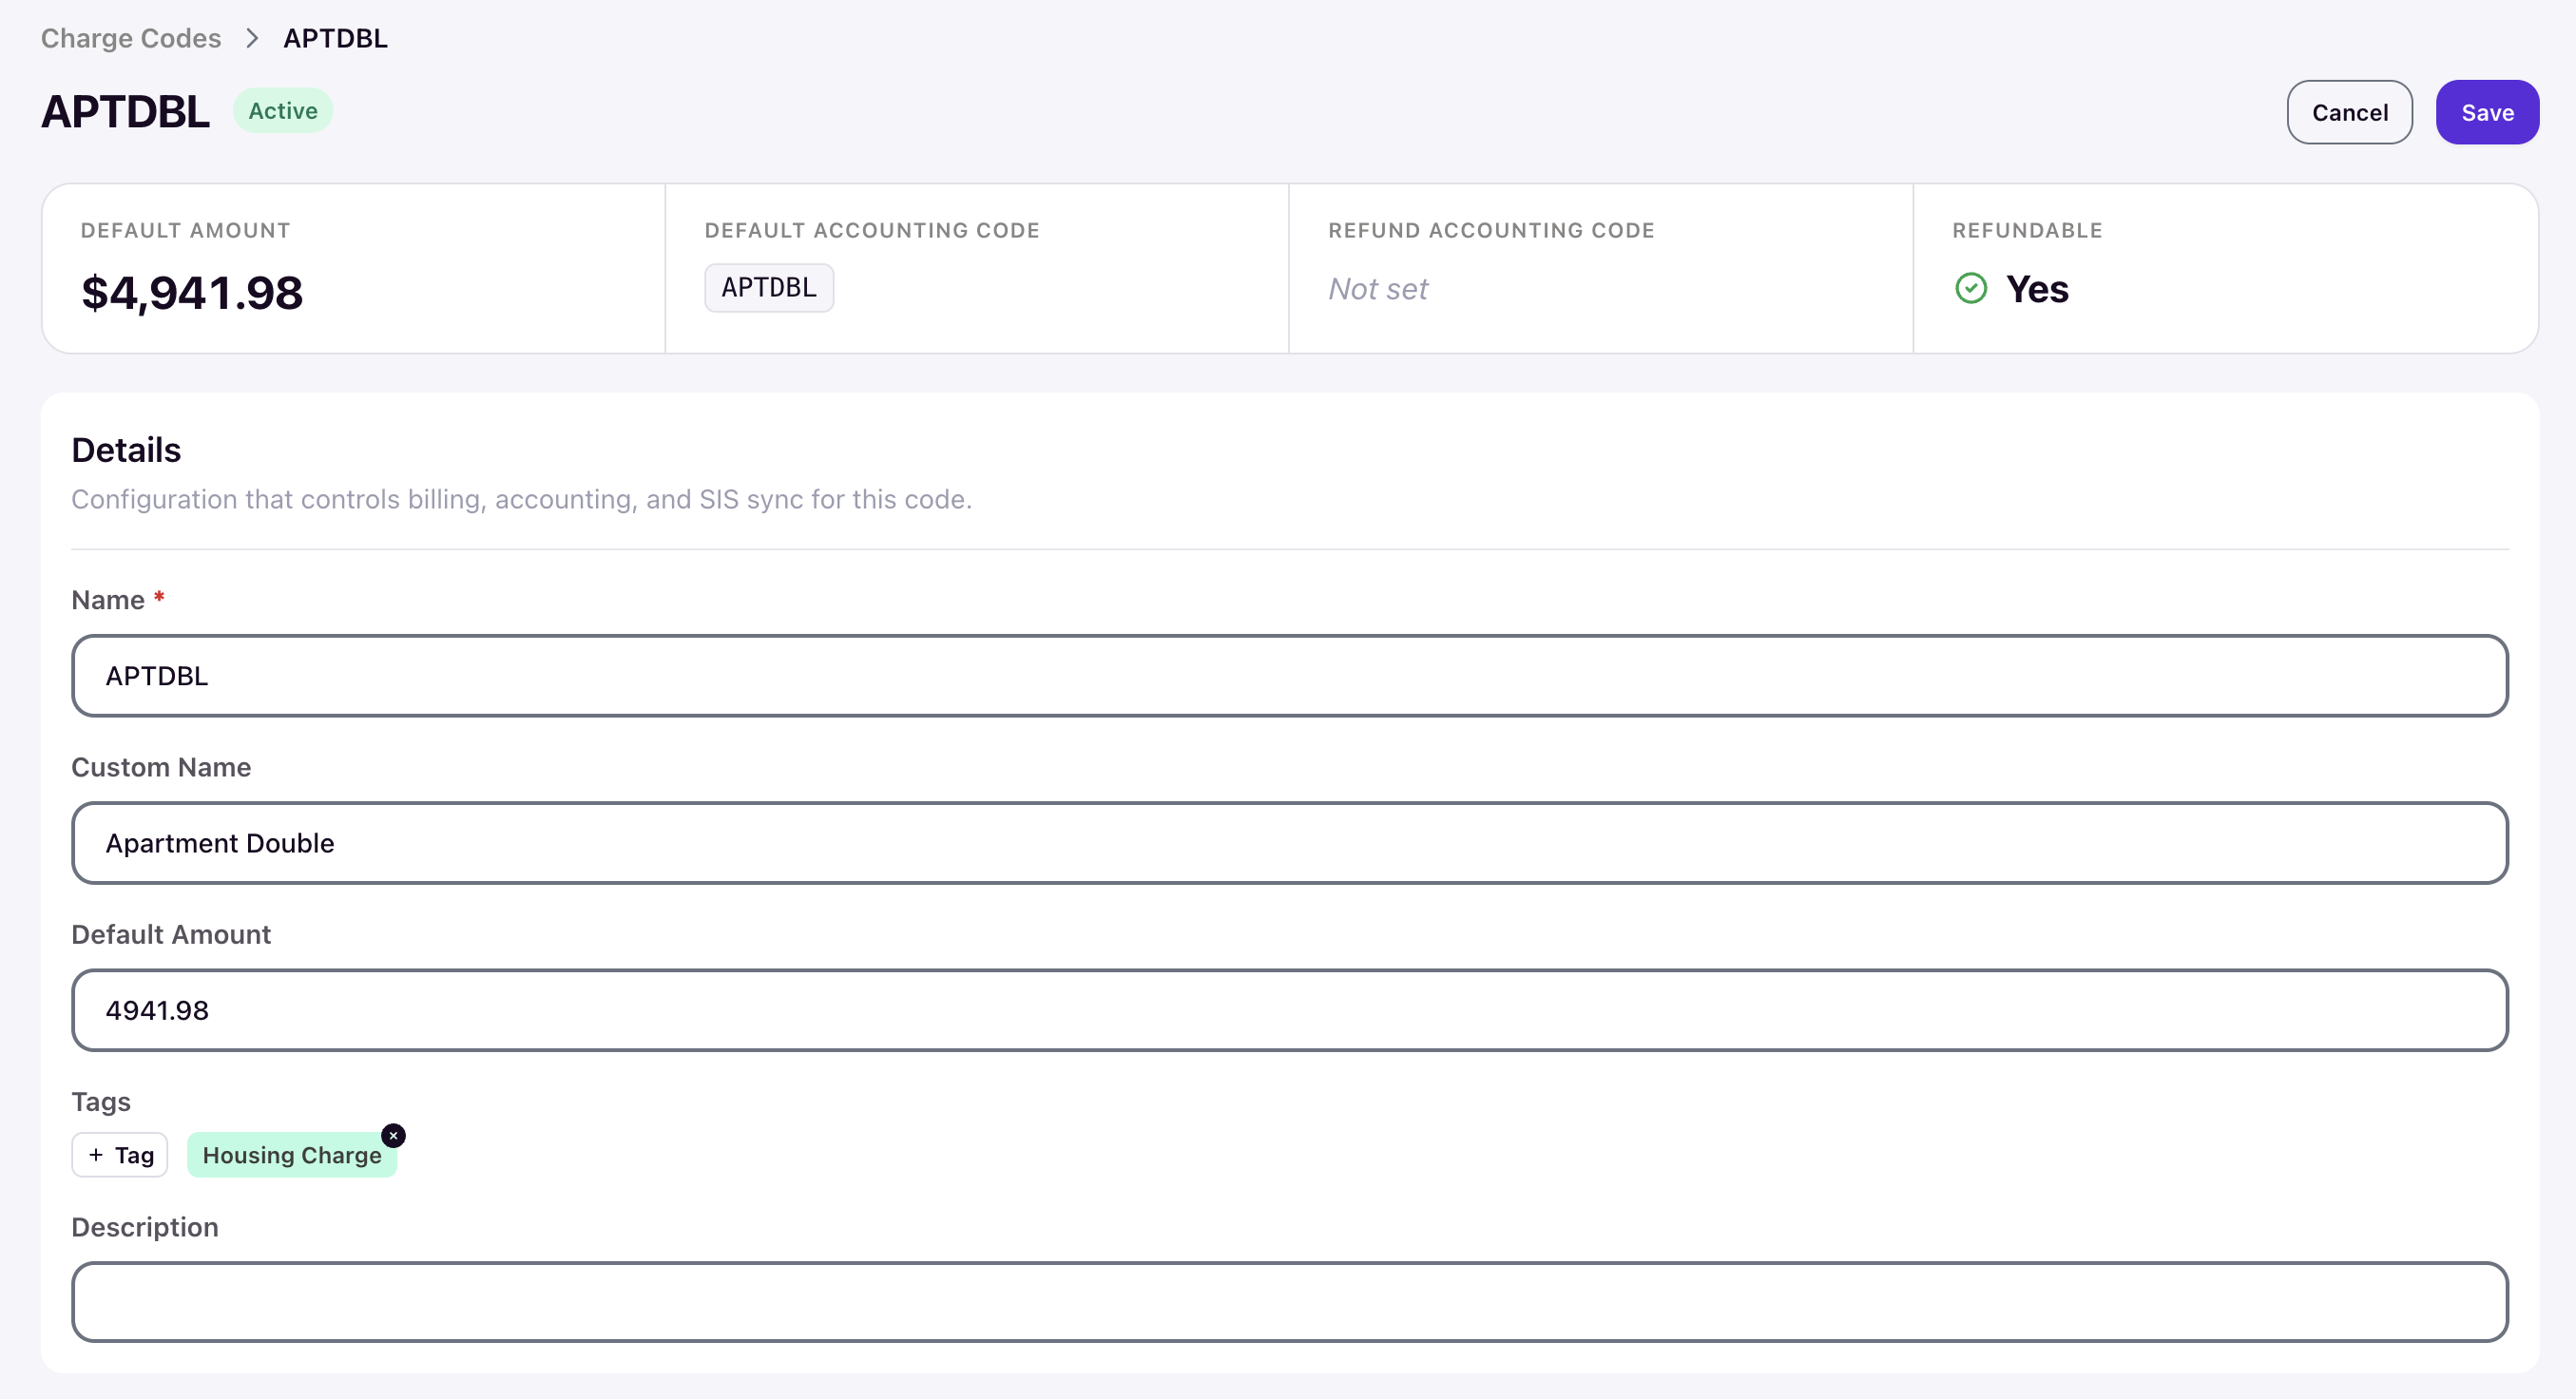
Note: The edit form shows the name, custom name, default amount, tags, and description. Accounting codes and refundable status are set at creation and are not editable from this form.
Manage tags on charge codes
You can add tags to a charge code from the edit form by clicking + Tag. Tags help you label and group charge codes for easier filtering and lookup.
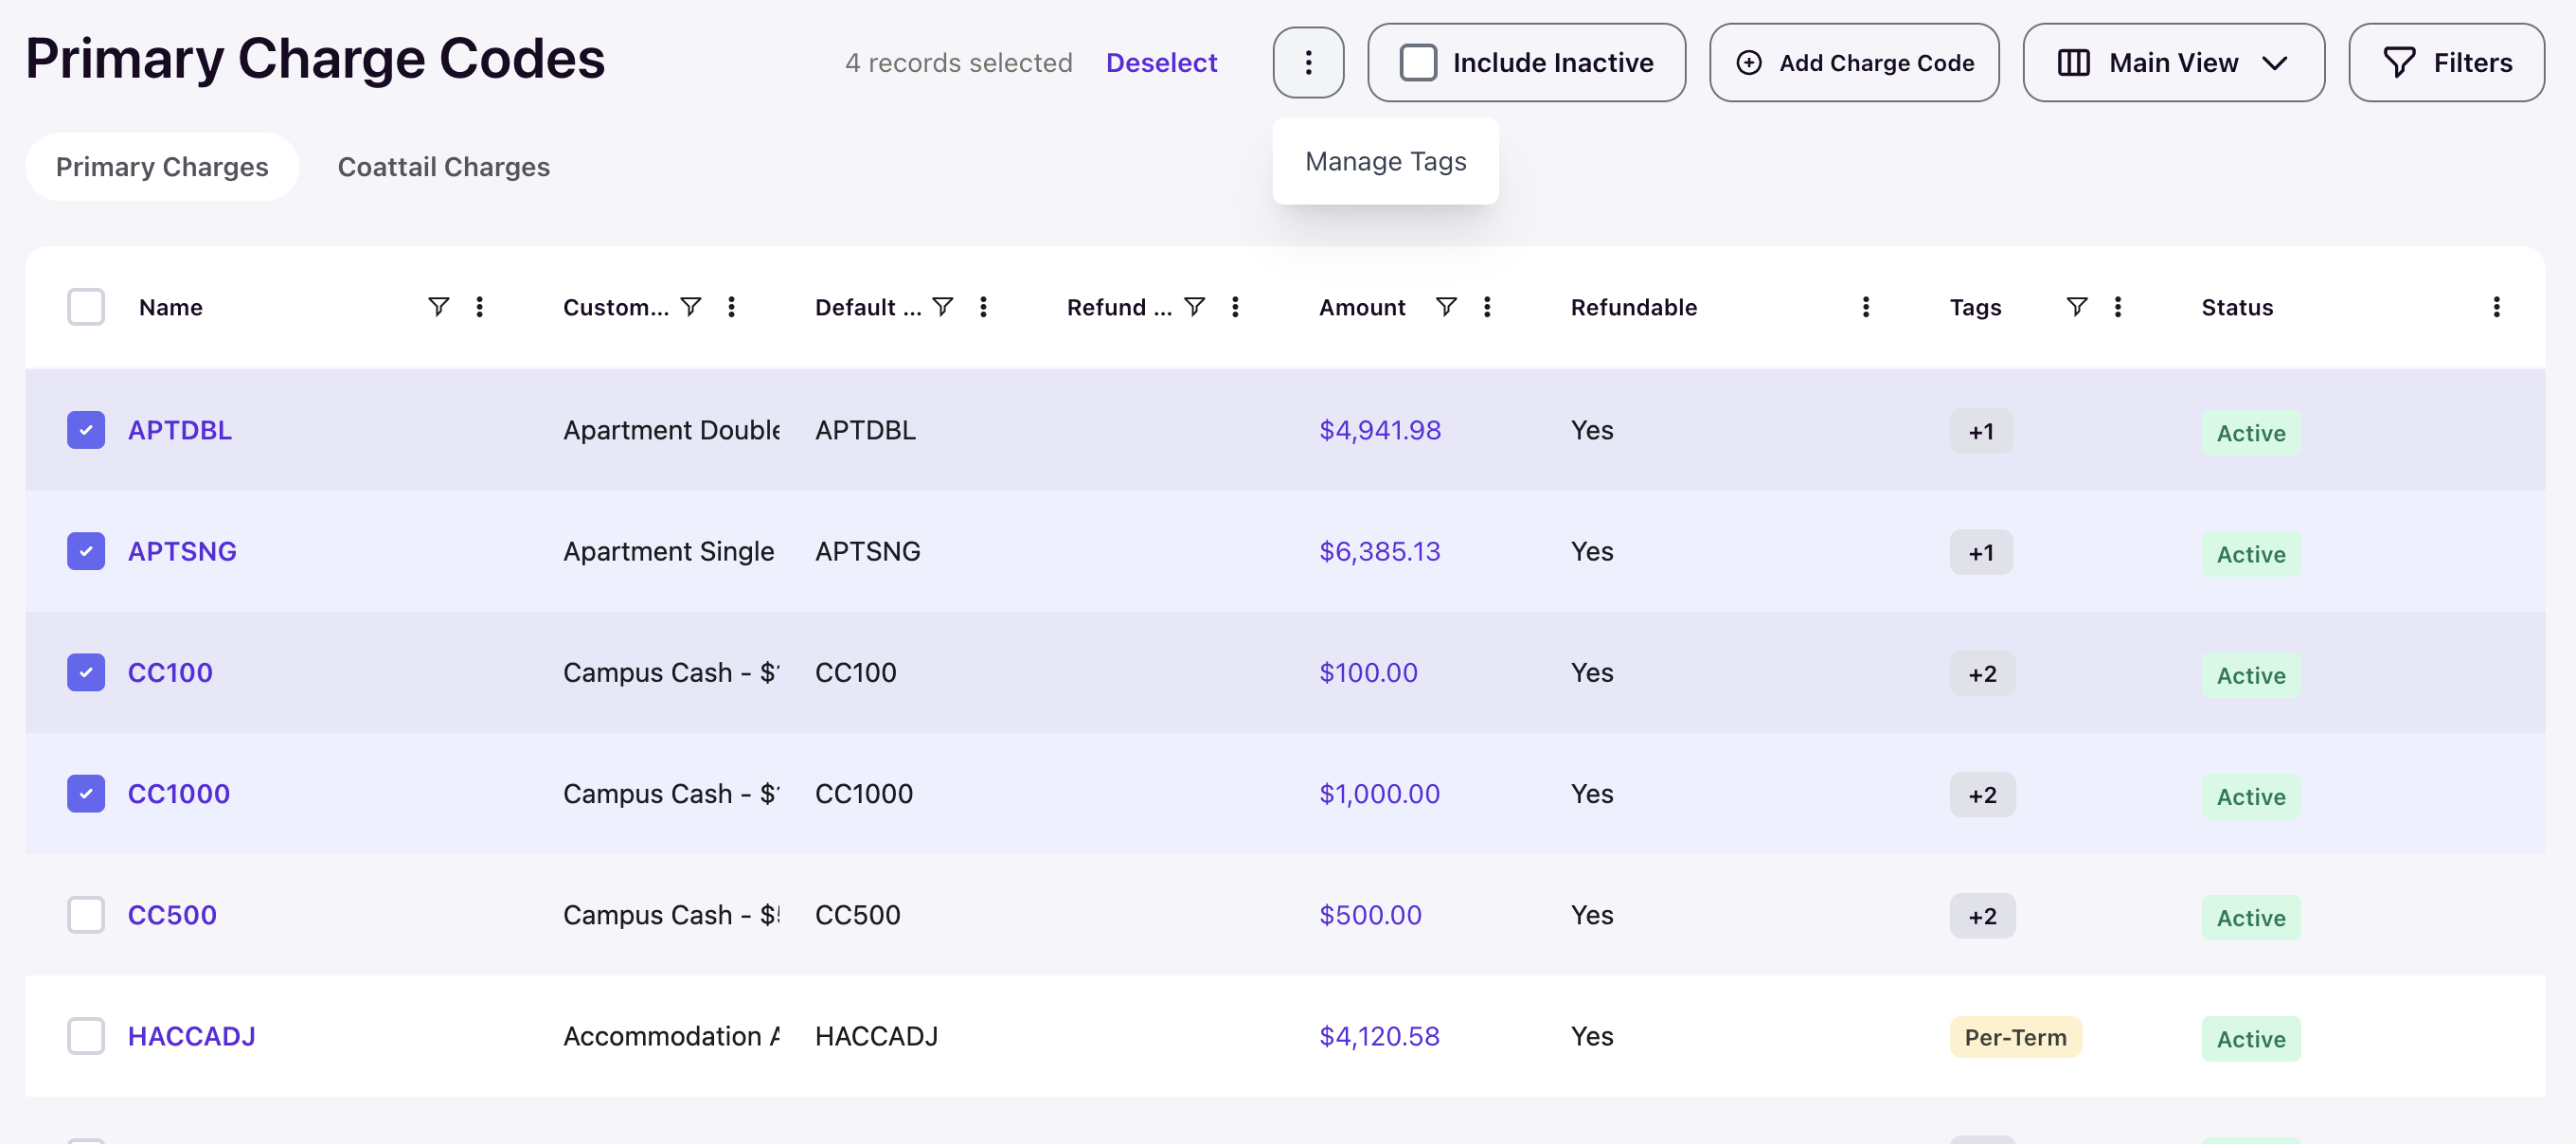
To manage tags across multiple charge codes at once, select the checkboxes next to the charge codes on the Primary Charges list, then open the overflow menu and choose Manage Tags.