Create ad-hoc transactions
Last updated: August 28, 2026
A transaction is any financial record tied to a student's profile — a charge (debit) or a refund or payment (credit). Every transaction references a charge code, which defines its type, default amount, accounting code, and whether it can be refunded.
Creating transactions through this manner is not meant to replace traditional billing practices (such as, a transaction being created when a student is assigned to a bed).
Create a transaction
Use this path whenever you want to enter the amounts yourself, whether you're charging one student or many. Adding more recipients doesn't change the flow — it's the same wizard from start to finish, and the only difference is that billing several people adds one question about how to divide the total.
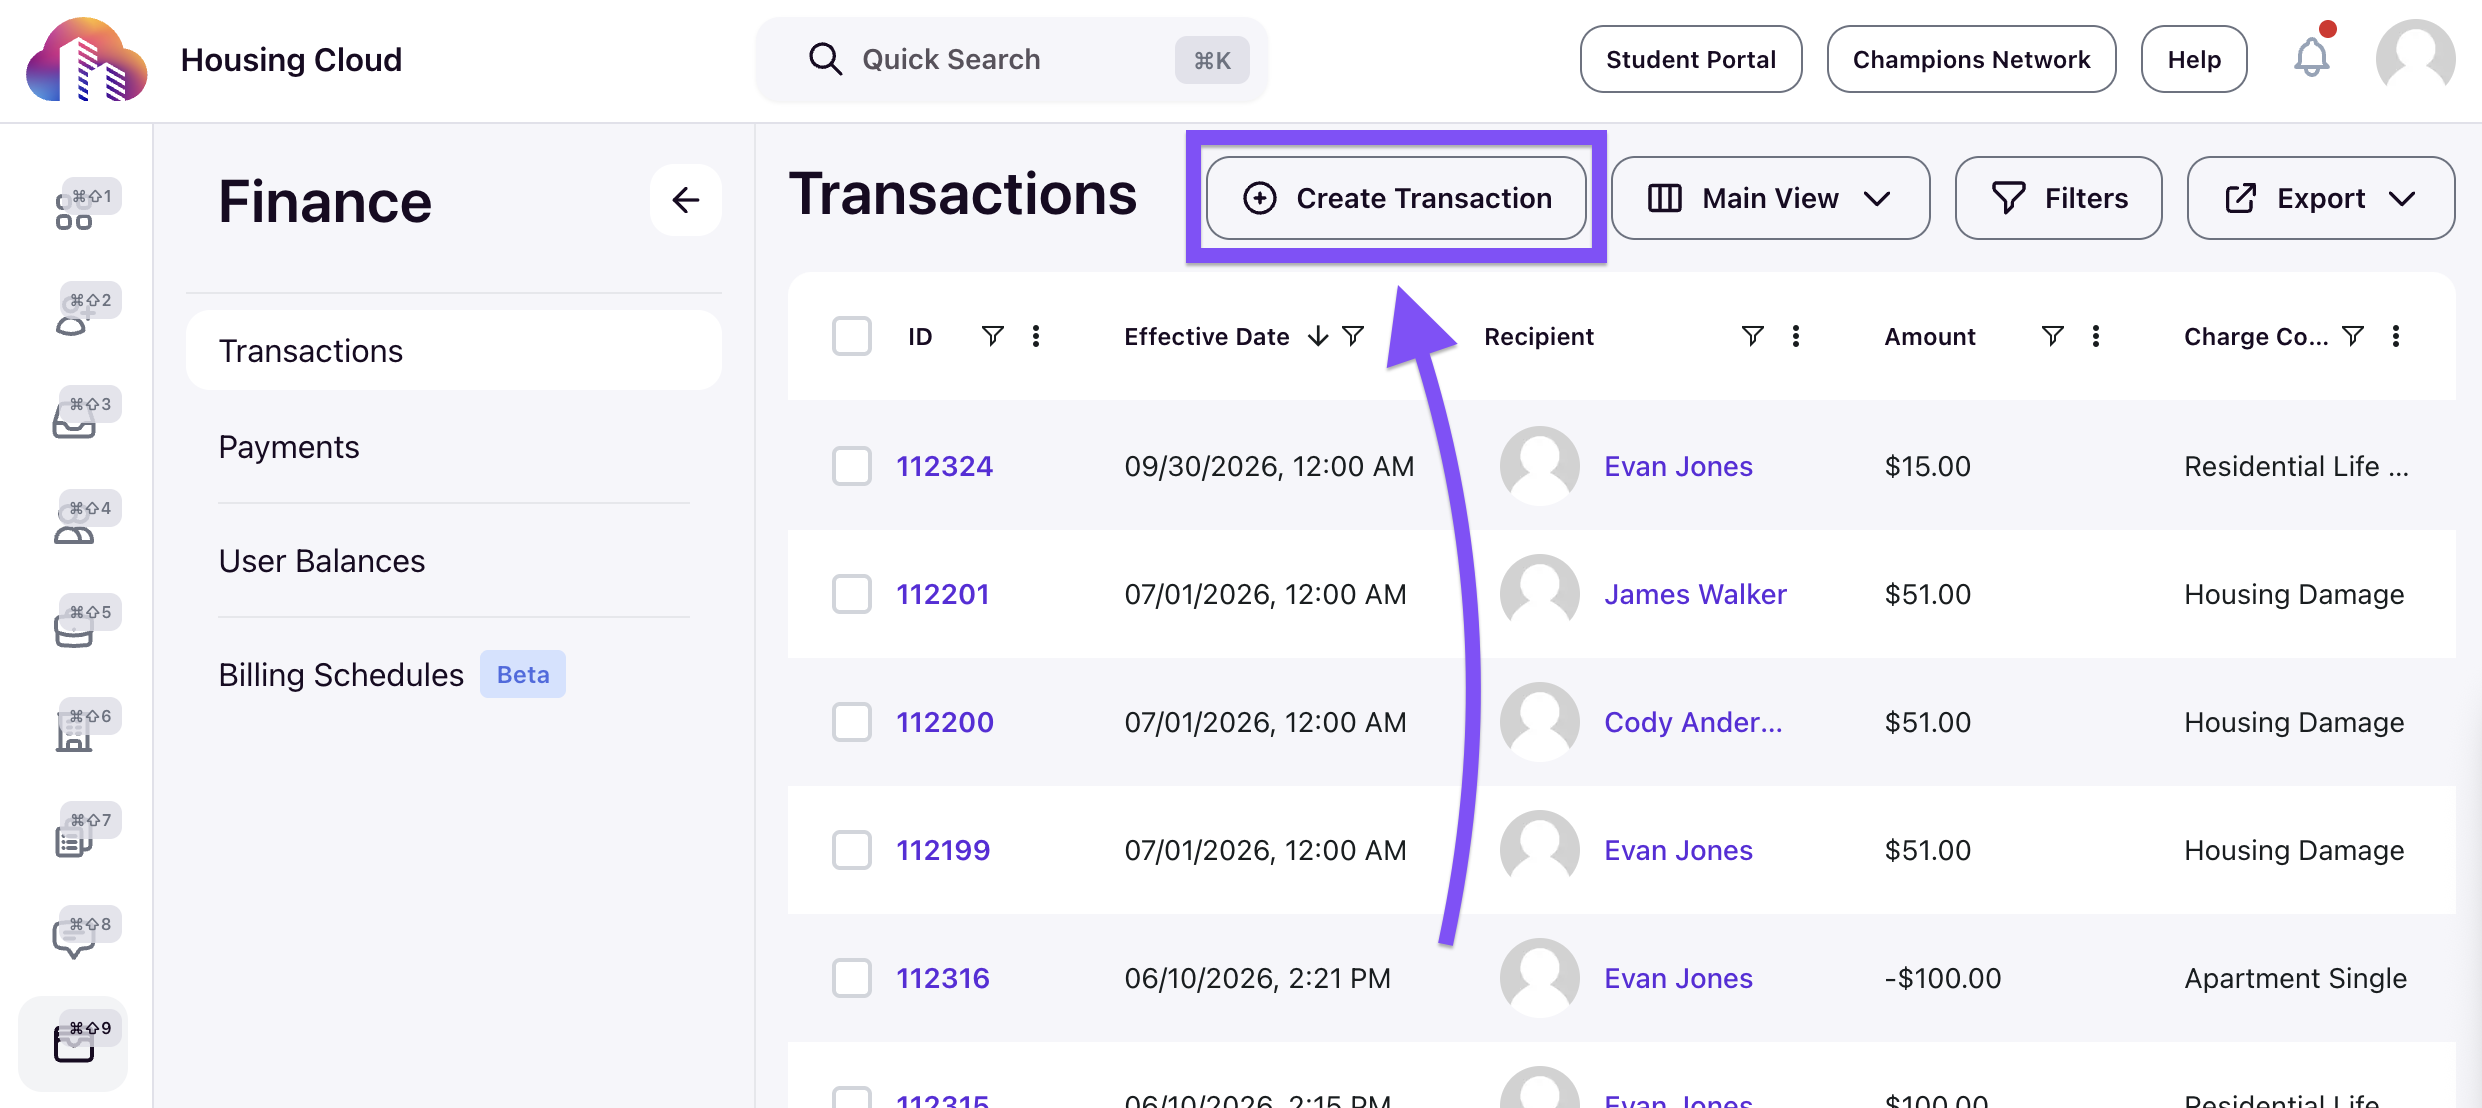
Start from the Create Transaction button, either under Finance or directly on a student's profile.
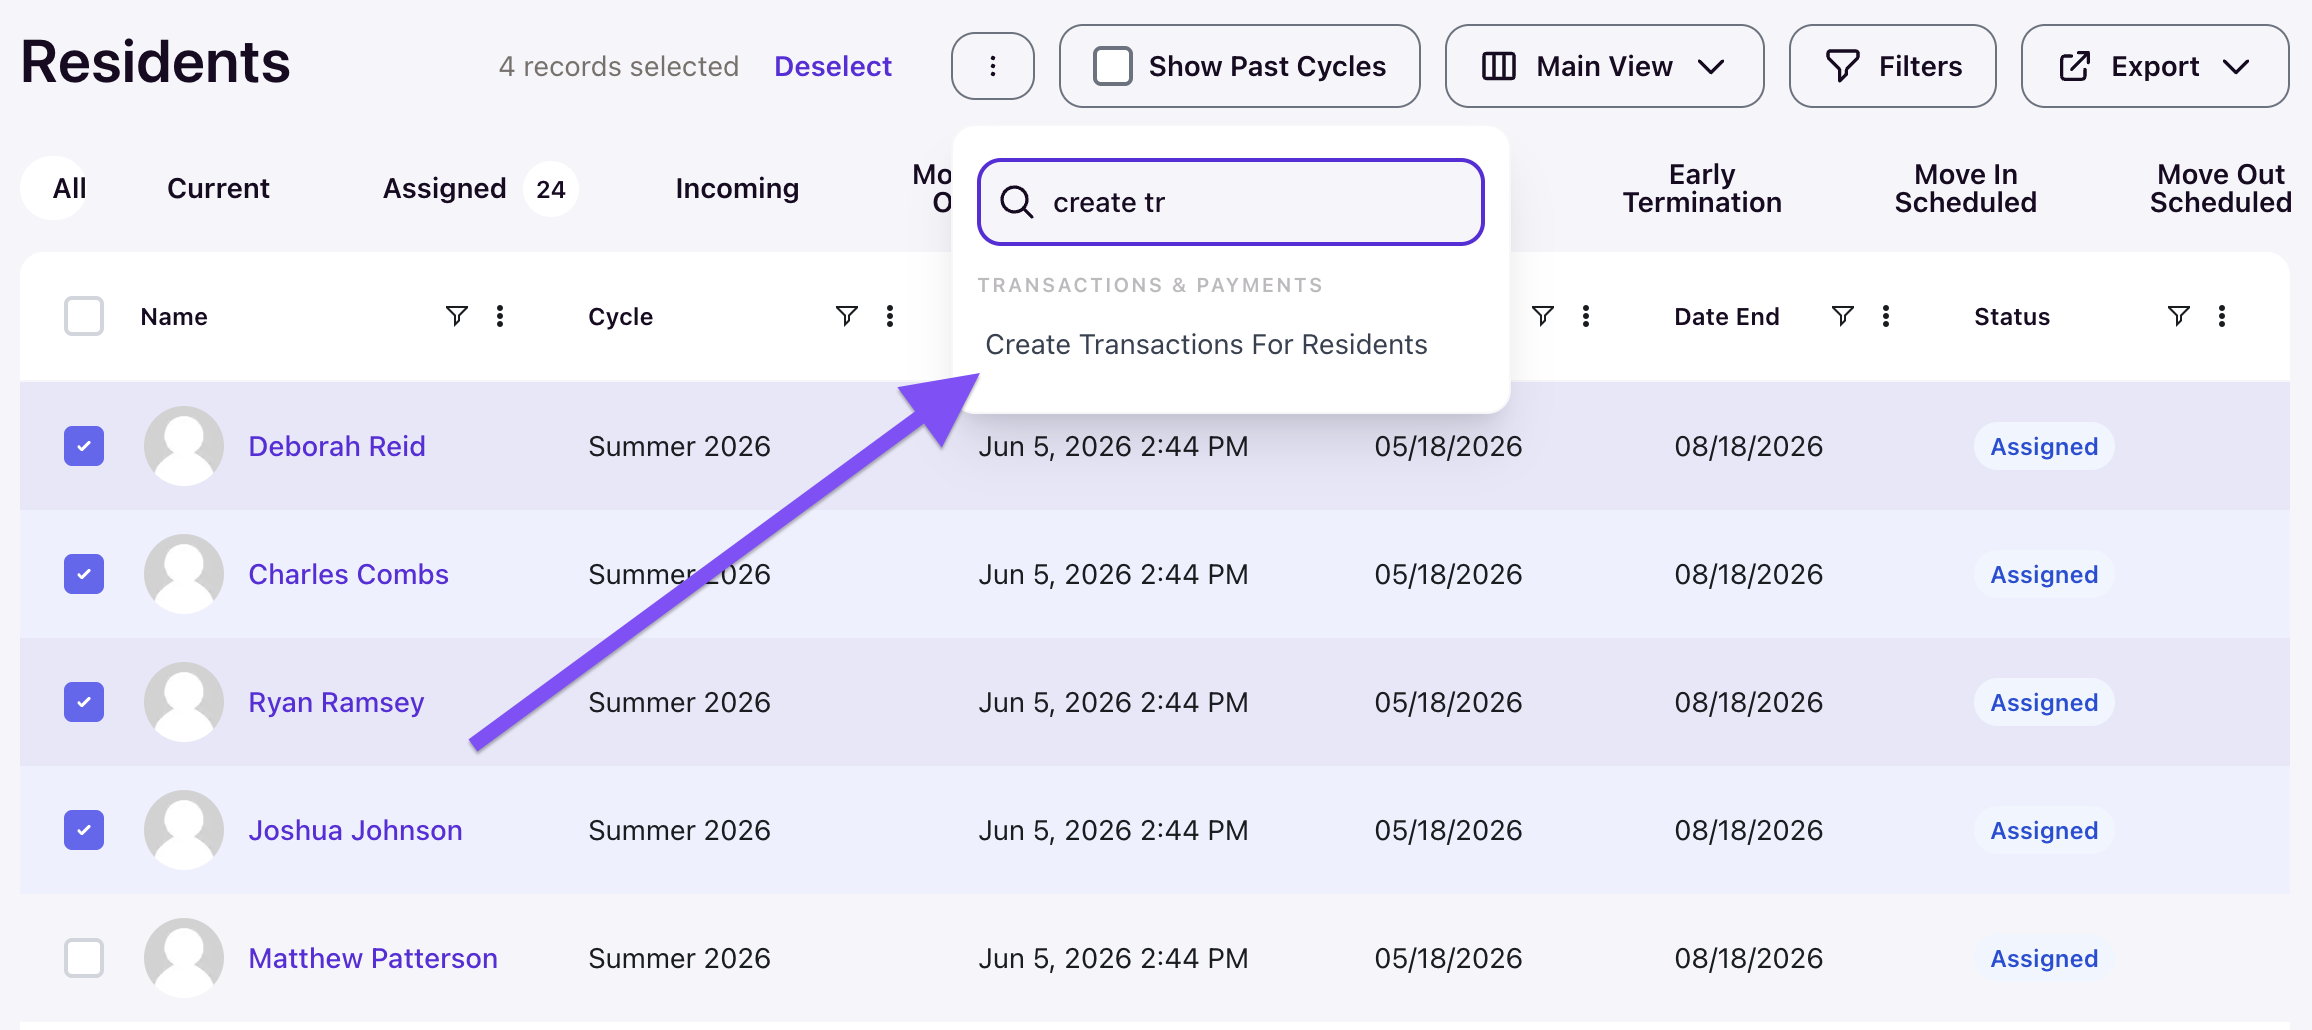
Optionally, use Create Transactions from the Profiles, Applicants, or Residents tables.
Choose the type and recipients
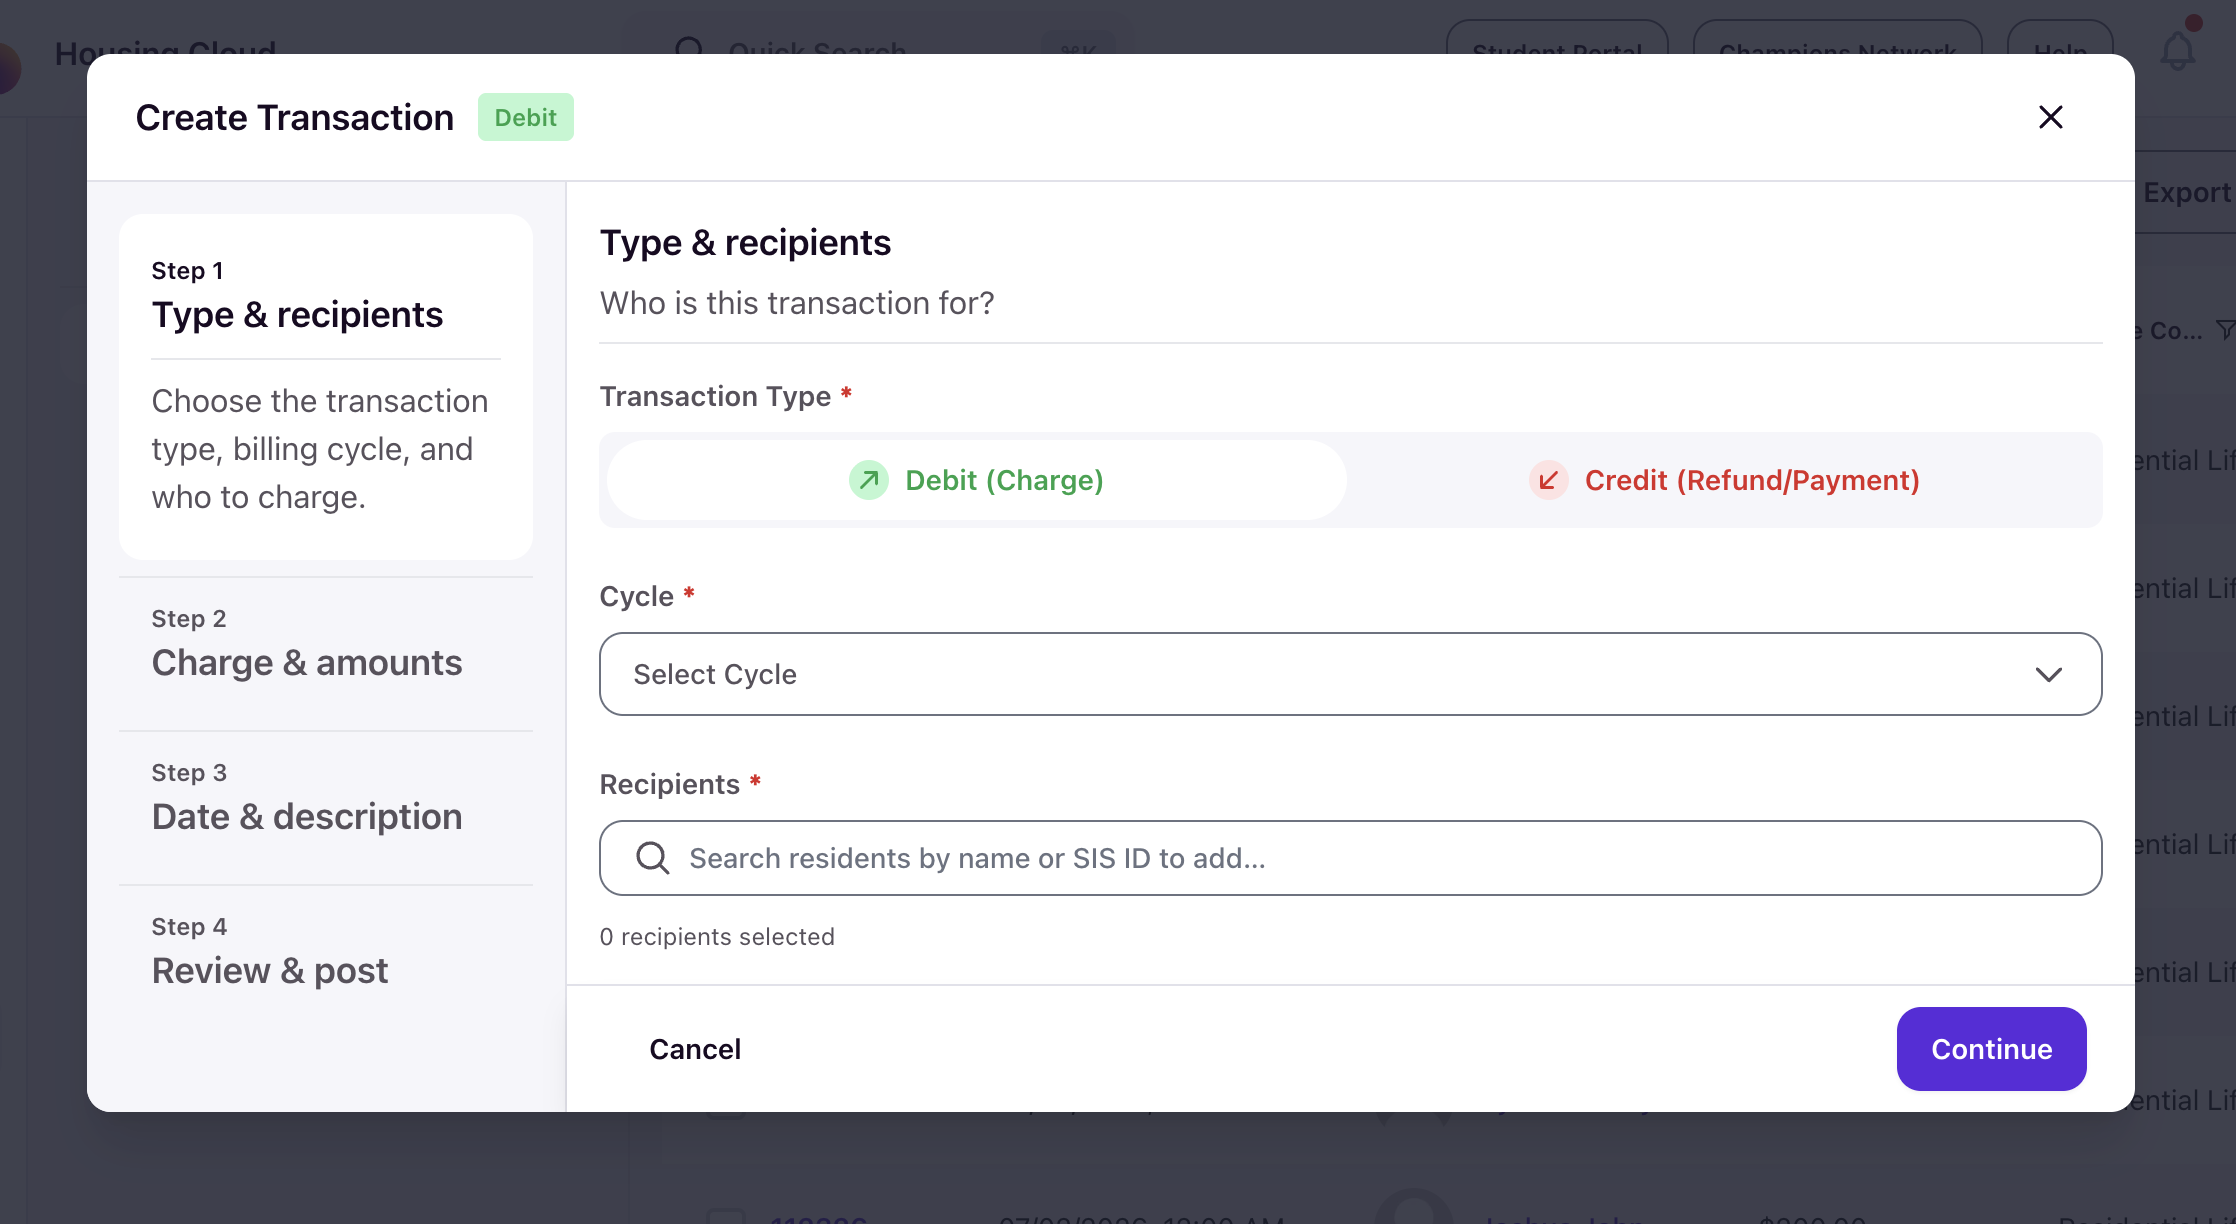
The wizard opens to a four-step flow — Type & recipients, Charge & amounts, Date & description, and Review & post — shown down the left side. The step you're on is highlighted, and each one earns a green check as you complete it.
Pick the transaction type — Debit (Charge) or Credit (Refund/Payment) — choose the billing cycle, then search residents by name or SIS ID and add as many as you need. Each person you add appears in a list with their SIS ID and a remove control, so you can adjust the group before moving on. When the list looks right, click Continue.
Note: Studentswill auto-populate if selected from a table for bulk actions.
Set the charge and amounts
Next, pick the charge code. Start typing the code or its name to filter the list. You can use the default amount from the charge code or enter your own, and you can tick Pro-rate charge to prorate it by a date window.
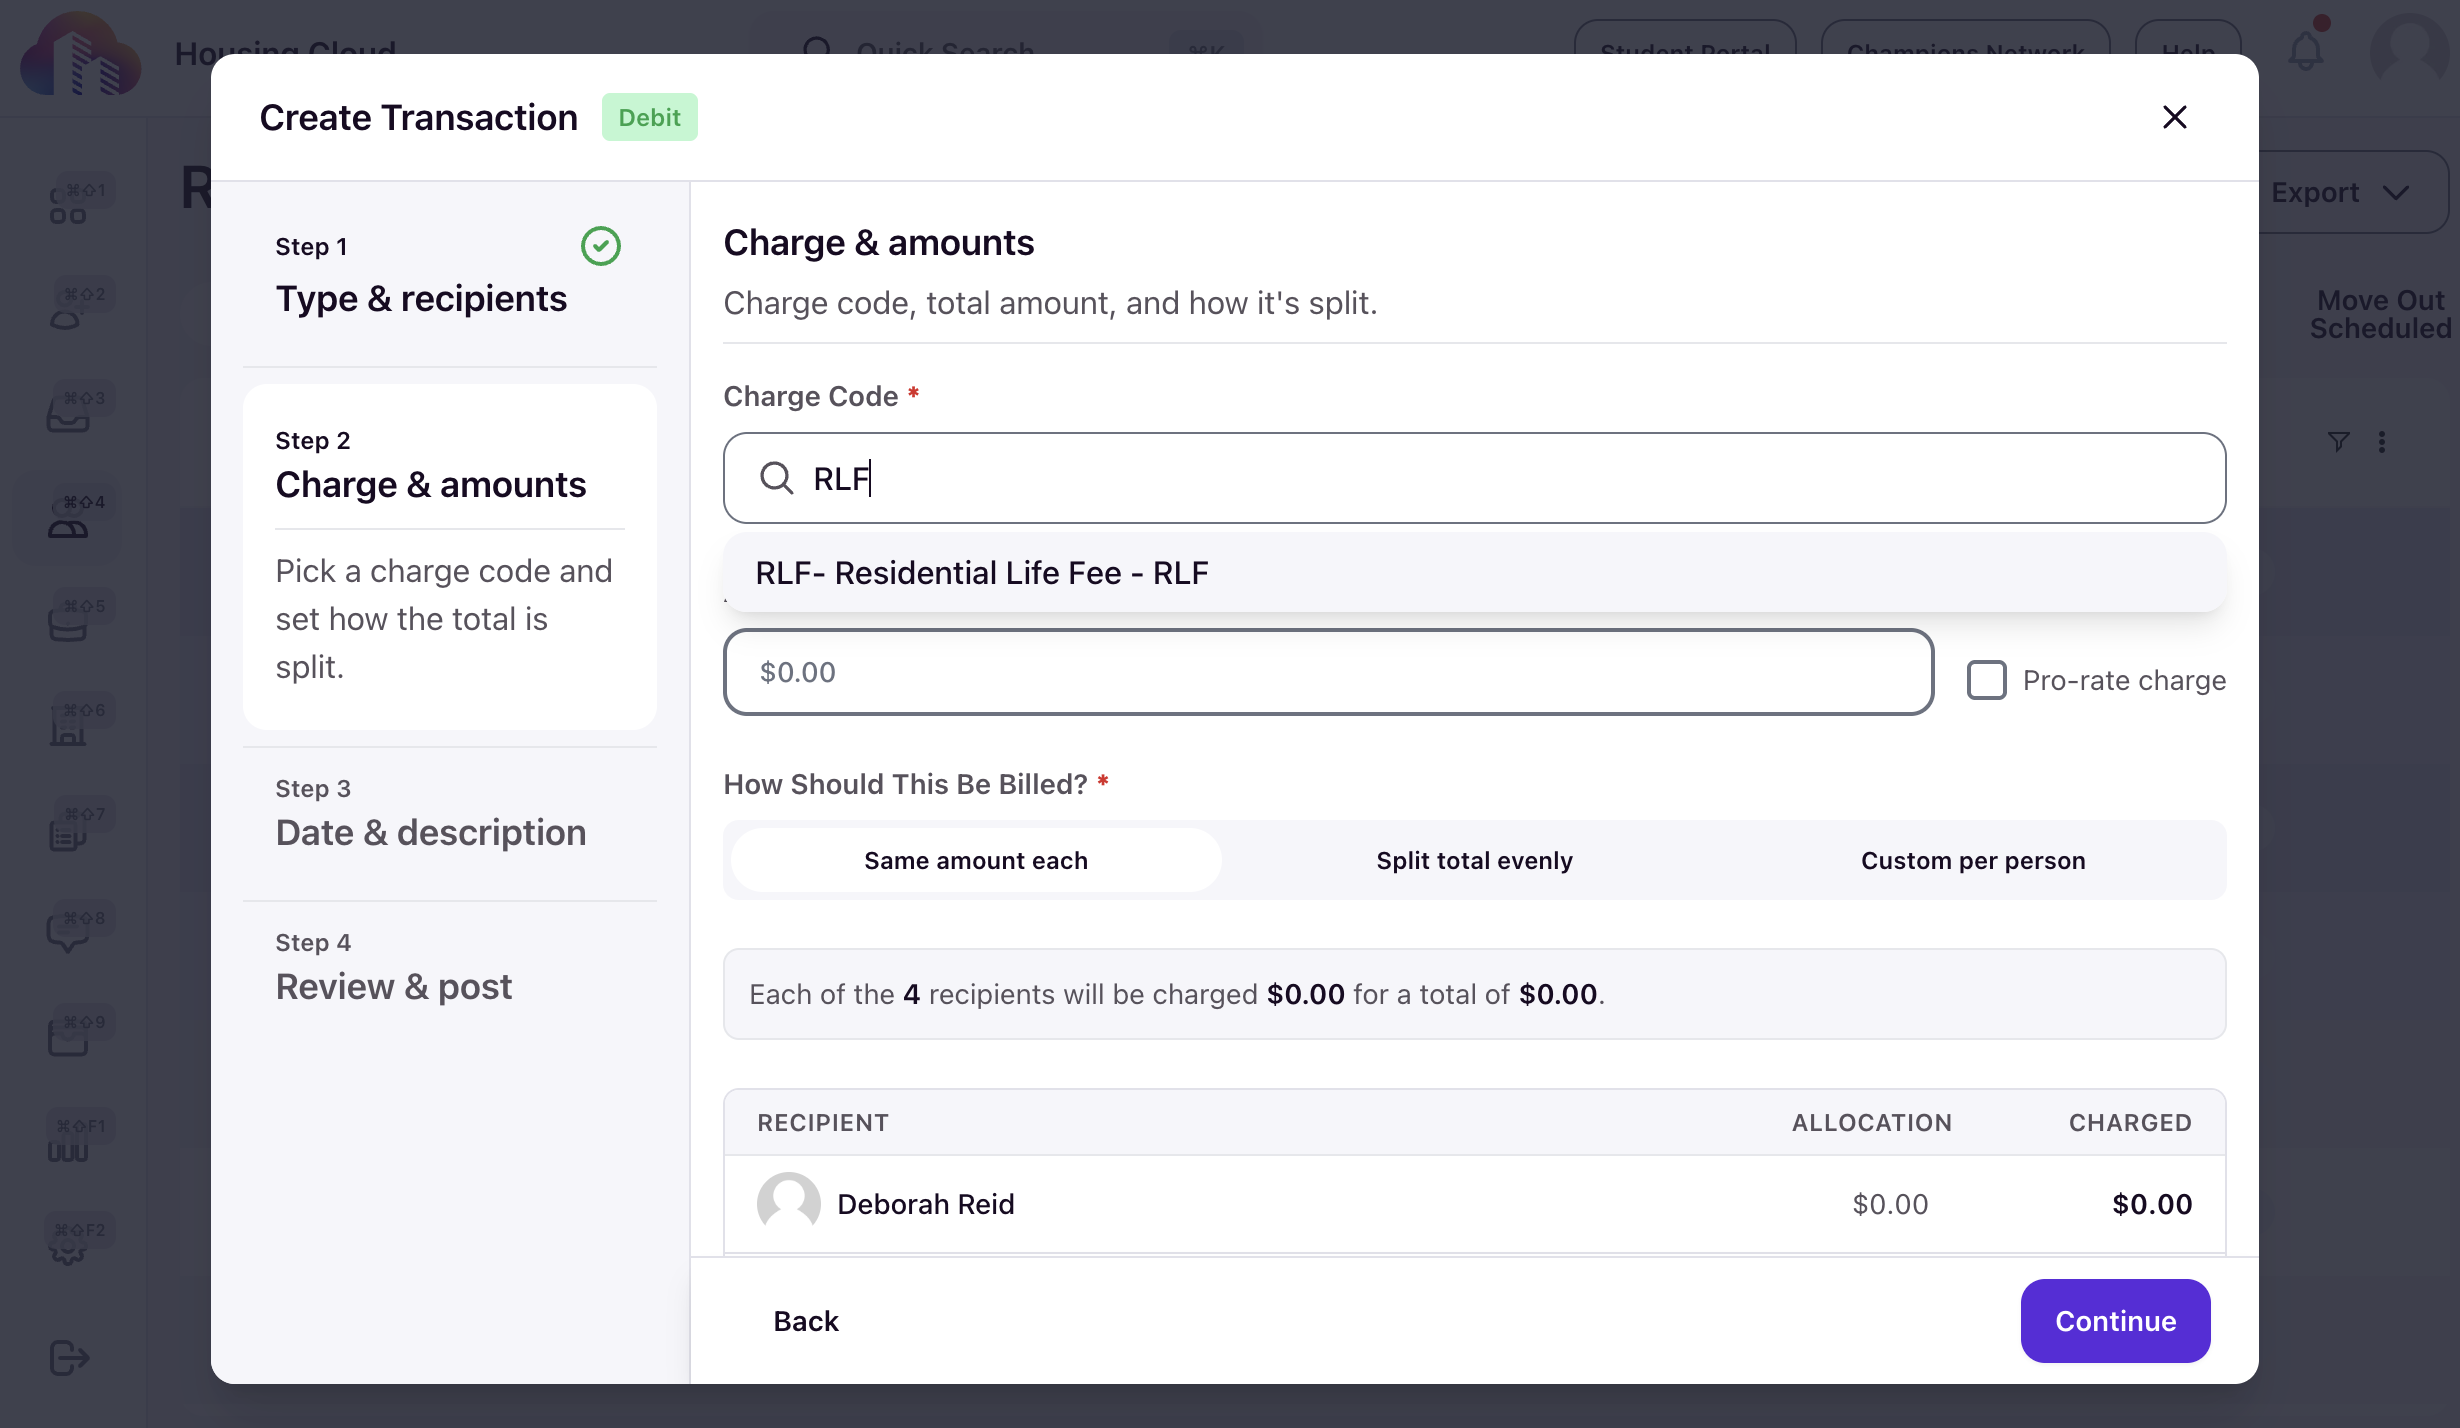
How should it be billed?
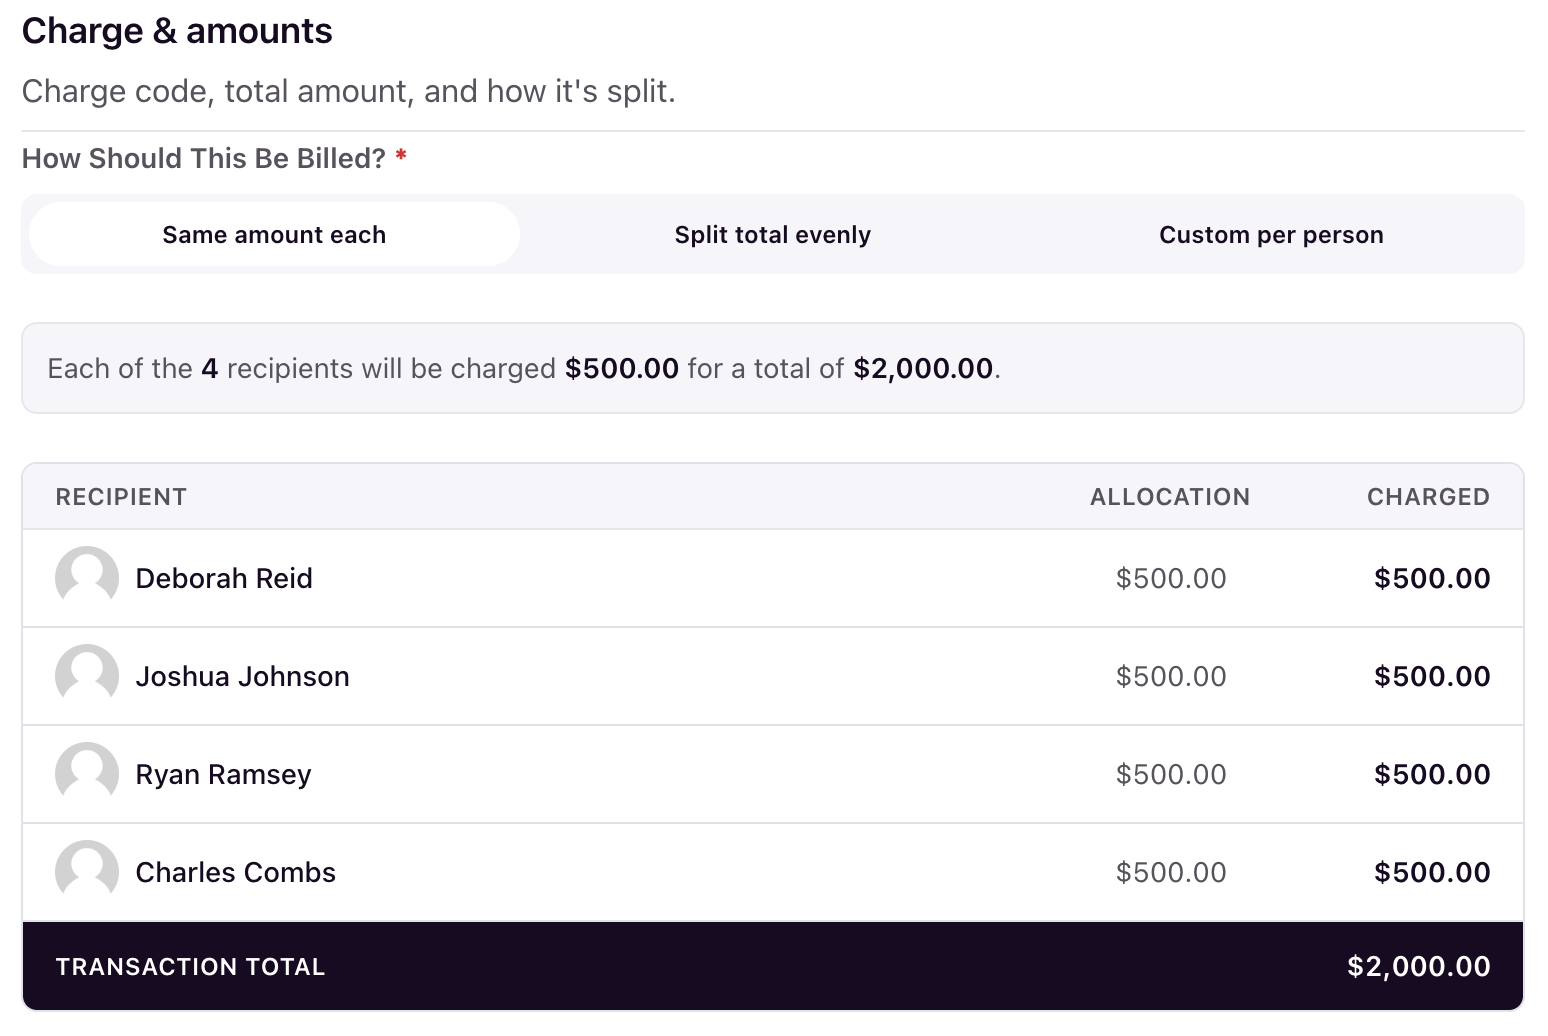
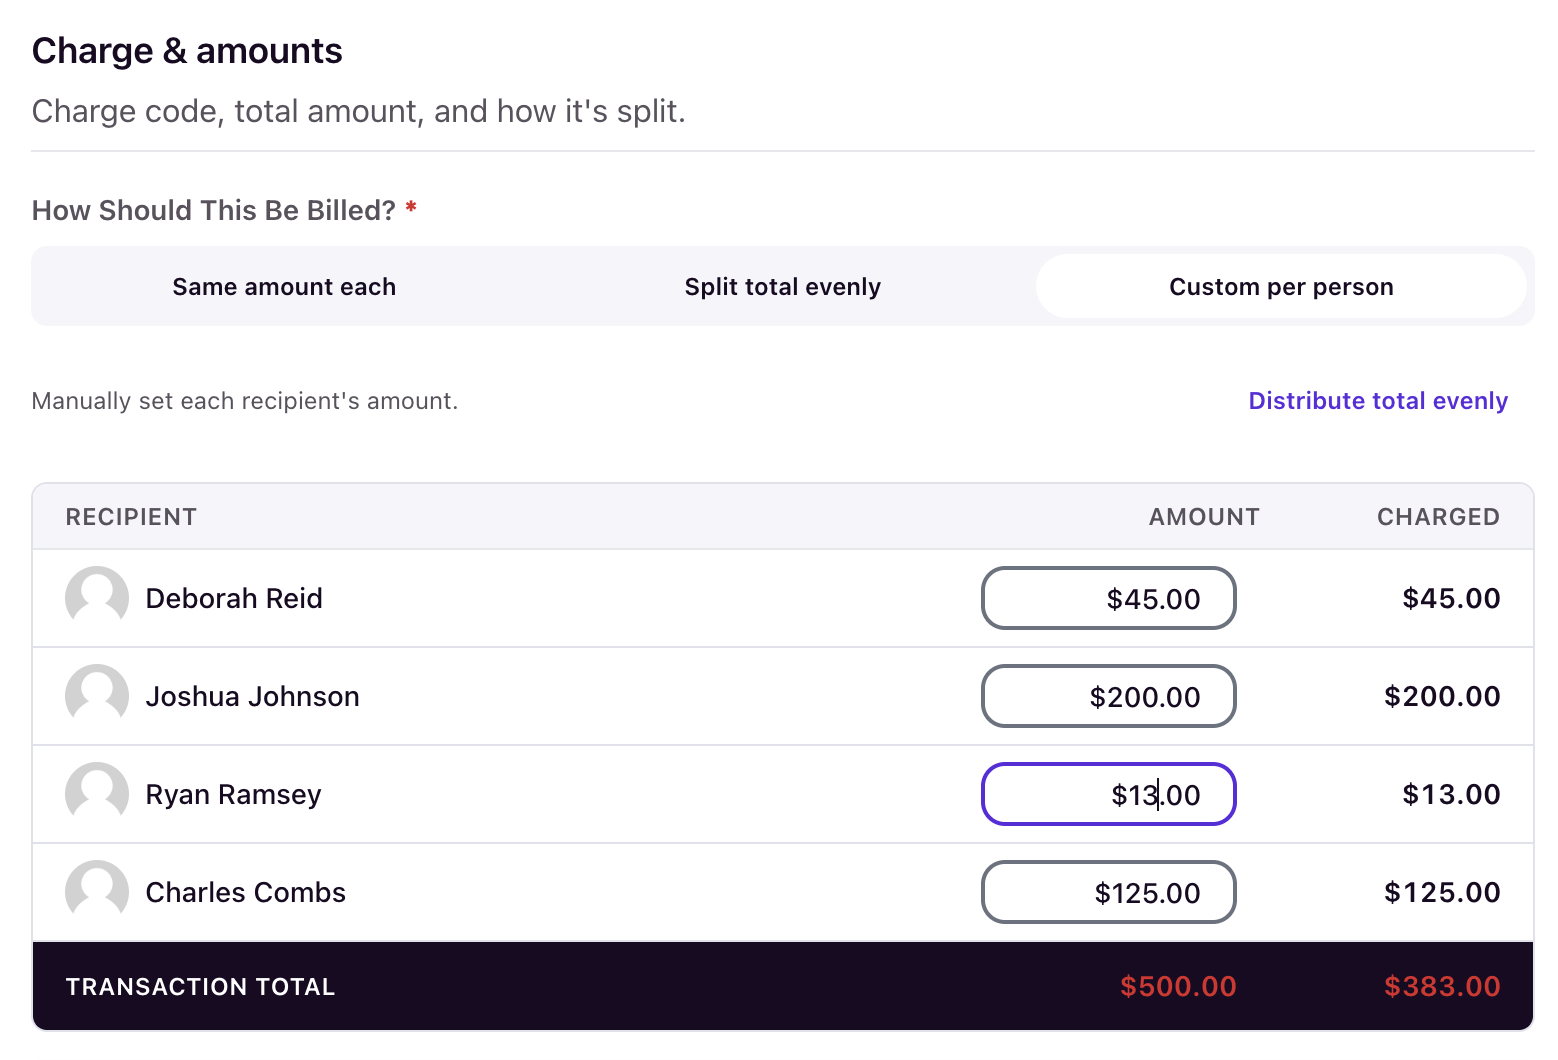
If you added more than one recipient, one more question appears — How Should This Be Billed? — with a live table and a running total so you always see what each person will owe. There are three ways to divide it.
Same amount each charges every recipient the figure you entered, so the summary reads, for example, "Each of the 4 recipients will be charged $500.00 for a total of $2,000.00."
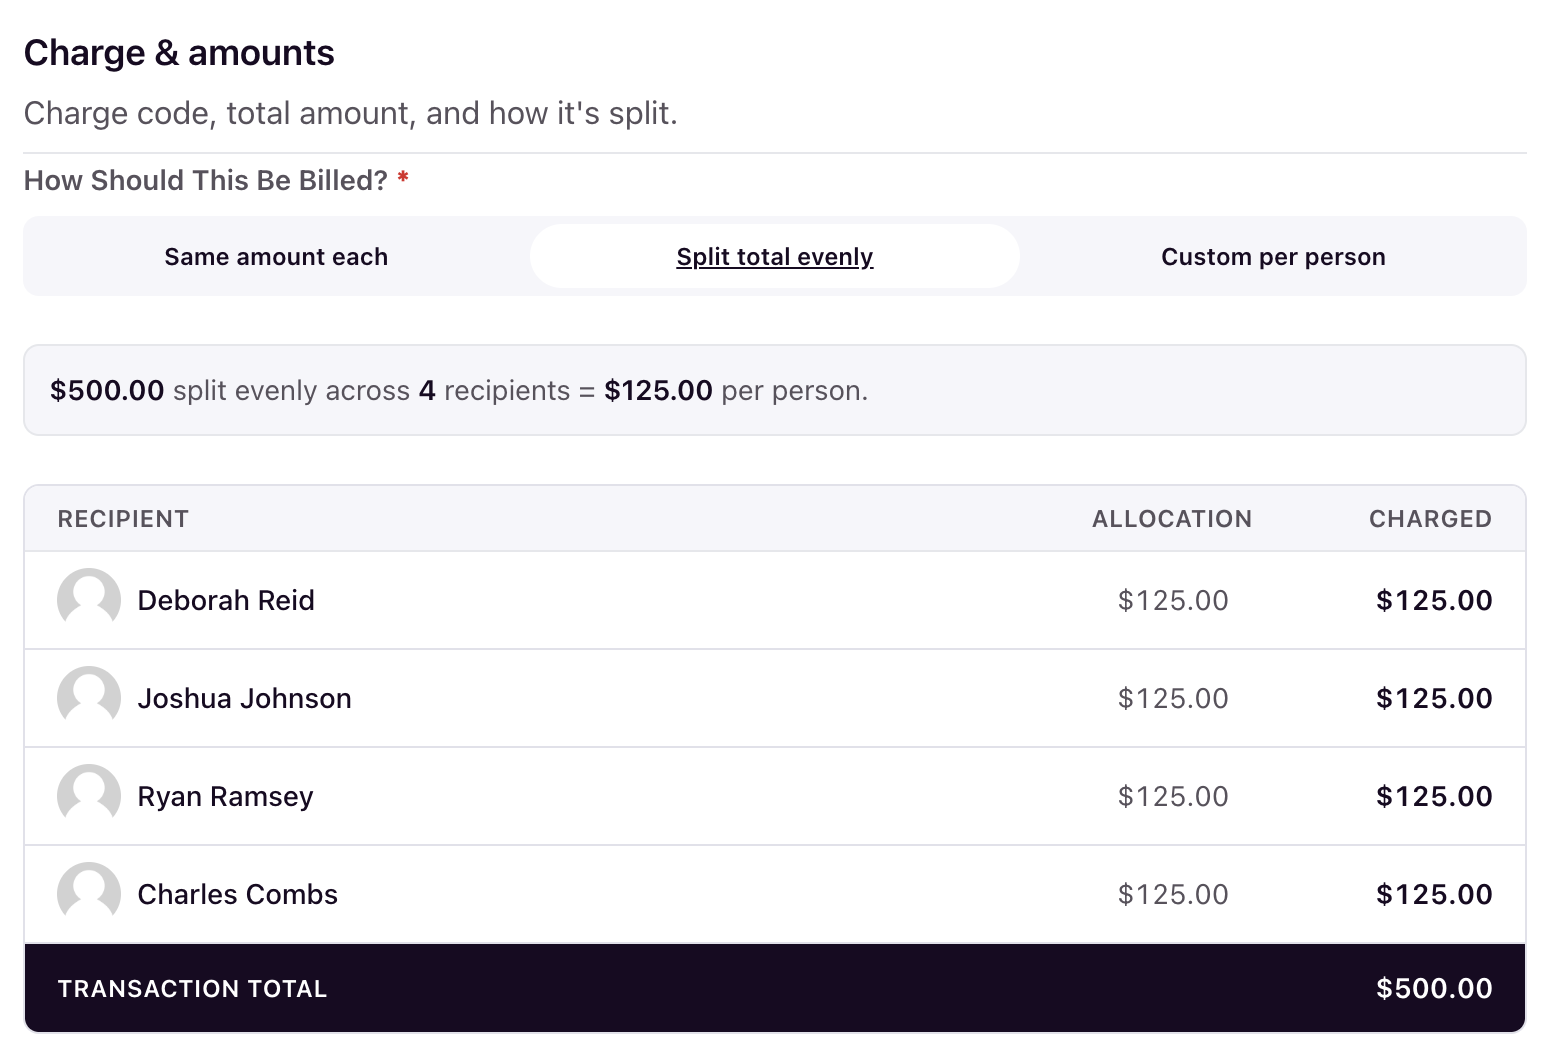
Split total evenly treats your figure as the whole and divides it across the group: "$500.00 split evenly across 4 recipients = $125.00 per person."
Custom per person lets you set each amount by hand, with a Distribute total evenly shortcut if you want a starting point.
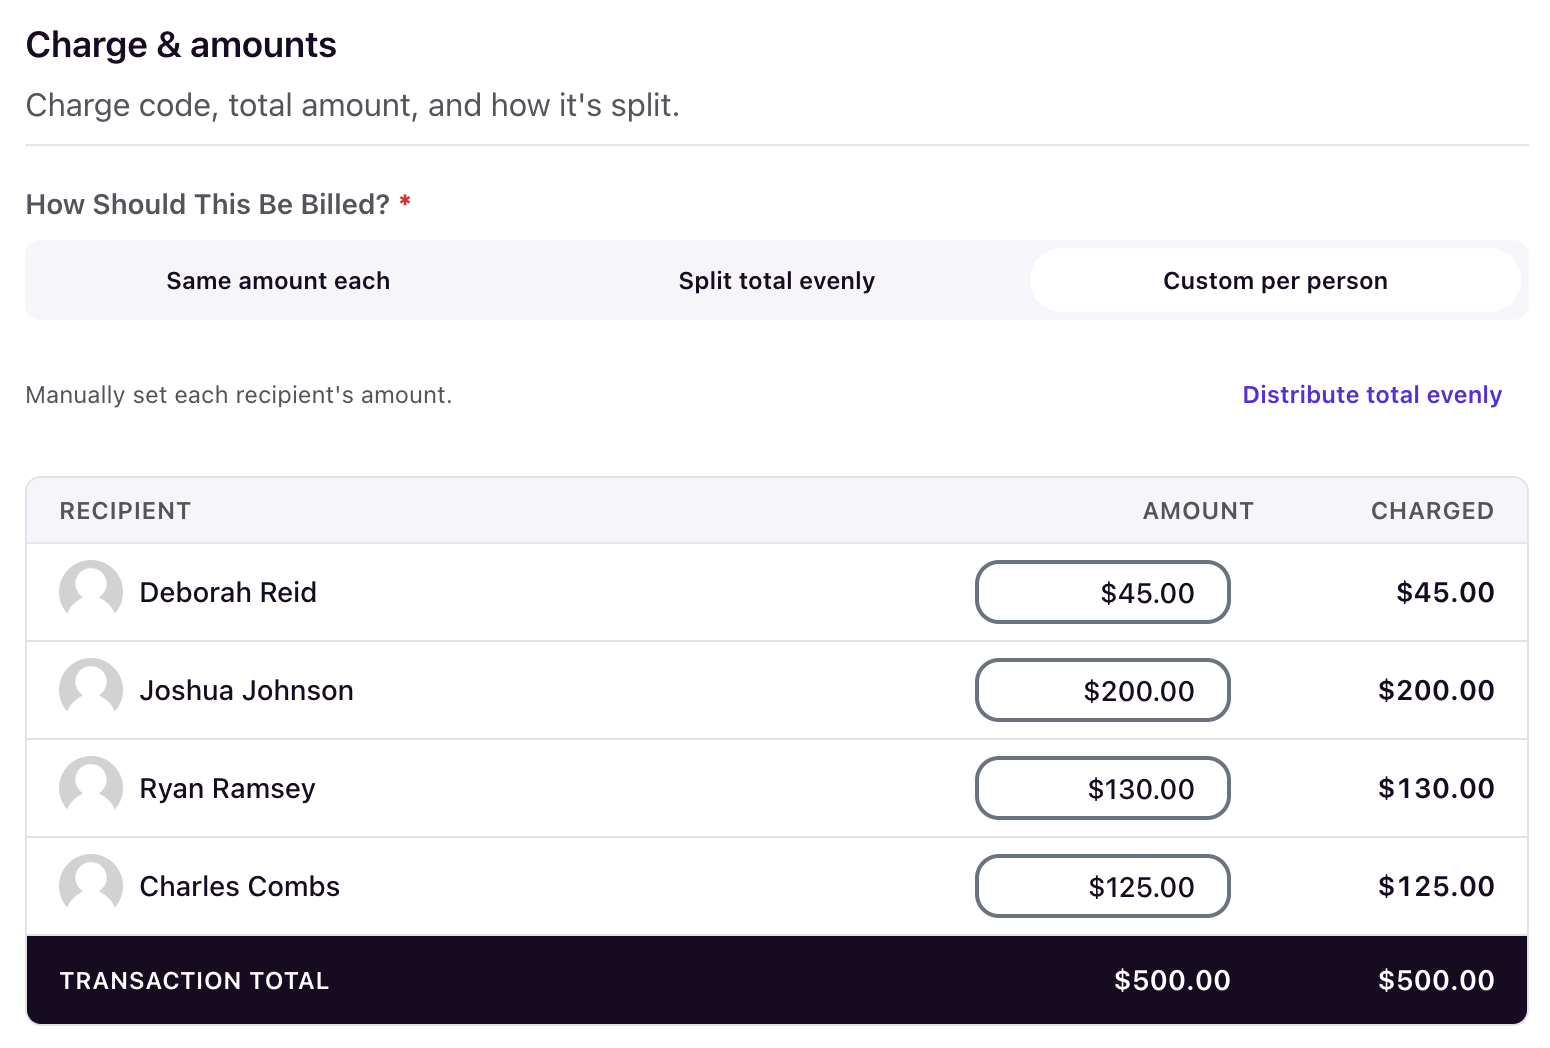
Whichever you choose, watch the footer: it shows your target total alongside the running charged total, and while the two don't match they both turn red and you can't continue. Once the charged total reconciles to the target, they return to black. When the amounts are set, click Continue.
Add the date and description
Now set when the transaction posts and what students will see. Choose the effective date and time, then write a description — it shows on the student's statement, so write it for them to read. Click Continue.
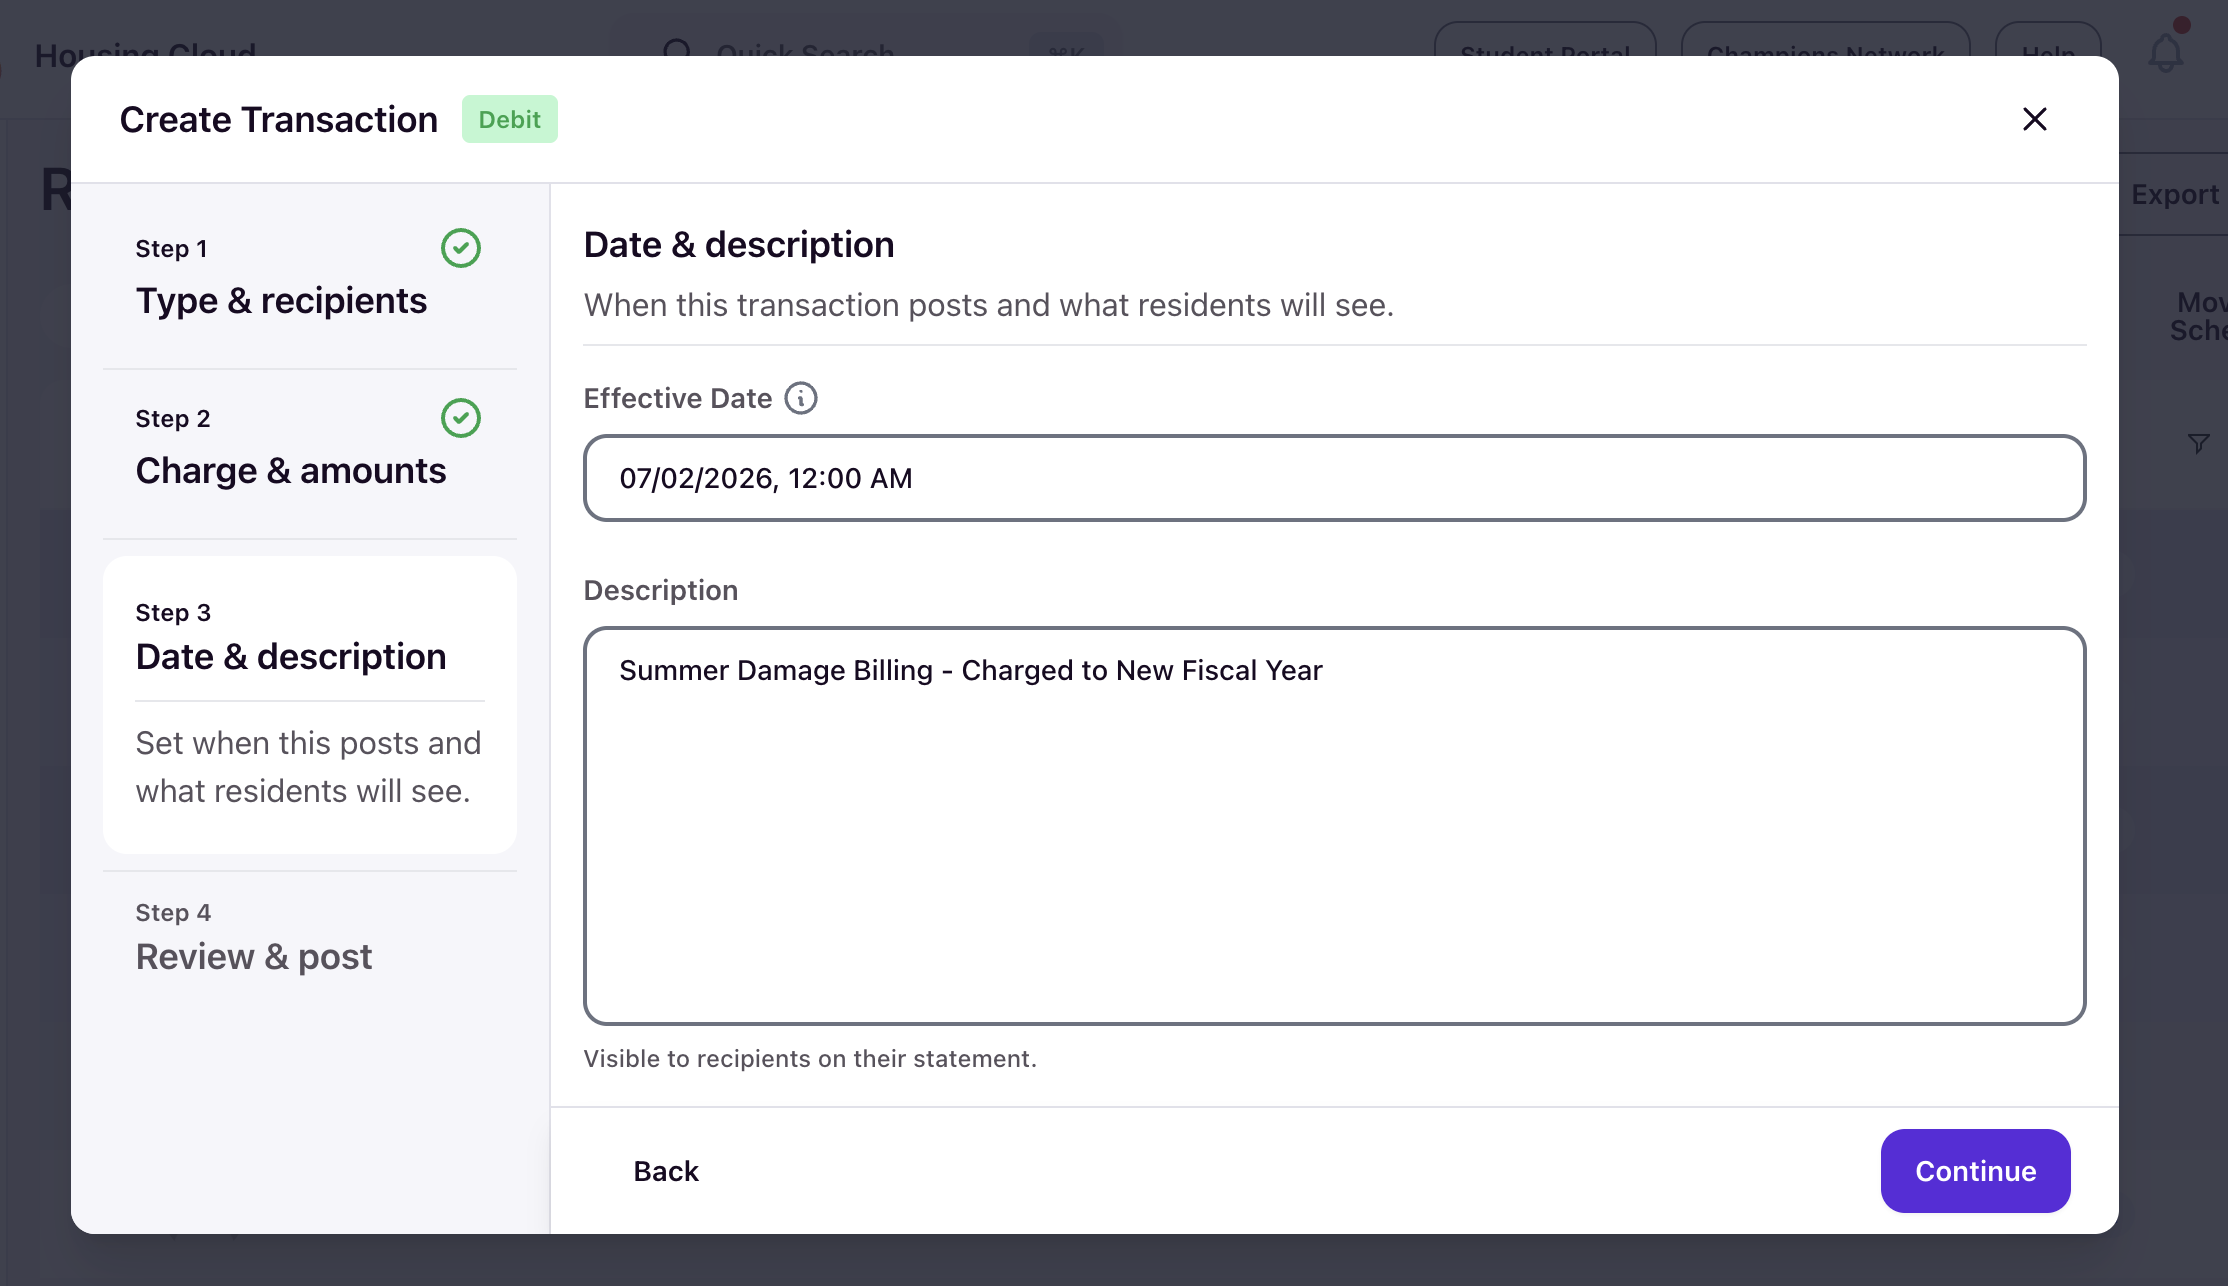
Note: The effective date can be the current moment or a future timestamp, which supports a range of finance processes. Most schools simply use the time the transaction is created, but check with your finance team if they require specific dates on transactions.
Review and post
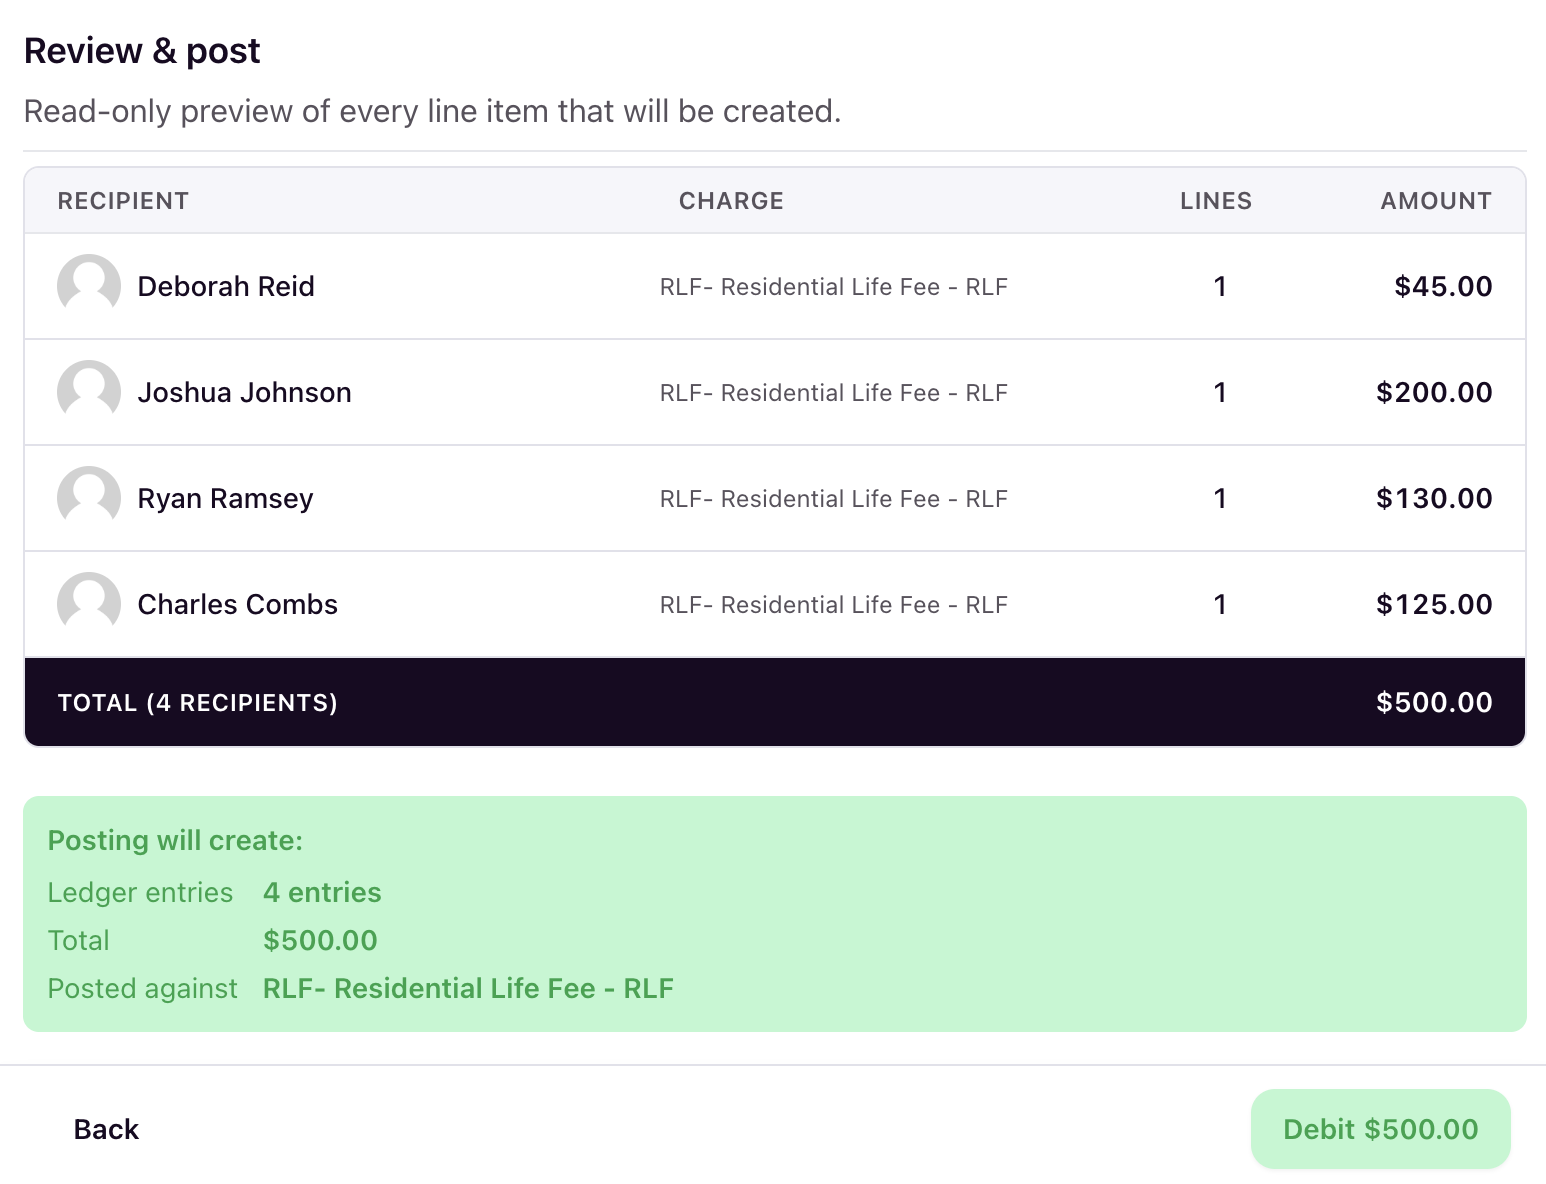
The last step is a read-only preview of every line item you're about to create. A summary panel confirms how many ledger entries will be created, the total, and the charge code everything posts against. When everything checks out, click the Debit (or Credit) button to post.
Confirm the result
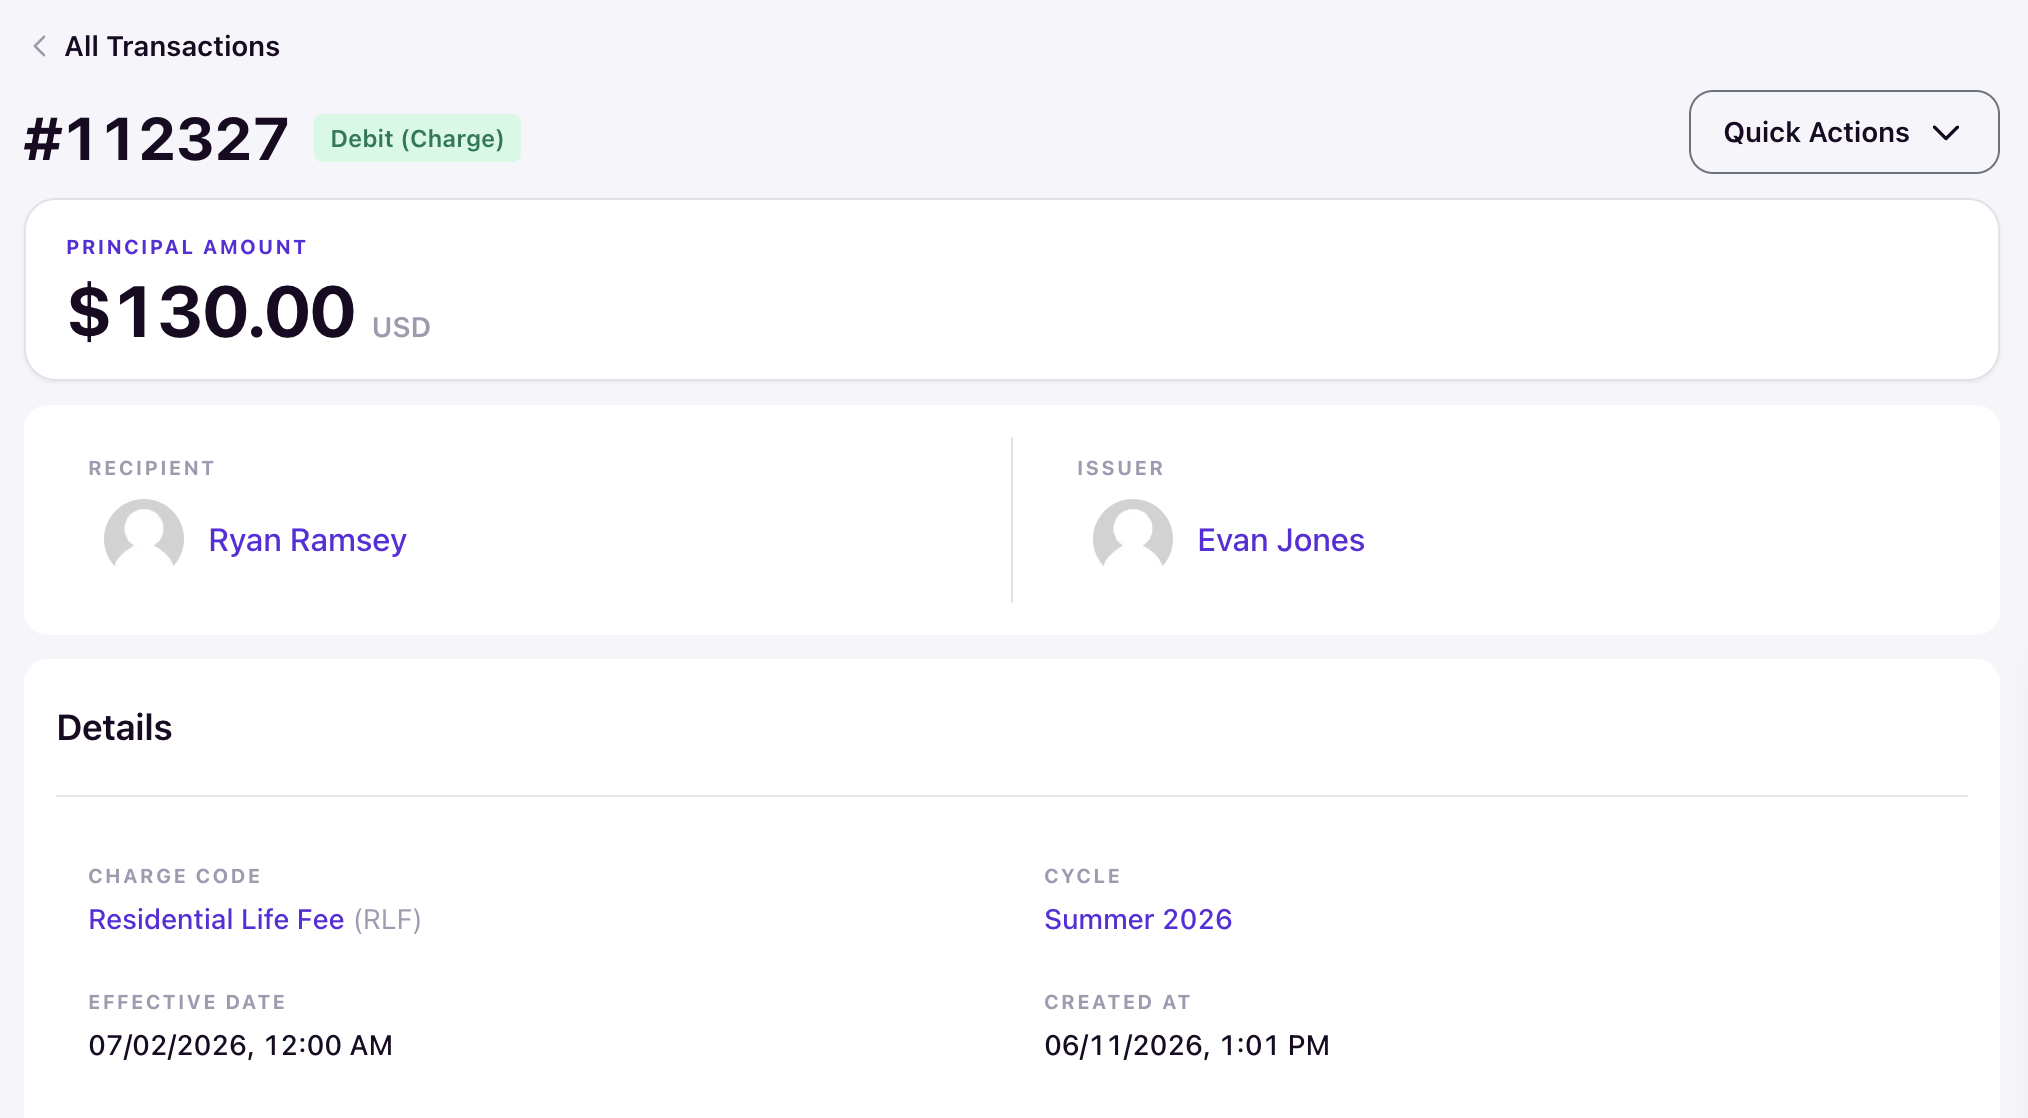
Your new transactions show up in Finance › Transactions with their effective date, amount, charge code, cycle, and issuer. Credits appear as negative amounts. Use Filters to narrow to a charge code or cycle, and click any ID to open its detail page, where you'll see the full record.
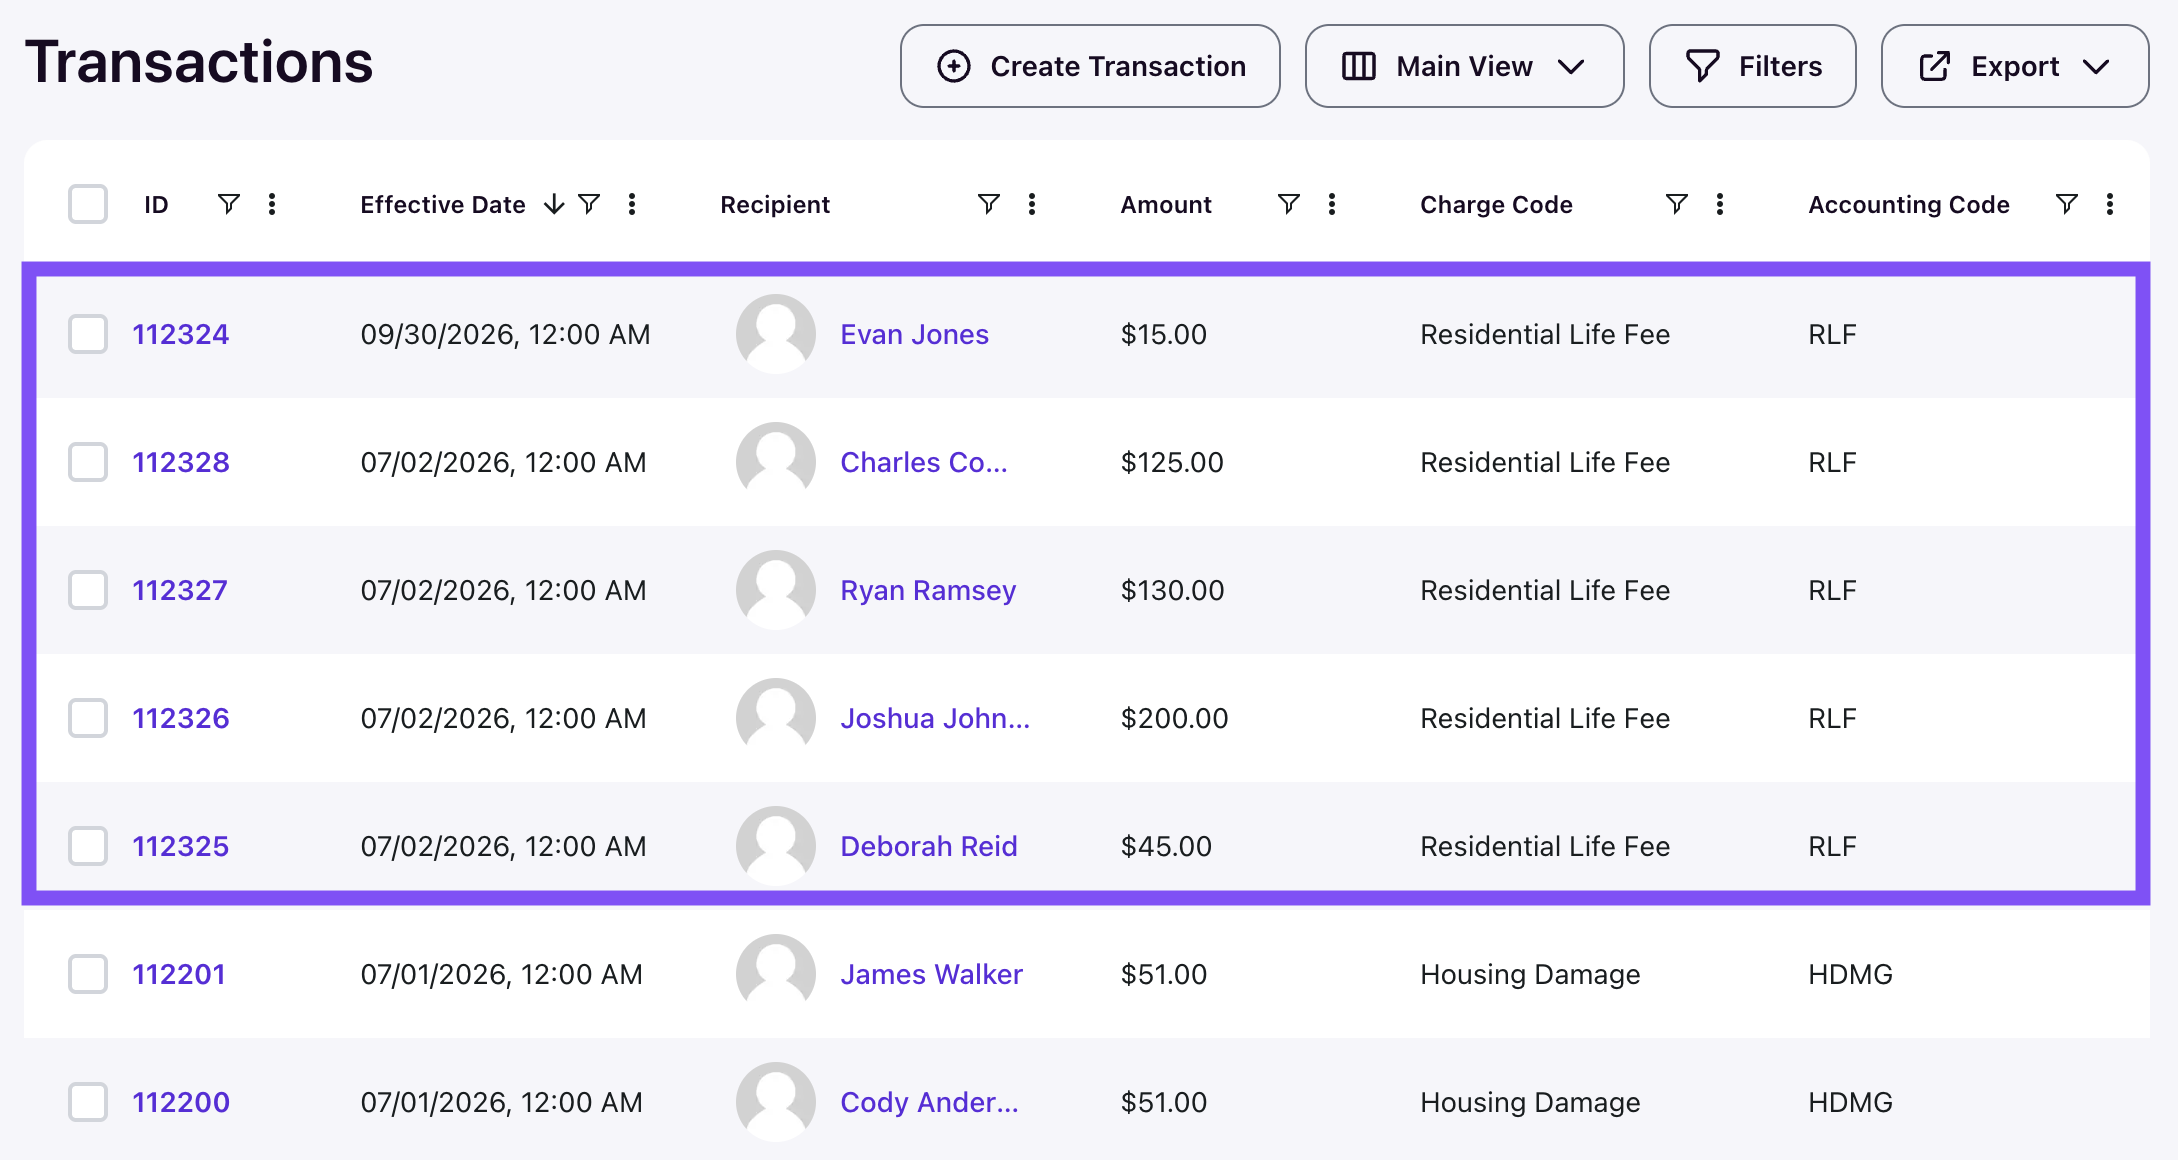
For more information, click the the Transaction ID to see more details about an individual transaction.