Set Up Mailrooms, Storage Locations and Mailroom Options
Last updated: October 8, 2026
The Mailroom lets a front desk log every package and envelope that arrives, tell the resident it is waiting, keep track of which shelf it sits on, and record who picked it up. Before any of that can happen, a mailroom manager sets up the desk itself in the admin portal: the mailroom, the storage locations clerks will shelve mail in, and the options that decide how long mail waits before it is flagged and who can receive it.
Mailroom setup lives at Admin → Mailroom, under the envelope icon in the admin sidebar, on two tabs: Mailrooms and Configuration. Setting it up needs the Manage mailroom manager permission (see Mailroom Permissions for Desk Staff and Managers).
Create a mailroom
On the Mailrooms tab, click Add Mailroom. The form asks for a name and at least one storage location, added one entry at a time. When everything is filled in, Create Mailroom saves it and shows a Mailroom created confirmation, and the mailroom appears as a card on the tab. Each card keeps Edit and Delete buttons for later.
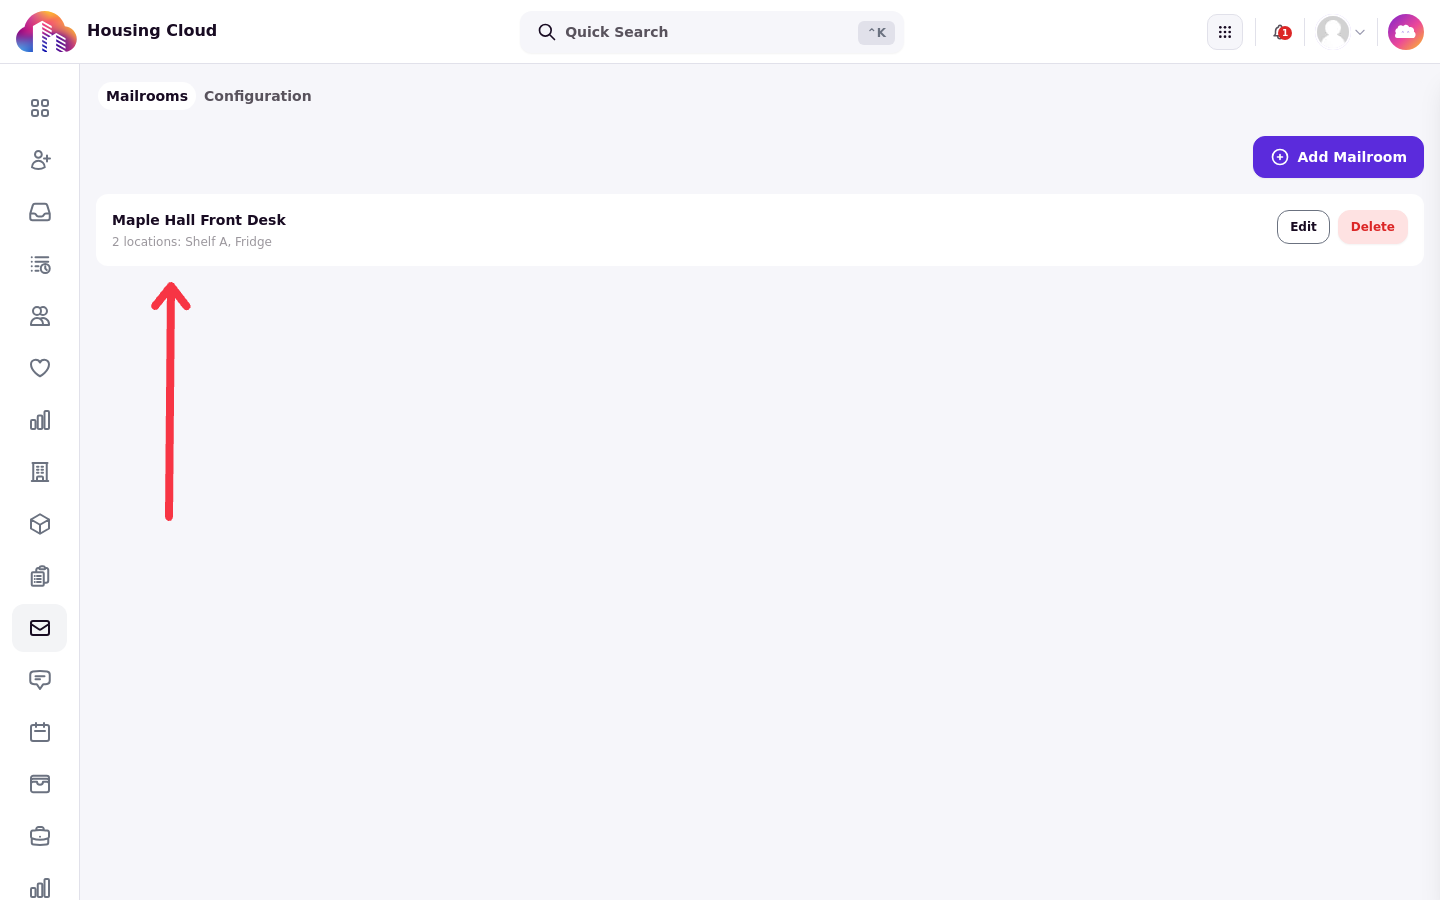
A school can have several mailrooms, each with its own storage locations, such as one desk per hall. See Work Across Several Mailrooms for how staff move between them.
Storage locations
Storage locations are the shelves, bins and cages mail is actually placed on: at a lobby desk that might be Shelf A, Shelf B, an Envelope Bin, an Oversize Cage and a Fridge. They are the choices clerks pick from when checking mail in, so name them the way the desk talks about its shelves.
Residents never see storage locations or mailroom names. They see that something is waiting, not which shelf it is on, so staff tell them where to go.
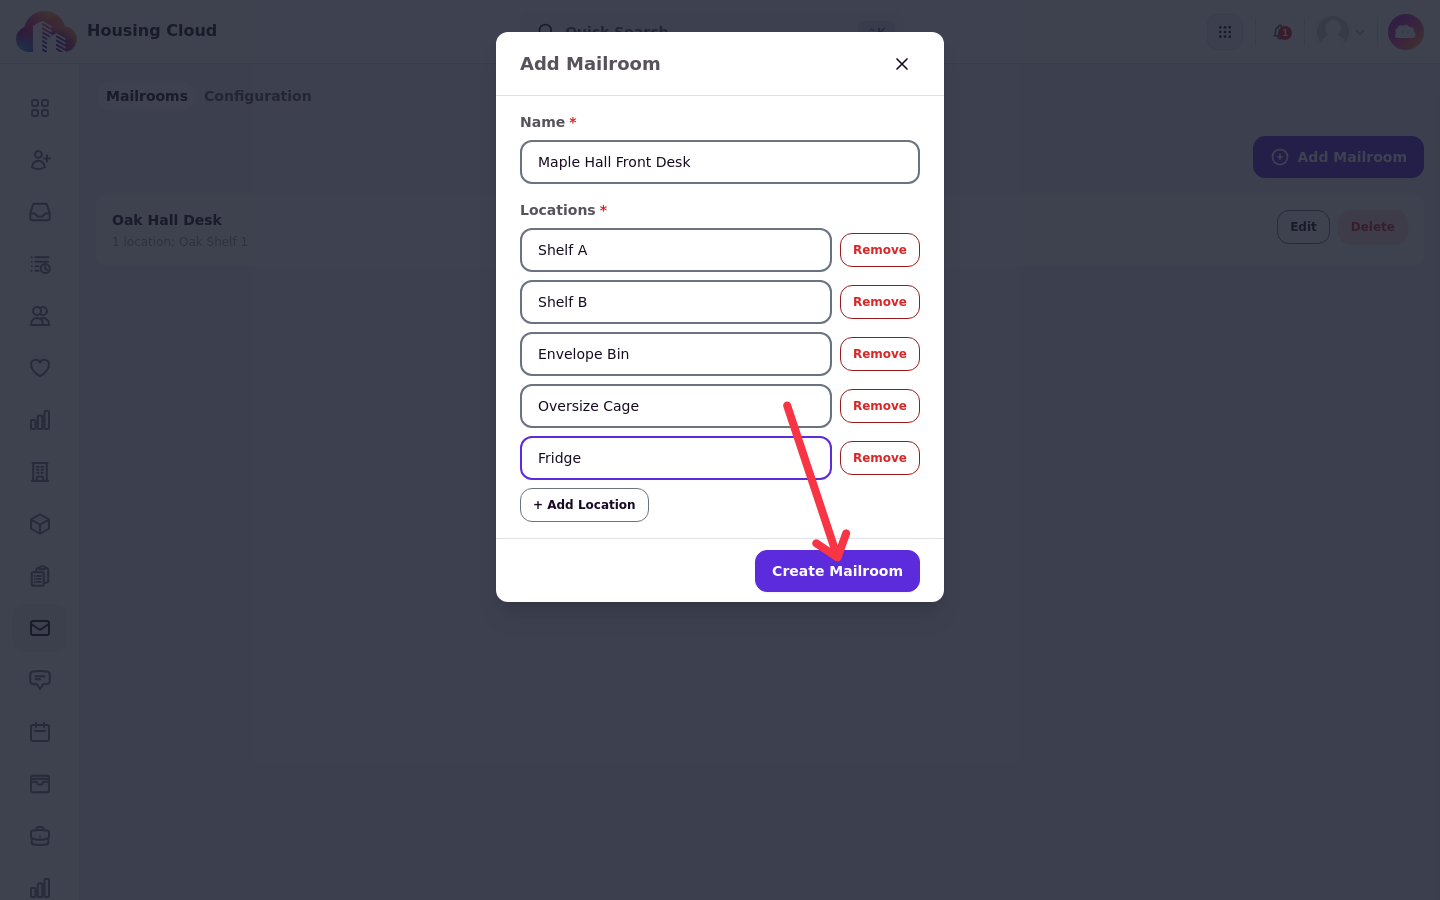
When a mailroom has no location, a clerk who tries to log mail into it sees This mailroom has no configured locations. Adding one here fixes it.
Mail Release Requirements
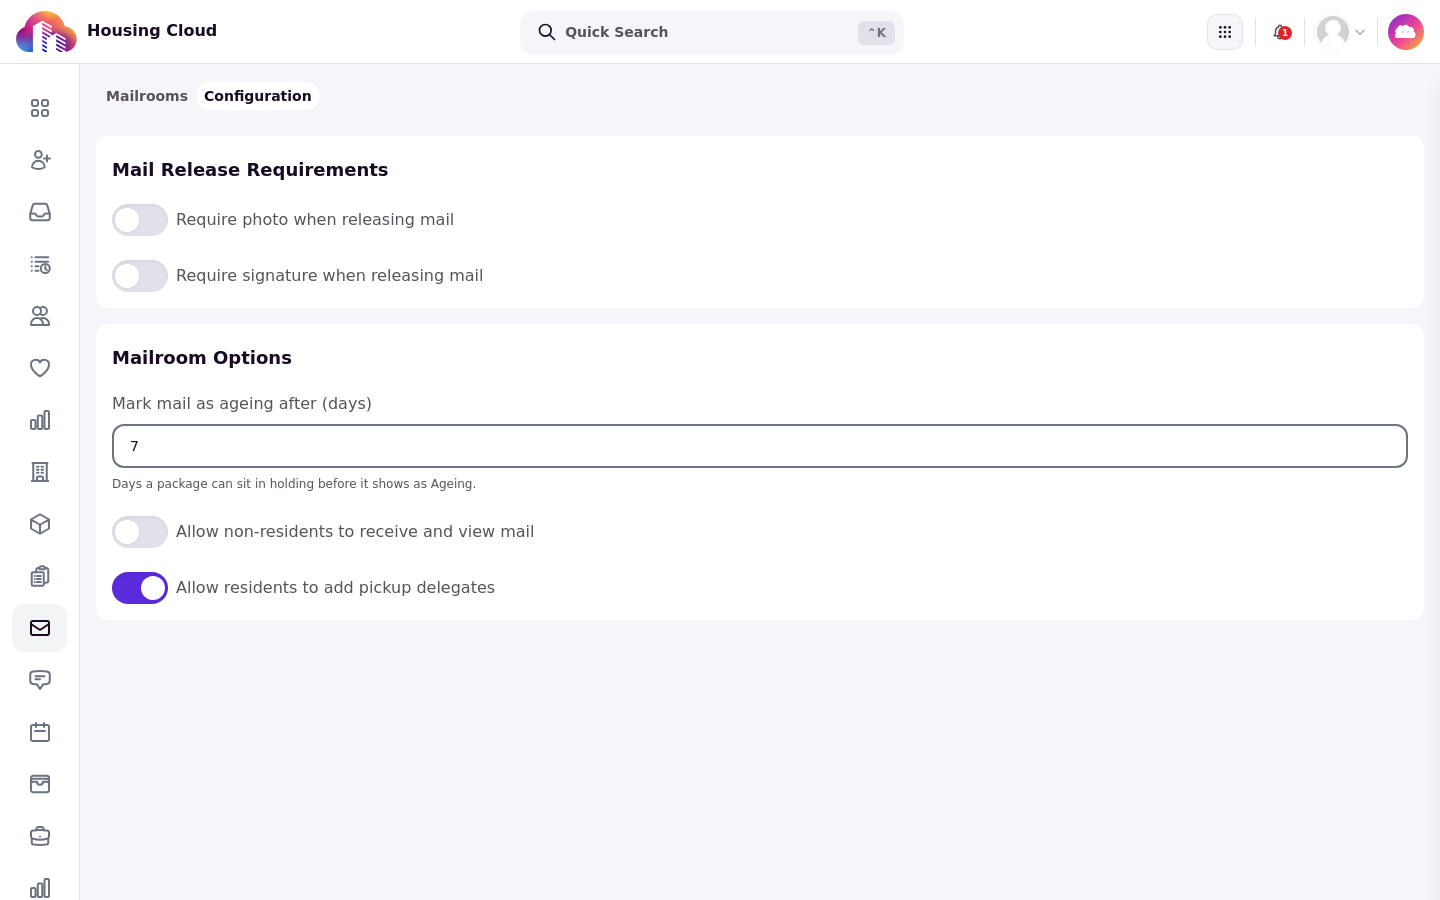
The Configuration tab holds what the desk must capture when handing mail over. Two switches sit under Mail Release Requirements: Require photo when releasing mail and Require signature when releasing mail. When a switch is on, the pickup screen marks the matching capture as required and the desk cannot complete the hand-off without it.
Mailroom Options
The Mailroom Options section decides how the mailroom treats waiting mail and who can take part:
Mark mail as ageing after (days) sets how many days mail waits before it is labelled Ageing, counted from the day the item was received. The value runs from 1 to 365 days and starts at 7. Changing it relabels existing mail straight away.
Allow non-residents to receive and view mail lets people without a current room receive and see mail. On by default, only current residents and staff can receive mail, and mail for a student who has moved out cannot be logged.
Allow residents to add pickup delegates lets residents name someone else who may collect their mail at the desk. Delegates are added in the resident portal, so this must be on for that flow to exist.
Good to know
Mailrooms are not tied to buildings. Any desk can log mail for any resident; the Mailroom never checks that a recipient lives in the mailroom's building.
The Mailroom is switched on per school by Housing Cloud. Schools cannot turn it on themselves. If you do not see it, contact Housing Cloud.
Carriers are free text. There is no carrier list to configure, so no carrier setup is needed here.
Once the mailroom exists, give desk staff their permissions and start logging mail. The result is visible immediately on the Mailrooms tab as a card, and the desk works from the operations portal at /ops/mailroom.