Run a Test Drive: create a test profile
Last updated: October 8, 2026
Running a Test Drive clones a student into a temporary [TEST] profile through a five-step wizard. You choose what to copy, when the simulation starts, and when the test data deletes itself. The test profile is created in the background; you get a notification when it is ready to impersonate.
Before you start: Test Drive must be switched on for your school, and your role needs staff access plus the Create and manage test simulation profiles permission. The Service actions: impersonate, audit logs etc permission is not needed to create a test profile; it is needed separately to impersonate the profile once it is ready. See Permissions you need for impersonation and Test Drive.
Pick a source student
The source student is the template the test profile is cloned from. Use a demo student when you can: the test profile carries the source student's real details.
Open the Run Test Drive wizard
Open the source student's profile, click the … Profile actions button, and choose Run Test Drive from the Test drive action group in the profile actions menu.
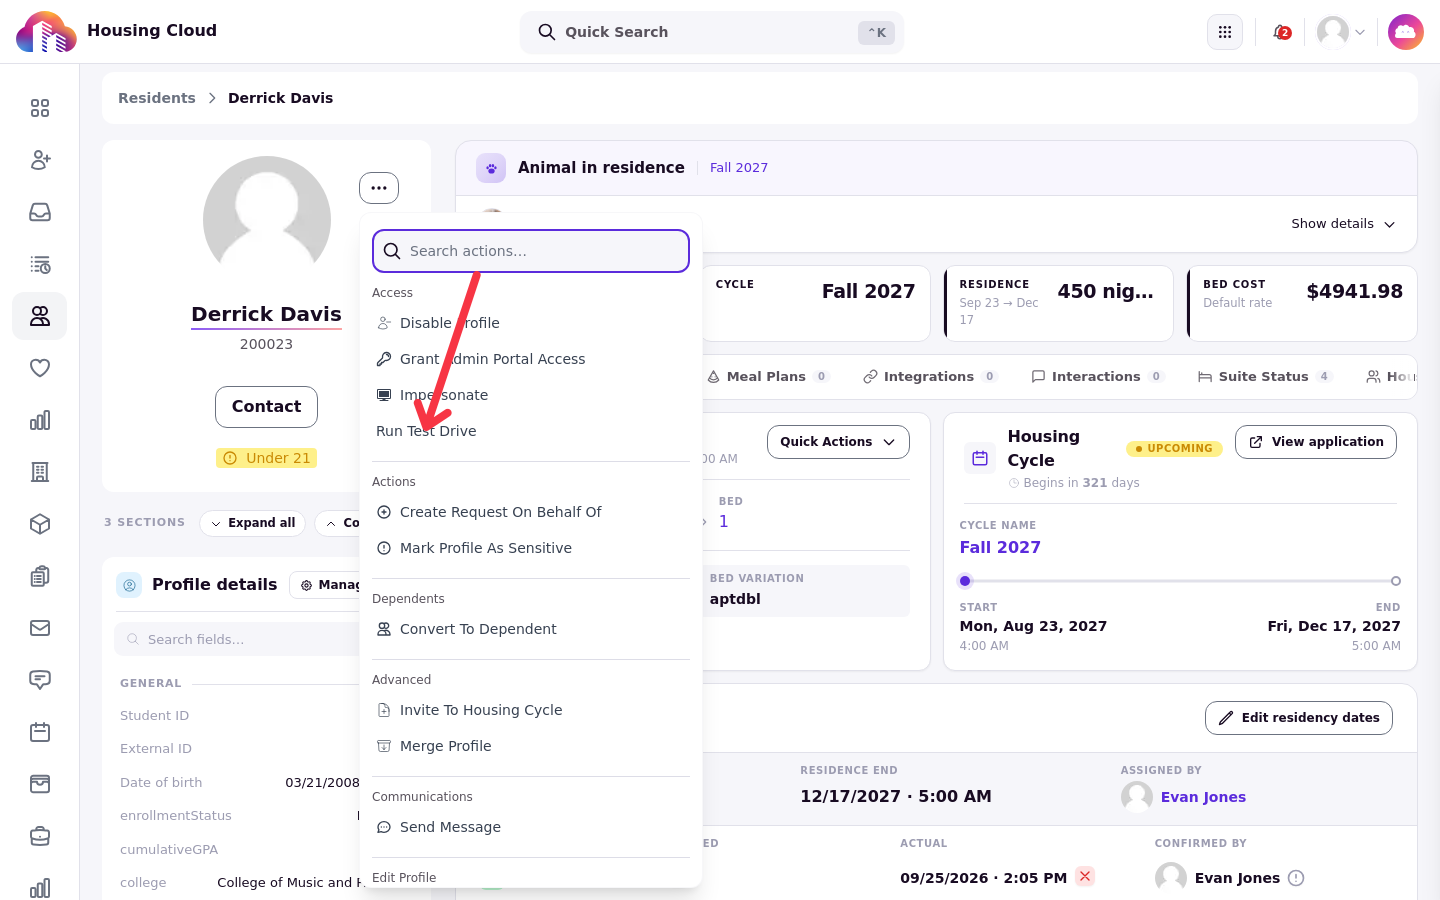
The Run Test Drive window opens with five steps on the left: Profile Metadata, Source Selection, Clone Content, Teardown, and Review. The Profile Metadata step is first.
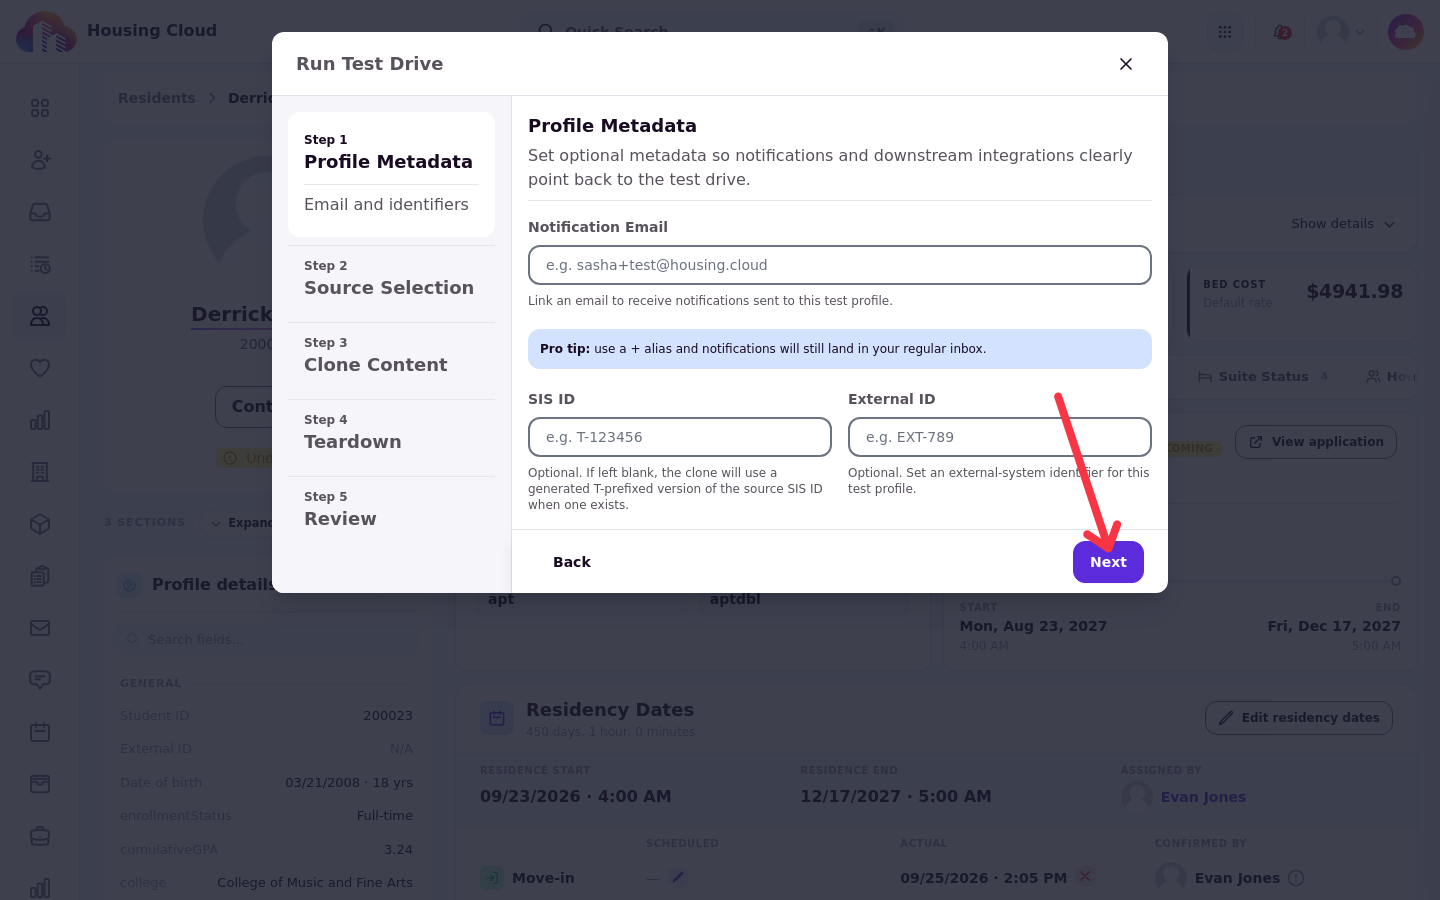
Profile Metadata
Set optional metadata so notifications and downstream integrations clearly point back to the test drive:
Notification Email: the email that receives notifications sent to this test profile. Emails triggered while you test really send, so set this if you want to see them. If you leave it blank, the test profile has no email address; the real student's email is not copied.
SIS ID (optional): if left blank, the clone uses a generated T-prefixed version of the source SIS ID when one exists.
External ID (optional): an external-system identifier for the test profile.
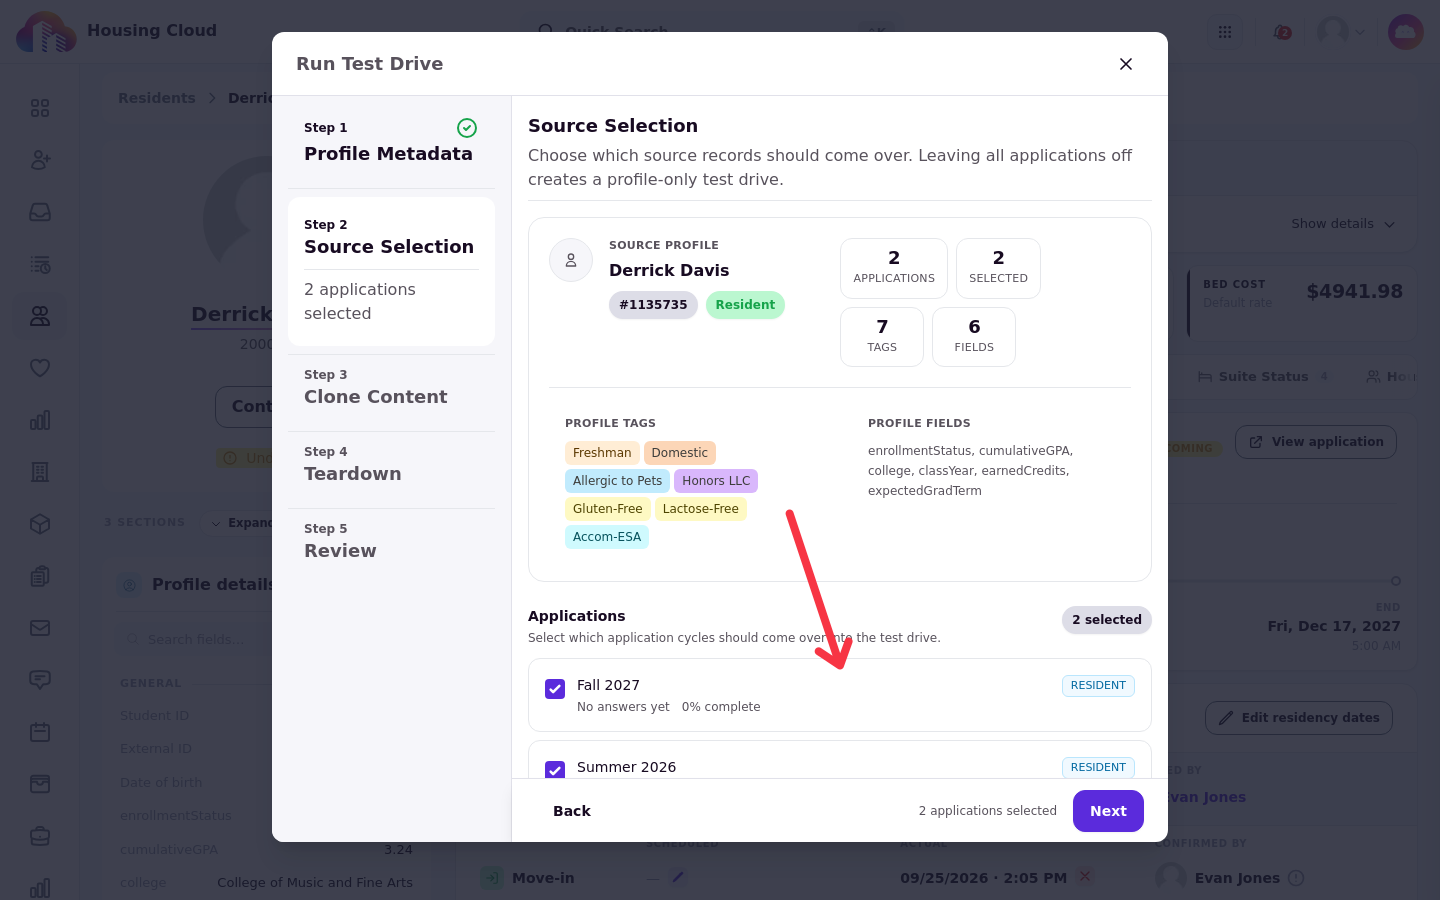
Source Selection
Choose which of the student's applications to copy into the test drive. Each application is a card with its cycle and status. Select none for a profile-only test drive with no applications.
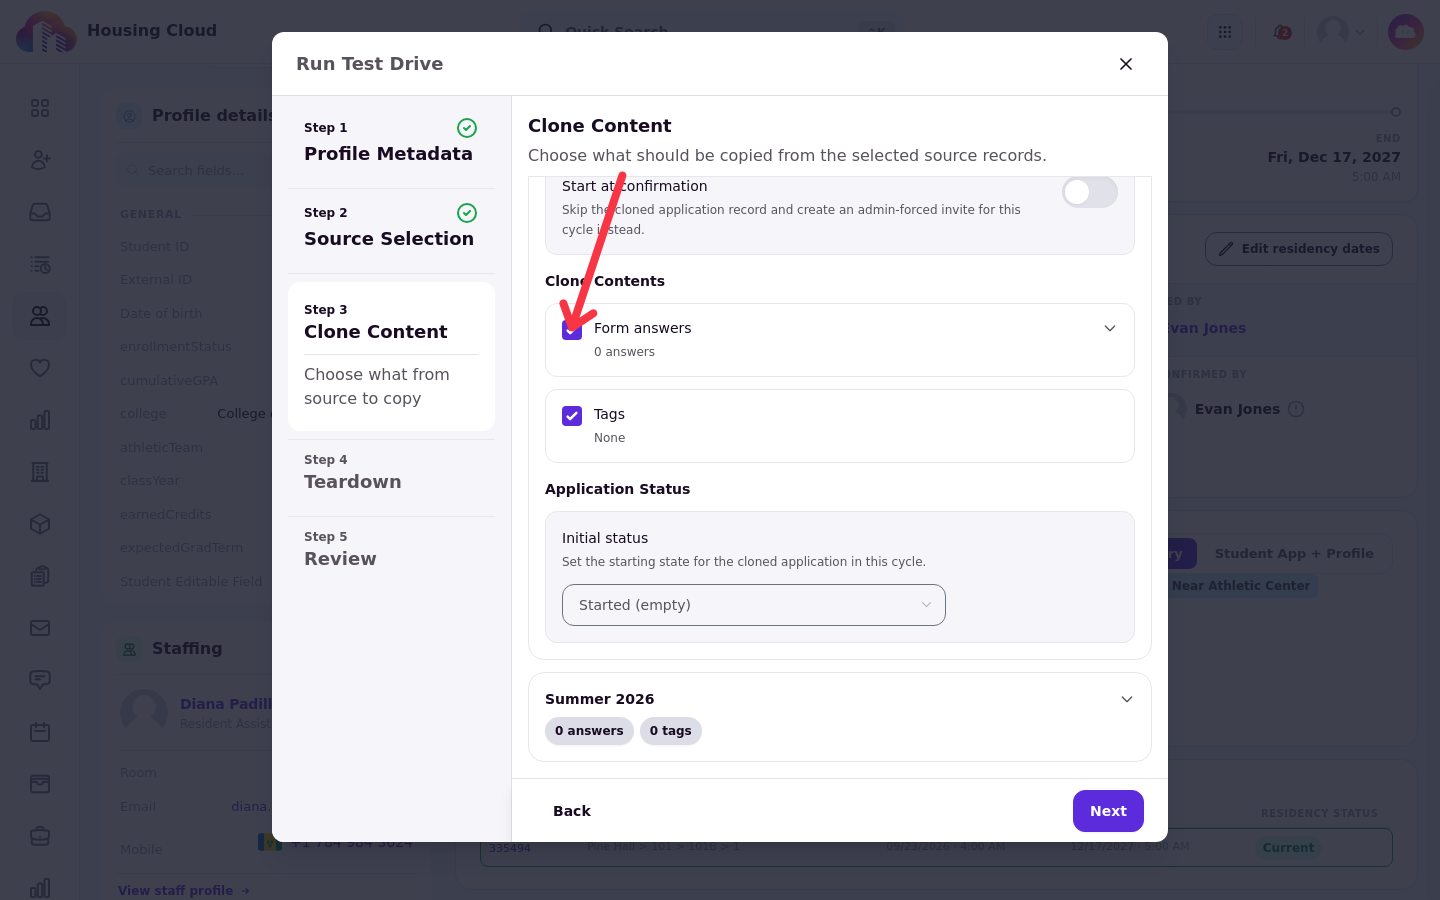
Clone Content
Expand an application card to choose what gets copied for it:
Start at confirmation: start the simulation at that application's confirmation point.
Clone Contents: tags, custom fields, and form answers.
Initial status: the status the copied application starts in.
Meal plan assignments and the matching (roommate) group are copied with their own controls; the Matching Group step only appears when you chose to copy roommates.
Teardown
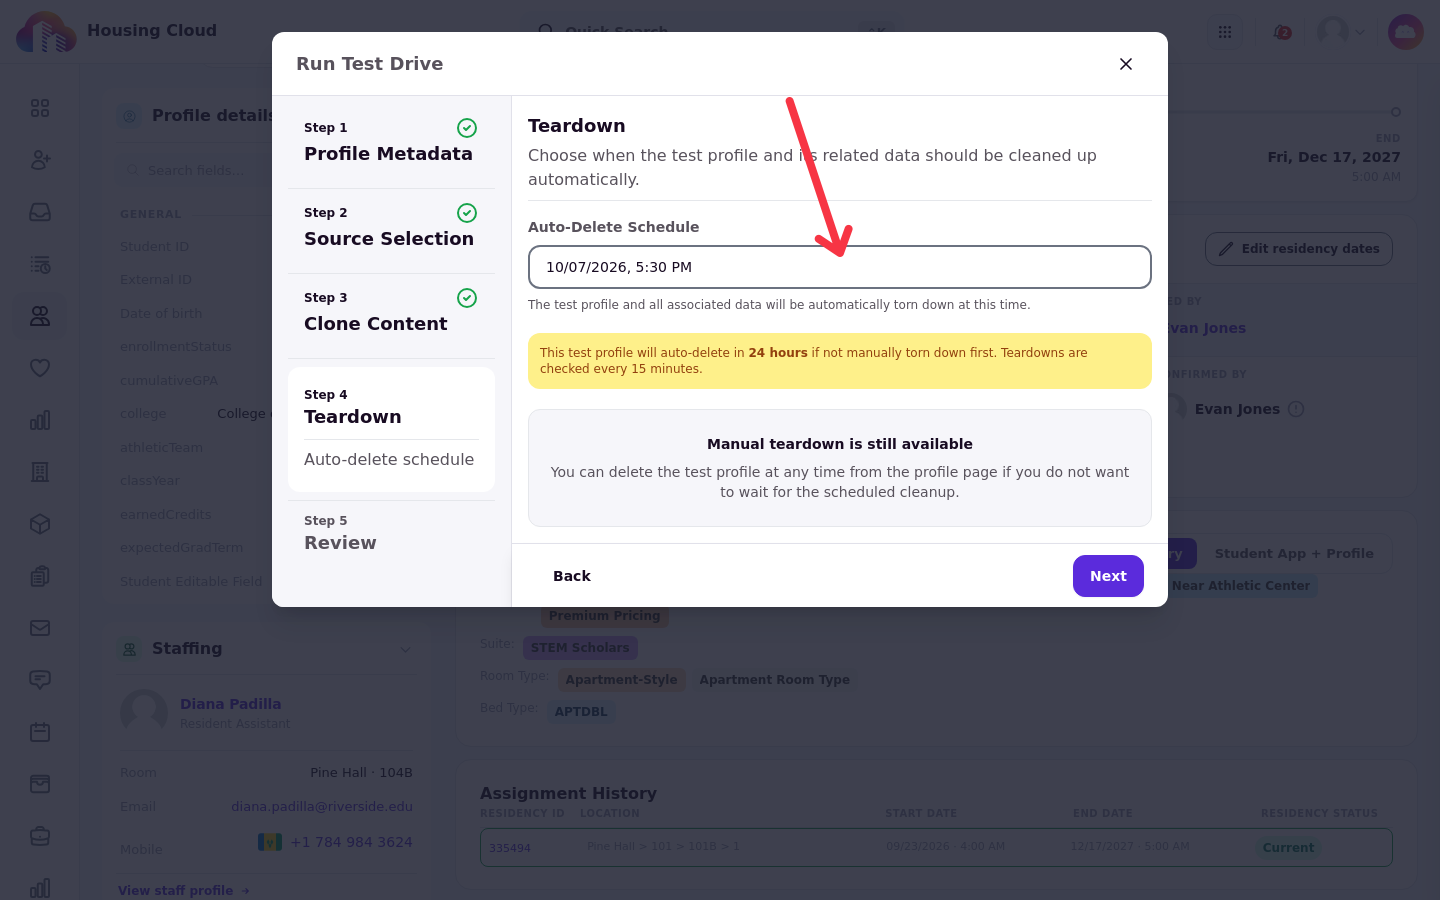
The Auto-Delete Schedule sets when the test profile deletes itself, 24 hours by default. The schedule is checked every 15 minutes, so a test profile can last up to 15 minutes past its scheduled time. Deleting removes the test profile and any cloned roommates; the source student is never changed.
Review and run
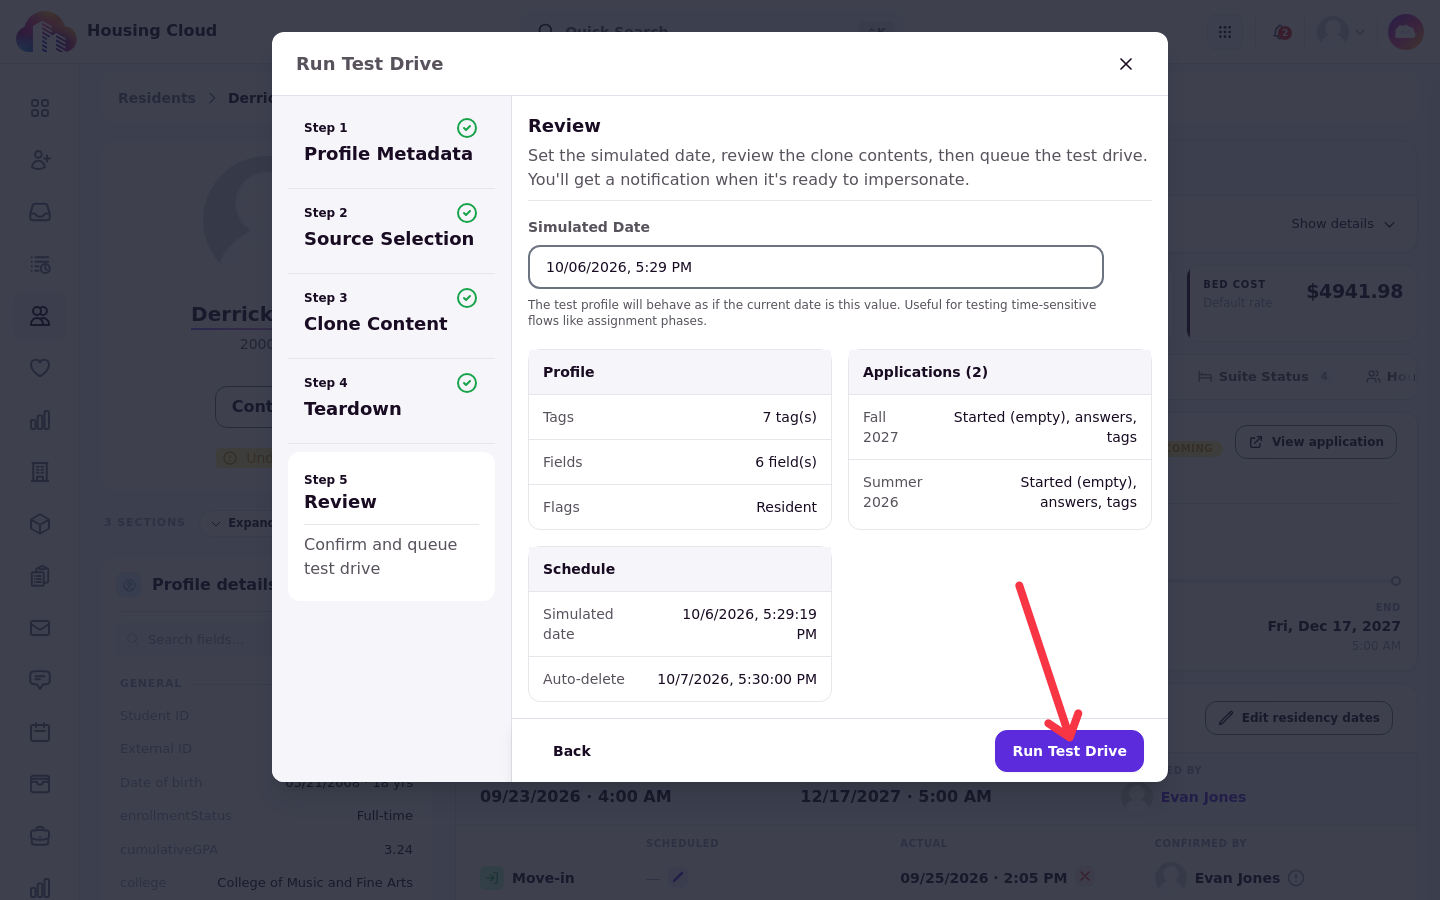
The Review step summarizes your choices, including the Simulated Date the test drive starts on, today by default. Click Run Test Drive at the bottom of the step.
What happens next
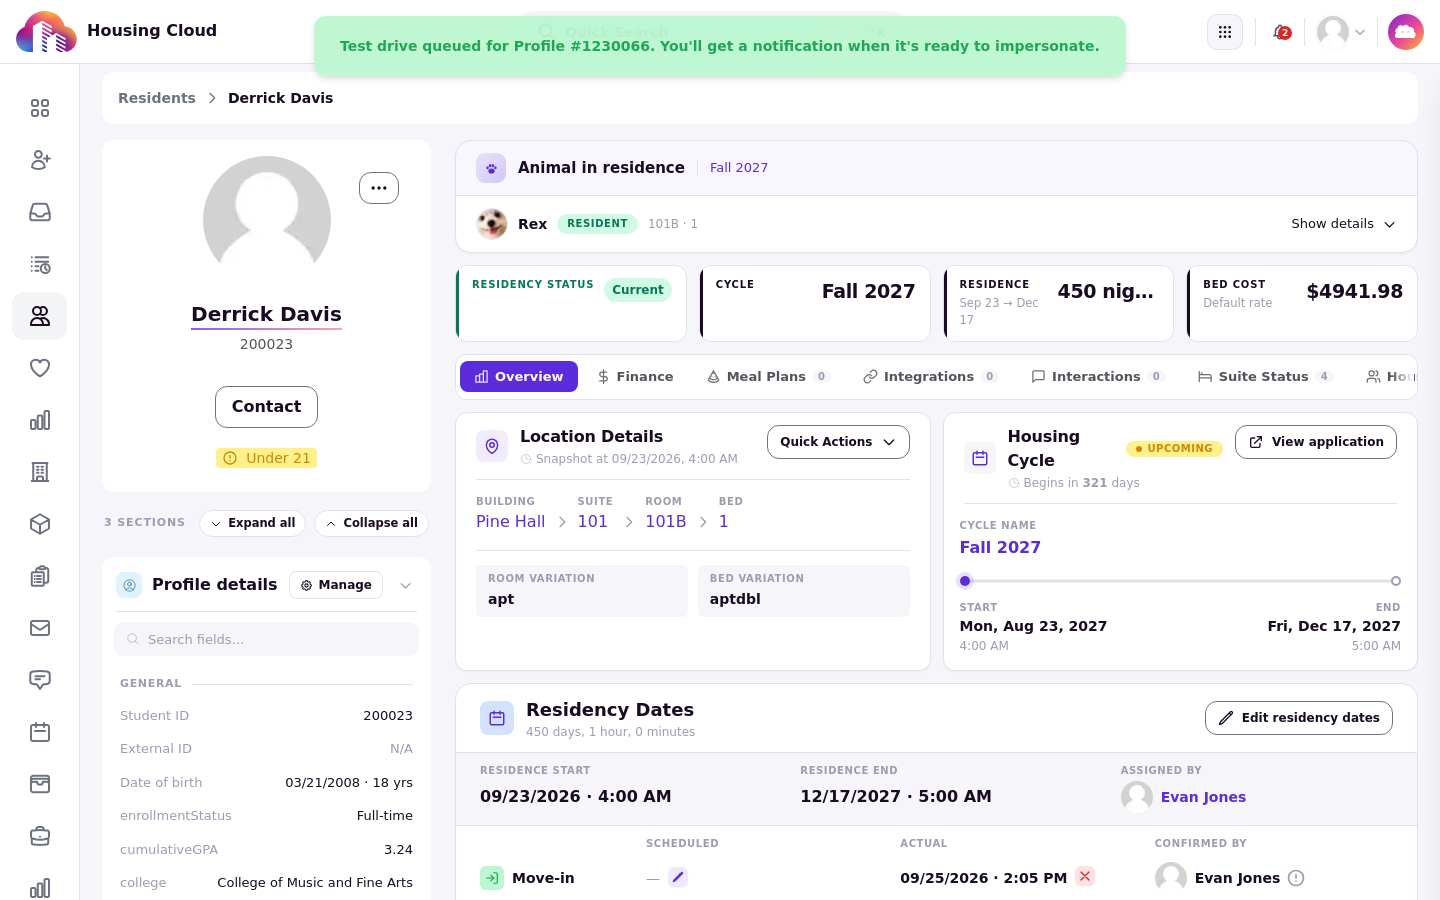
Submitting the wizard queues the simulation and shows a confirmation: Test drive queued for Profile #…
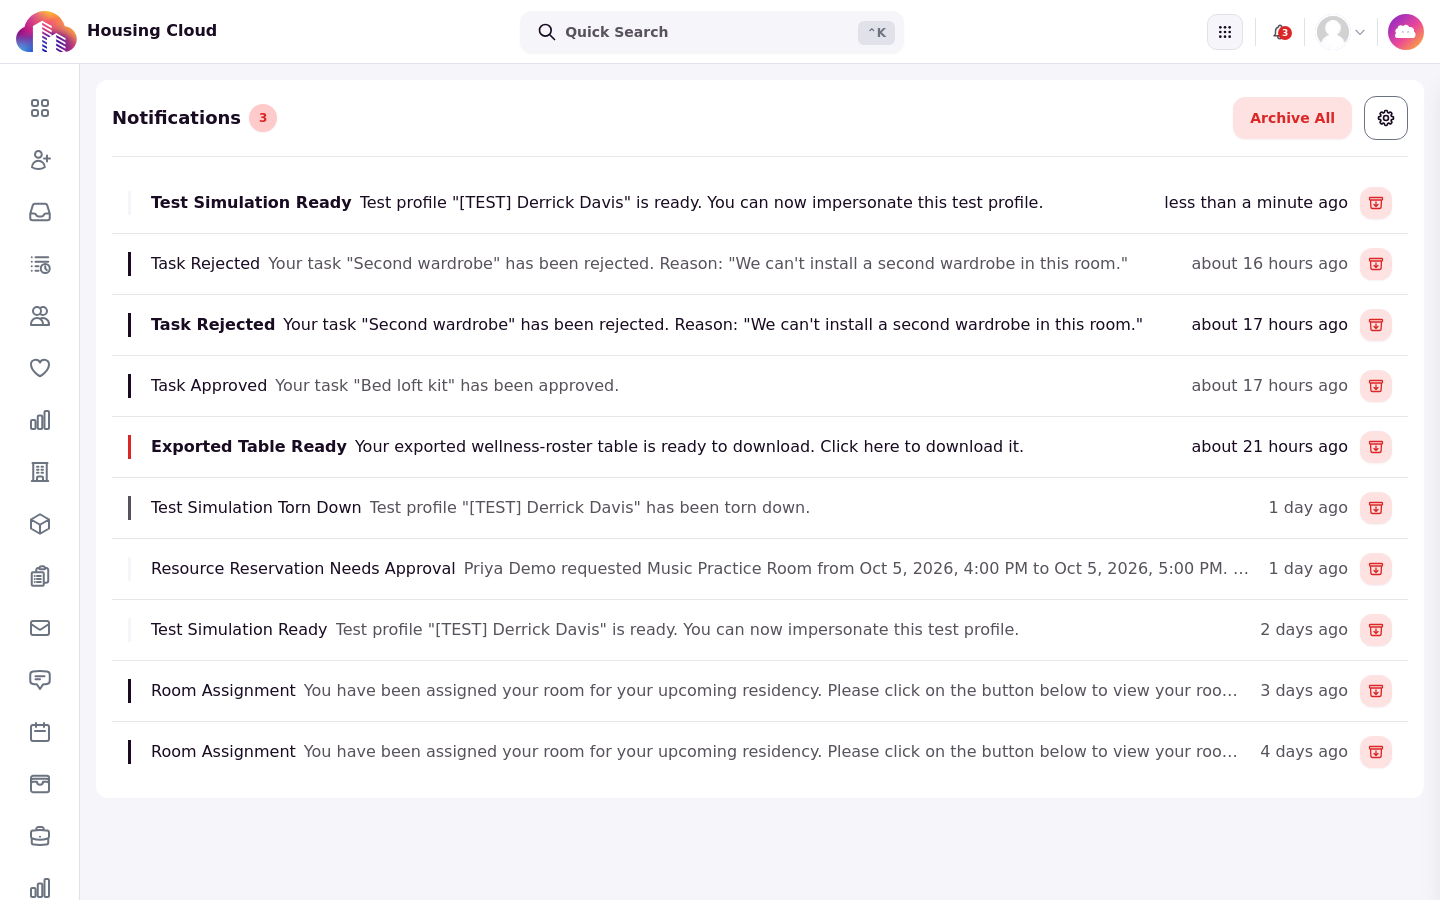
Creation runs in the background; when it finishes, an in-app notification tells you the test profile is ready to impersonate. If you instead see a creation-failed notification, the test profile was not created: see Test Drive troubleshooting.
Next step: open the test profile and get to know the Test Drive panel.