Quick Start — Set Up Your First Billing Schedule
Last updated: October 7, 2026
This walkthrough takes you from an empty workspace to a running recurring charge in about five minutes. You will create a billing schedule, assign a student, and see the first charge post to the student's ledger. Once the loop is working, day-to-day management is mostly monitoring and handling exceptions.
Scheduled Billing automates recurring charges so your team does not post each transaction manually. A schedule defines what to charge, how much, and when; the system generates individual charges on its own. This differs from one-time fees, which post a single charge and stop.
The example below uses a monthly parking fee, but the same workflow applies to rent installments, payment plans, or any charge that repeats on a fixed cadence.
Before you begin
The schedule needs an existing Charge Code if you are posting ledger charges, or an existing Fee Type if you are using a payment gateway.
The student you plan to assign must already have a profile in the system.
The Start Date must be in the future.
Open Billing Schedules
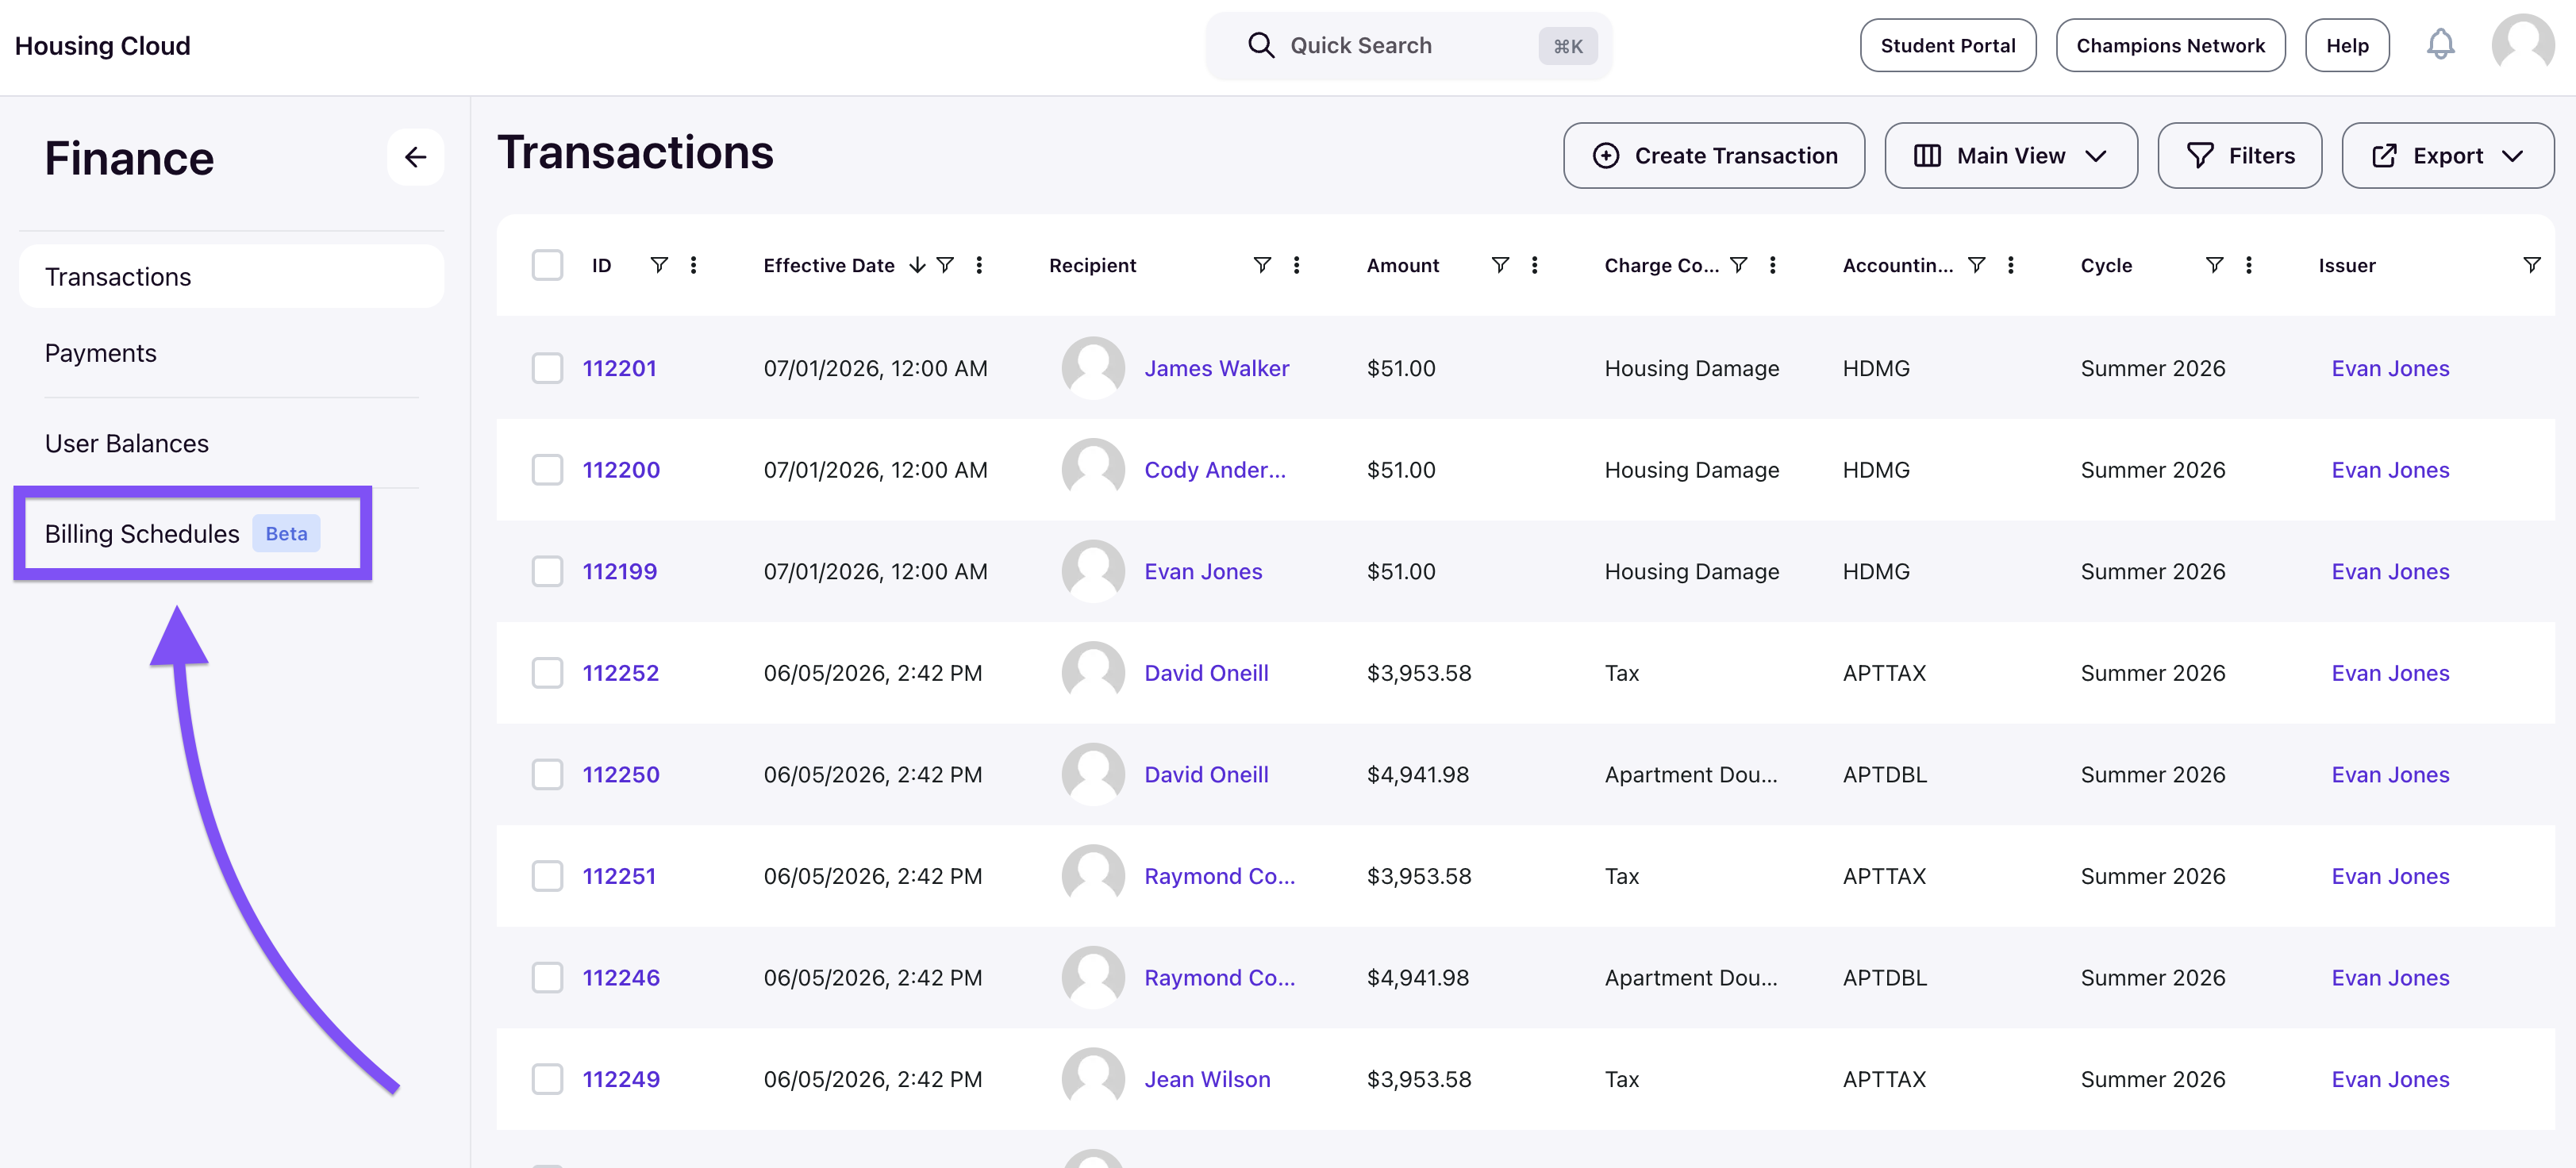
In the admin portal, select Finance in the left navigation and open Billing Schedules.
Create the schedule
Click Create Schedule and fill in the form. The example below sets up a $300 annual parking fee split across twelve monthly occurrences.
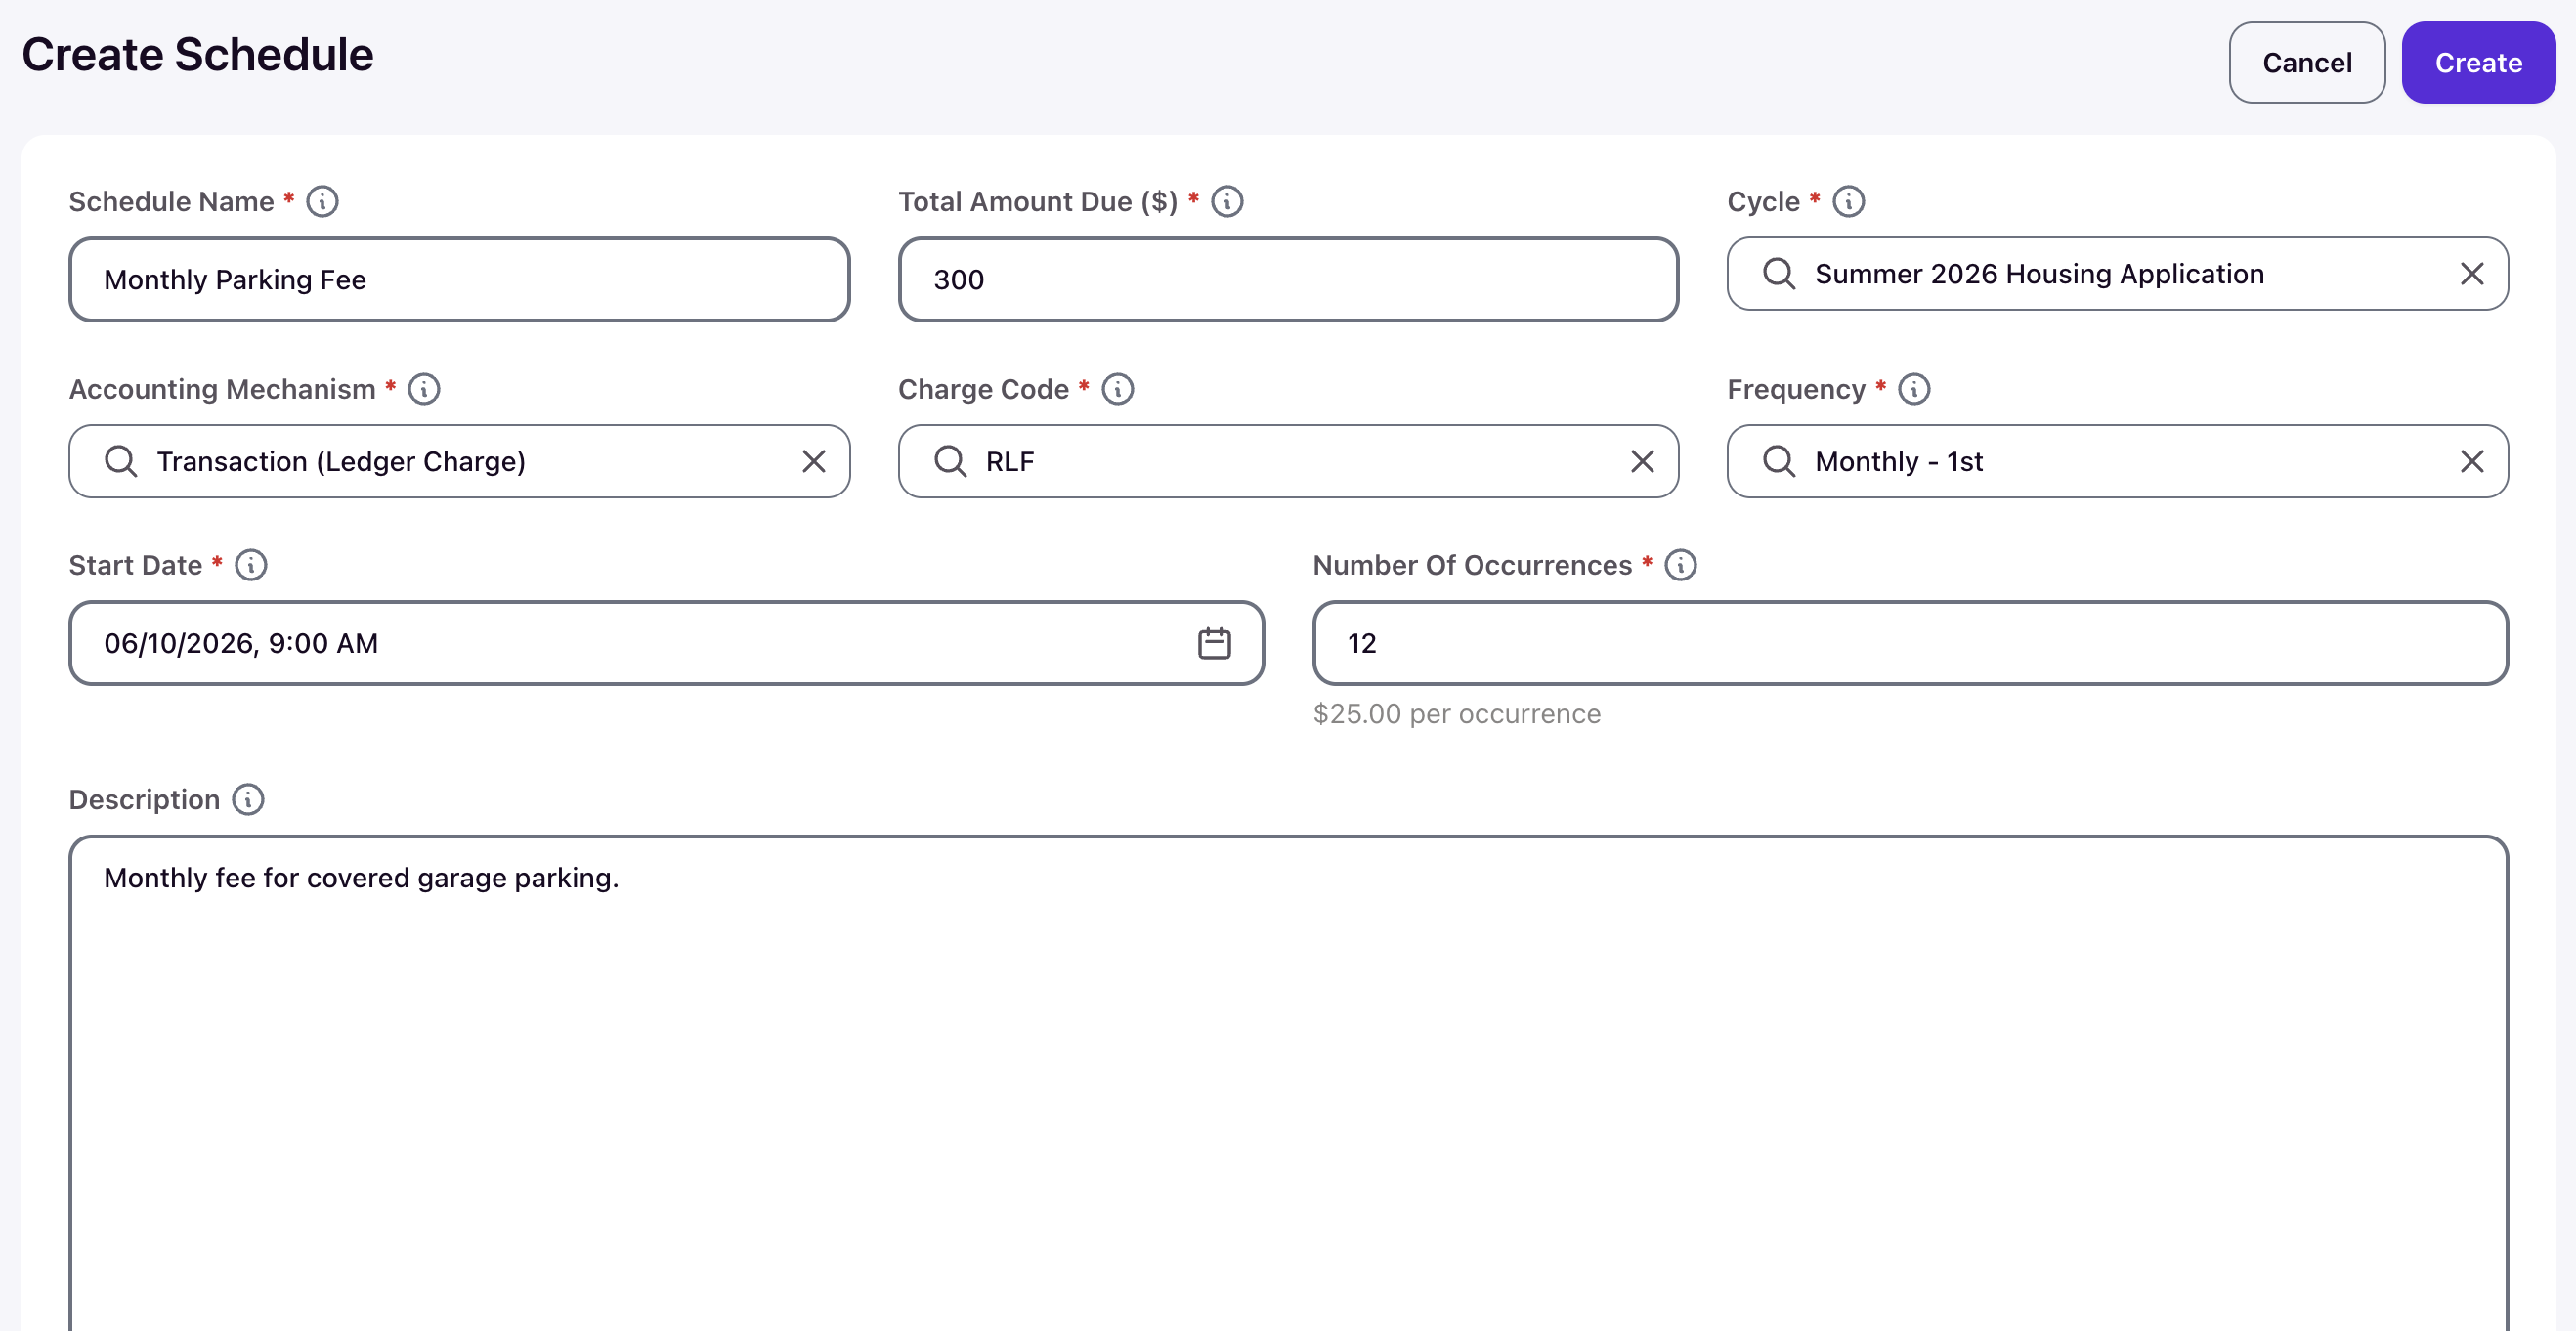
Enter Monthly Parking Fee as the Schedule Name. Enter 300 in Total Amount Due ($) — this is the total for the entire schedule, not per charge. Select your current Cycle, choose Transaction (Ledger Charge) as the Accounting Mechanism, and select the appropriate Charge Code. Set Frequency to Monthly - 1st, choose a future Start Date, and enter 12 in Number Of Occurrences. The helper text confirms the per-occurrence amount.
Click Create. The schedule opens with an Active badge and a computed End Date. The schedule now exists, but it will not bill anyone until you assign a student. For more details on each field, see 📄 Create a billing schedule.
Assign a resident
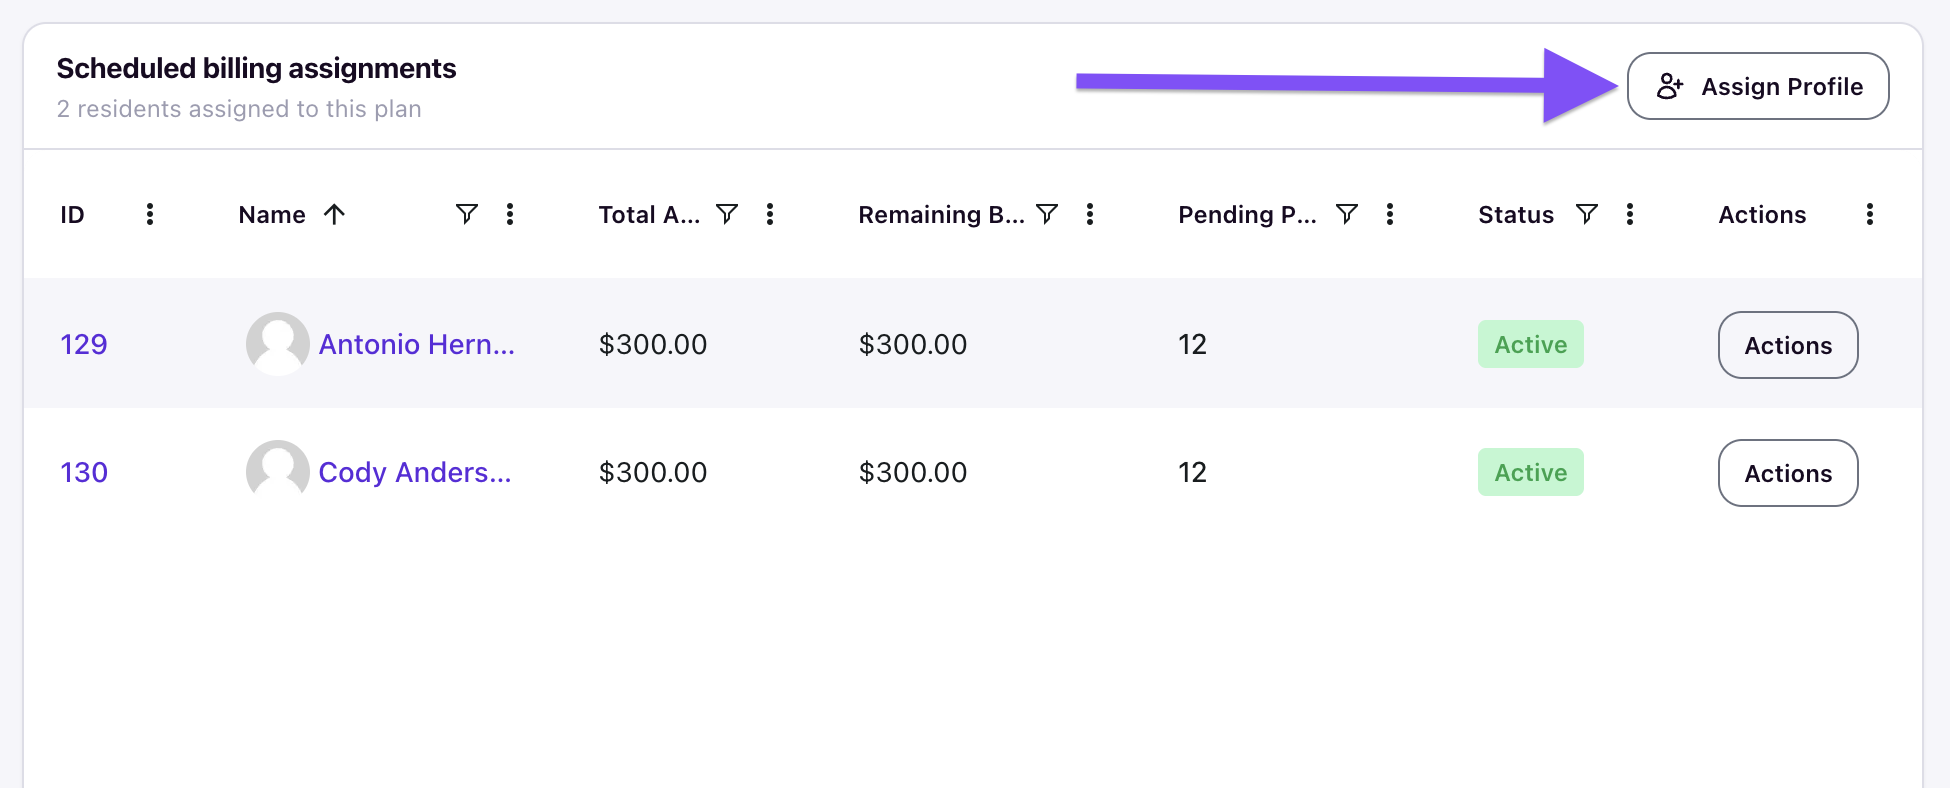
Scroll to the Scheduled billing assignments section and click Assign Profile.
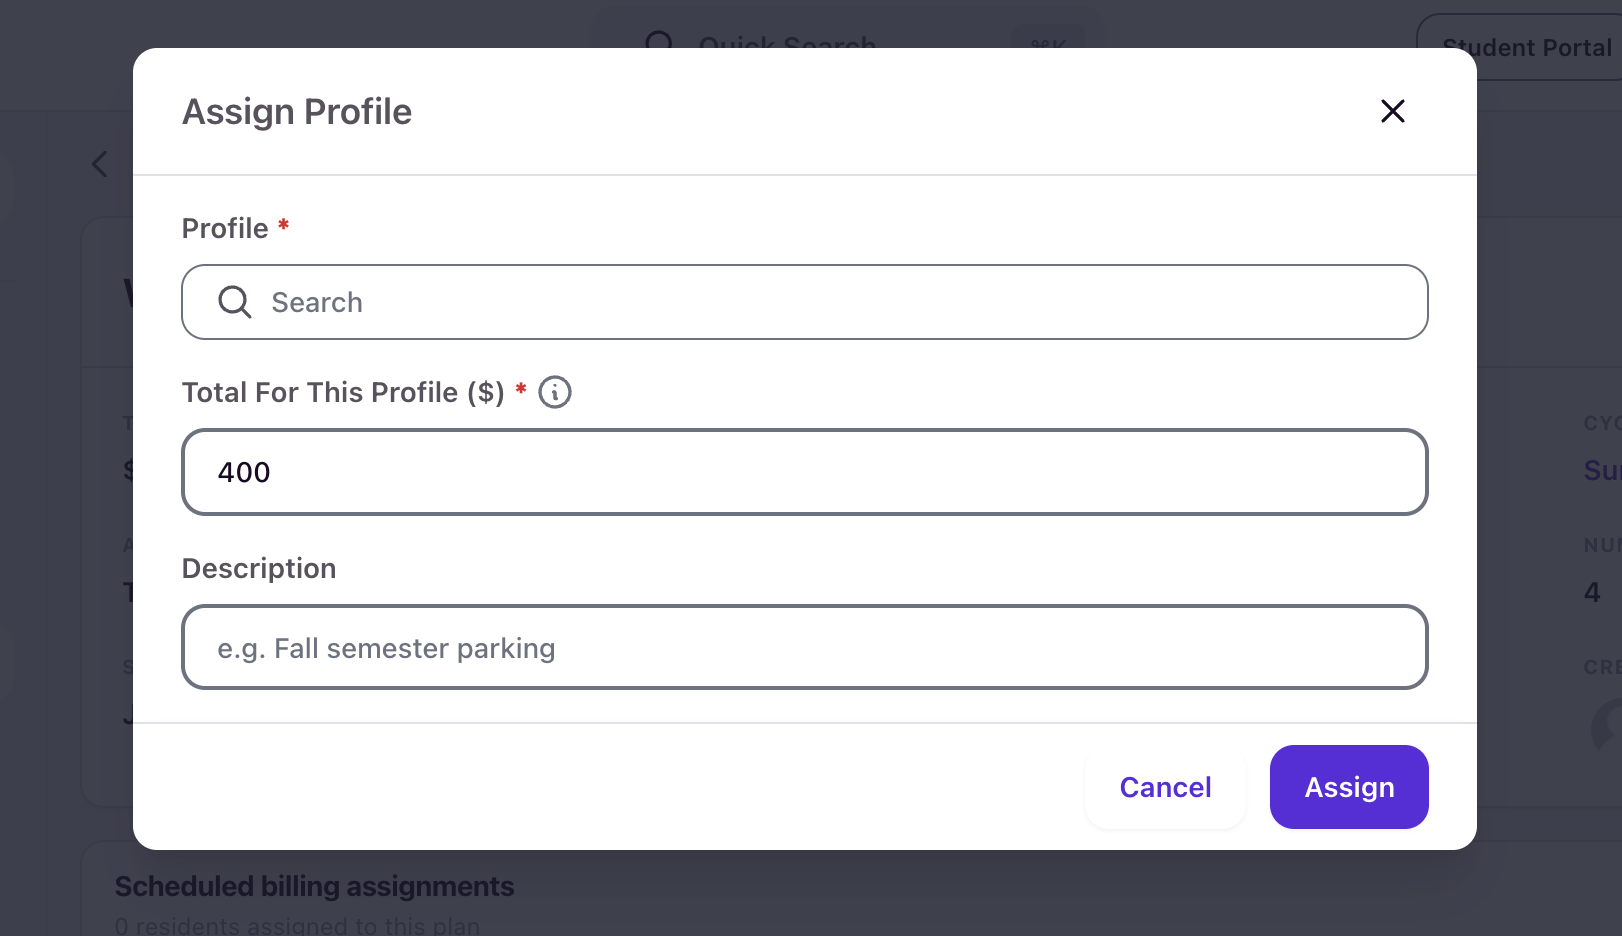
Search for the student, keep or override the Total For This Profile ($), and click Assign.
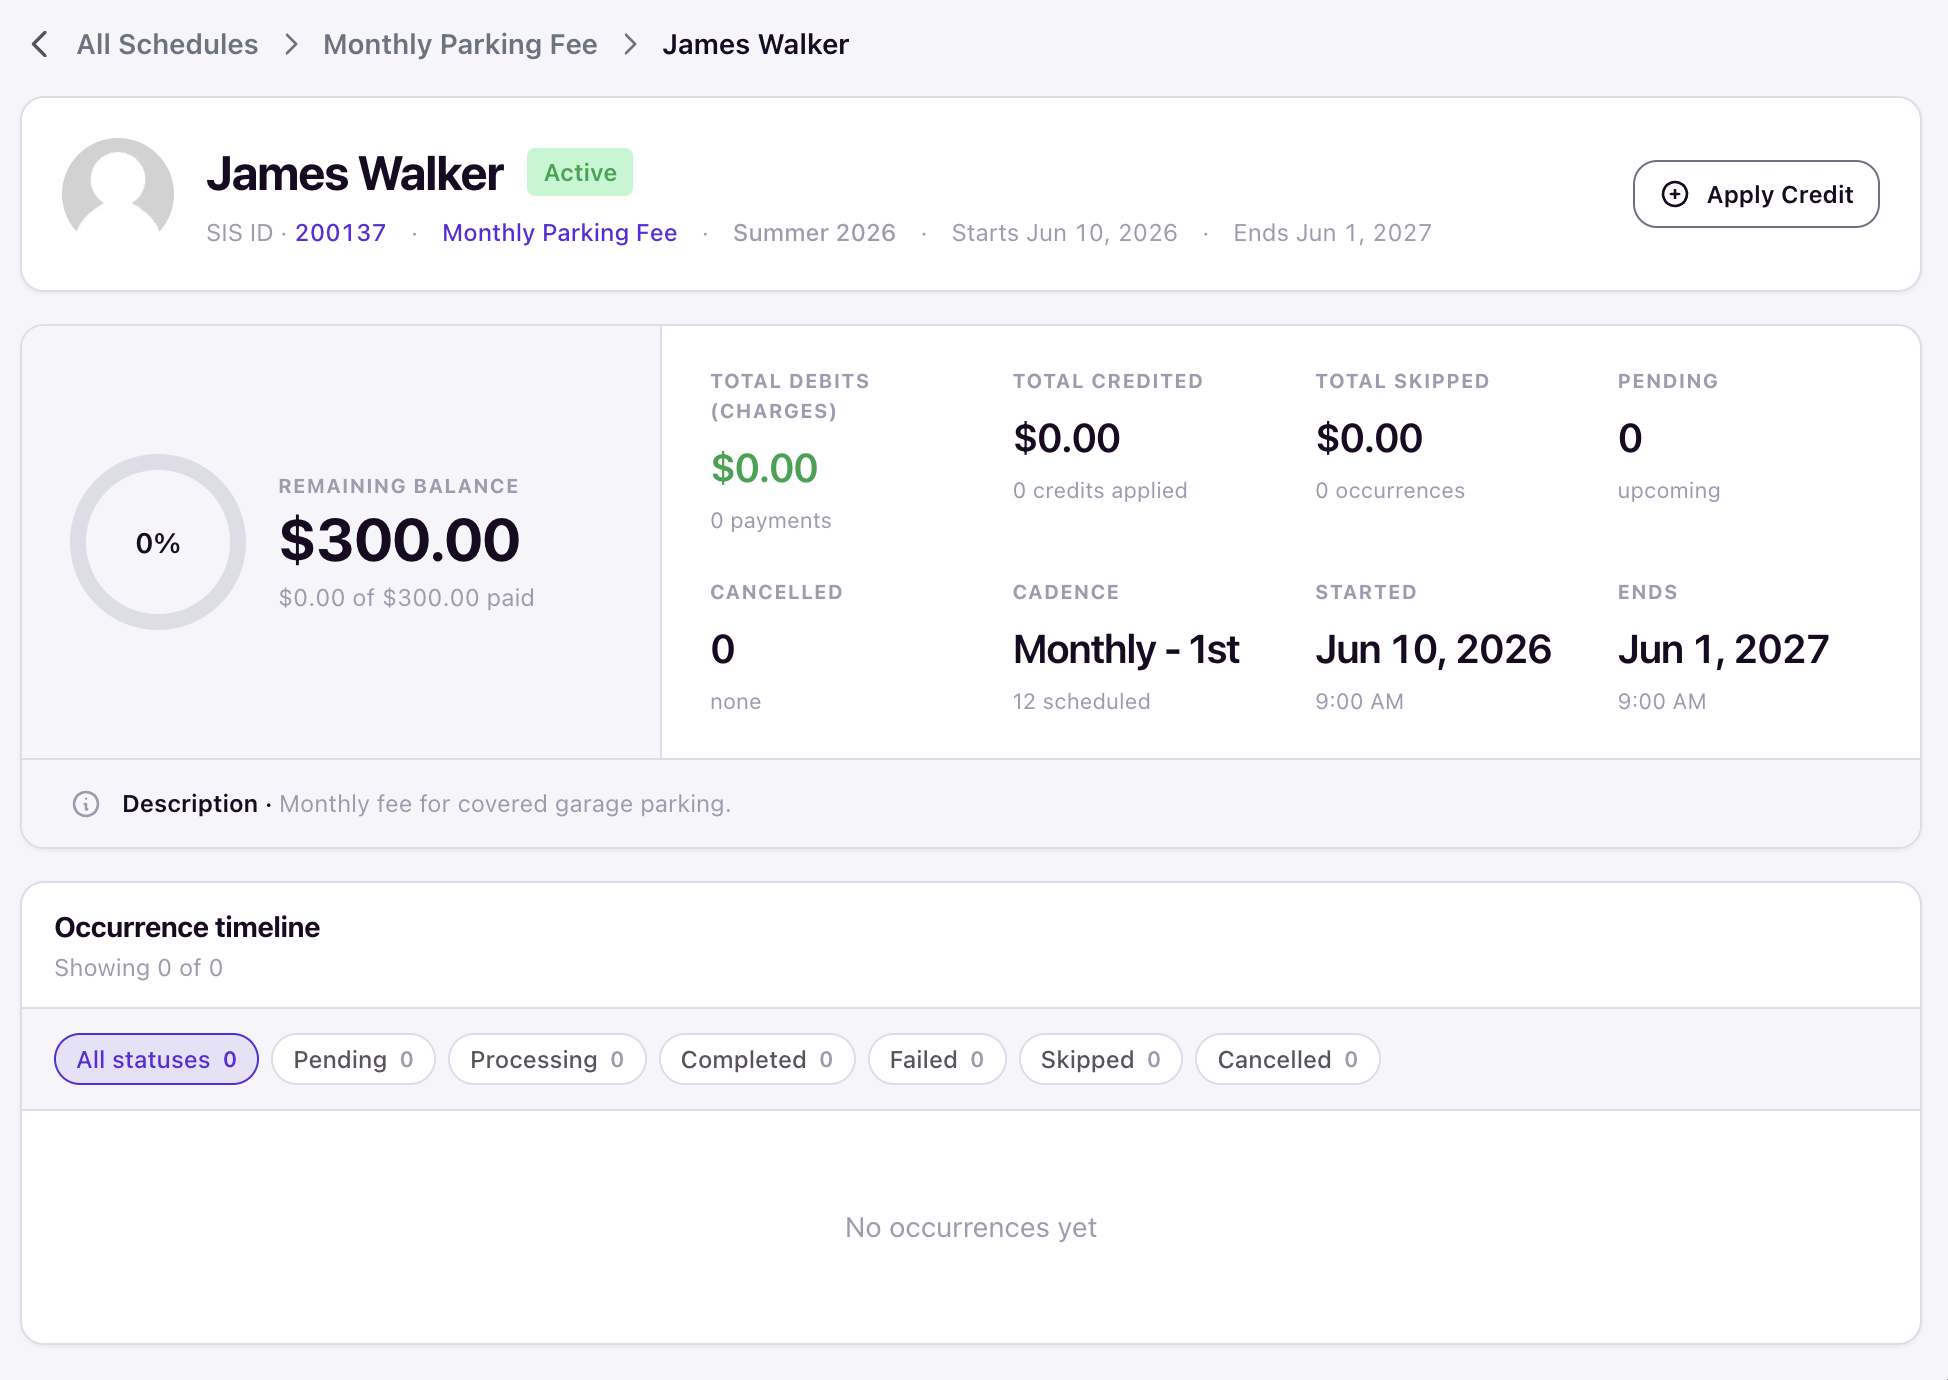
Click a resident's row to open their assignment detail. You will see a remaining-balance ring at 0%, the cadence, and the date range. The Occurrence timeline shows no occurrences yet because the system generates them during the next daily run.
Review the generated occurrences
The Occurrence timeline shows twelve pending occurrences, each scheduled for the first of the month at the amount you set.
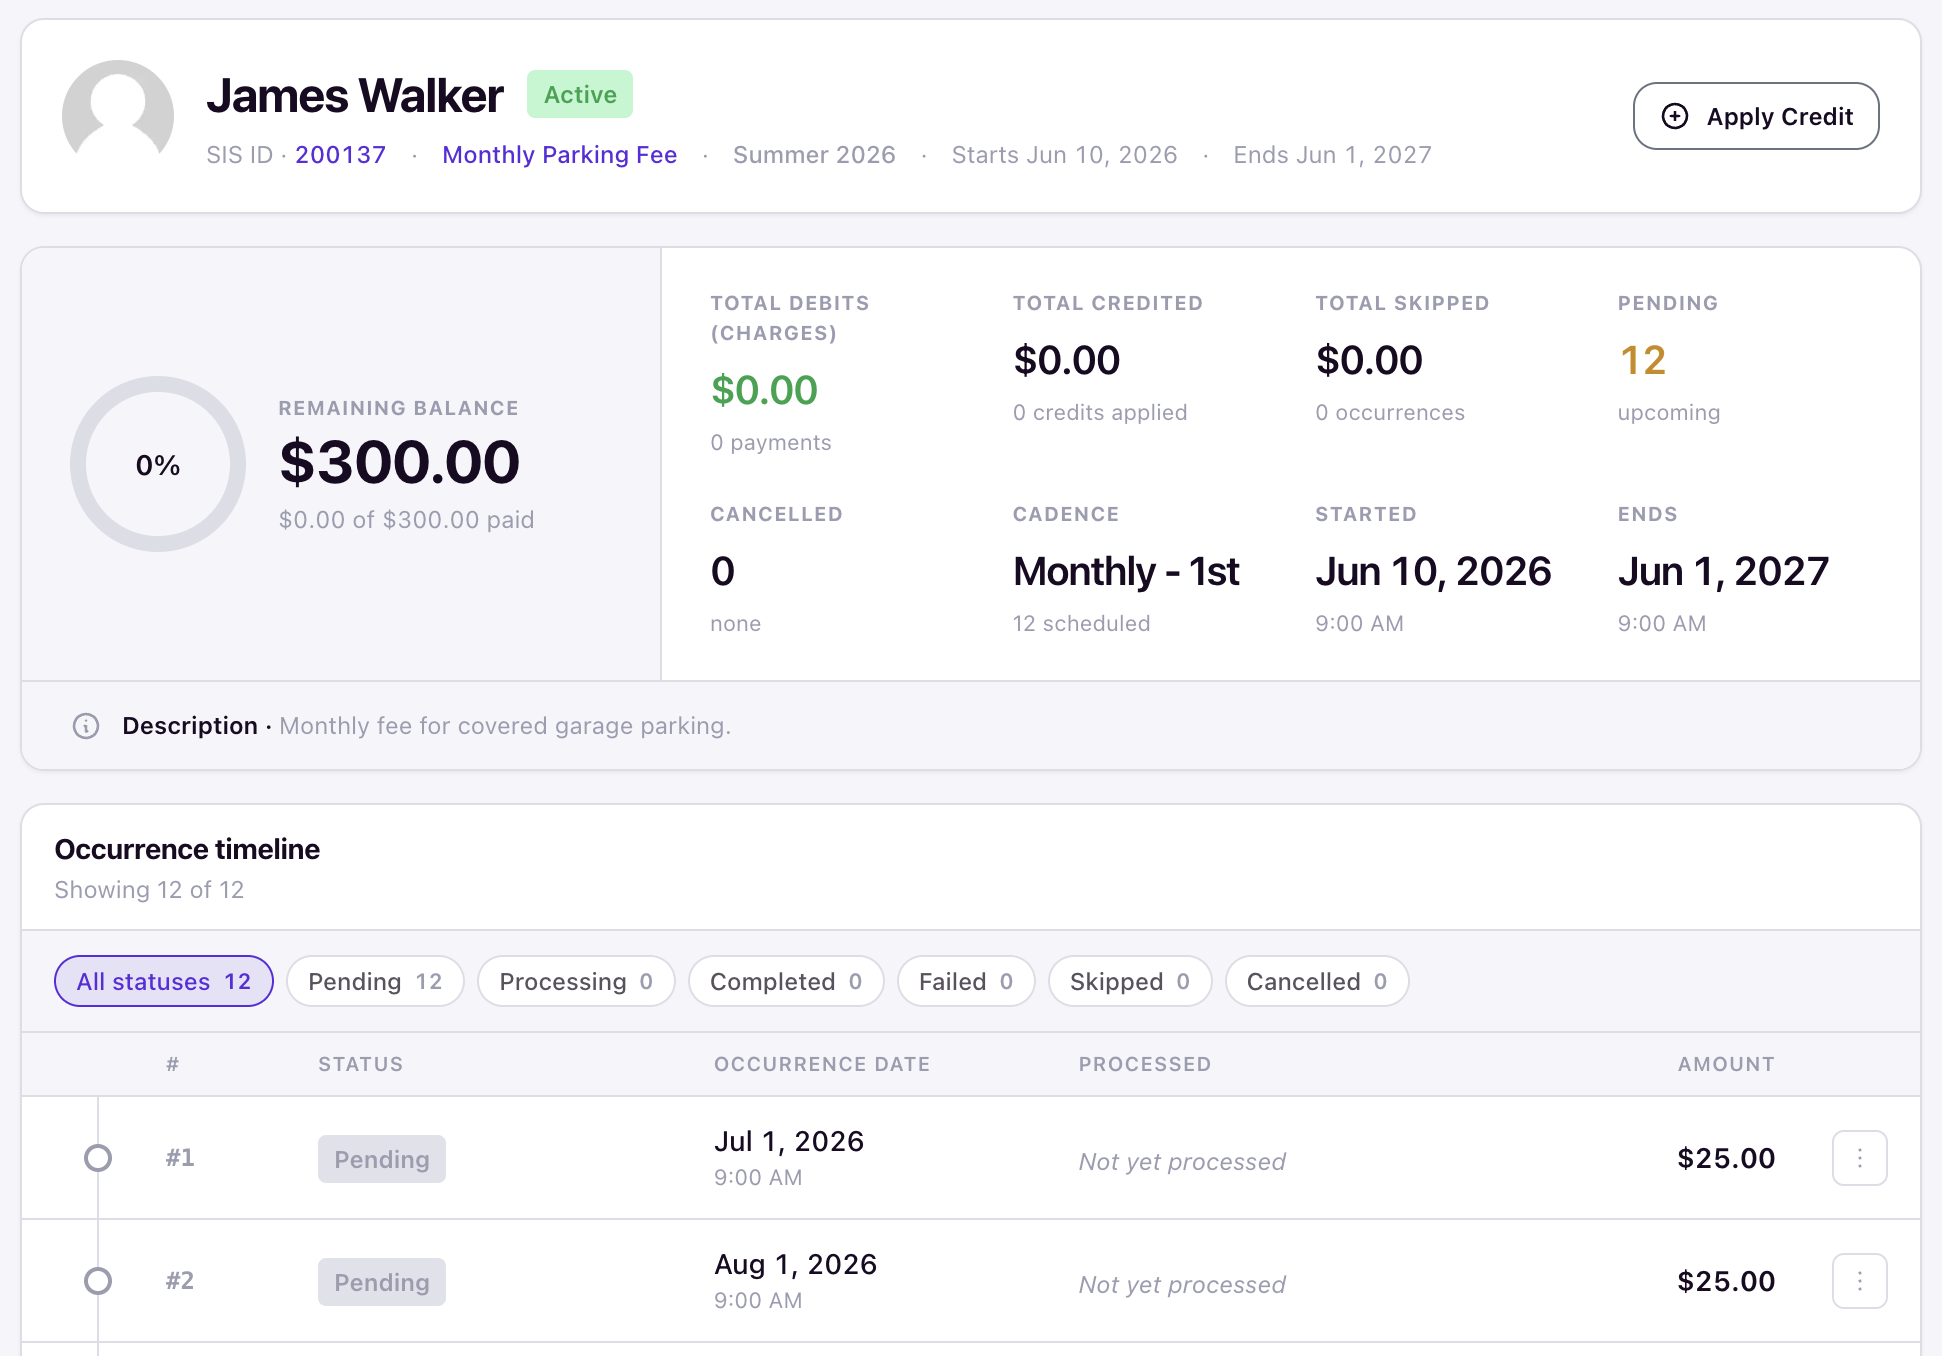
Occurrences are processed automatically every six hours on their scheduled dates. You can wait for the system to post the first charge, or open an occurrence's row menu and select Execute to post one immediately.
Confirm the first charge
Once an occurrence posts, its status changes to Completed and displays a TXN # link.
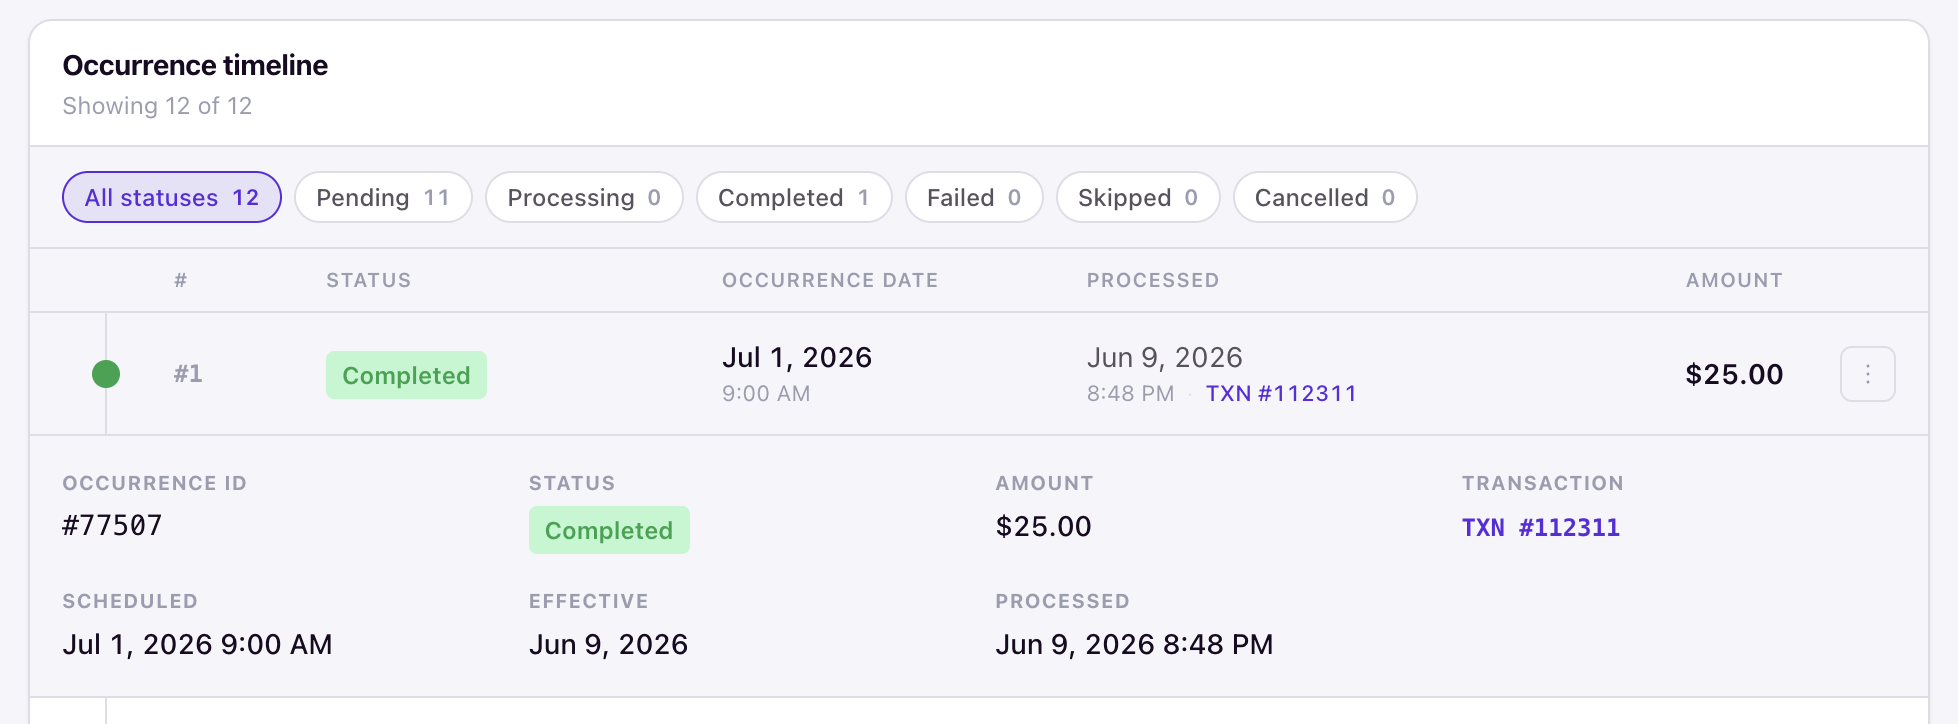
Click the TXN # link to open the transaction on the student's ledger. The transaction carries the Charge Code and Cycle from the schedule. The student's balance view now includes a Scheduled billing card tracking paid, remaining, and the next occurrence.
What to do next
That is the whole loop: schedule → assignments → occurrences → transactions. From here, your day-to-day workflow is mostly skipping or modifying individual occurrences, applying credits, and checking the Calendar for upcoming billing rounds.