Check Animals In and Out
Last updated: October 8, 2026
Animal check-in records when an animal is present in your community. An animal is always checked in behind its owner: either during the owner's check-in, or from the animal application itself once the owner is checked in. Checking the resident and the animal together records both as present in the community.
Use animal check-in during a resident's move-in when they arrive with their animal. Use animal check-out when the animal leaves the space while the resident stays, for example when the animal leaves with a family member. Both actions are available to housing administrators and student staff completing check-in.
Before you check in an animal
An animal can only be checked in with its owner, and only when both of the following are true:
The owner has an active Residency for the same Housing Cycle, meaning the owner is already checked in.
The animal's form is approved for a first check-in, or previously resident after an earlier stay.
Check in animals with the resident
During a resident's check-in, an Animals section appears on the Complete Check-In step when the resident has animals and the Animals feature is enabled for your instance. The section contains the option Also check in approved animals, which is preselected for the resident's approved animals. If any animal should not be checked in, deselect that animal before confirming check-in. Confirming check-in attempts to record both the resident and the animal as present in the community. If recording the animal fails while the resident is checked in, use the animal's row in the Animals section to check it in.
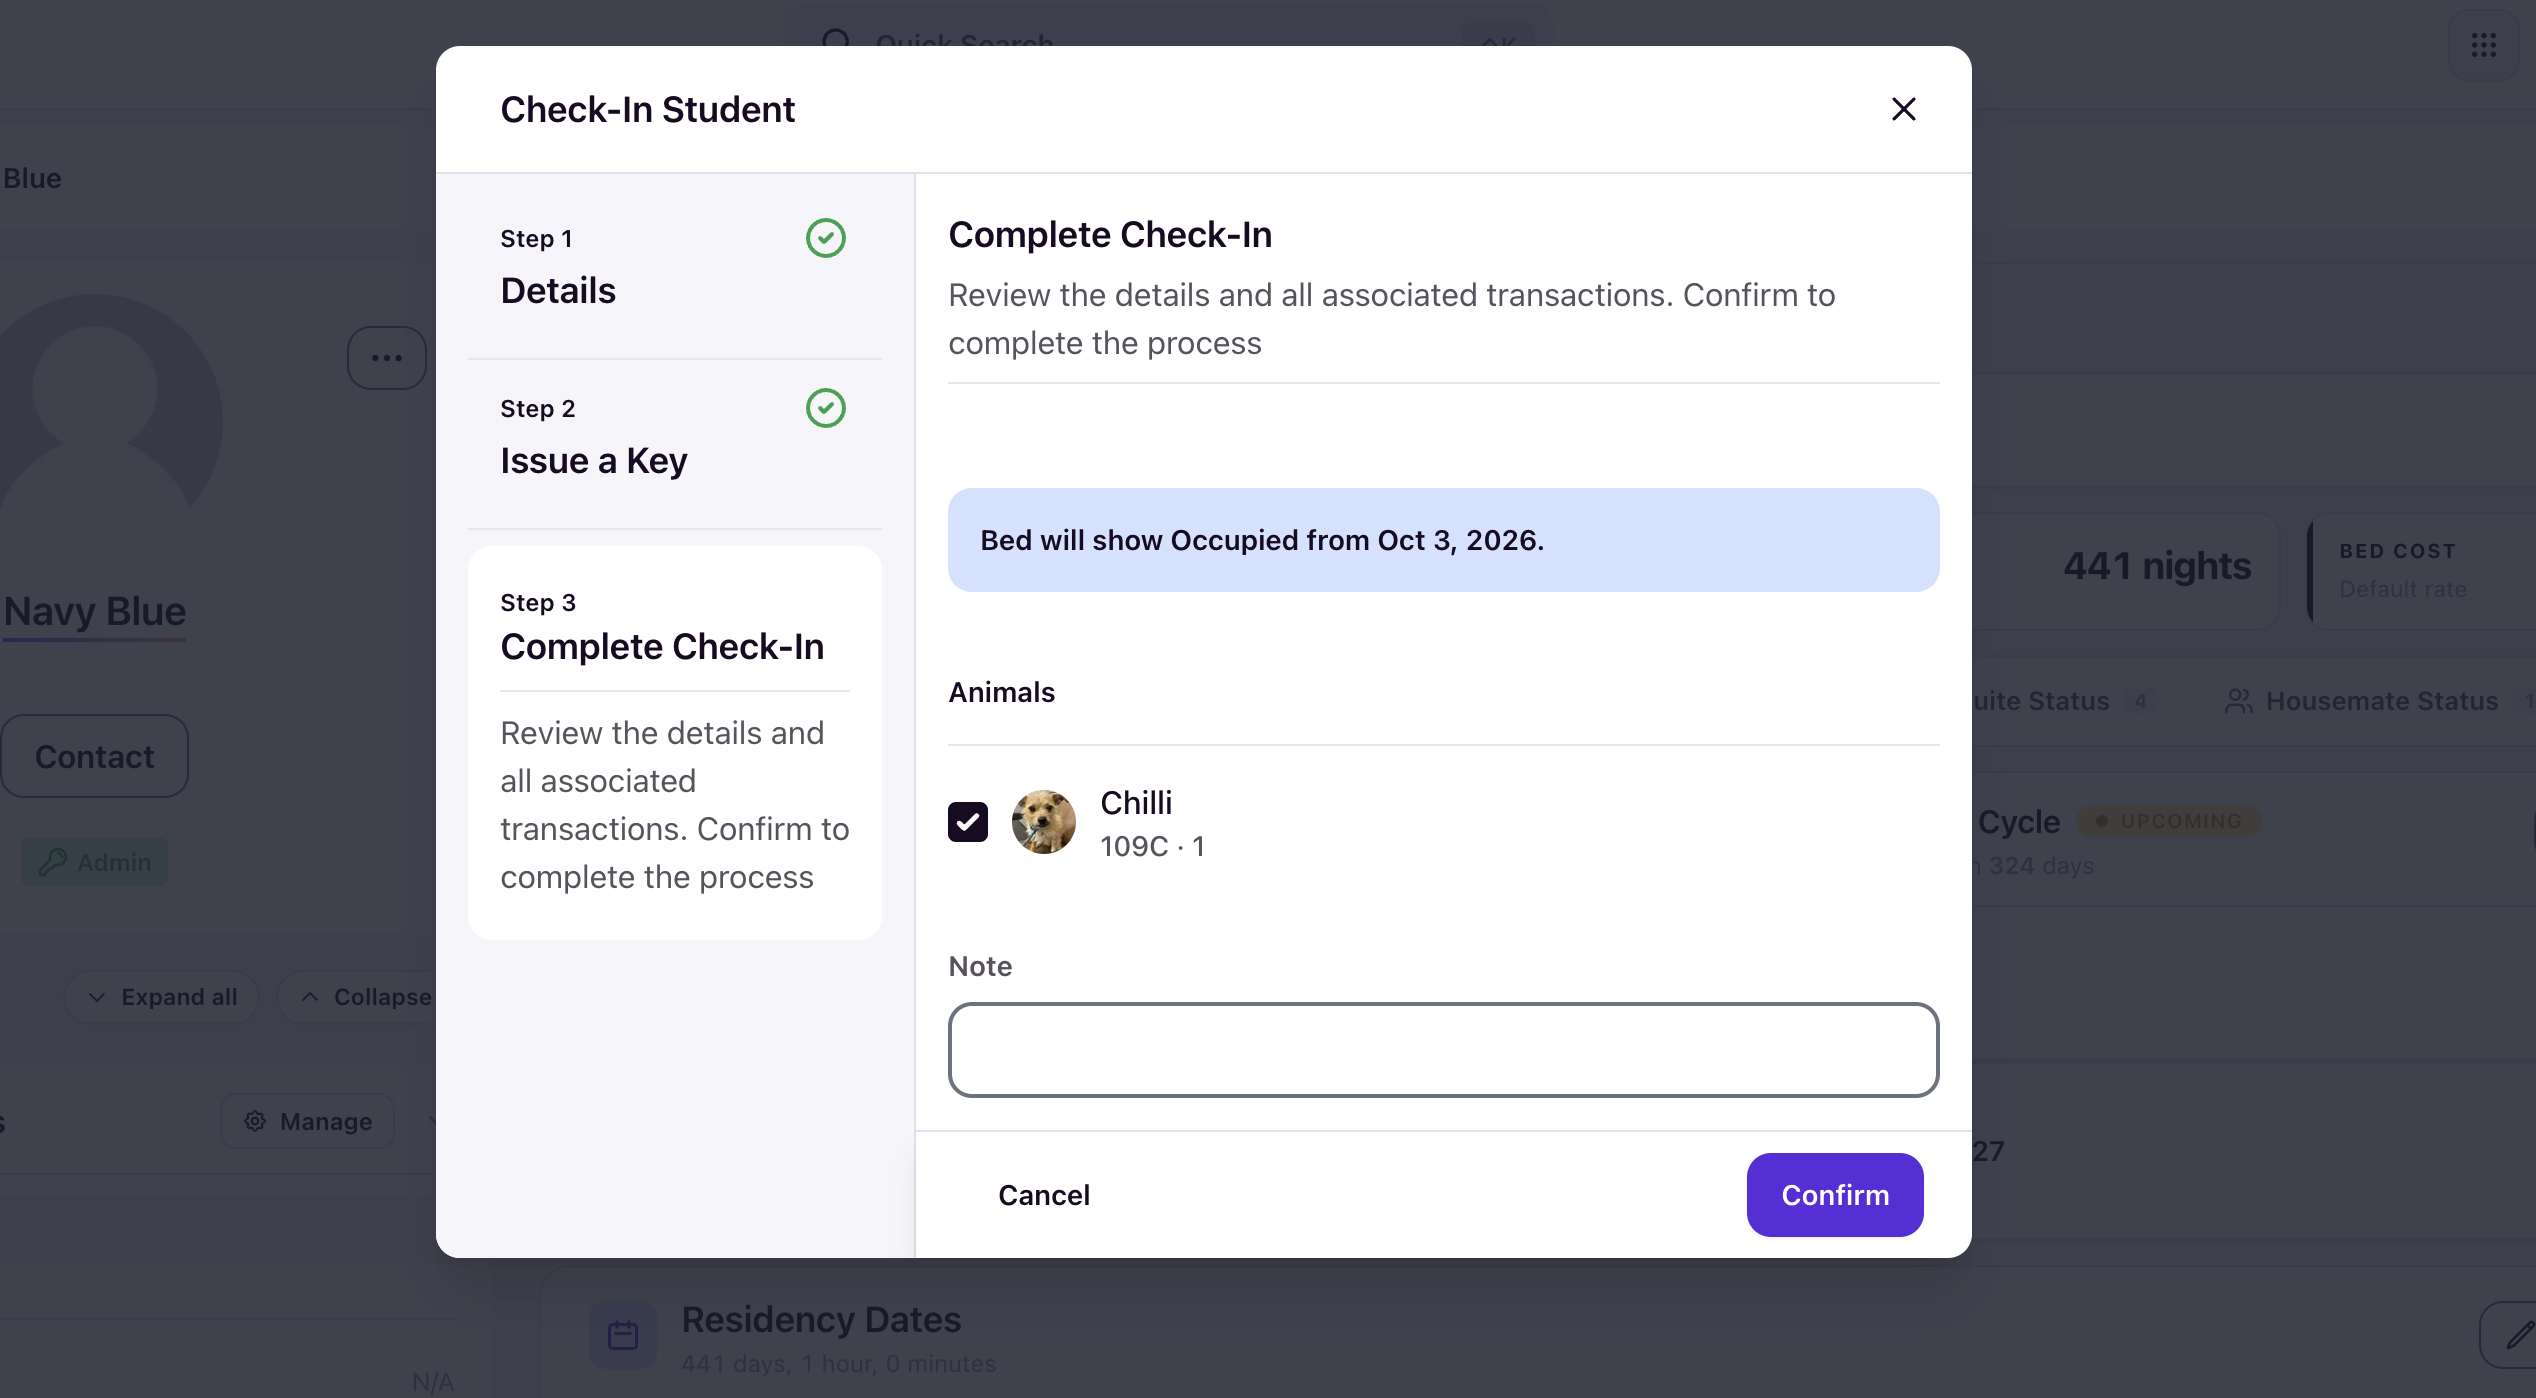
The animal's stay inherits the owner's bed, so there is no separate bed selection for the animal.
Check an animal in from its application
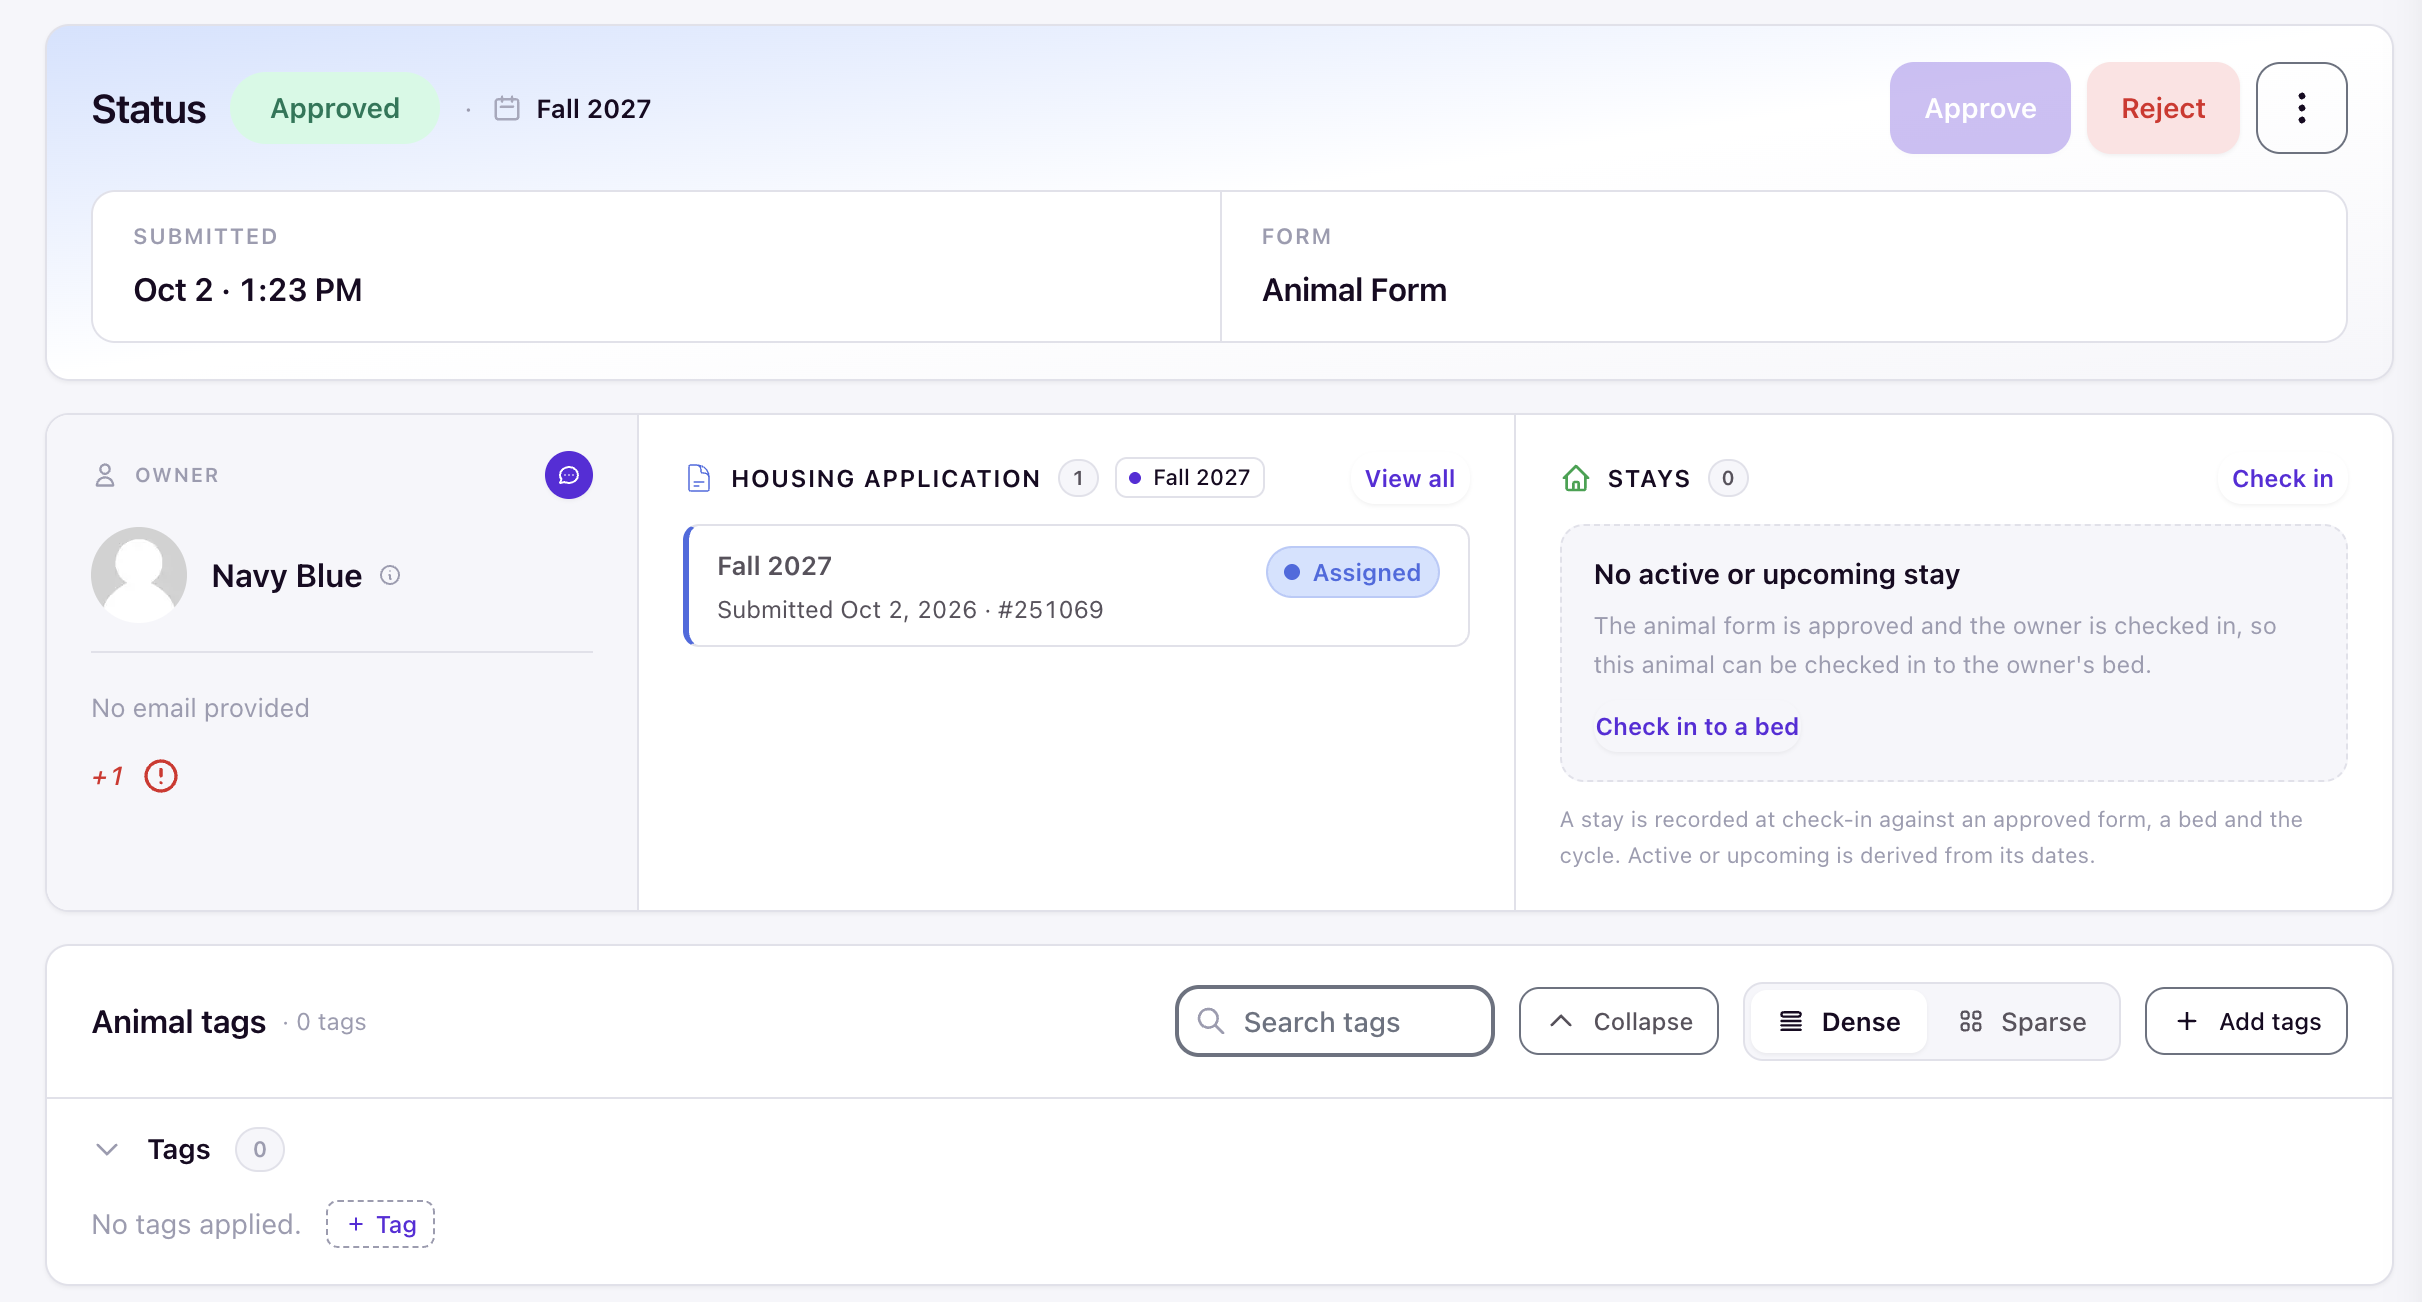
An approved animal application can also be checked in directly. On the application's detail page, the Stays card shows the animal's stay state and a Check in action. The action stays unavailable until the owner is checked in to their residency, because an animal is only checked in behind its owner. Once the owner is checked in, the Stays card confirms the animal can be checked in to the owner's bed and offers Check in and Check in to a bed.
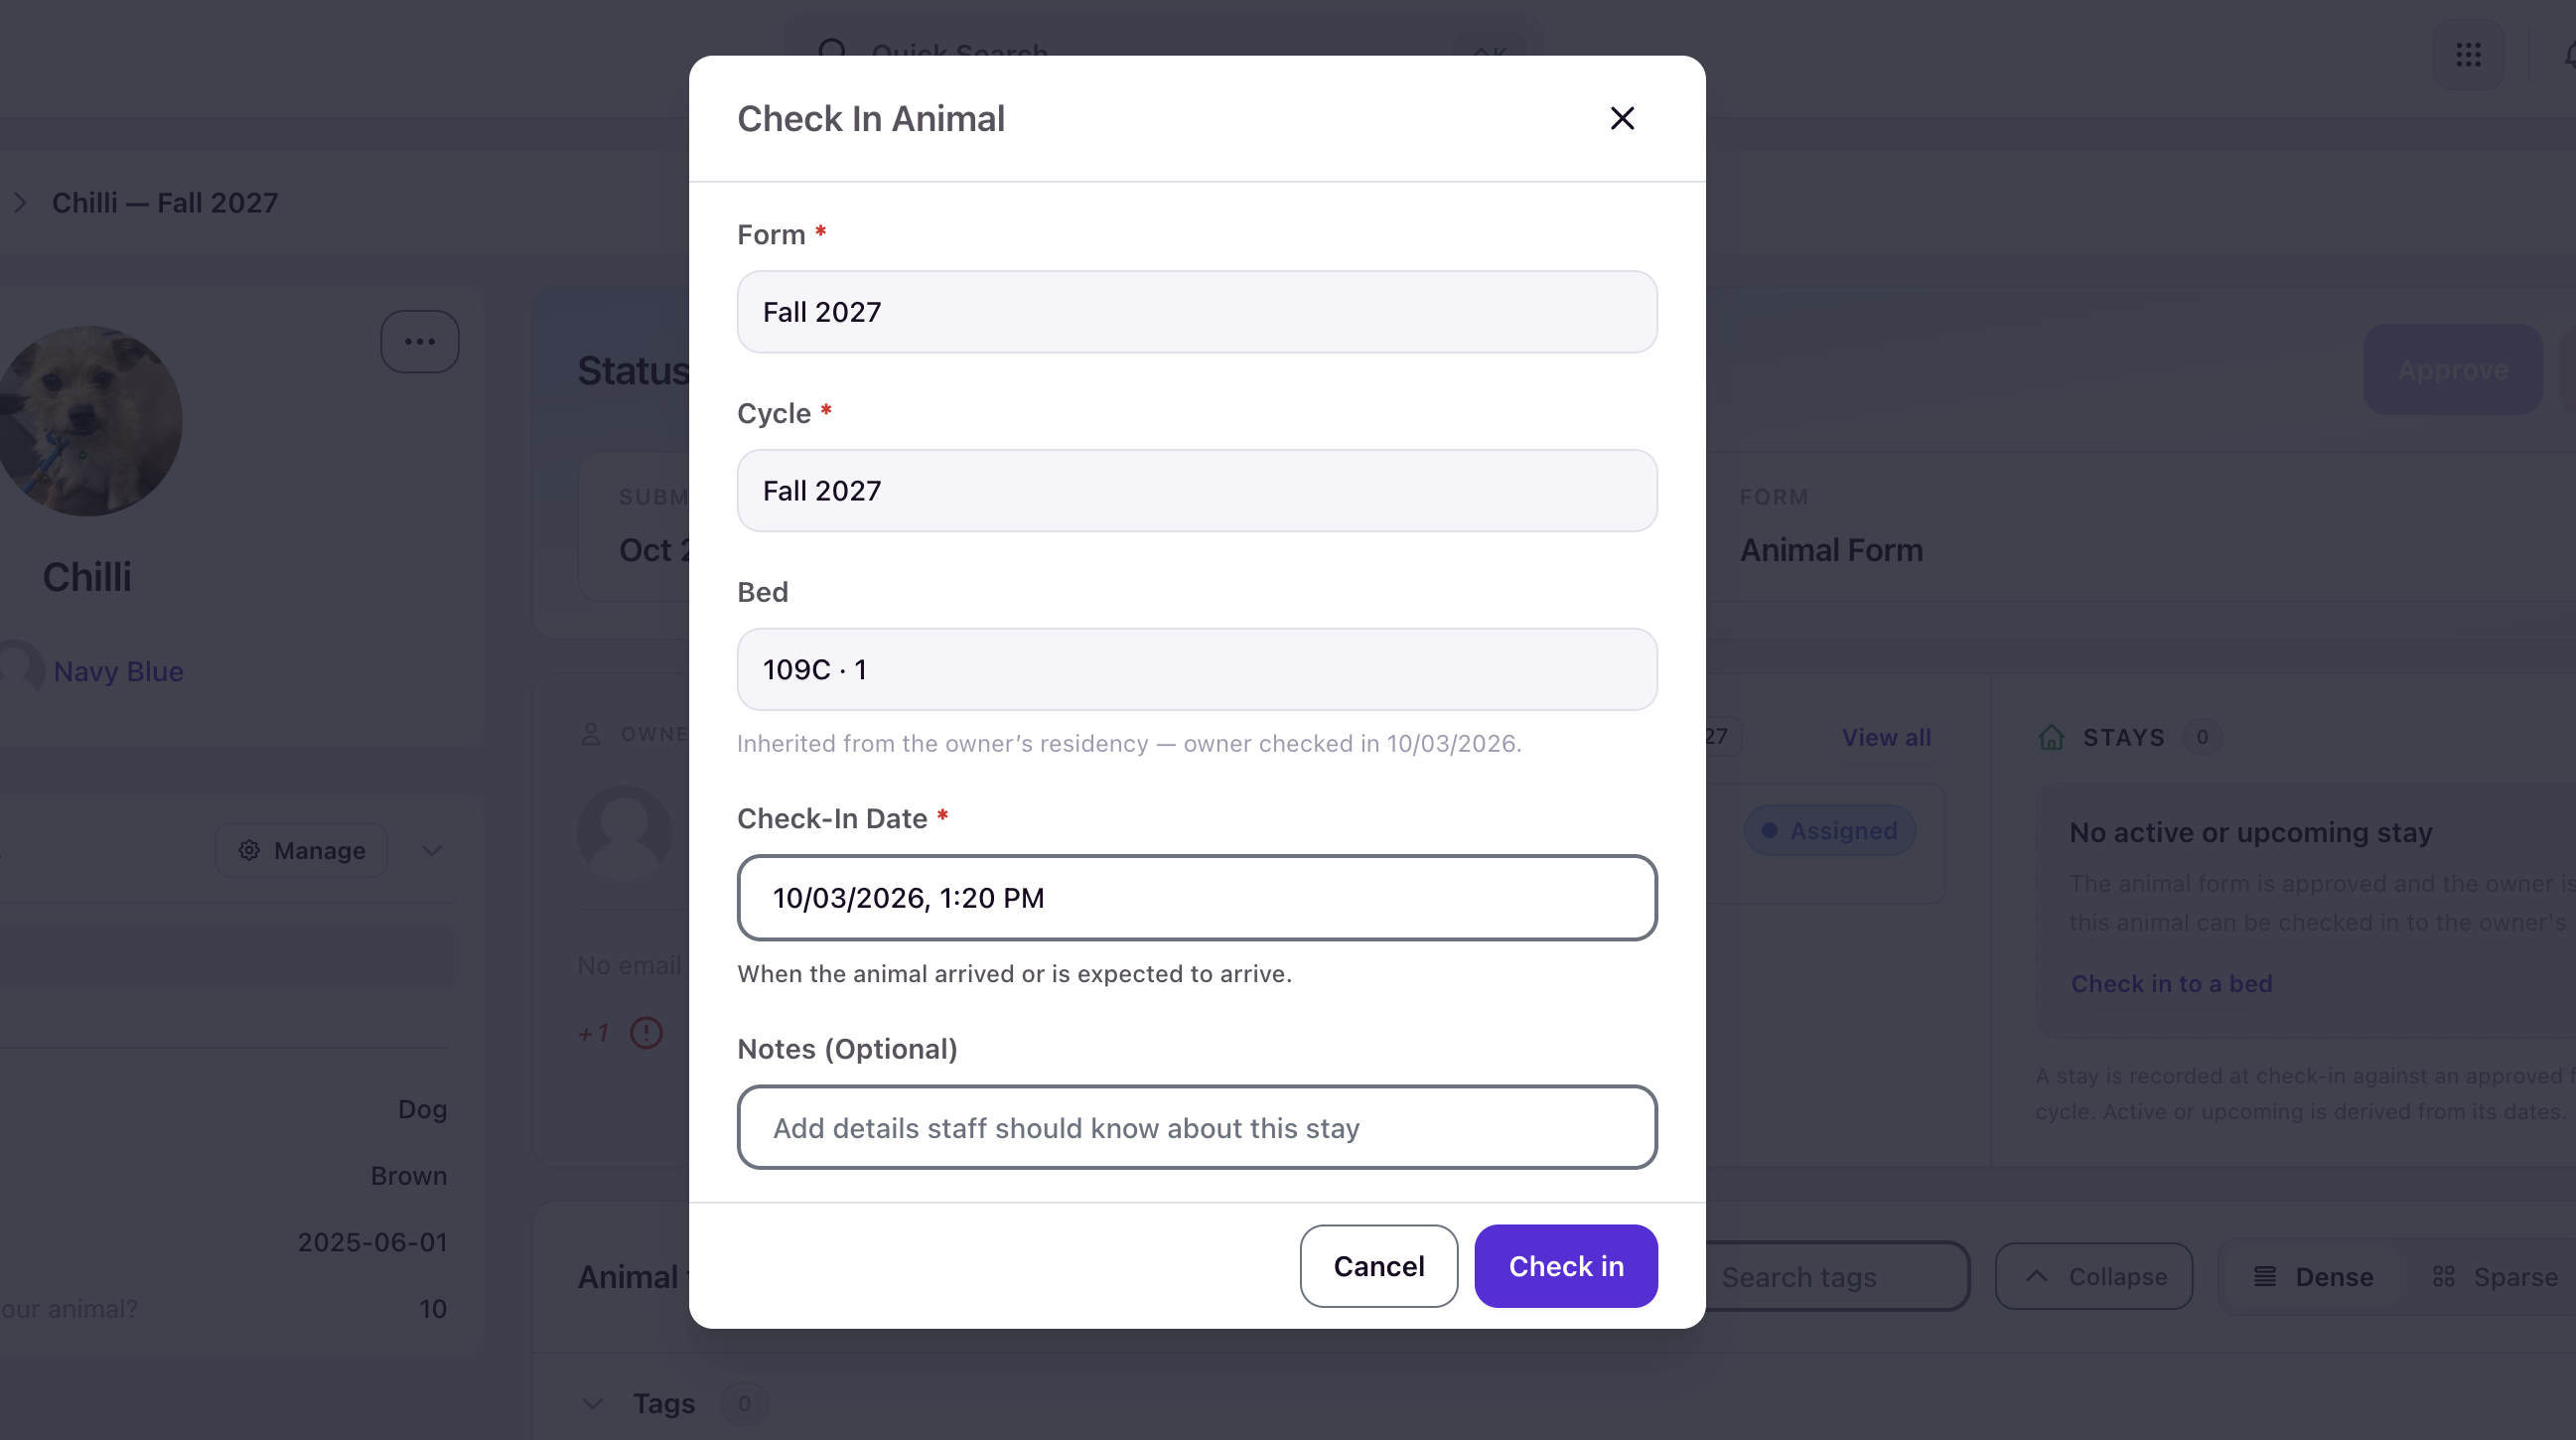
Selecting Check in opens a dialog that confirms the animal form and Housing Cycle, shows the bed inherited from the owner's residency, and provides a pre-filled Check-In Date and optional Notes. There is no separate bed selection for the animal. Confirming the check-in records the stay against the approved form, the bed, and the cycle.
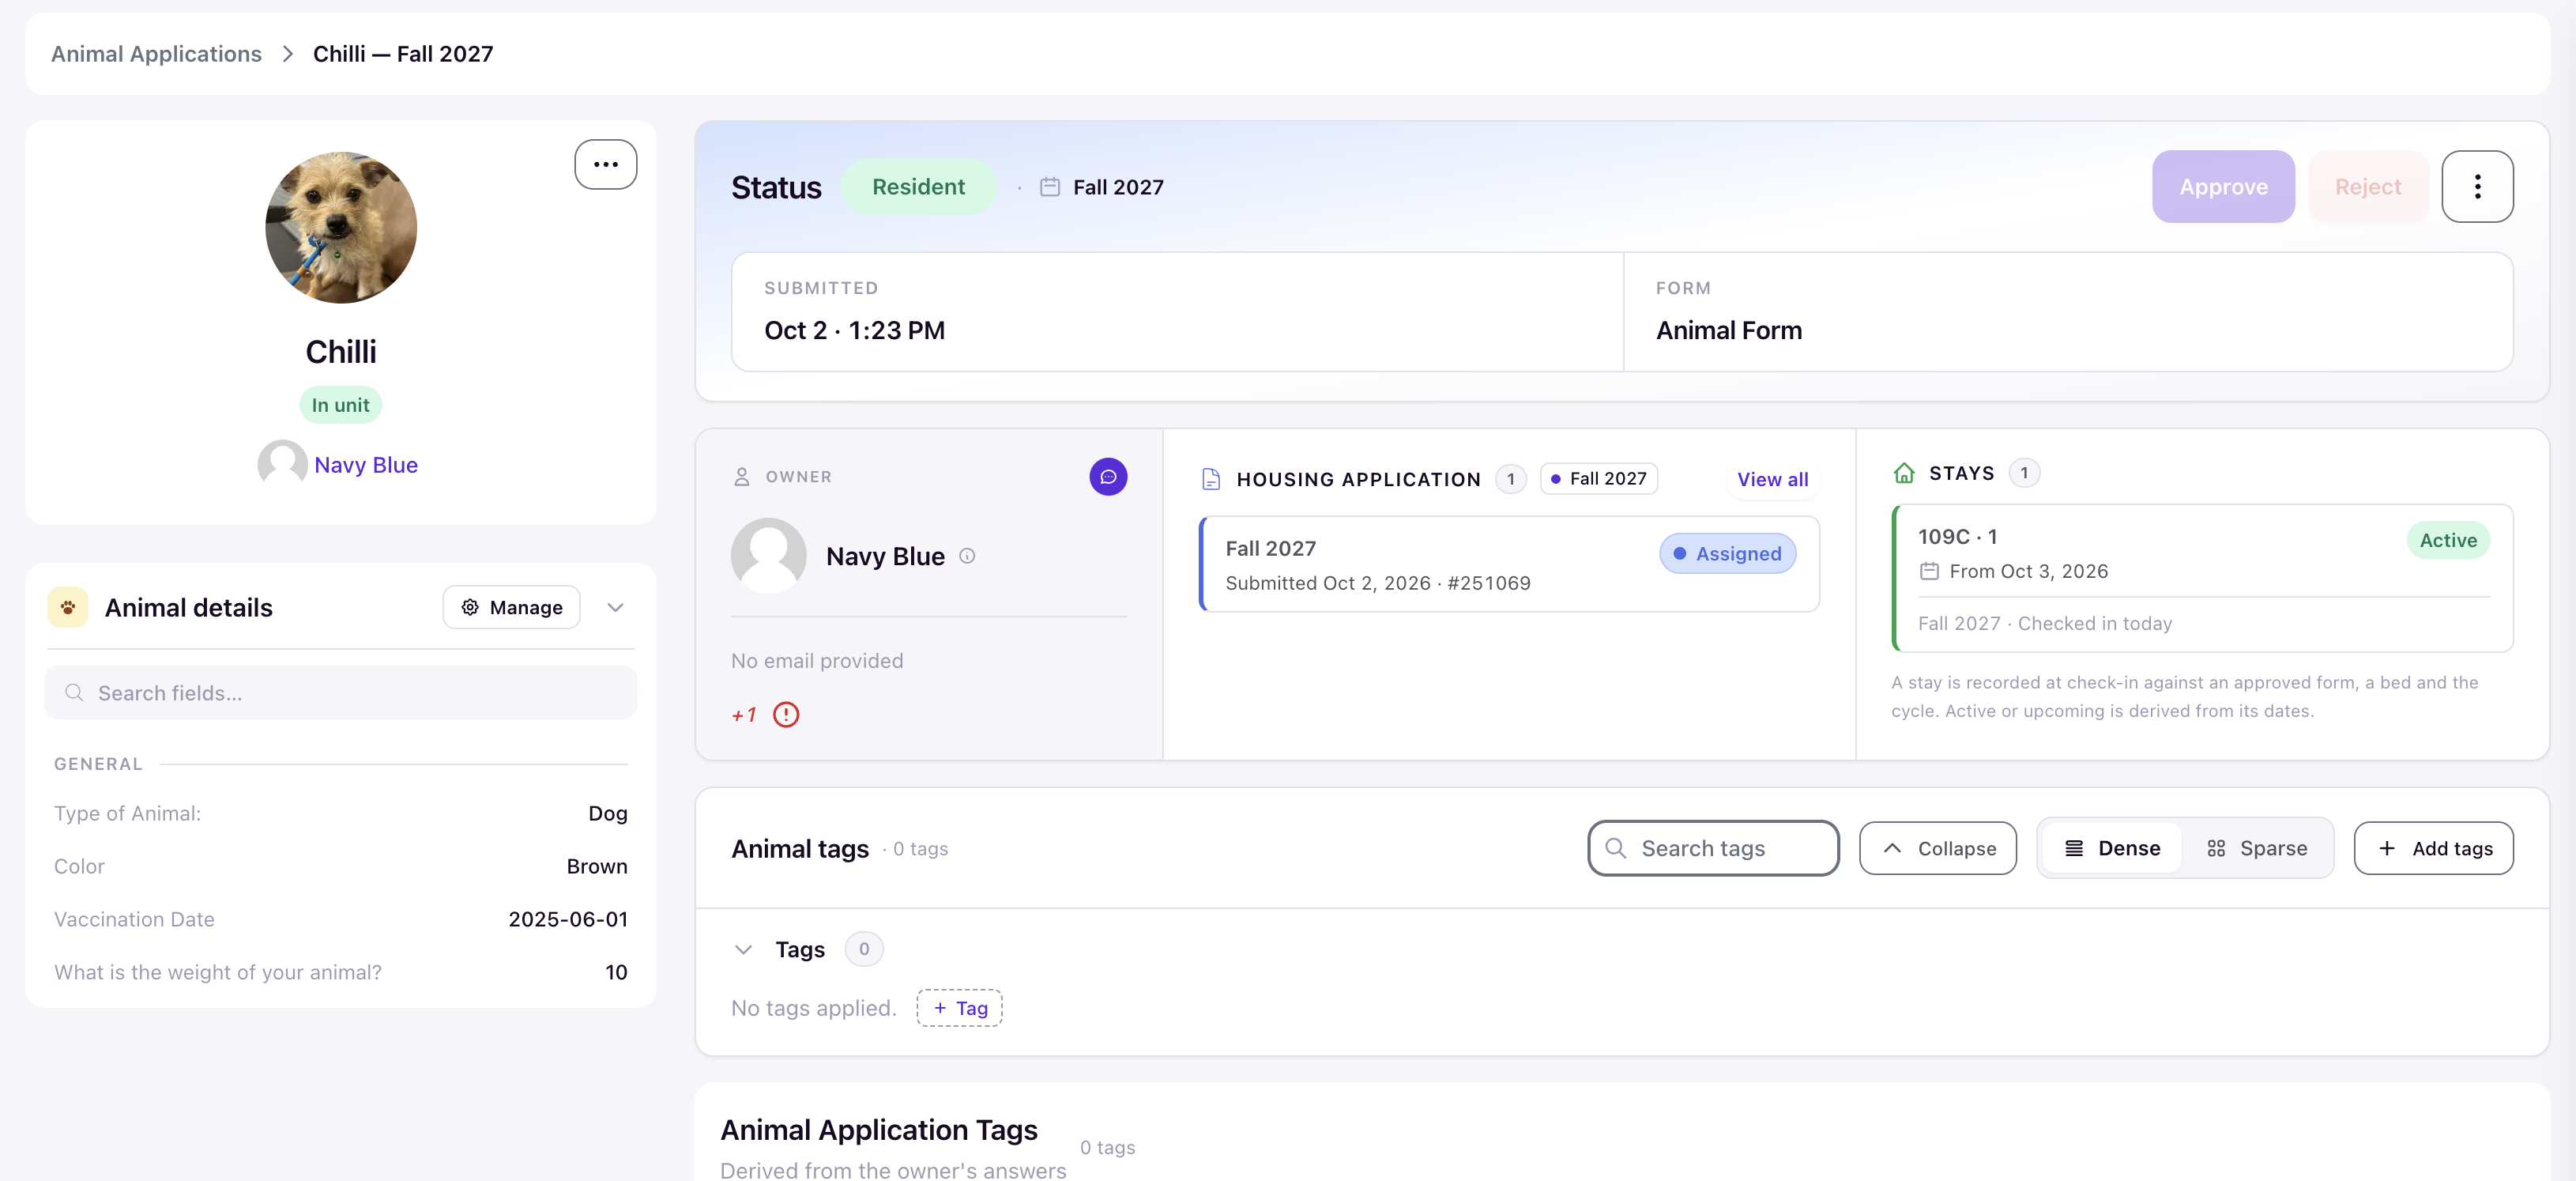
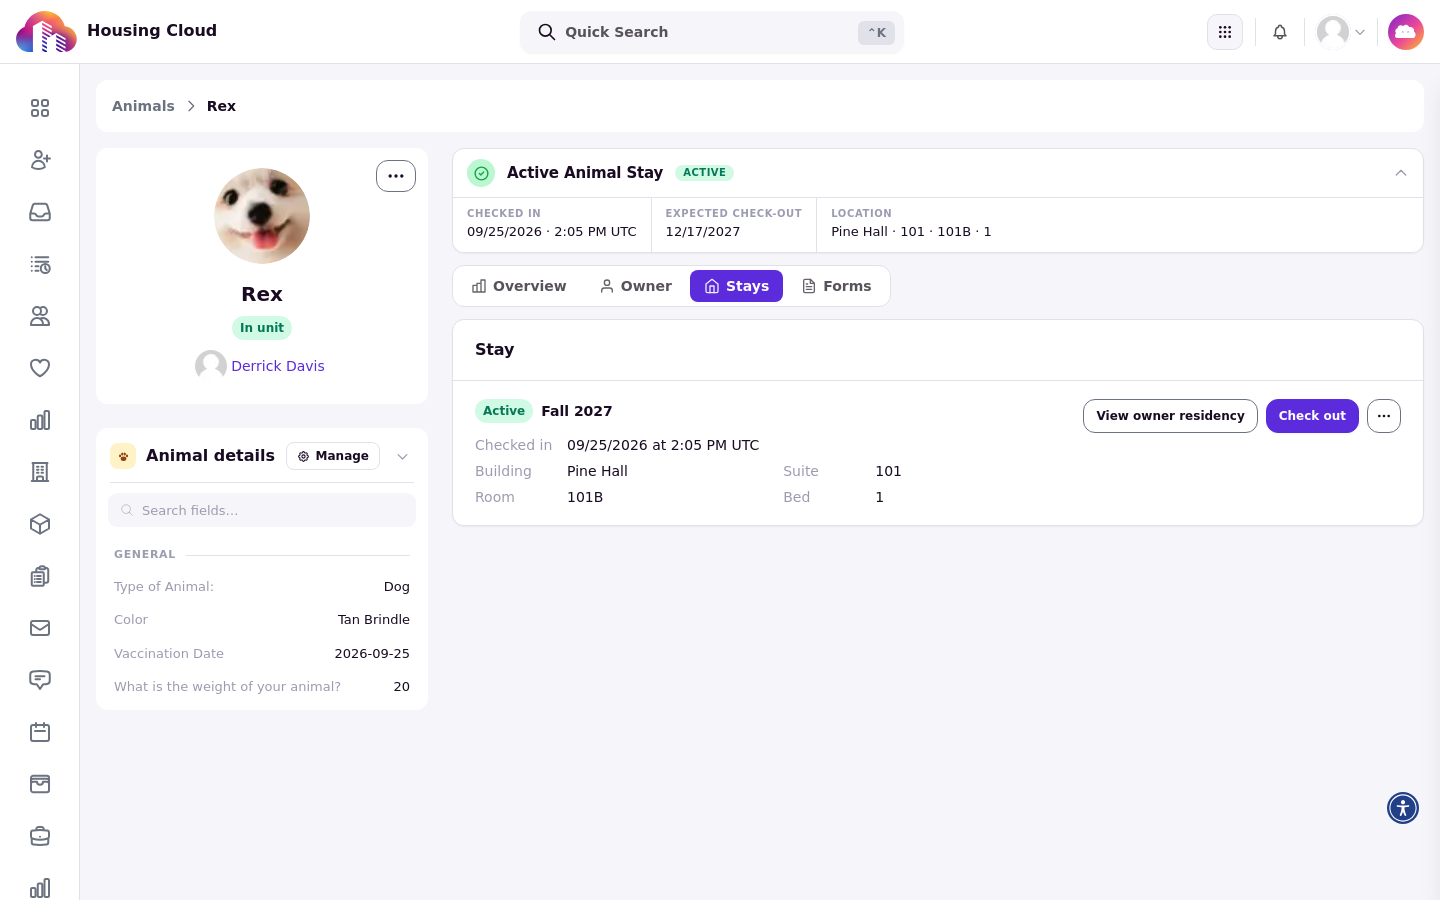
After check-in, the application status shows Resident, the animal shows as In unit, and the stay appears as Active from the check-in date. The stay's active or upcoming state is derived from its dates.
Check an animal out separately
Rows in the Animals section can offer Check in animal or Check out animal individually, so staff can check an animal out while the resident stays, for example when the animal leaves with a family member.
How animal stays work
An animal stay is the record of the animal's physical presence in the space. Check-in creates the stay, and check-out sets the stay's end date. A stay without an end date is In unit once its start date arrives; before that date it shows as Upcoming.
Animal presence is shown as Upcoming, In unit, or Checked out.
Where animal presence appears
On the animal's profile, the Stays tab lists its stay history and the Owner tab shows the owner's current Residencies.
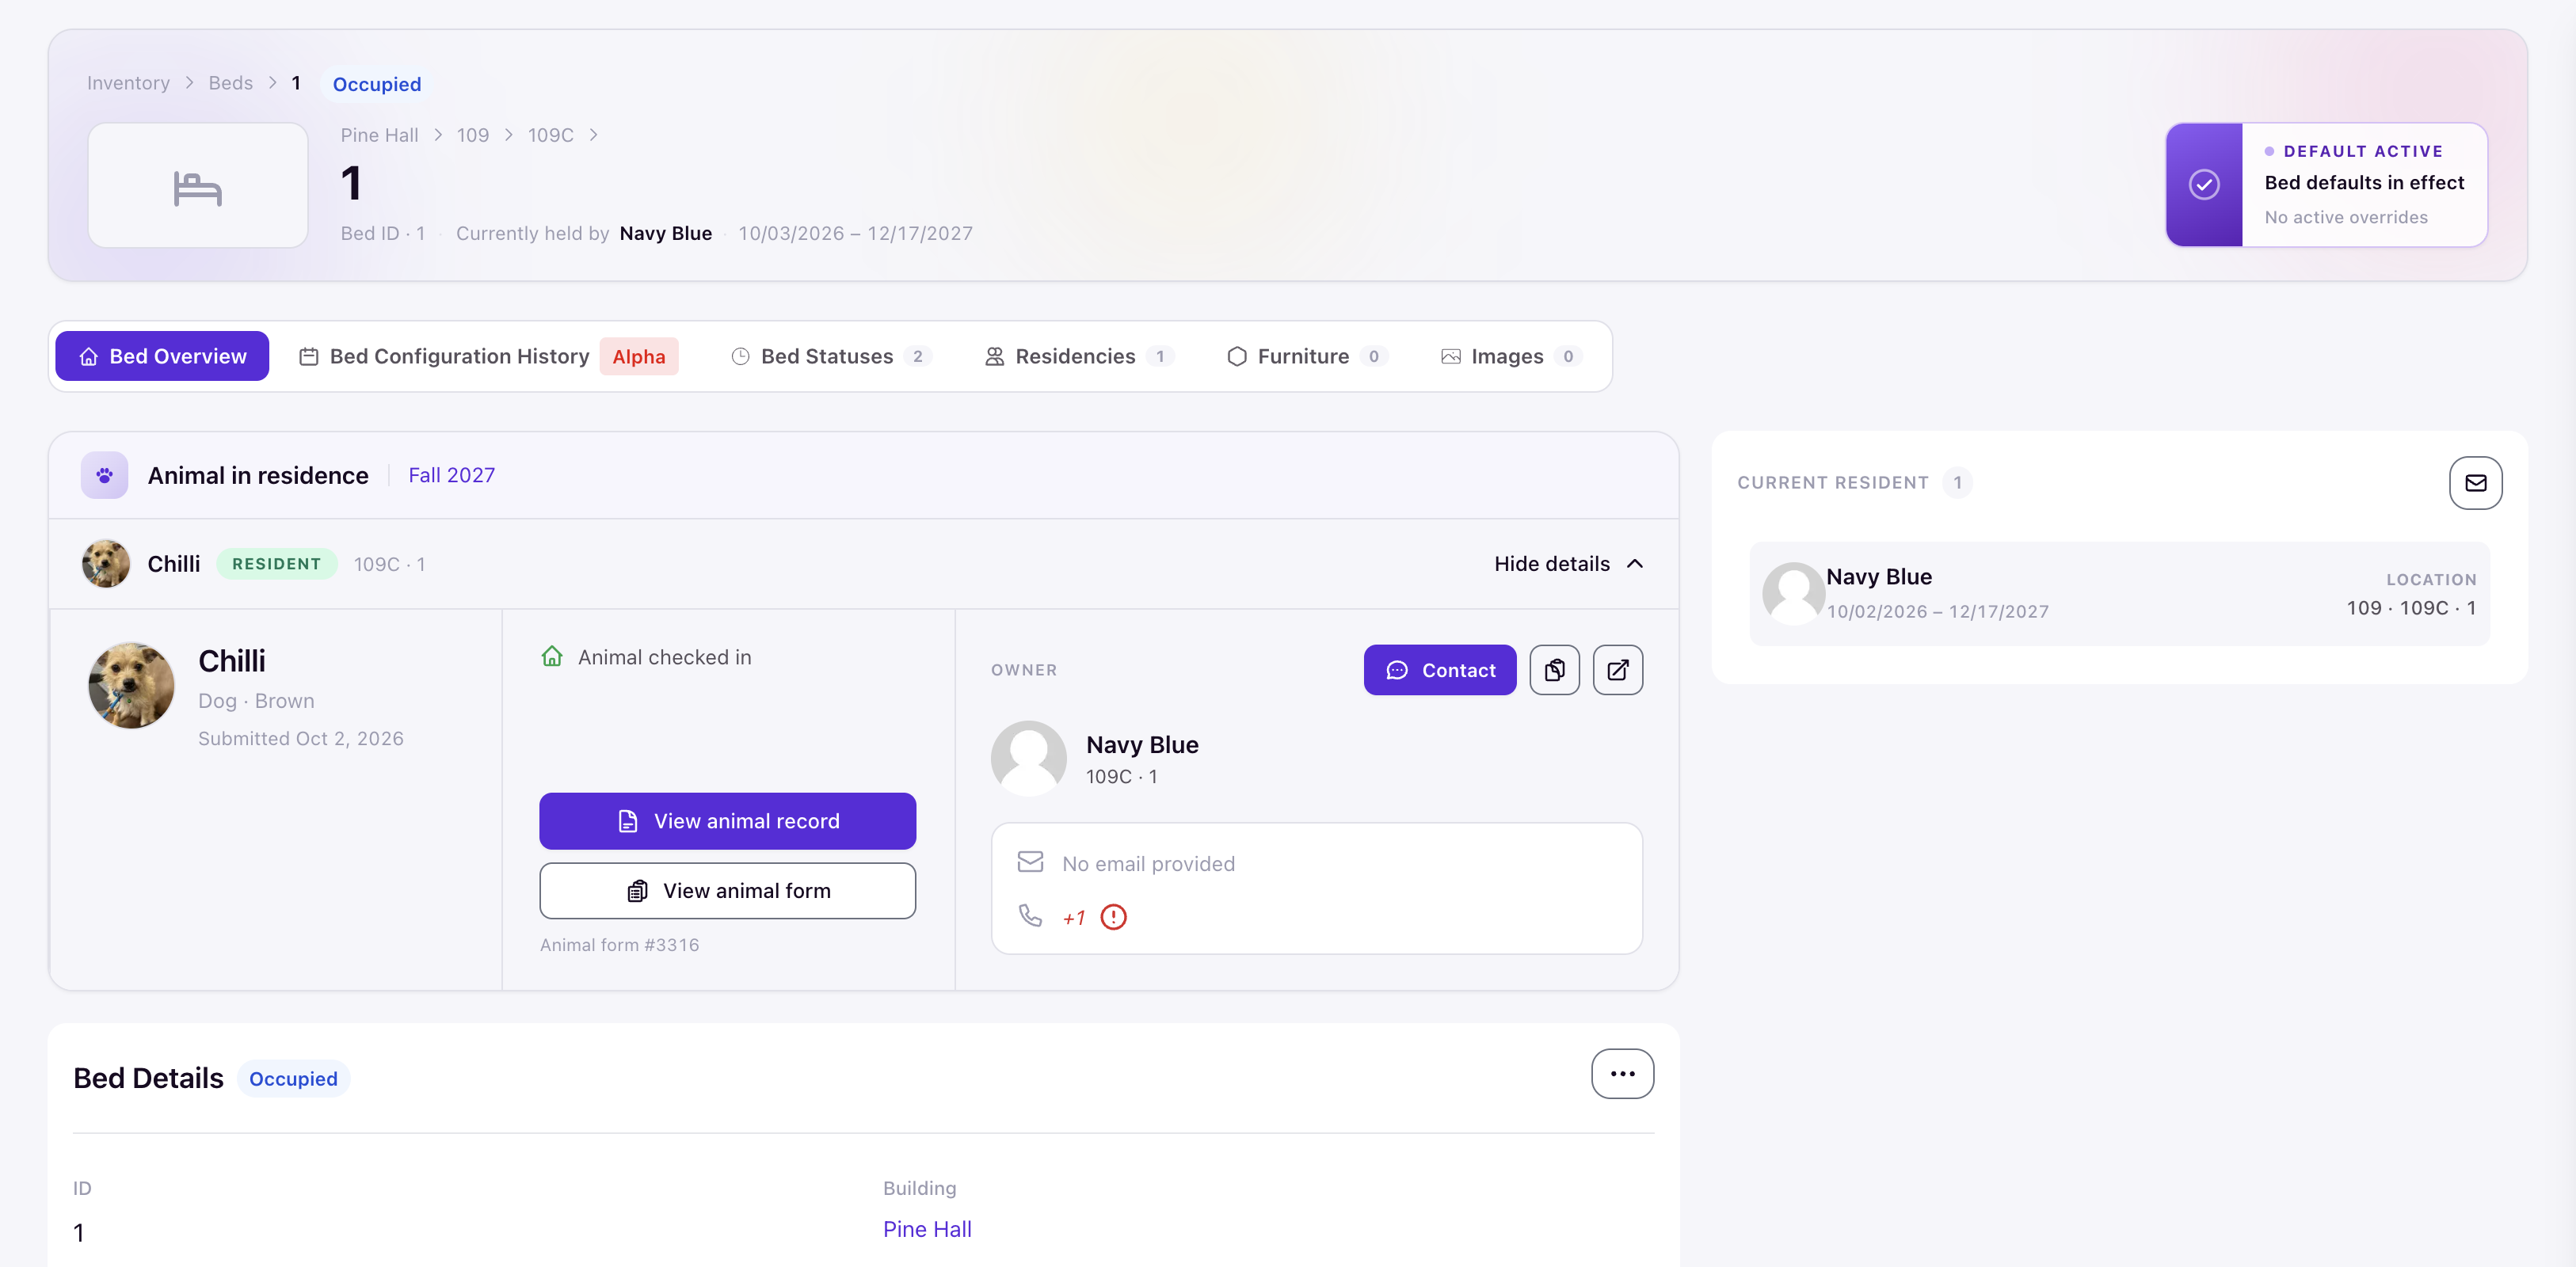
In inventory, bed, room, and suite detail pages show an Animal in residence banner when an animal is present in that space. The banner requires a live owner Residency and an approved animal application for that Residency's Housing Cycle.
Verify the check-in
After check-in, the animal's profile shows the active stay, and the bed, room, or suite detail page for the owner's space shows the Animal in residence banner once the animal is present.