Build and publish an animal application form
Last updated: October 8, 2026
An animal application form is the agreement a student signs before bringing an animal into campus housing. You build it in the Form Builder like any other form, then set its Form Type to "Animals" so it can be enabled in a housing cycle and reach the students who need it.
Before this feature existed, campuses typically collected animal details through a general additional form attached to the housing application. An animal application form is a dedicated form type: the form carries the agreements the student signs, while the animal's details are stored on the animal profile through animal custom fields.
Before you publish
The form's Form Type must be set before you publish, so confirm it first:
The form's Form Type must be set to "Animals" before you publish. After publication, the Form Type selection is locked with the message Form is currently published.
To change a published form's type, unpublish it, change the Form Type, and publish it again.
Only forms published with the "Animals" type can be enabled in a housing cycle's animal application settings.
Set the form type in the Form Builder
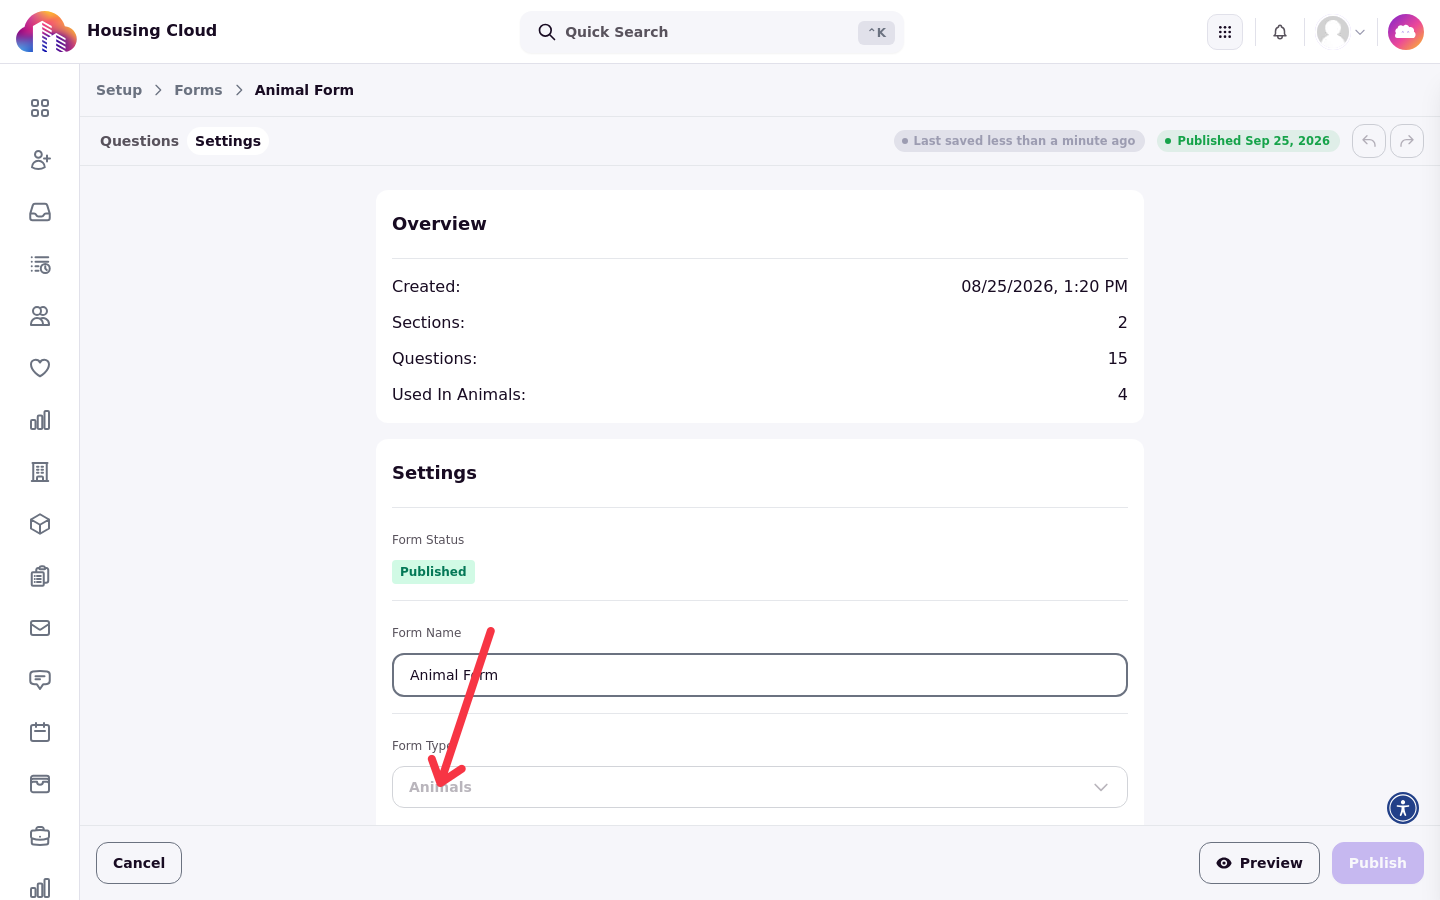
In the Form Builder, open the form's Settings card and set Form Type to "Animals". Publish the form once the content is complete. Forms of this type are listed under Animal Applications in the Forms area of Setup, described as "Forms used for housing related animals". If you edit the form later, republish it to apply the changes.
Collect animal details with animal custom fields
Keep animal details out of the form. Details such as name, species, breed, color, vaccination date, and weight belong in animal custom fields, which work like the profile fields you use for students: each field holds an attribute of the animal rather than an attribute of the person.
When these details are custom fields, each answer is saved to the animal profile automatically as the student completes the application. If the same details are form questions instead, they sit in form responses that staff would have to export and cross-reference.
Build the agreement content
Use the form itself for what the student must agree to: a pet behavior standard, liability and damage responsibility, community rules, and your terms and conditions. Add a signature element so the student signs each agreement as part of the application.
You can publish more than one animal application form. Some institutions create a separate form for each reason an animal is on campus, with different terms and conditions for each, because the agreements they need the student to sign differ.
What this form is not for
This form is not the process for approving accommodation requests. Campus partners such as Disability Services review medical documentation and confirm whether the student is approved for the reasonable accommodation. Your office uses this form to collect the signed agreement.
After you publish
The form appears under Animal Applications in the Forms area of Setup. From there, enable it in a housing cycle's animal application settings so students complete it during their application process, alongside their other required documents.