Change or Add Report Field Permissions for a Role
Last updated: August 28, 2026
Overview
Report field permissions control which data fields users with a specific role can see when building reports or viewing shared reports. By restricting certain fields, you can protect sensitive information such as personally identifiable details, medical accommodations, or financial data while still giving staff access to the reports they need.
This configuration lives in the role editor under Setup, not in the Reports section. Each role has its own report field visibility settings, so you can customize access based on job responsibilities. A billing coordinator might see financial fields while a residence life coordinator does not.
This is different from the Restricted fields tab in the same role editor, which controls visibility of custom profile fields in student records. Report field permissions specifically control what appears in the report builder and in shared reports that users view or export.
Check eligibility before starting
- The Report fields tab only appears for saved roles that have an ID assigned. New roles must be created and saved first.
- Your institution must have the REPORT_BUILDER_V2 feature flag enabled. If you don't see the Report fields tab, contact your Housing.Cloud support representative.
- You need the manageAdmins permission to access and edit roles in Setup.
Navigate to the Report fields tab
Report field permissions are configured in the role editor. Go to Setup in the sidebar, then click Roles.
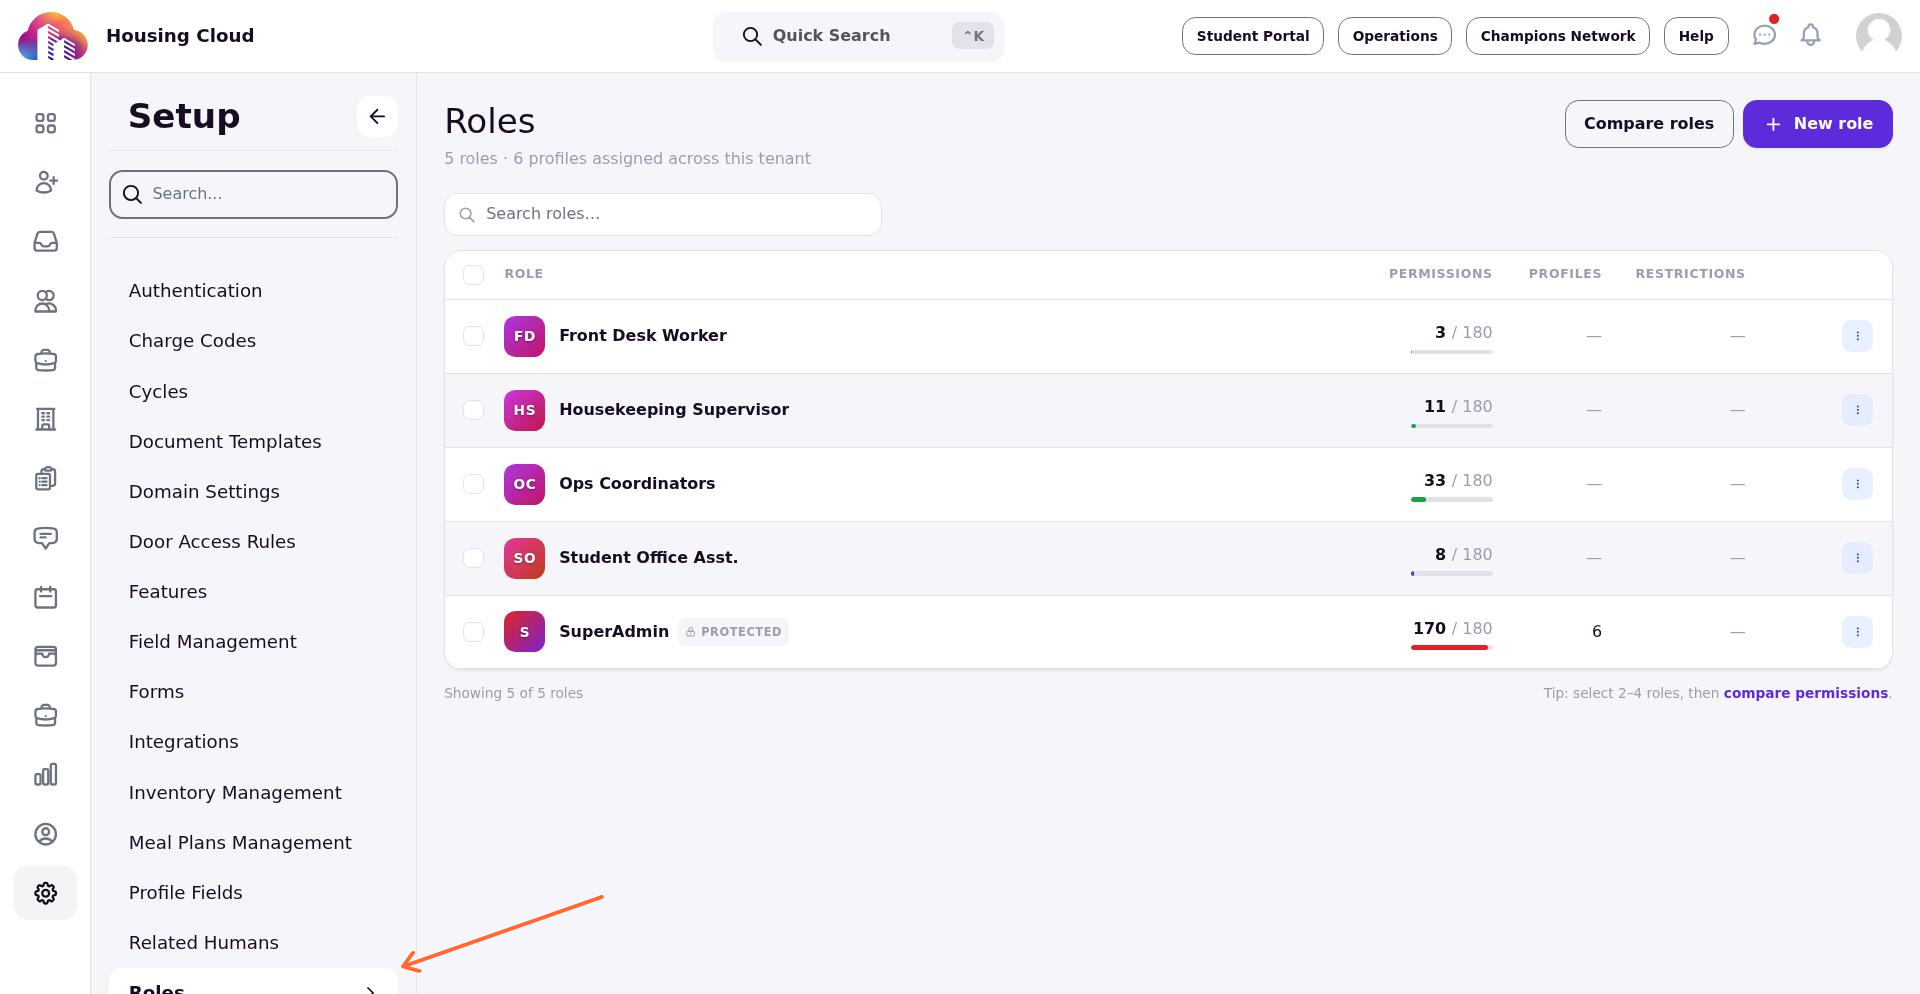
Click the name of the role you want to edit to open the role editor.
The role editor opens with several tabs. Click the Report fields tab to view and modify report field visibility for this role.
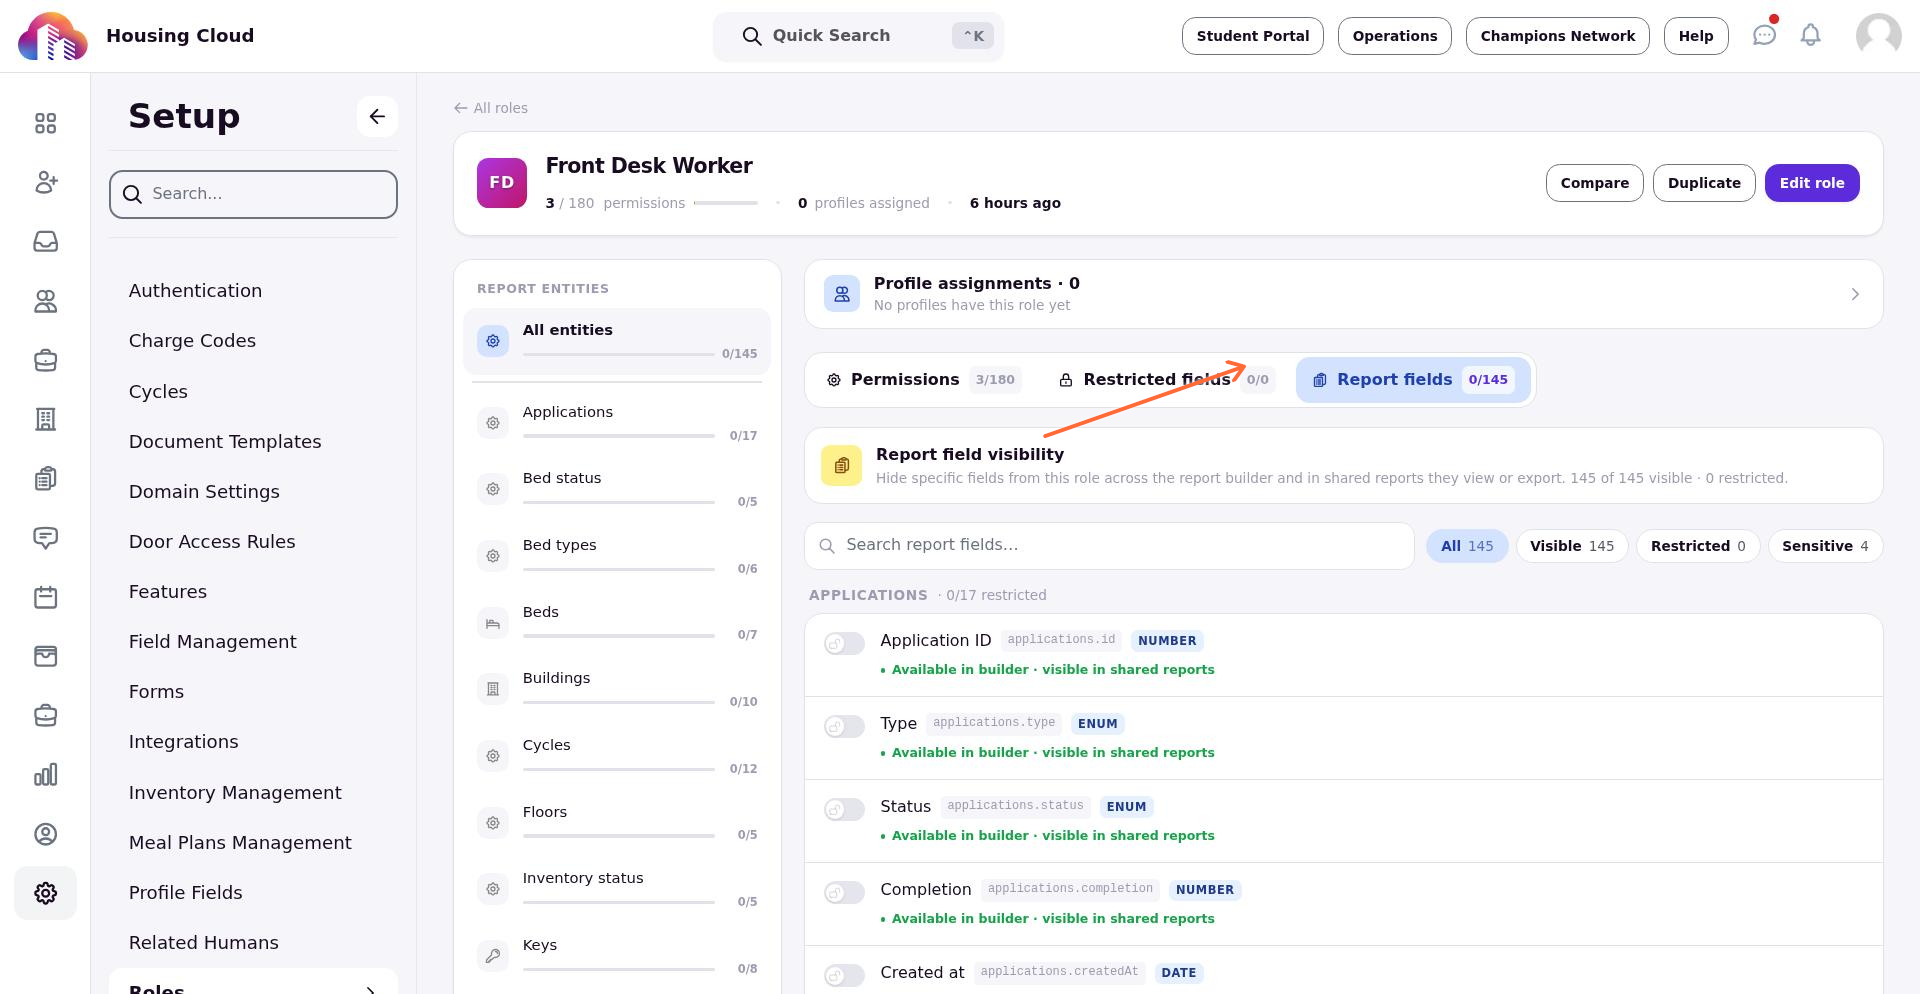
The tab shows a summary card titled Report field visibility explaining that you can hide specific fields from the role across the report builder and in shared reports they view or export.
Understand visibility states
Each report field has a visibility state that shows what happens when users with this role work with reports:
- Available in builder · visible in shared reports — Users can add this field when building reports, and they see the actual data when viewing or exporting shared reports.
- Hidden in builder · blanked-out in shared reports — Users cannot add this field when building reports. If someone shares a report with them that includes this field, the data appears blank rather than showing the actual values.
This distinction matters for shared reports. A restricted field doesn't just hide the field from the builder—it also masks the data when the user views a report someone else created.
Search and filter report fields
The Report fields tab displays all available fields organized by report entity. Use the tools at the top of the page to find specific fields quickly.
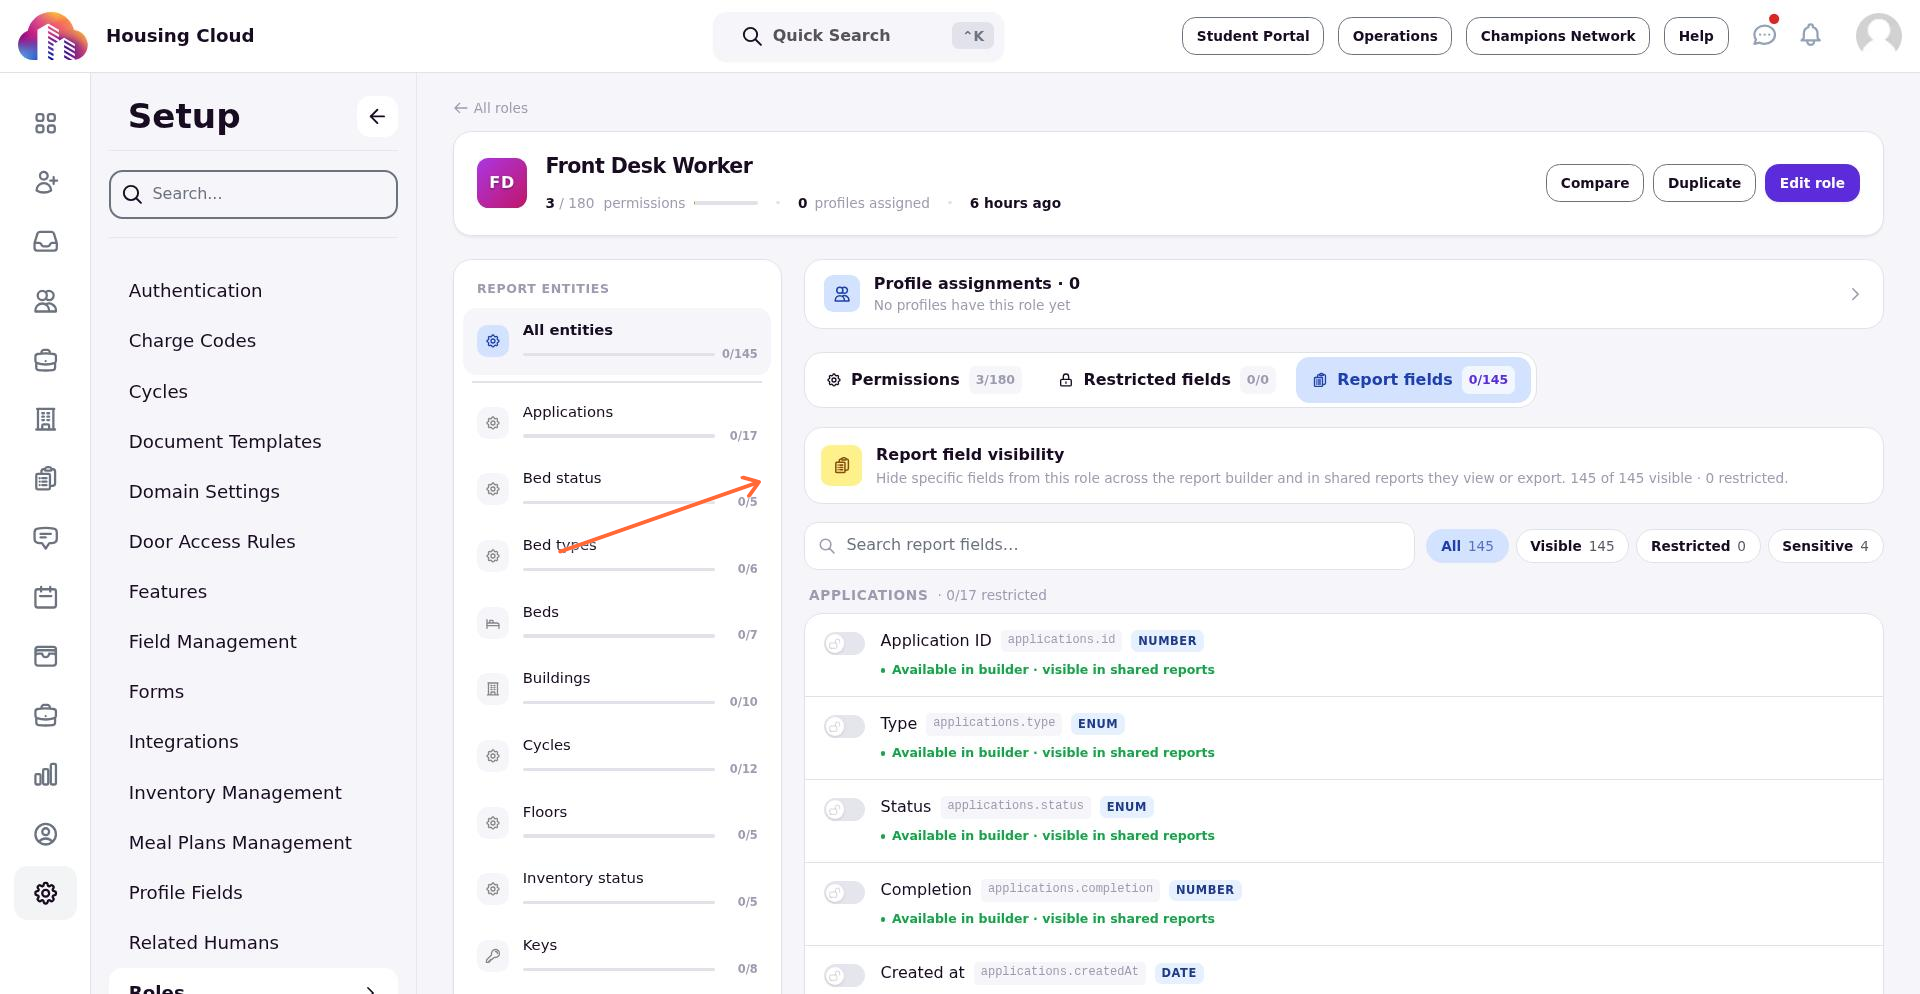
The Search report fields input lets you find fields by name. As you type, the list filters to show matching fields. Clear the search to see all fields again.
The Filter report fields chips let you narrow the list by state:
- All — Shows every field regardless of visibility state.
- Visible — Shows only fields currently available to this role.
- Restricted — Shows only fields currently hidden from this role.
- Sensitive — Shows fields flagged as sensitive data.
- Changed — Appears when you have unsaved changes and shows only fields with pending modifications.
Browse fields by report entity
The sidebar on the left is titled Report entities and groups fields by the data source they belong to, such as Profiles, Applications, Residents, or Inventory.
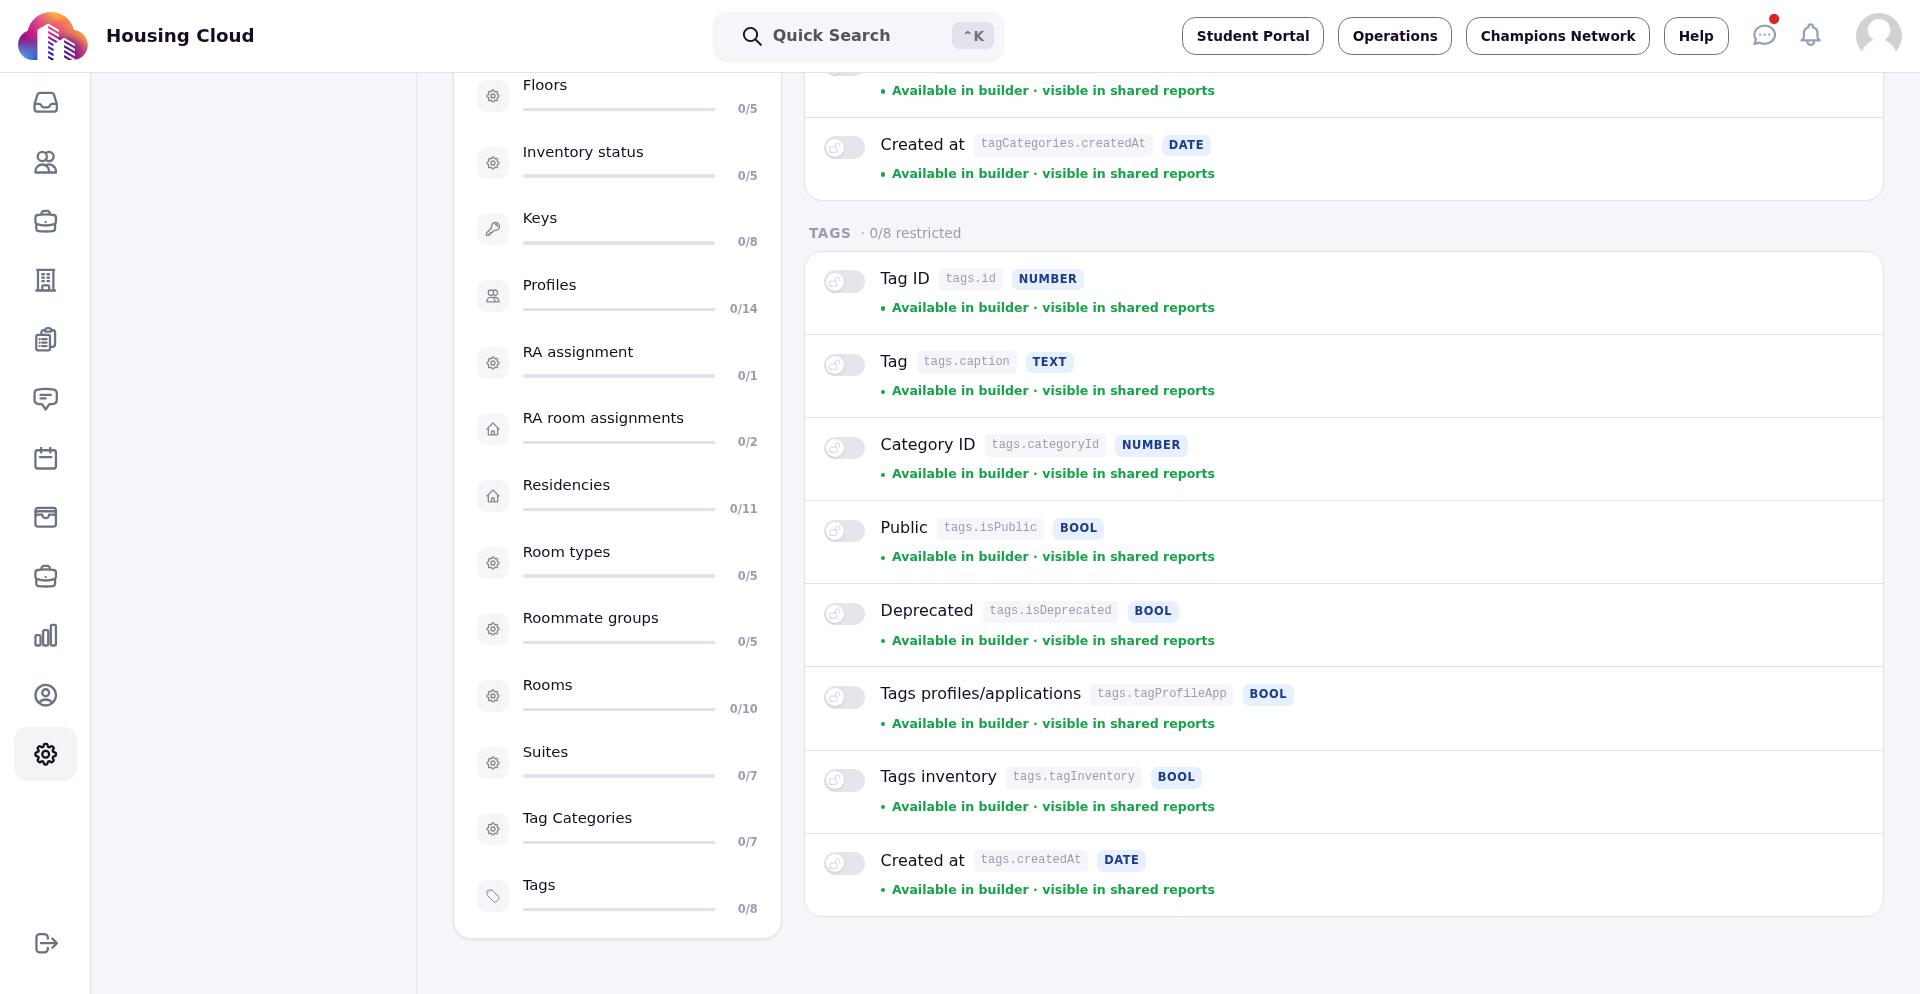
Click an entity name to see only fields from that source. Click All entities to see the complete list.
Each field row shows the field label, a code-form key in the format {entityId}.{fieldId}, a kind tag indicating the field type, and the current visibility state. Some fields also display a Sensitive badge if they contain sensitive data.
Toggle field visibility
To change a field's visibility, click anywhere on the field row. This enters edit mode and toggles the field between allowed and restricted states. The row updates to show the pending change:
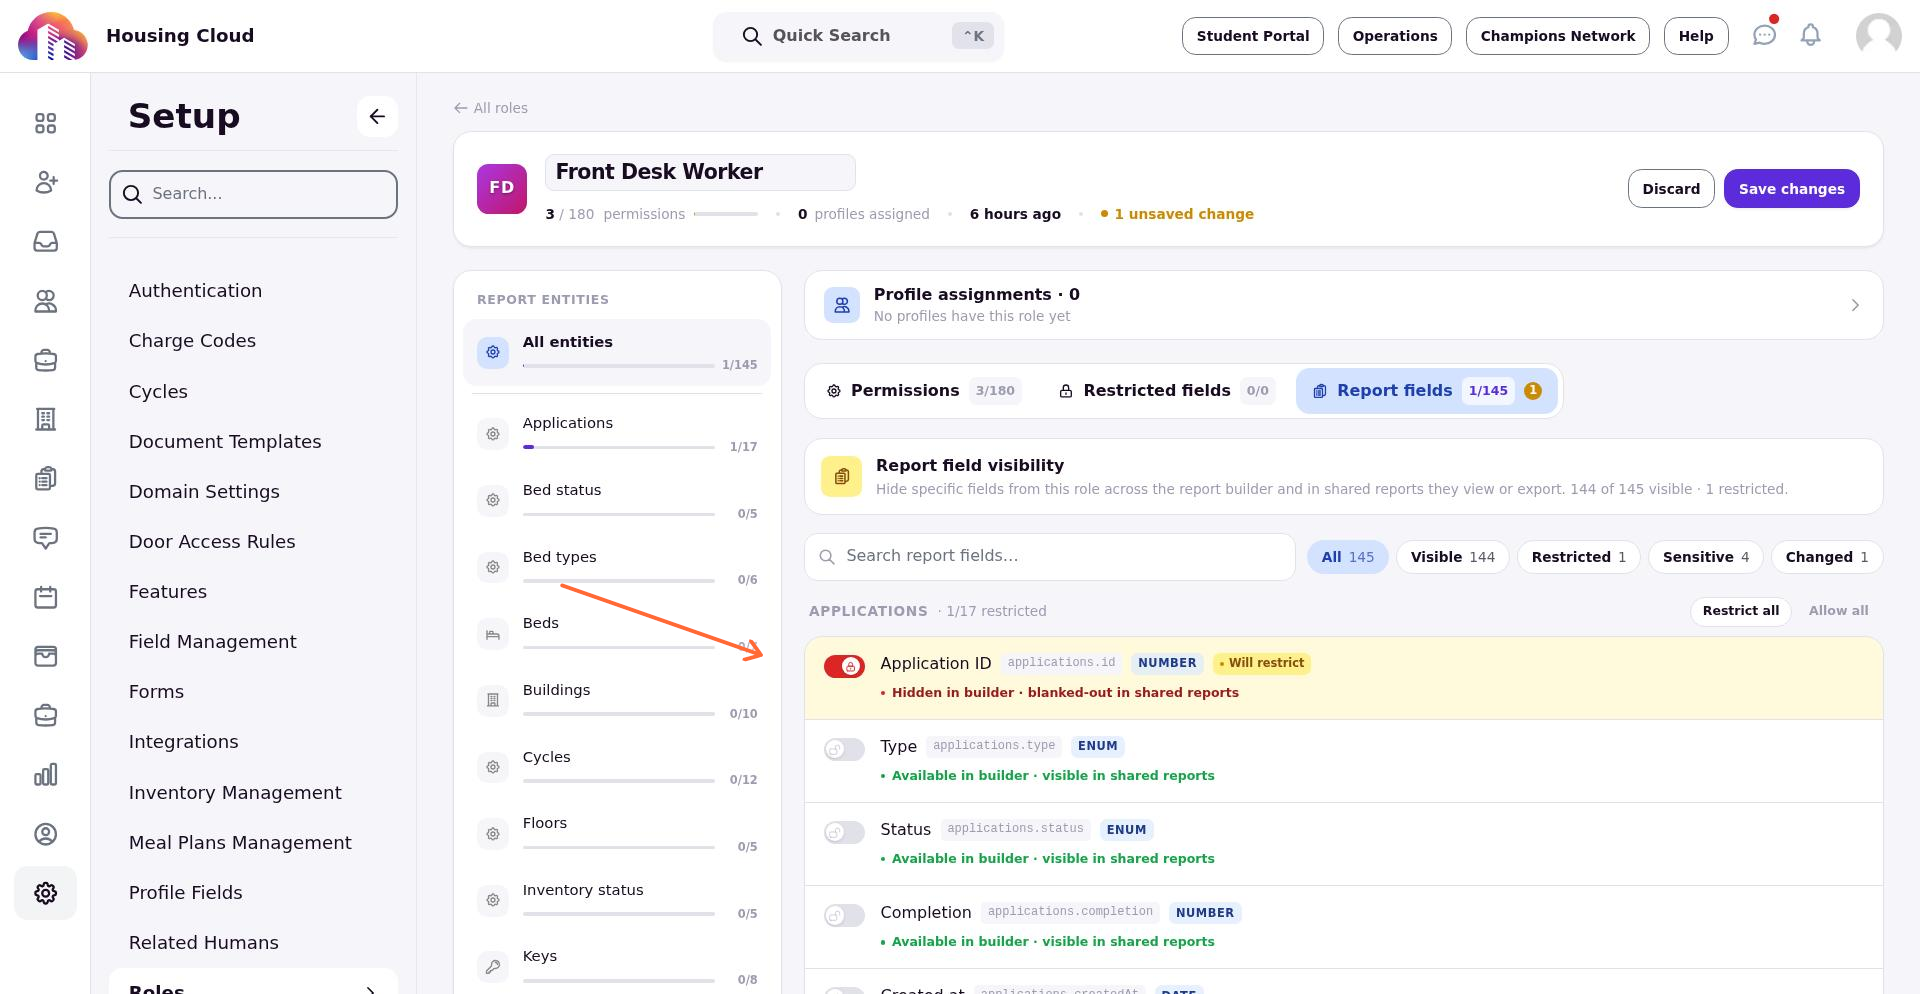
- A field being restricted shows a Will restrict badge and the action label changes to Allow [field name].
- A field being allowed shows a Will allow badge and the action label changes to Restrict [field name].
Click the row again to undo the change before saving. All changes remain pending until you save the role.
Apply bulk actions (Optional)
For faster configuration, you can restrict or allow multiple fields at once using bulk actions. These options appear when you're in edit mode.
In the Report entities sidebar, each entity section includes bulk action links:
- Restrict all — Hides all fields within that entity from this role.
- Allow all — Makes all fields within that entity visible to this role.
At the top of the sidebar, additional bulk actions apply across all entities:
- Restrict all sensitive — Hides all fields marked as sensitive from this role in one action. This is the fastest way to protect sensitive data.
- Allow all — Makes every field visible to this role.
Use these bulk actions carefully. Restricting all fields for an entity may prevent users from building useful reports. Consider which fields are truly necessary for each role's work.
Save your changes
After making all visibility changes, save the role to apply them. The role editor tracks pending changes, and the Changed filter chip helps you review modifications before saving.
Click Save changes in the role editor. The visibility settings take effect immediately. Users with this role will see updated field availability the next time they open the report builder or view a shared report.
What happens after saving
The role's report field permissions update immediately. Users assigned to this role experience the following changes:
- Fields you restricted no longer appear in the field picker when they build reports.
- Any shared reports they view will show blank values for restricted fields instead of the actual data.
- Exports of shared reports will also exclude the actual data for restricted fields.
Review the role details page to confirm the settings. You can return to the Report fields tab at any time to adjust permissions as job responsibilities change.