Preview Email & Letter Templates with Recipient Data
Last updated: October 2, 2026
Overview
When composing emails with template variables like {{FIRST_NAME}} or {{CURRENT_RESIDENCY_ROOM}}, you can preview exactly how the message will appear for specific recipients before sending. The recipient preview feature replaces placeholder variables with real student data, helping you catch errors and verify personalization.
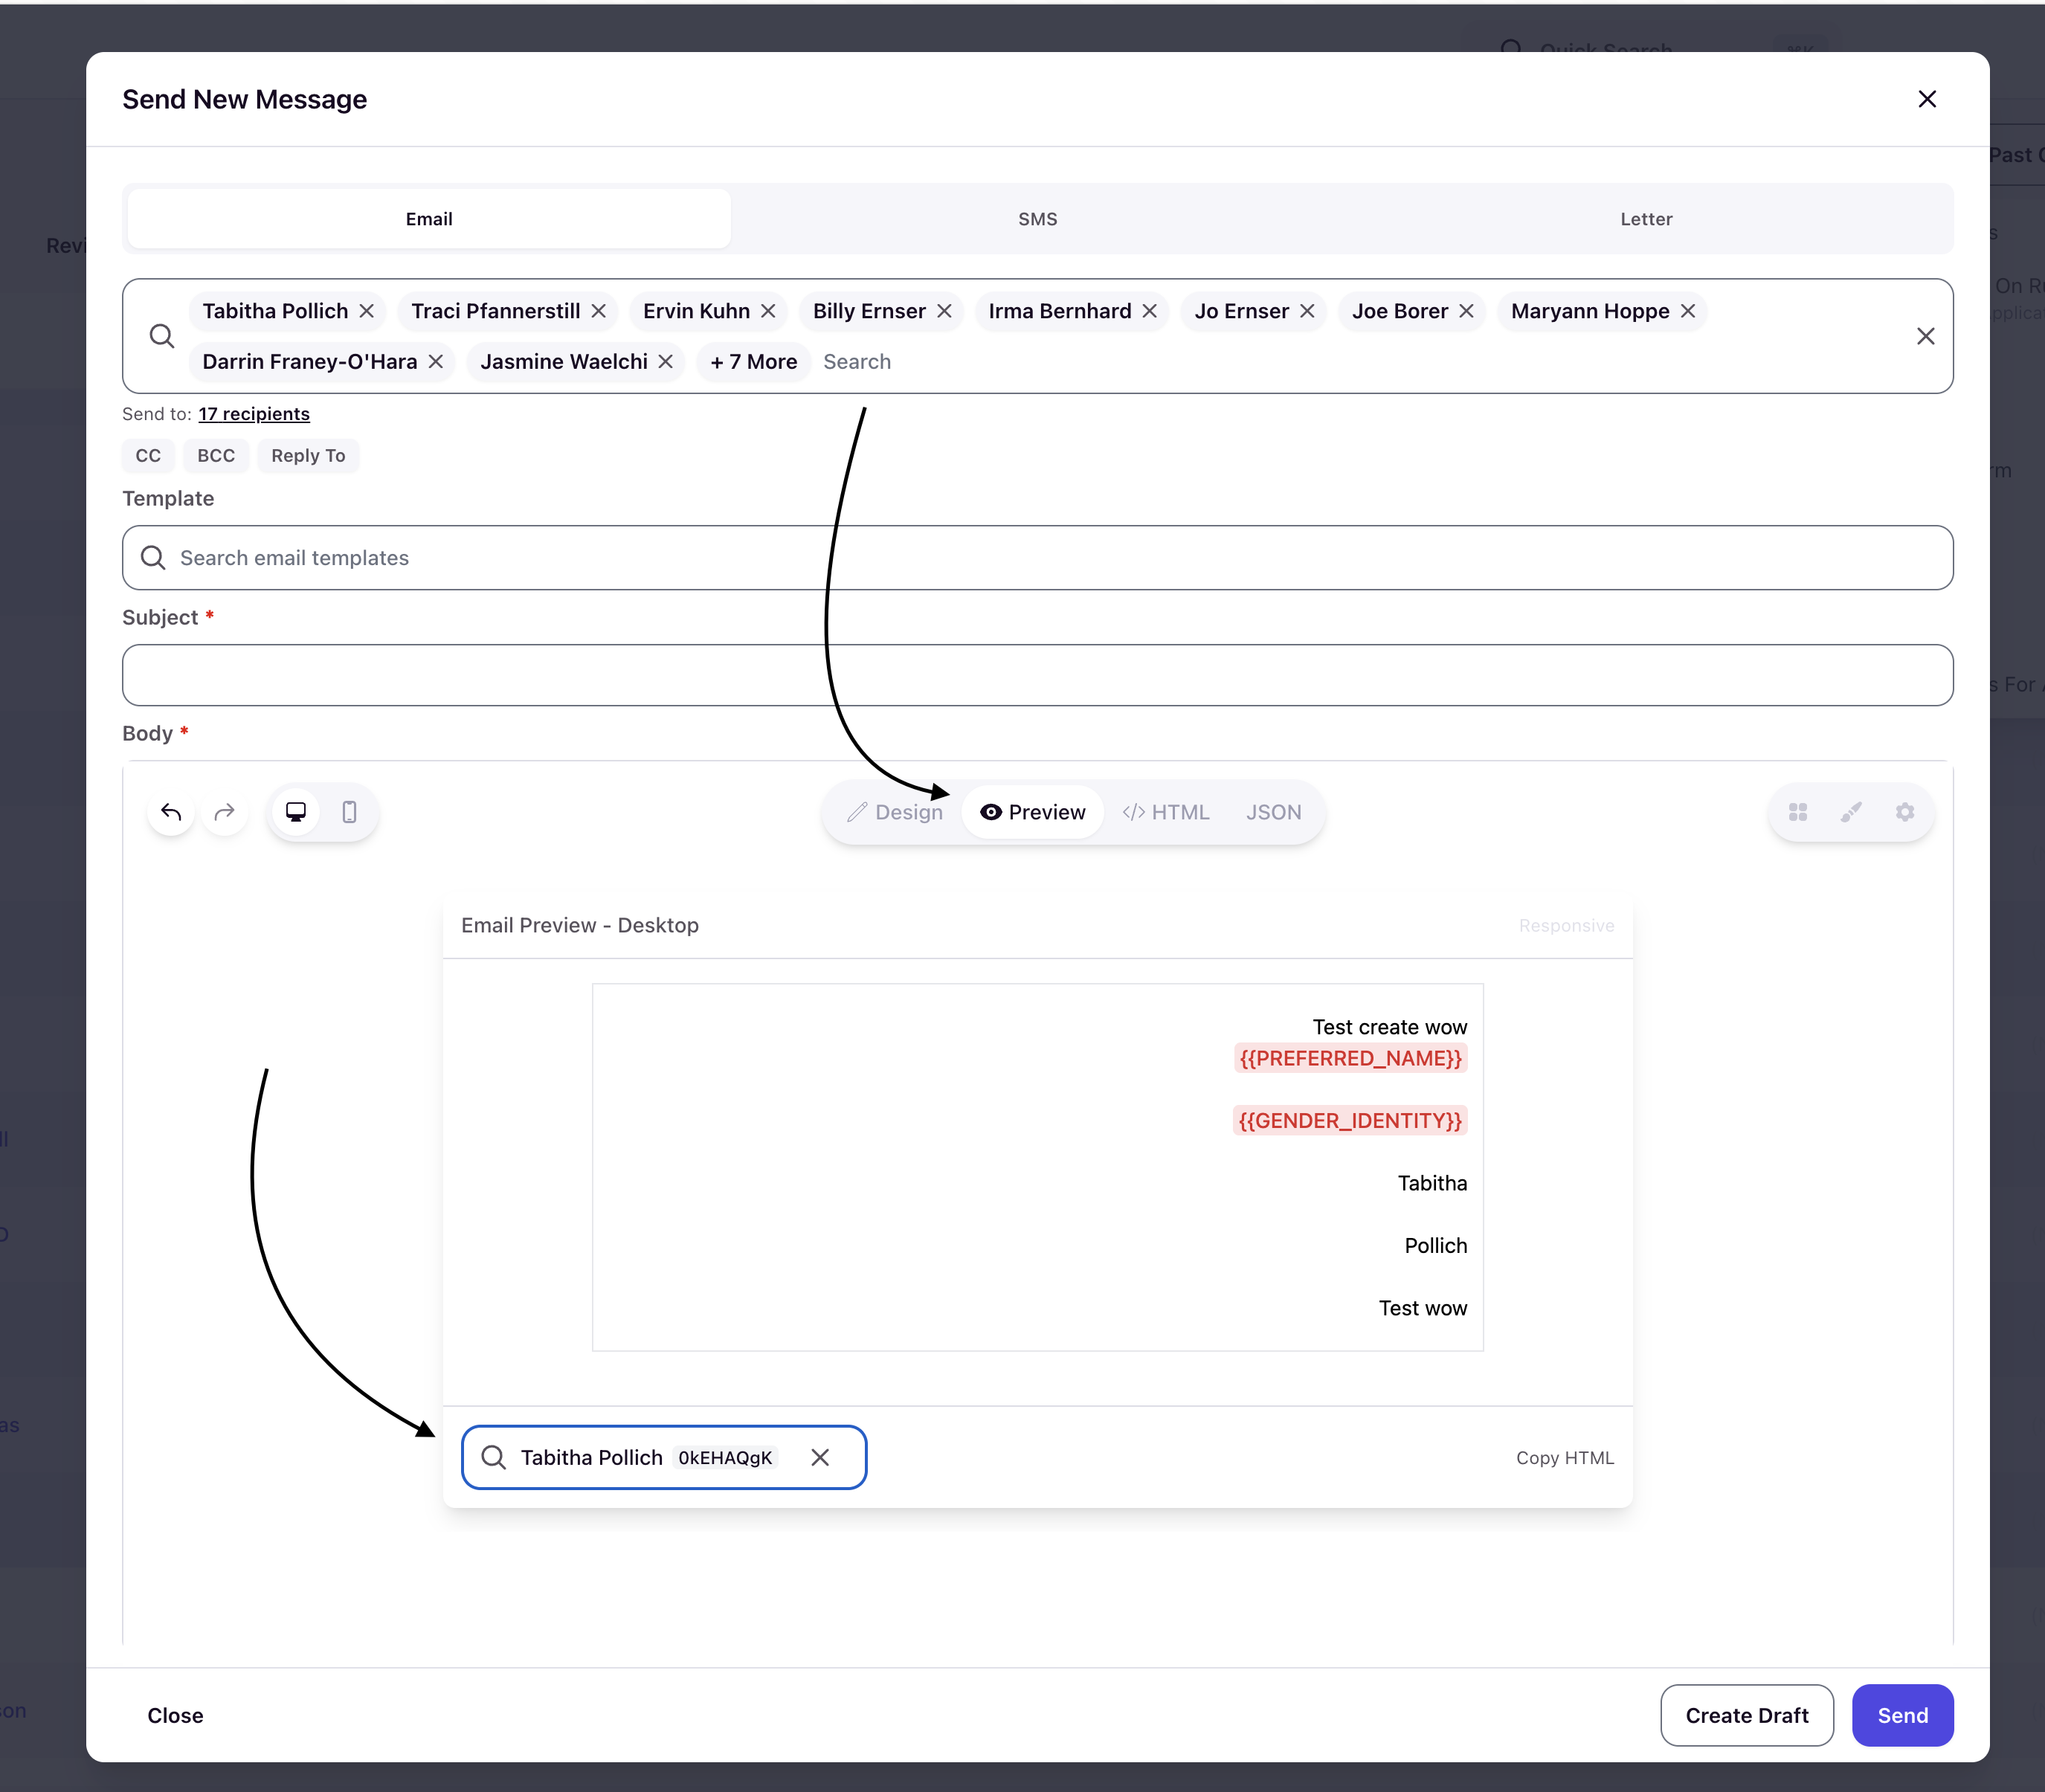
Access the Preview Feature
The recipient preview appears in the Preview tab of the email builder when you have recipients selected.
- Navigate to Admin > Communications > New Email or open an existing template
- Add recipients to the To field
- Compose your message with template variables (e.g., {{PREFERRED_NAME}}, {{CURRENT_RESIDENCY_BUILDING}})
- Click the Preview tab in the toolbar
The preview feature only appears when you have recipients selected and template variables in your message body.
Select a Recipient to Preview
At the bottom left of the preview panel, you'll see a search combobox that replaces the standard "1 blocks" indicator.
Search for Recipients
- Click the "Preview as recipient..." combobox
- Type at least 2 characters to search by:
- Student name (first or last)
- SIS ID
- Select a recipient from the dropdown
Each option shows:
- Student name (bolded)
- SIS ID badge
- Email address
View Rendered Variables
After selecting a recipient, the preview automatically updates to show:
- All template variables replaced with that student's data
- Missing variables highlighted in red with a light red background
- The complete message as the recipient will see it
Variables that don't have data for the selected recipient appear in red. For example, {{CURRENT_RESIDENCY_ROOM}} will be highlighted if the student hasn't been assigned a room yet.
Available Template Variables
You can insert variables using the Variables button in the email builder. Common variables include:
Personal Information
- {{FIRST_NAME}} - Student's first name
- {{LAST_NAME}} - Student's last name
- {{PREFERRED_NAME}} - Student's preferred name
- {{AGE}} - Student's age
Current Residency
- {{CURRENT_RESIDENCY_ROOM}} - Current room assignment
- {{CURRENT_RESIDENCY_BUILDING}} - Current building assignment
Past Residency
- {{LAST_RESIDENCY_ROOM}} - Previous room assignment
- {{LAST_RESIDENCY_BUILDING}} - Previous building assignment
Applications and Move-Ins
- {{LAST_APPLICATION_SUBMITTED_DATE}} - Date of most recent application
Use uppercase with underscores for all variables (e.g., {{FIRST_NAME}}, not {{first_name}}). The system recognizes approximately 25 different variables covering personal, residency, and application data.
Toggle Device Preview
Switch between desktop and mobile views to see how your email renders on different devices:
- In the preview header, click the Desktop or Mobile icon
- Mobile preview renders at 375px width to simulate smartphone displays
- Recipient-specific variables remain rendered in both views
Common Use Cases
Verify Room Assignments
Before sending move-in instructions, preview the email for students in different buildings to ensure room variables populate correctly.
Test Personalization
Check that preferred names appear properly throughout the message, especially for students with different name preferences.
Catch Missing Data
Identify students who lack required information (highlighted in red) before sending, allowing you to update records or adjust the message.
The preview updates instantly when you select different recipients, making it easy to spot-check multiple students without leaving the email builder.
Troubleshooting
Variables Show Red Highlighting
Red text with a light red background indicates the selected student doesn't have data for that variable. This could mean:
- The student hasn't been assigned to a room yet (for residency variables)
- The field is empty in their student record
- The variable references data from a different academic cycle
Solution: Update student records before sending, or remove variables that don't apply to all recipients.
Combobox Doesn't Appear
The recipient preview combobox only appears when:
- You have recipients selected in the To field
- You're in the Preview tab
- The feature is enabled for your institution
Solution: Add recipients first, then switch to the Preview tab.
Search Returns No Results
Search requires at least 2 characters and matches:
- First or last name (case-insensitive)
- SIS ID (case-insensitive)
Solution: Try searching by a different part of the name or use the student's SIS ID.
If you encounter issues with variables displaying incorrect cycle data (e.g., showing Fall assignments when you need Spring), contact support to verify your academic cycle settings.