Generating Print Letters with Mail Merge
Last updated: August 28, 2026
Overview
Generate print-ready letters for operational and compliance workflows like balance notices, move-out notices, certified mailings, and mailbox delivery notifications. Create reusable templates with merge fields, generate PDFs for individual students or bulk lists, and maintain an audit trail on each student's profile.
Letters are PDF documents generated from templates with student-specific merge fields. Unlike email communications, letters are designed for physical printing and mailing.
What You Can Do
- Build reusable letter templates with merge fields for student names, addresses, dates, and residency details
- Generate individual PDFs for single students or combined PDFs for bulk printing (100+ recipients)
- Download and print letters on-demand for operational workflows
- Track generated letters on student profiles with timestamps, content snapshots, and download links
Before You Start
You need:
- Communications access in your admin permissions to view and create letters
- Template management permissions to create or edit letter templates
- Complete profile data for merge fields (student names, addresses, room assignments, etc.)
Create and save templates in advance so you can quickly generate letters during peak operational periods like move-in, billing cycles, or academic dismissals.
Creating a Letter Template
Step 1: Navigate to Templates
Go to Admin → Communications → Templates.
Step 2: Create New Template
Click New Template and enter:
- Template Name (e.g., "Balance Due Notice", "Move-Out Notification")
- Subject (appears as the letter title)
- Body using the rich text editor
Step 3: Insert Merge Fields
Click Insert Variable to add dynamic fields that populate with student data when you generate the letter. Available merge fields include:
- Personal Information: {{FIRST_NAME}}, {{LAST_NAME}}, {{EMAIL}}
- Dates: {{TODAY_DATE}} (auto-inserts the date you generate the letter)
- Residency: {{LAST_RESIDENCY_ROOM_NUMBER}}, {{LAST_SCHEDULED_MOVE_IN}}
- Profile Fields: Custom fields configured in your institution's profile settings
Merge fields only populate if the student profile contains that data. If a field is blank (e.g., no room assignment), it will appear empty in the generated letter.
Step 4: Format and Save
Use the rich text editor to format headings, paragraphs, and spacing. Click Save to add the template to your library.
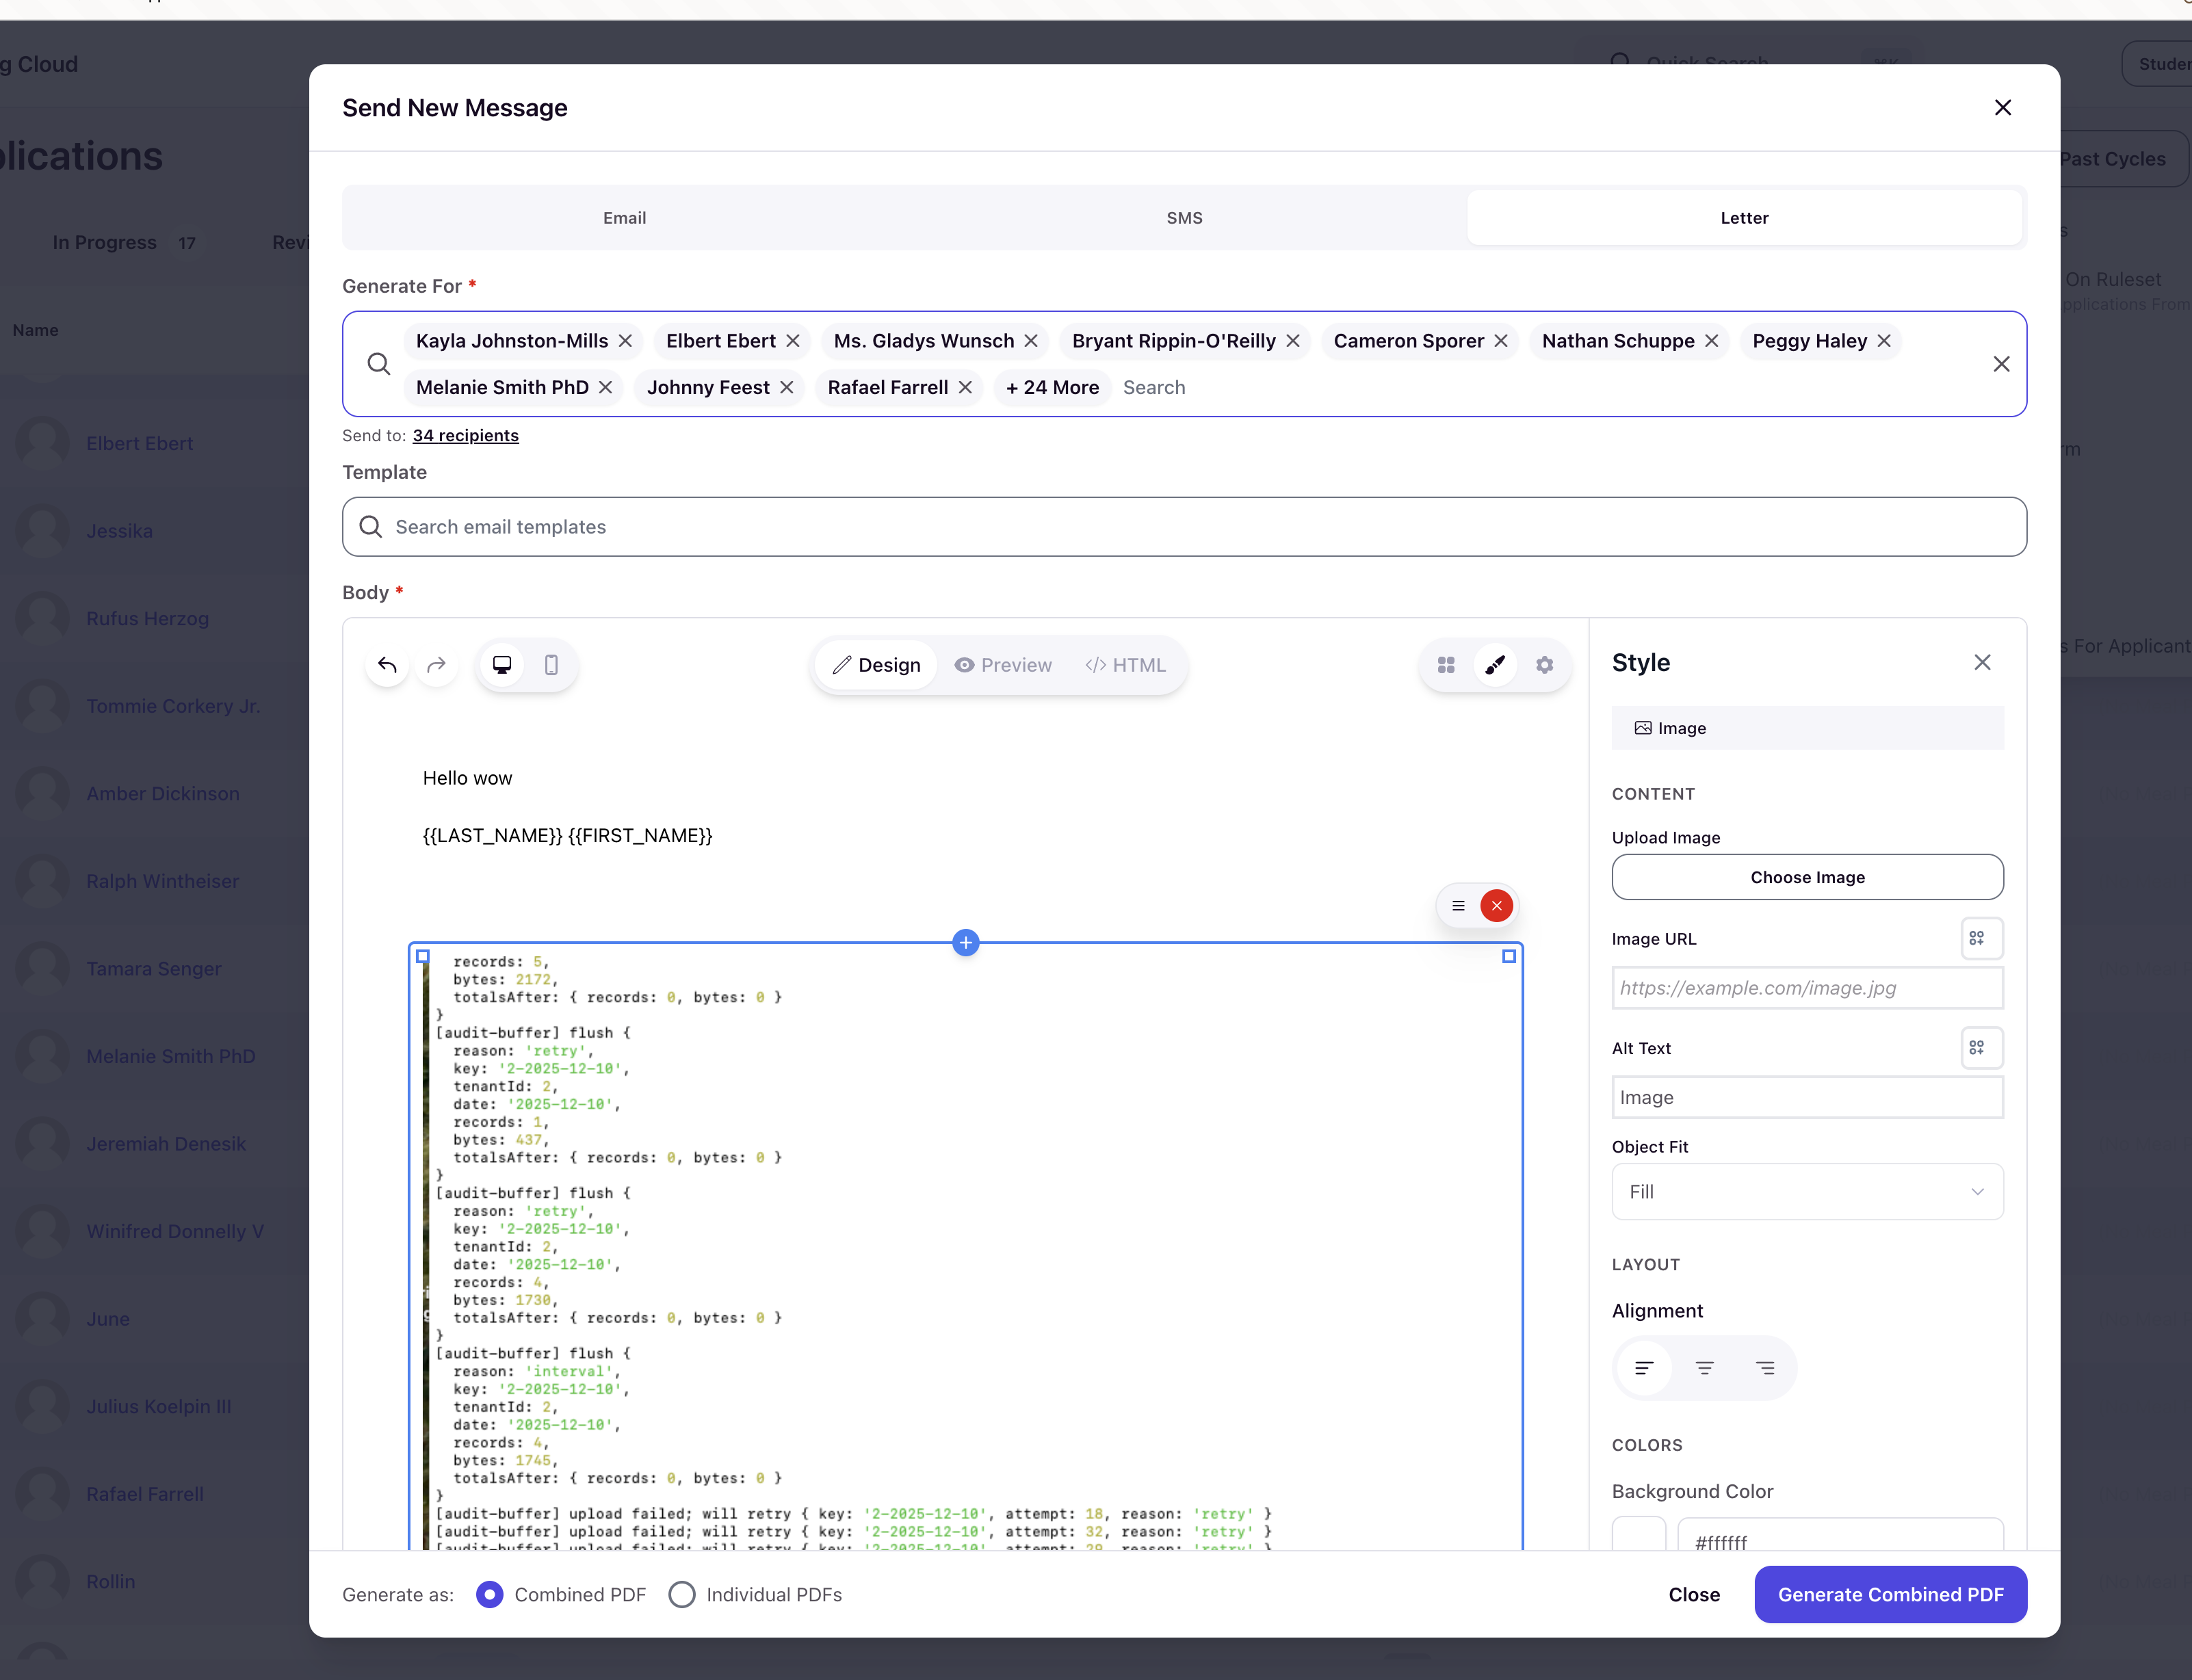
Generating Letters
For a Single Student
- Go to Admin → Communications
- Click Send Message in the top navigation
- In the Send Message modal, click the Letter tab
- Search for and select the student recipient
- Select your saved template from the dropdown
- Preview the PDF to confirm merge fields populated correctly (name, room, dates, etc.)
- Click Generate to create the letter
- Go to Admin → Communications → Letters to download the PDF
The generated letter is automatically logged to the student's User Activity with a download link and timestamp.
For Bulk Recipients
You can select multiple recipients from three different sources:
- Go to one of these locations:
- Profile Table (if Profile Table Communications is enabled in your settings)
- Applications list
- Residents list
- Select multiple students using checkboxes (or apply filters to target specific groups like students with balances or specific room assignments)
- Click Send Message
- In the Send Message modal, click the Letter tab
- Confirm your selected recipients appear in the list
- Choose your template
- Select generation format:
- Individual PDFs: One file per student (useful for mailing services that need separate documents)
- Combined PDF: Single file with all letters for batch printing
- Click Generate
- Go to Admin → Communications → Letters to download your PDFs
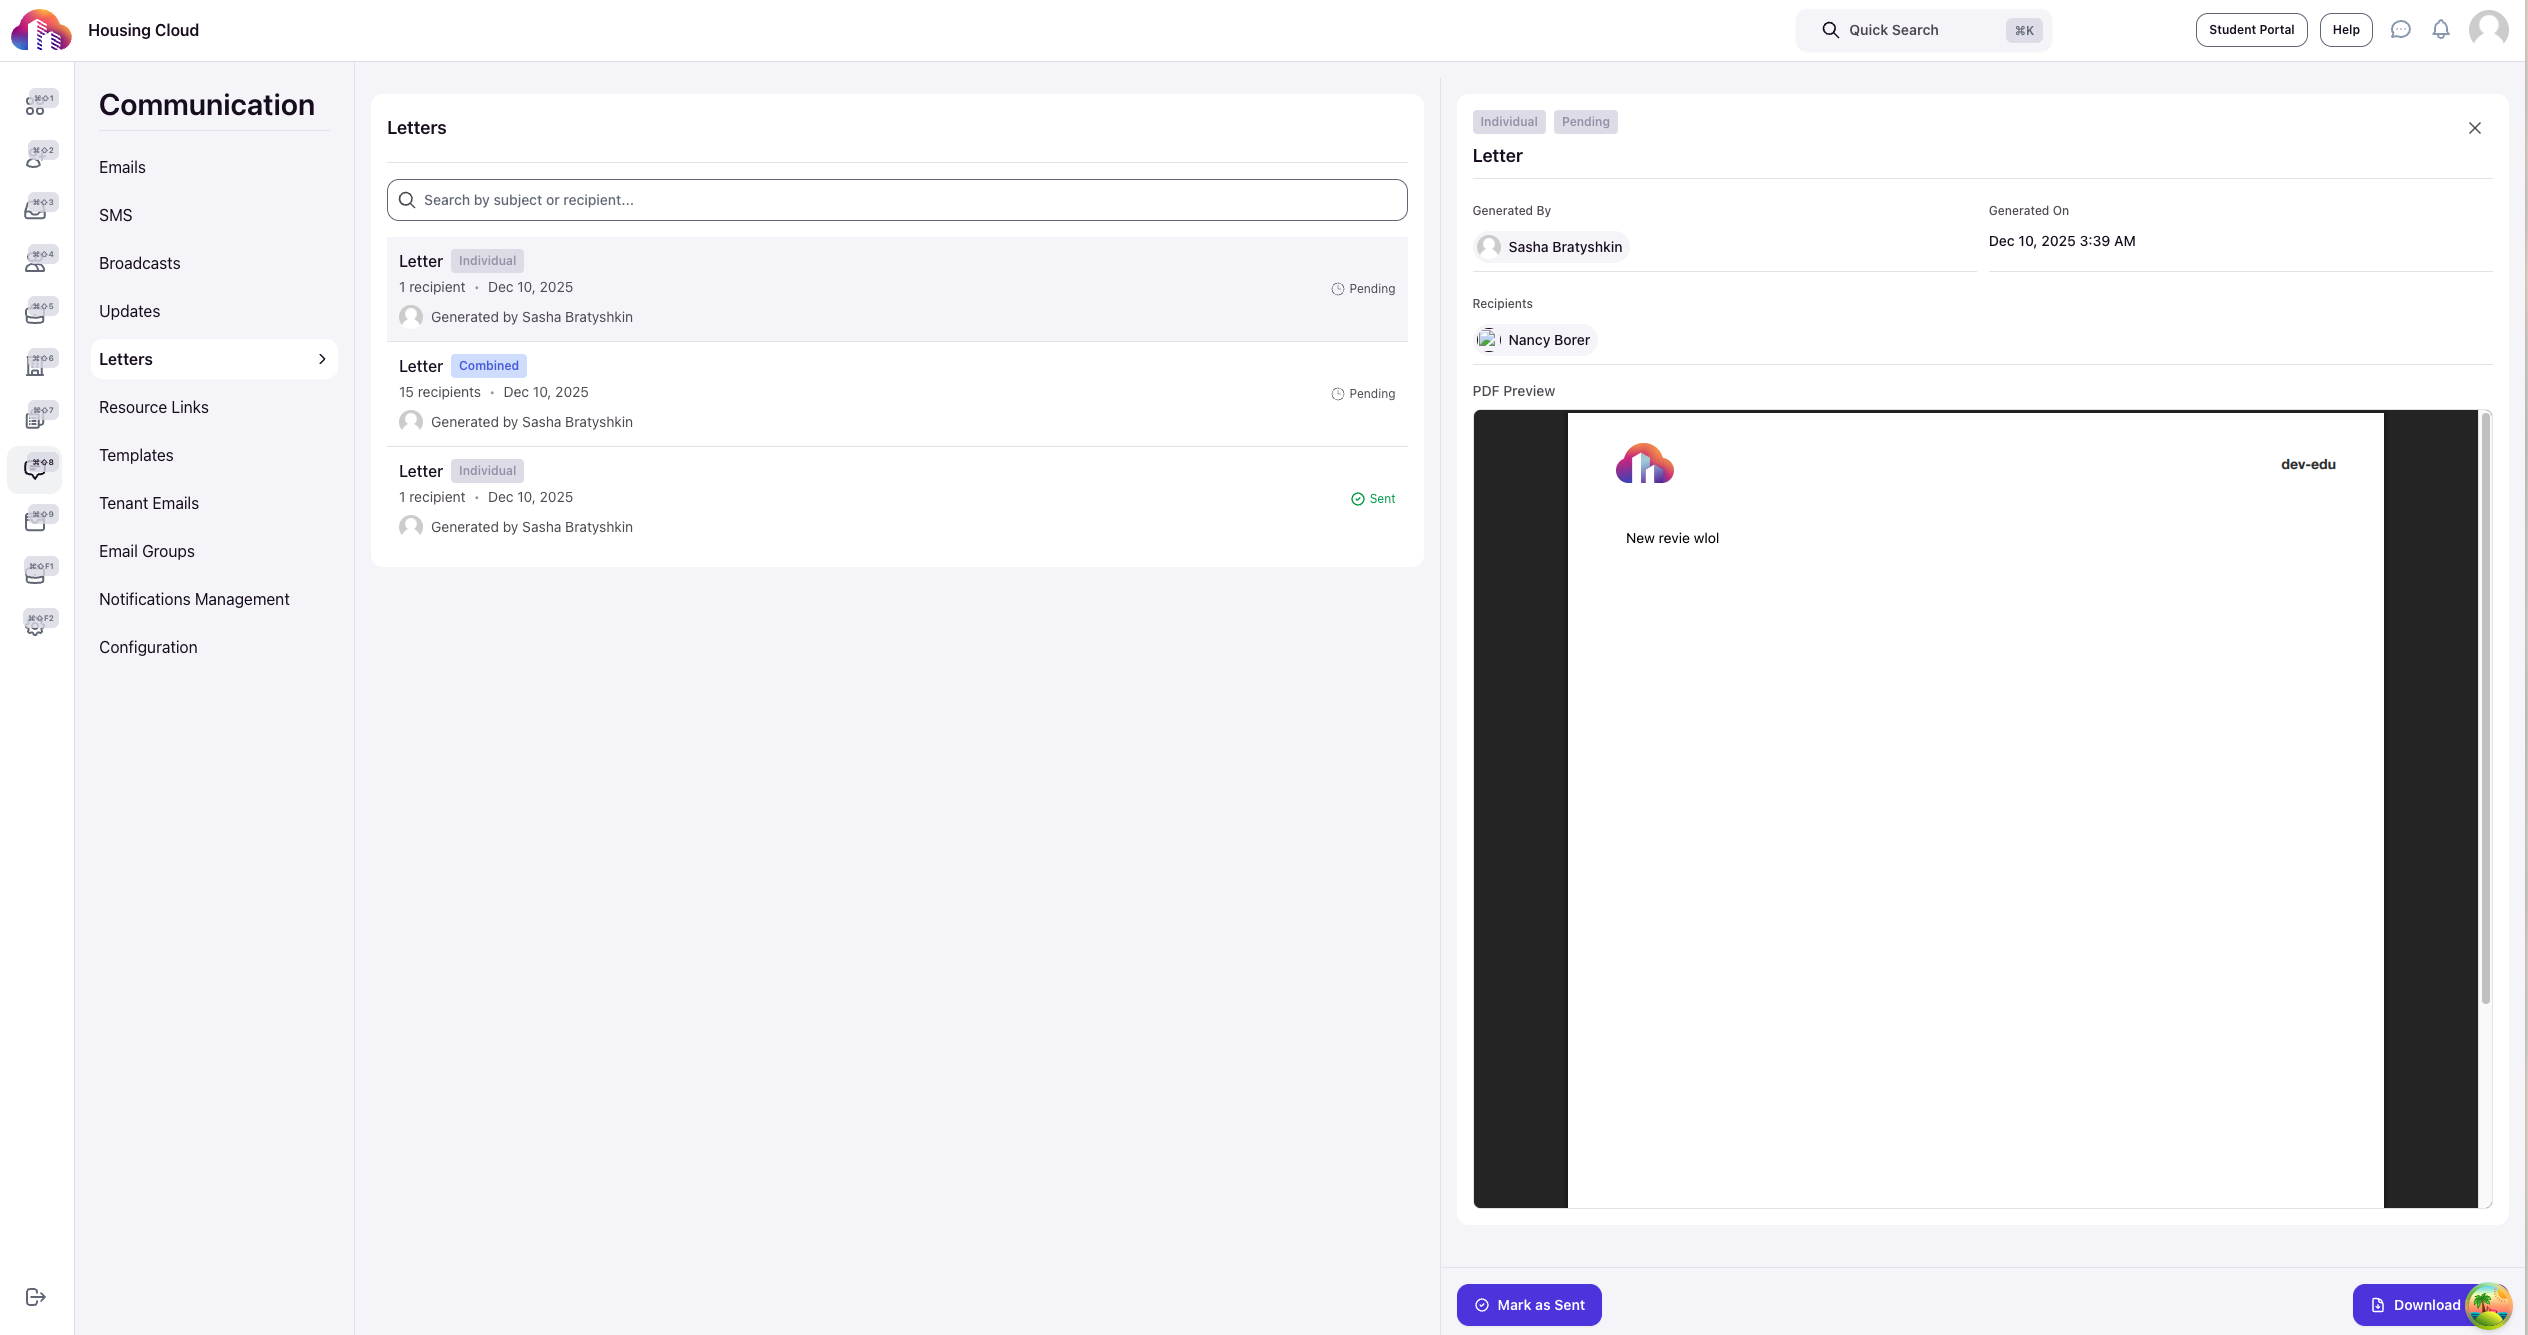
Combined PDFs are ideal for high-volume scenarios like 100+ certified letters. Download once and send to your print center or mail vendor.
Managing Generated Letters
View All Letters
Go to Admin → Communications → Letters to see all generated letters. This is the primary location for downloading and managing all letters.
The Letters table shows:
- Type: Individual or Combined
- Recipients: Number of students included
- Generated date and by: Timestamp and admin who created it
- Status: Pending or Sent (manually updated)
- Preview: View the PDF before downloading
Download and Print
Click Download next to any letter to save the PDF. For combined PDFs, you'll get one file ready for batch printing.
Mark as Sent
After mailing letters, click Mark as Sent to update the status. This helps your team track which notices have been delivered.
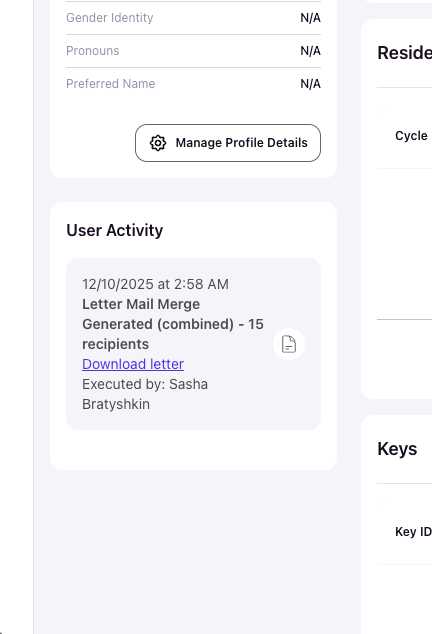
Audit Trail and Logging
Every generated letter is logged to each recipient's profile under User Activity. While you can download letters from the activity log, the Letters table is the primary location for managing all generated letters.
The log entry includes:
- Activity type: "Letter Mail Merge"
- Number of recipients: How many students received the same letter batch
- Timestamp: Exact date and time of generation
- Generated by: Admin user who created the letter
- Download link: Direct access to the exact PDF sent to that student
The system saves a snapshot of the rendered content, not just the template reference. Even if you edit the template later, the logged letter shows exactly what was generated at that time.
Common Use Cases
Balance and Non-Registration Notices
Generate letters for students with outstanding balances before registration deadlines. Use merge fields for account numbers, amounts due, and payment deadlines.
Academic Dismissal Move-Out Notices
Create bulk letters notifying students of move-out requirements following academic dismissal. Include merge fields for room numbers, move-out dates, and key return instructions.
Certified Letters Home
Generate individual PDFs for certified mailings to parent addresses. Use profile merge fields for parent names and home addresses.
Mailbox Delivery Notices
Print slips for student mailboxes notifying them of packages or important documents. Include merge fields for mailbox numbers and today's date.
Troubleshooting
Merge Field Shows Blank
Cause: The student's profile is missing that data field.
Fix: Go to the student's profile and update the missing information (room assignment, address, etc.). Regenerate the letter after updating.
PDF Preview Is Blank or Malformed
Cause: Template formatting issue or temporary generation error.
Fix: Regenerate the letter. If the issue persists, check the template for unusual formatting (extra line breaks, nested tables) and simplify.
Can't Find Template in Dropdown
Cause: Template is not published or you lack permissions.
Fix: Go to Communications → Templates and verify the template status is active. Contact your system admin if you need template management permissions.
Related Resources
Working with Student Profiles - Where letter logs appear and how to access profile data for merge fields
Documents & Forms - How e-signature documents differ from print letters