Enable SMS auto-reply
Last updated: August 28, 2026
SMS auto-reply sends automatic responses to inbound text messages during hours when your staff is unavailable. This provides immediate acknowledgment to residents while controlling exactly when automated responses are sent.
Use weekly schedules to cover regular after-hours periods and date overrides for holidays or special closures. The system sends only one auto-reply per contact per 24-hour period to avoid message fatigue.
Before you begin: You need at least one active SMS template and access to Communications settings.
Turn on auto-reply
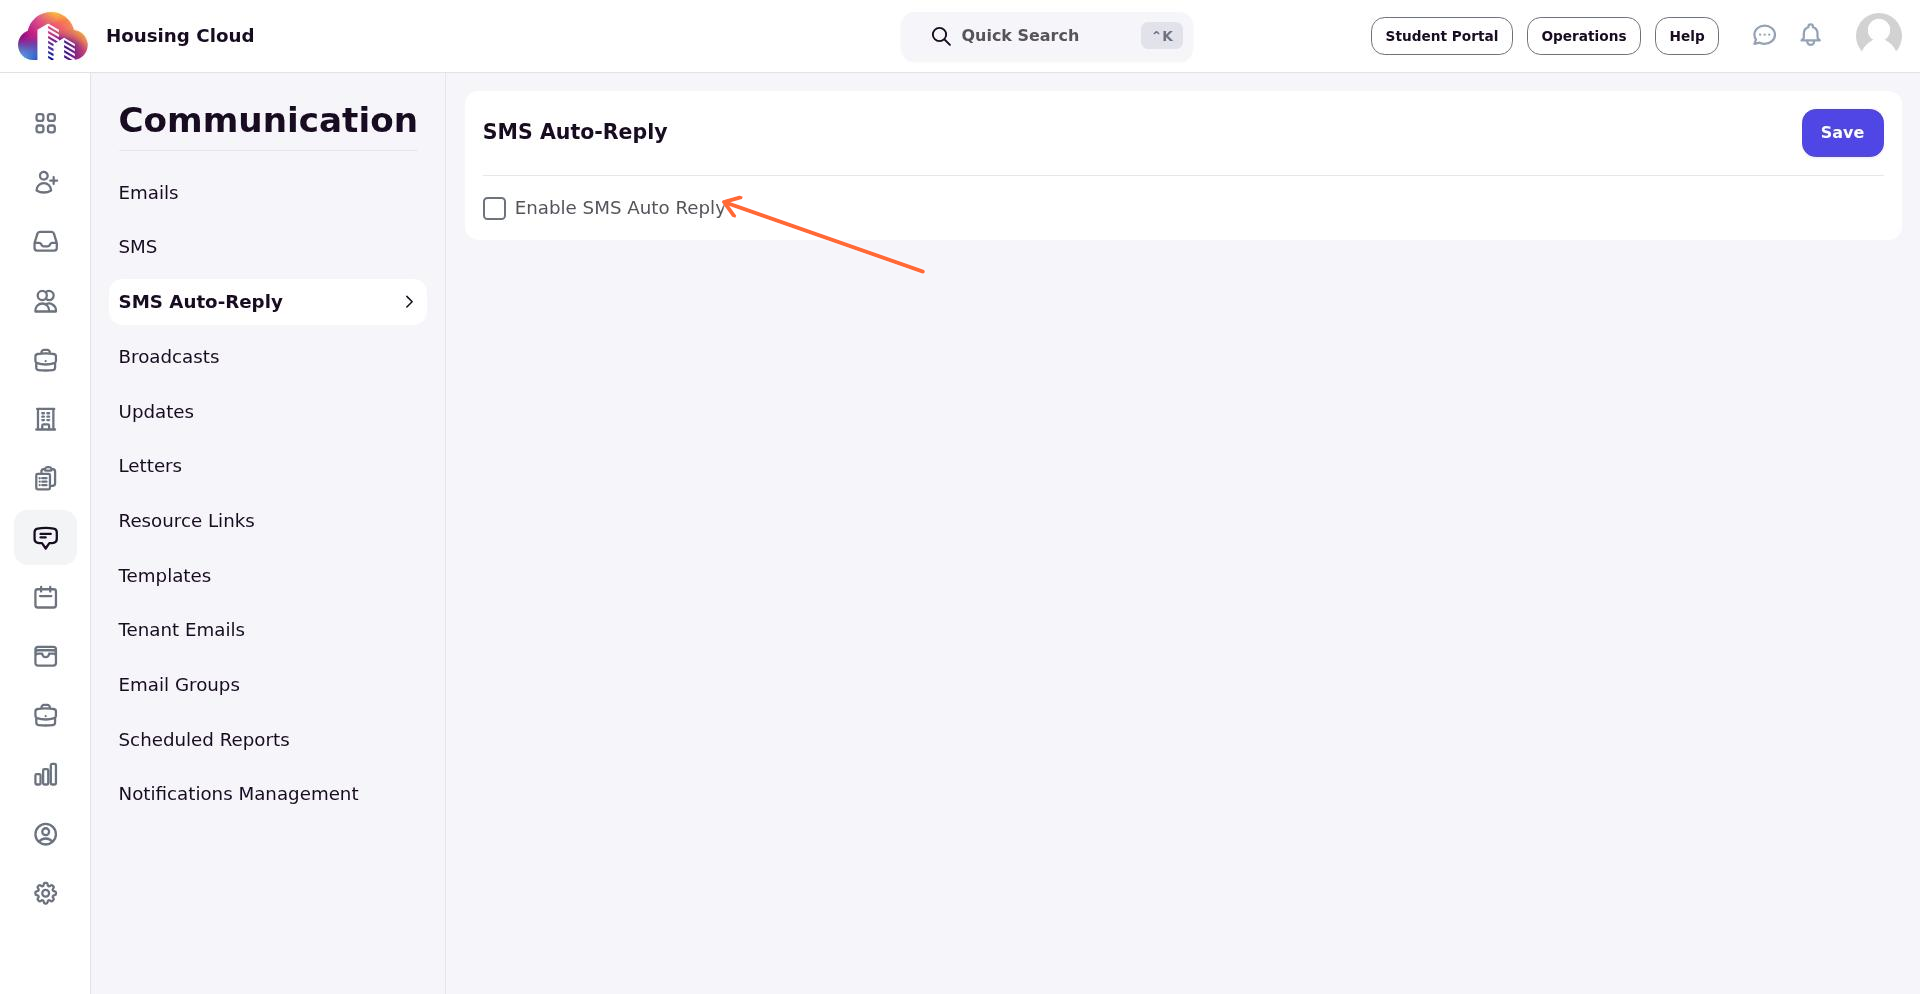
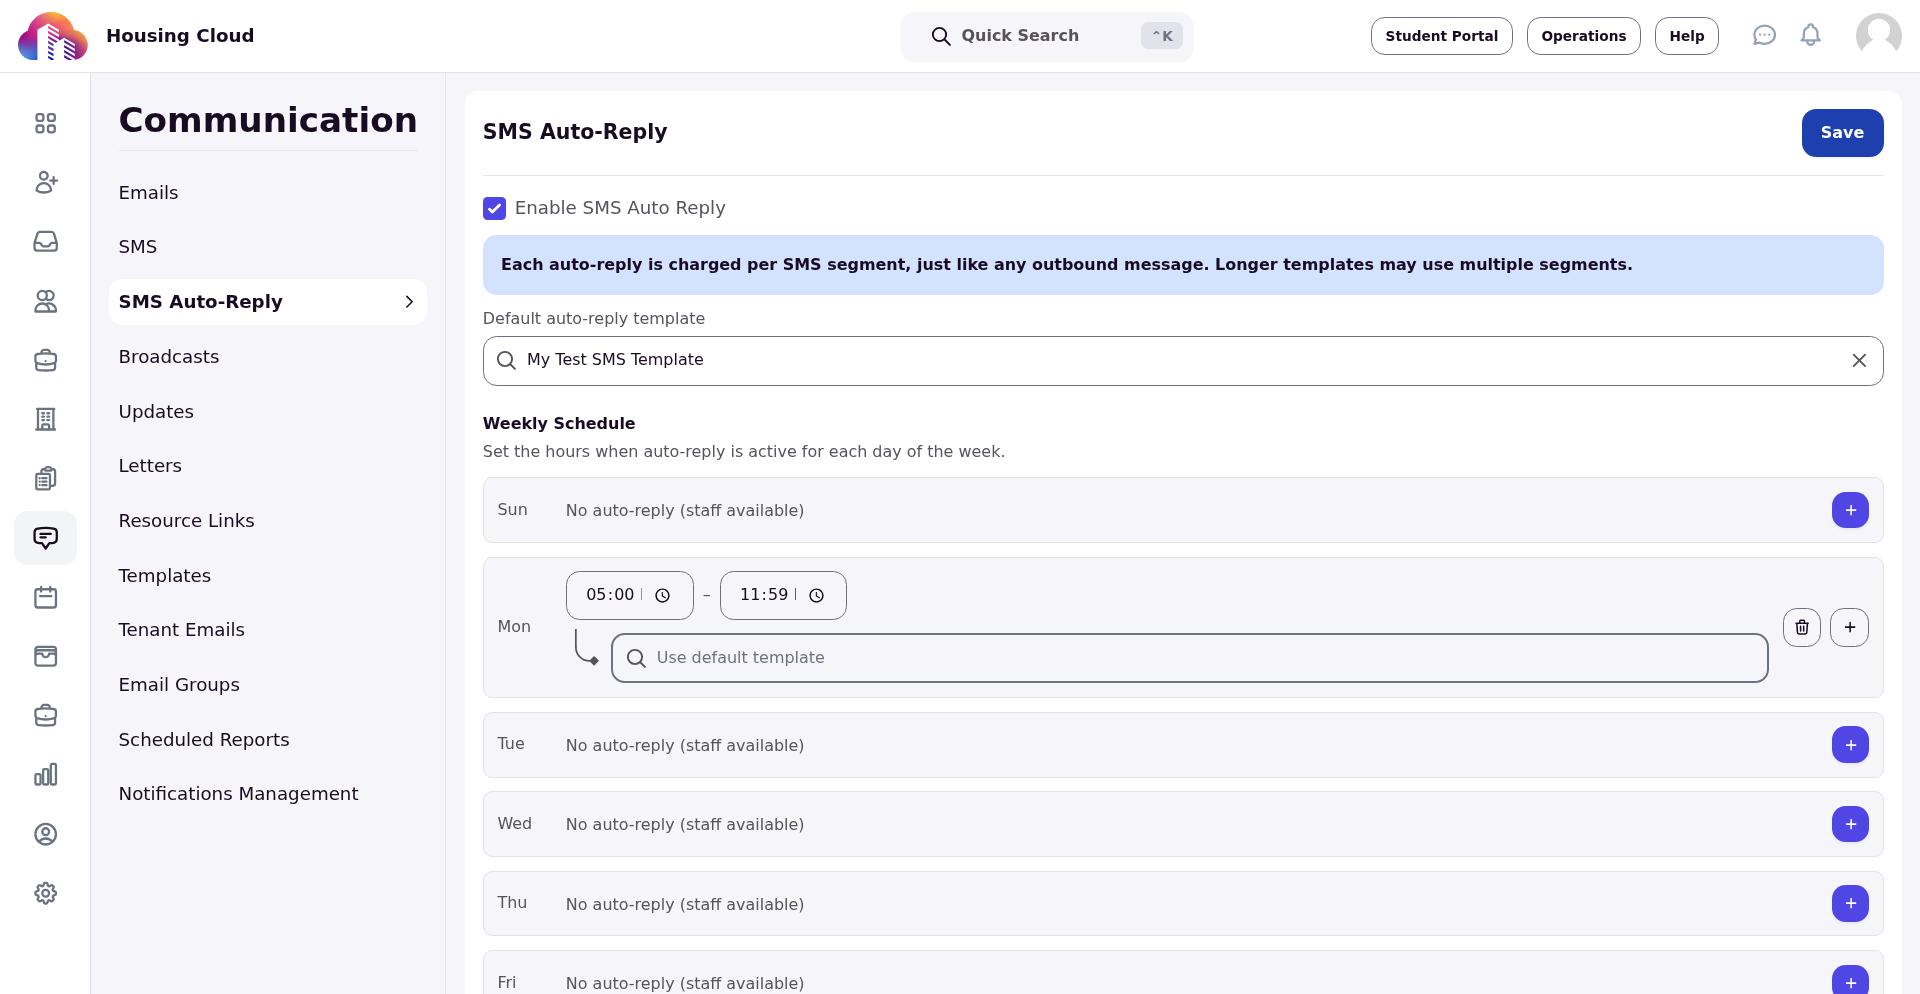
Navigate to Admin > Communications > SMS Auto-Reply and check Enable SMS Auto Reply.
Select your default template
Choose an active SMS template from the Default SMS template dropdown. This template will be used for all auto-replies unless you override it for specific days or dates.
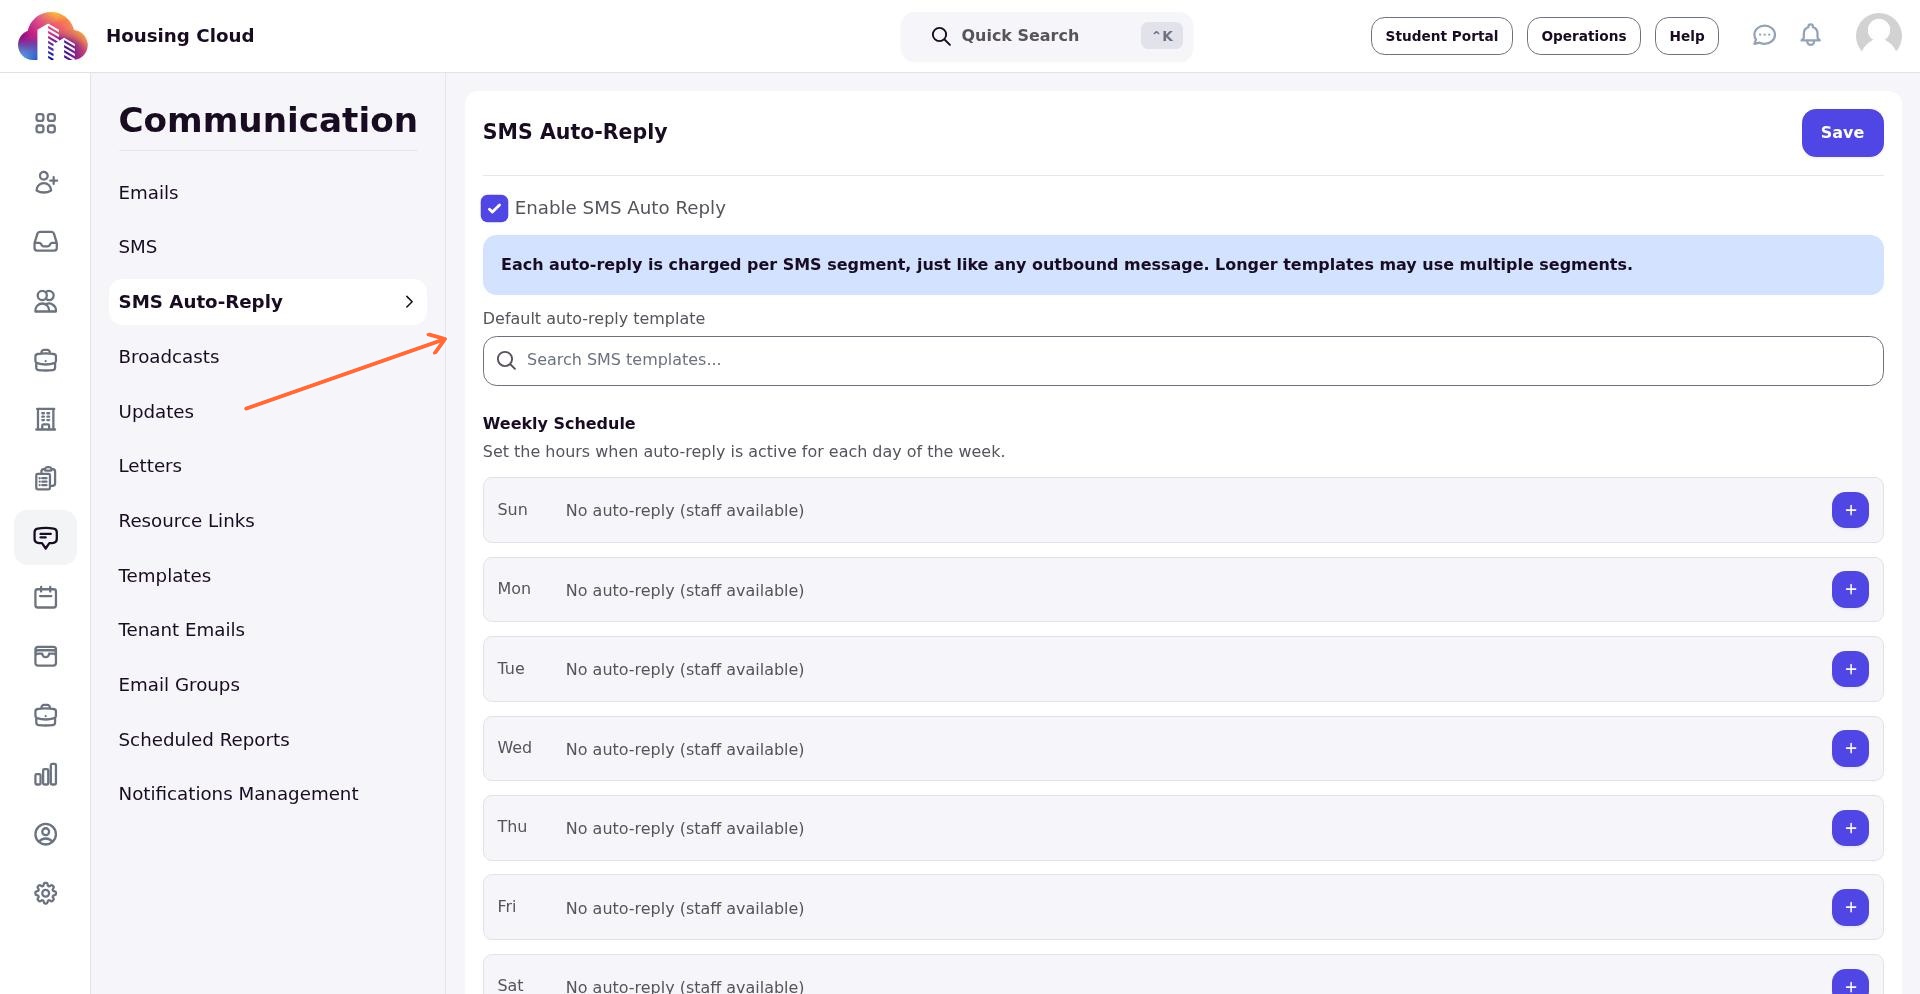
Once selected, the weekly schedule and date override sections appear.
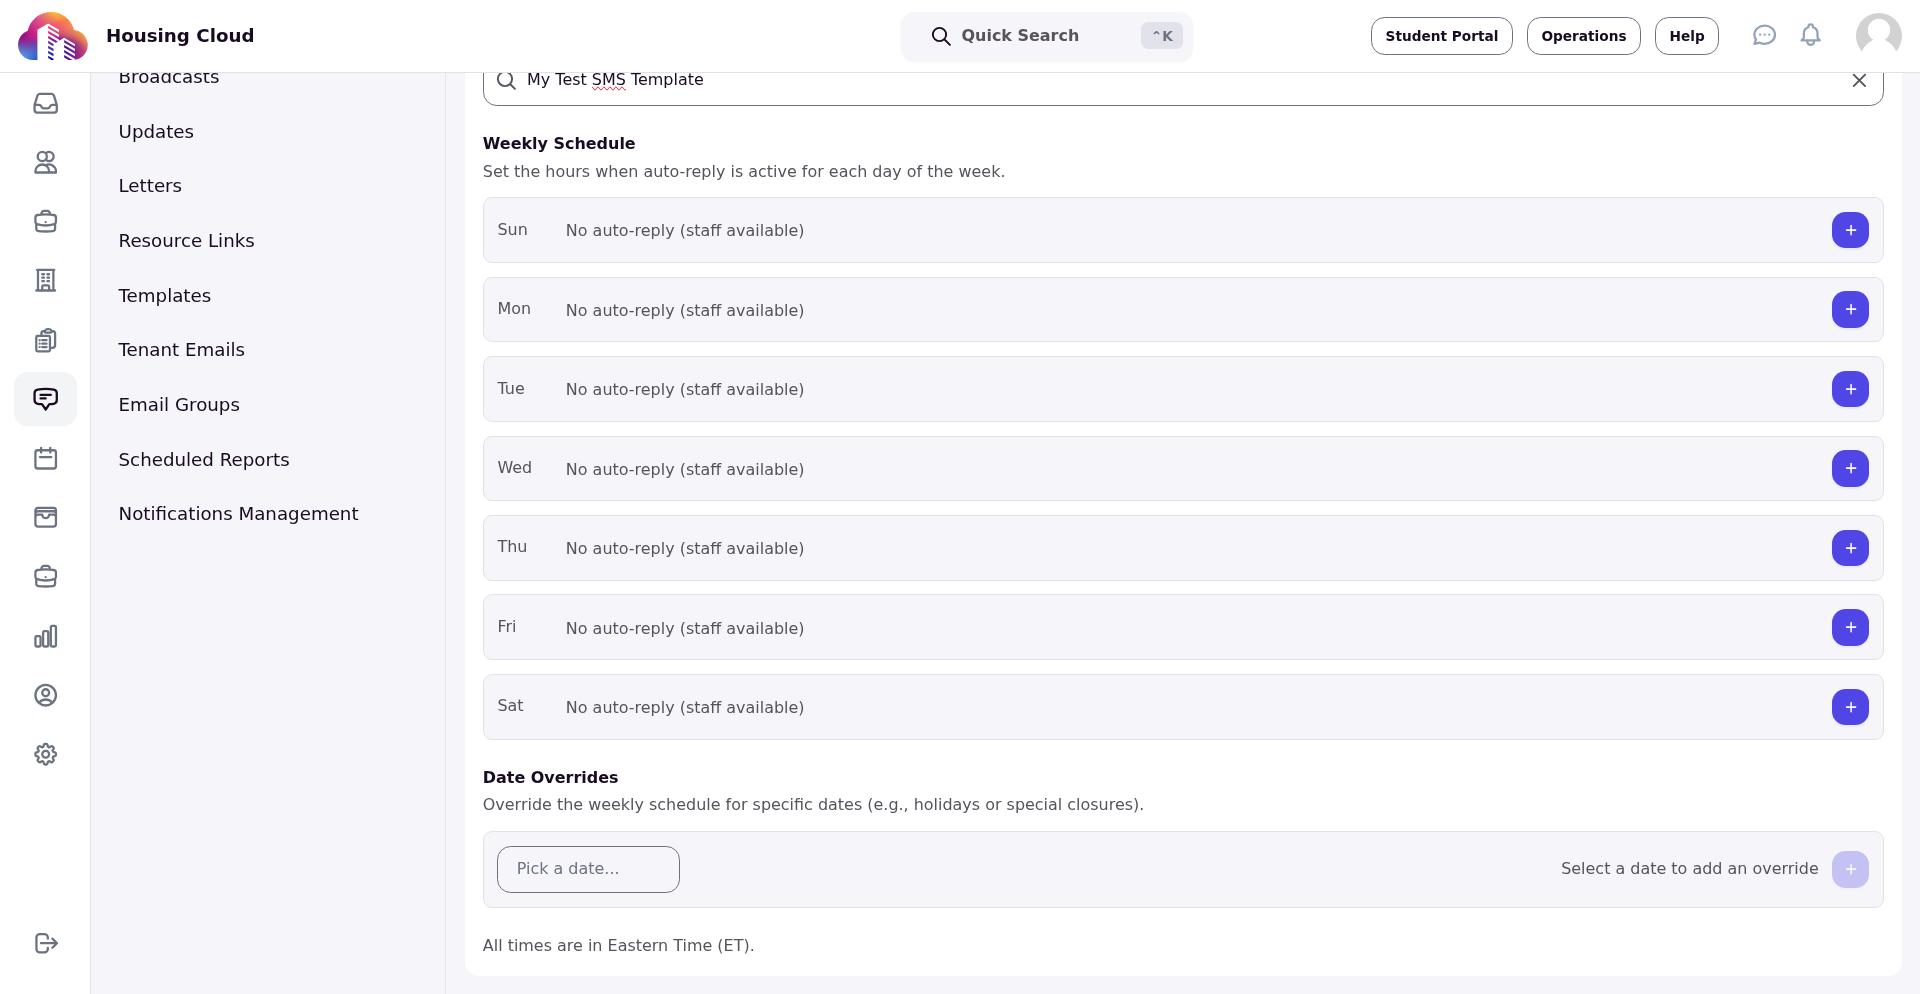
Each auto-reply is charged per SMS segment, just like any outbound message. Longer templates may use multiple segments.
Configure weekly schedule
The weekly schedule controls when auto-reply is active for each day of the week. Days are off by default, meaning staff is available and no auto-replies are sent.
To enable auto-reply for a day, click the plus icon next to the day name.
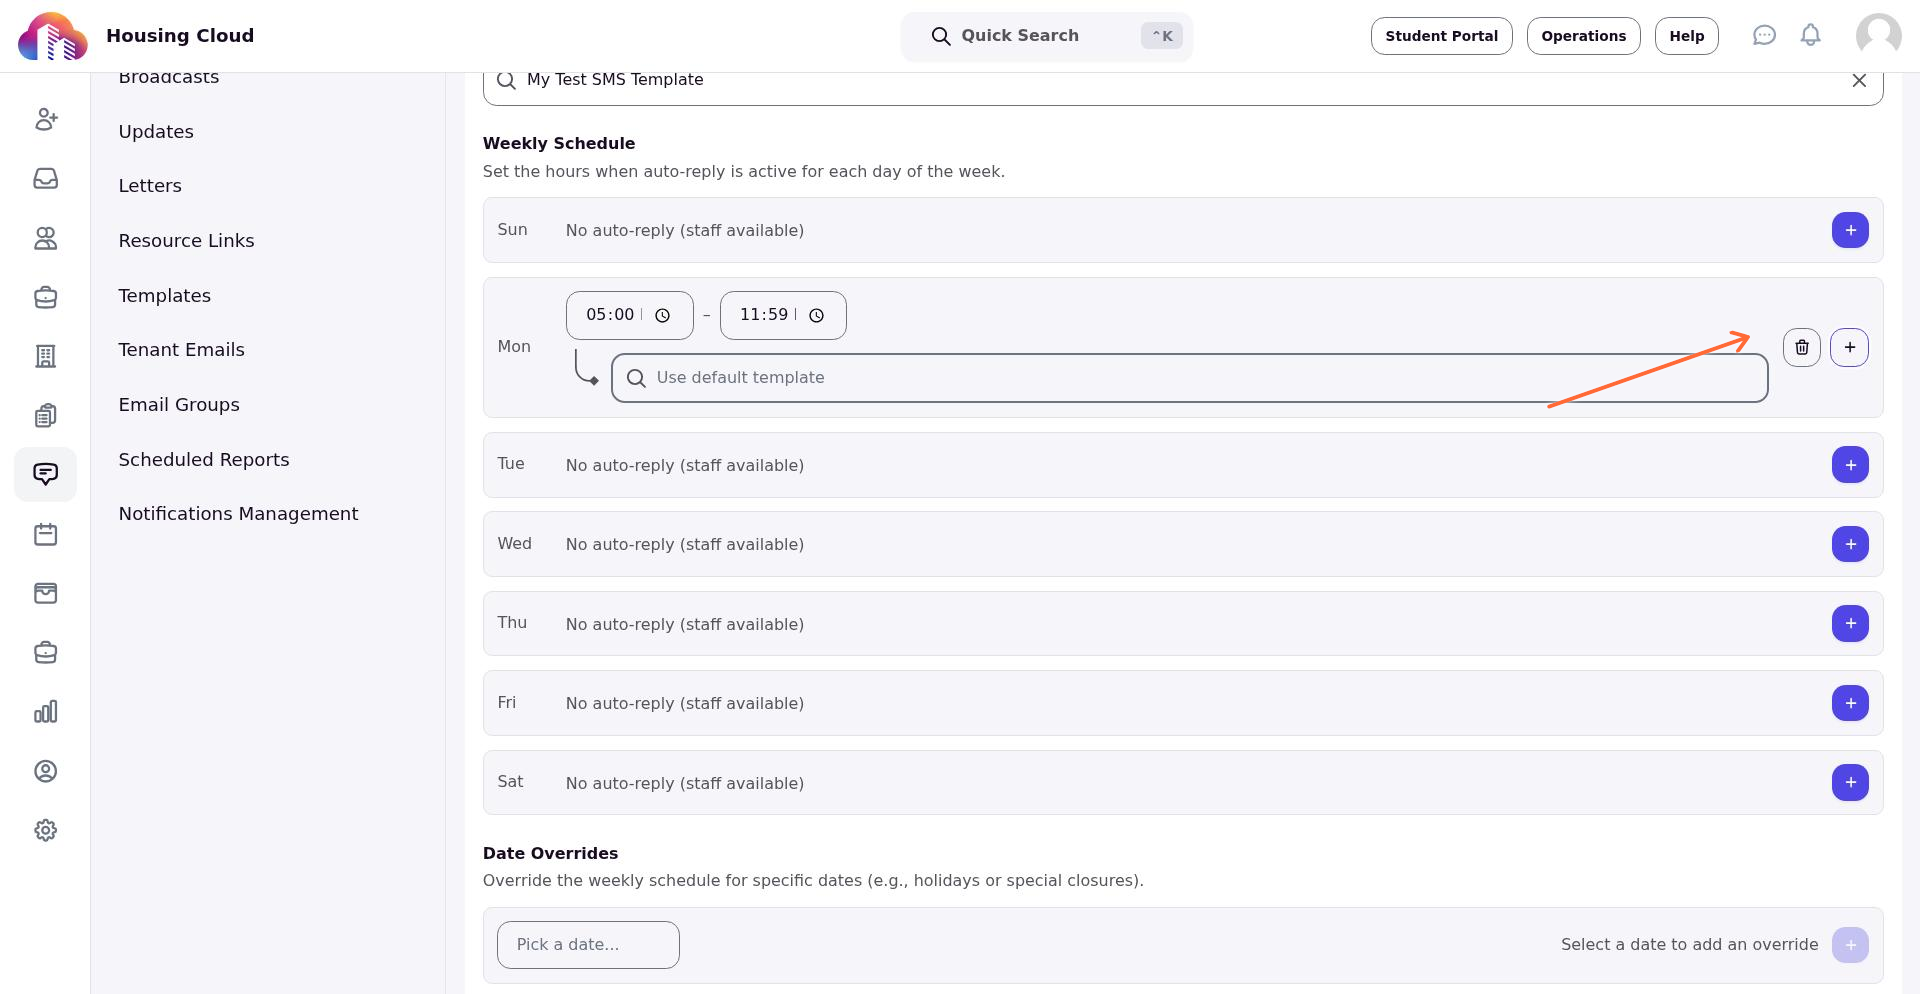
Set the start and end times when auto-reply should be active. The default range is 17:00 to 23:59.
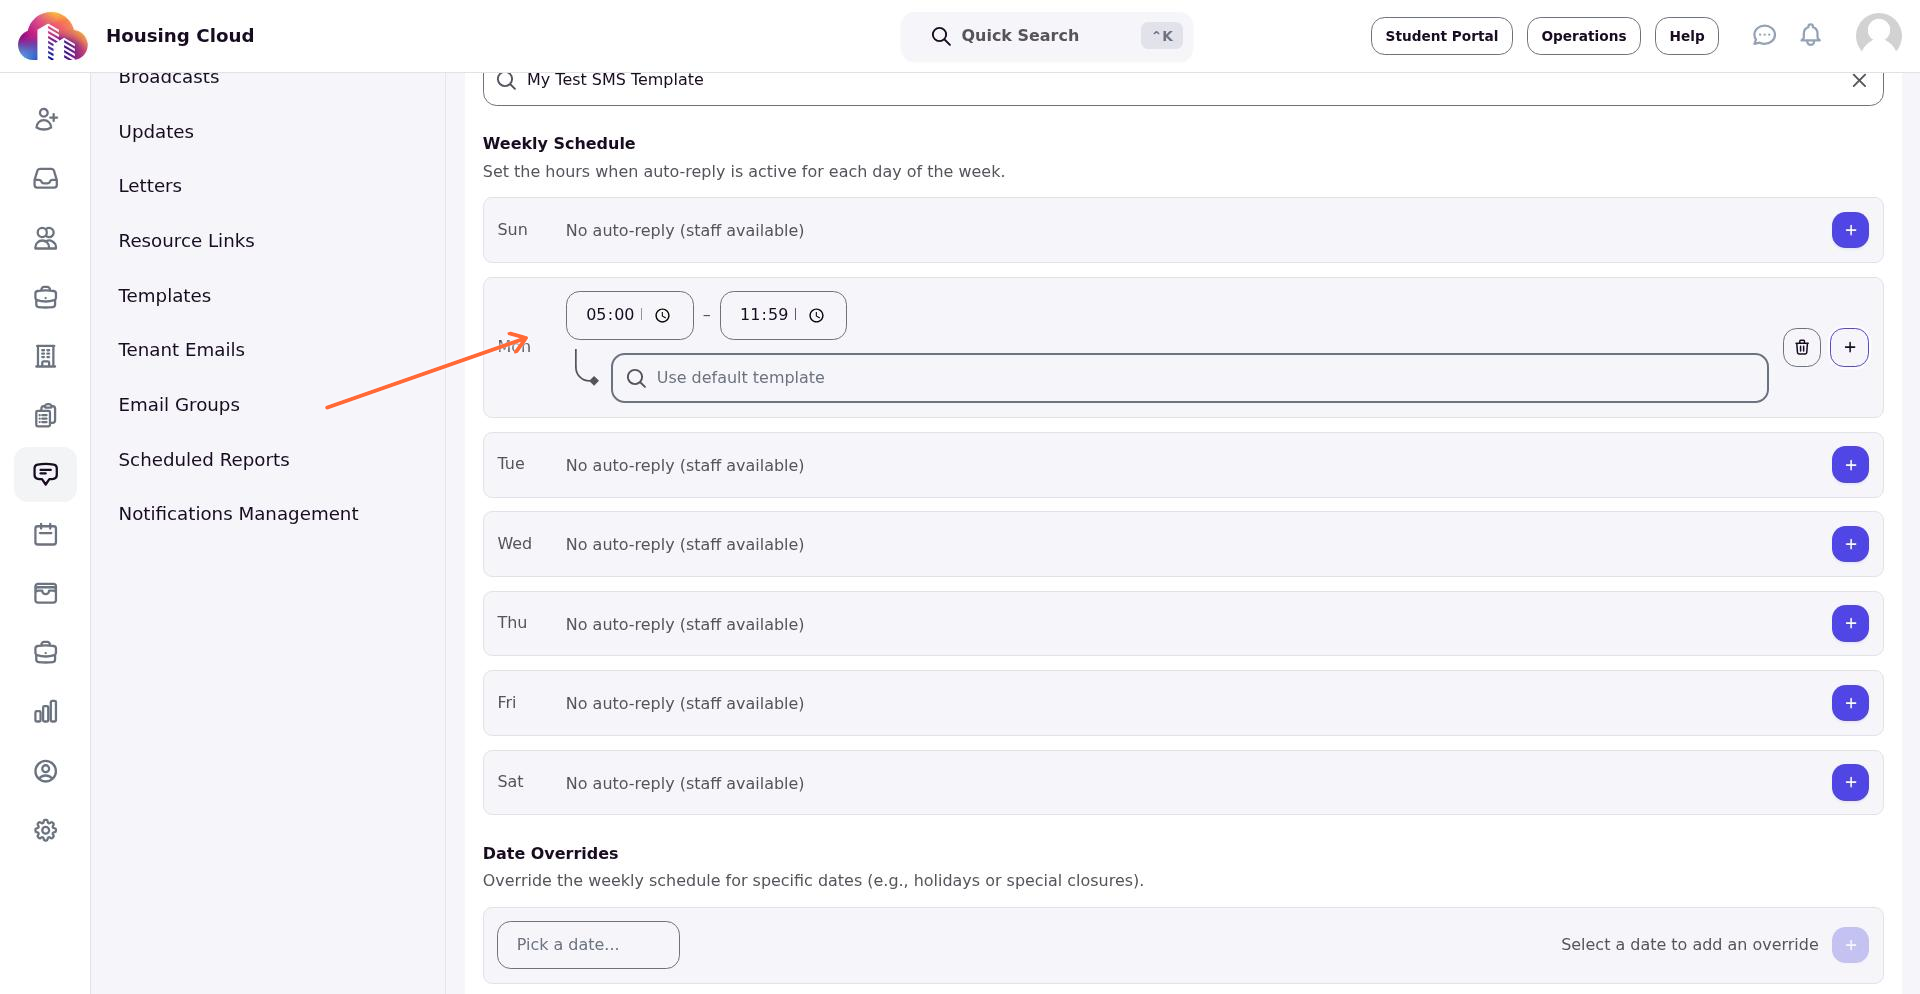
Add multiple time slots (Optional)
Click Add time slot to create additional active periods for the same day. This is useful if you need auto-reply during multiple disconnected time ranges.
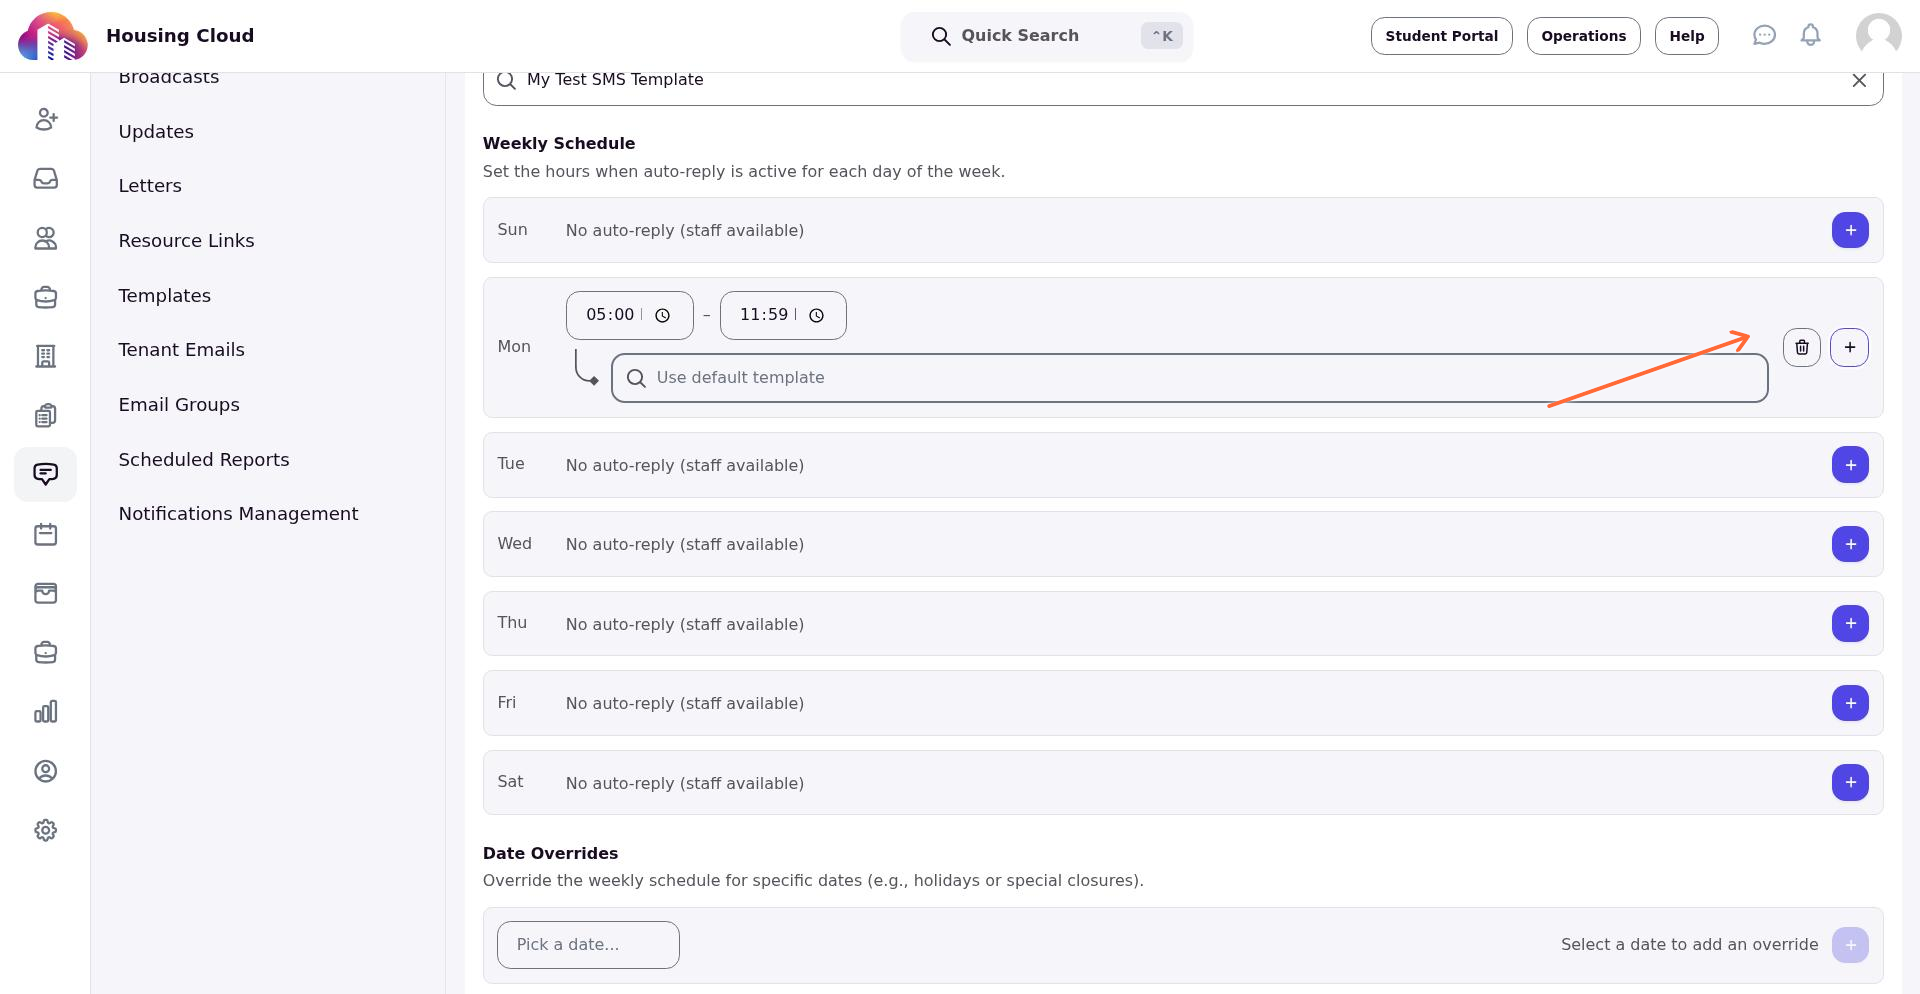
Override template for a day (Optional)
Uncheck Use default template on any time slot to select a different template for that specific day and time range.
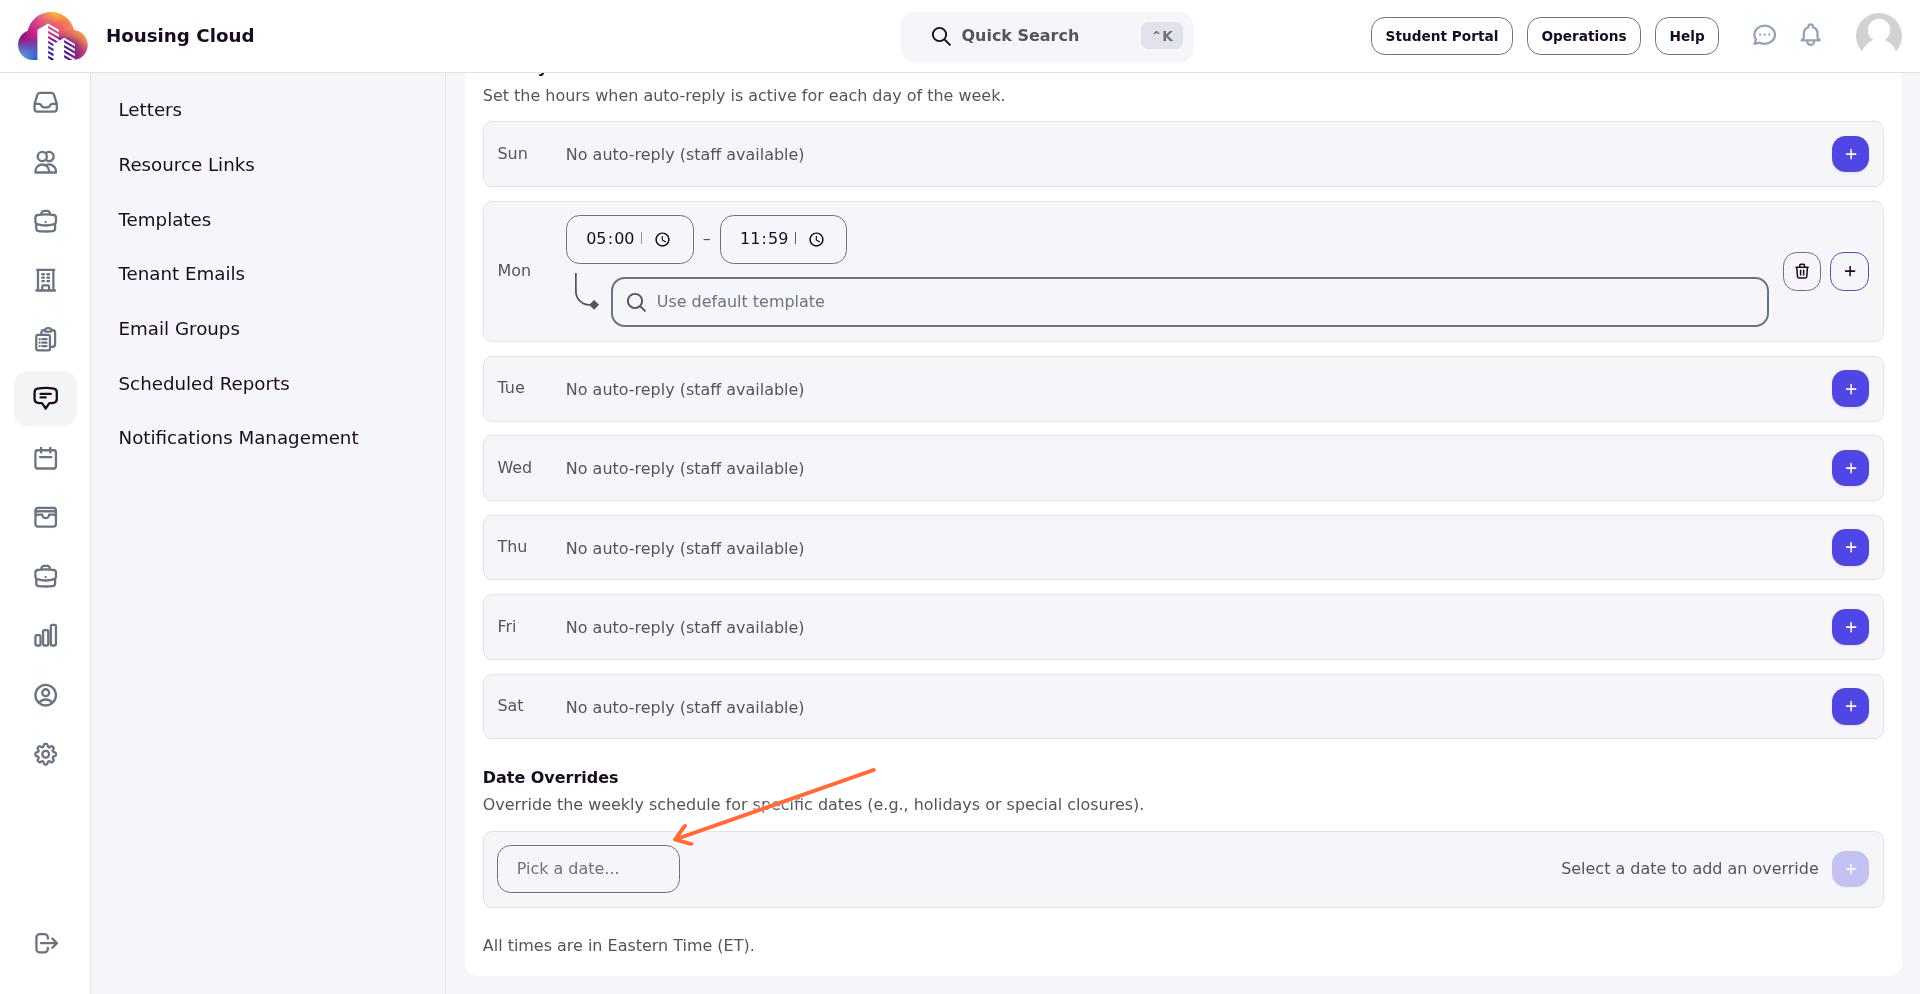
The timezone for all times is shown at the bottom of the page. You can update your timezone in Setup > Configuration if needed.
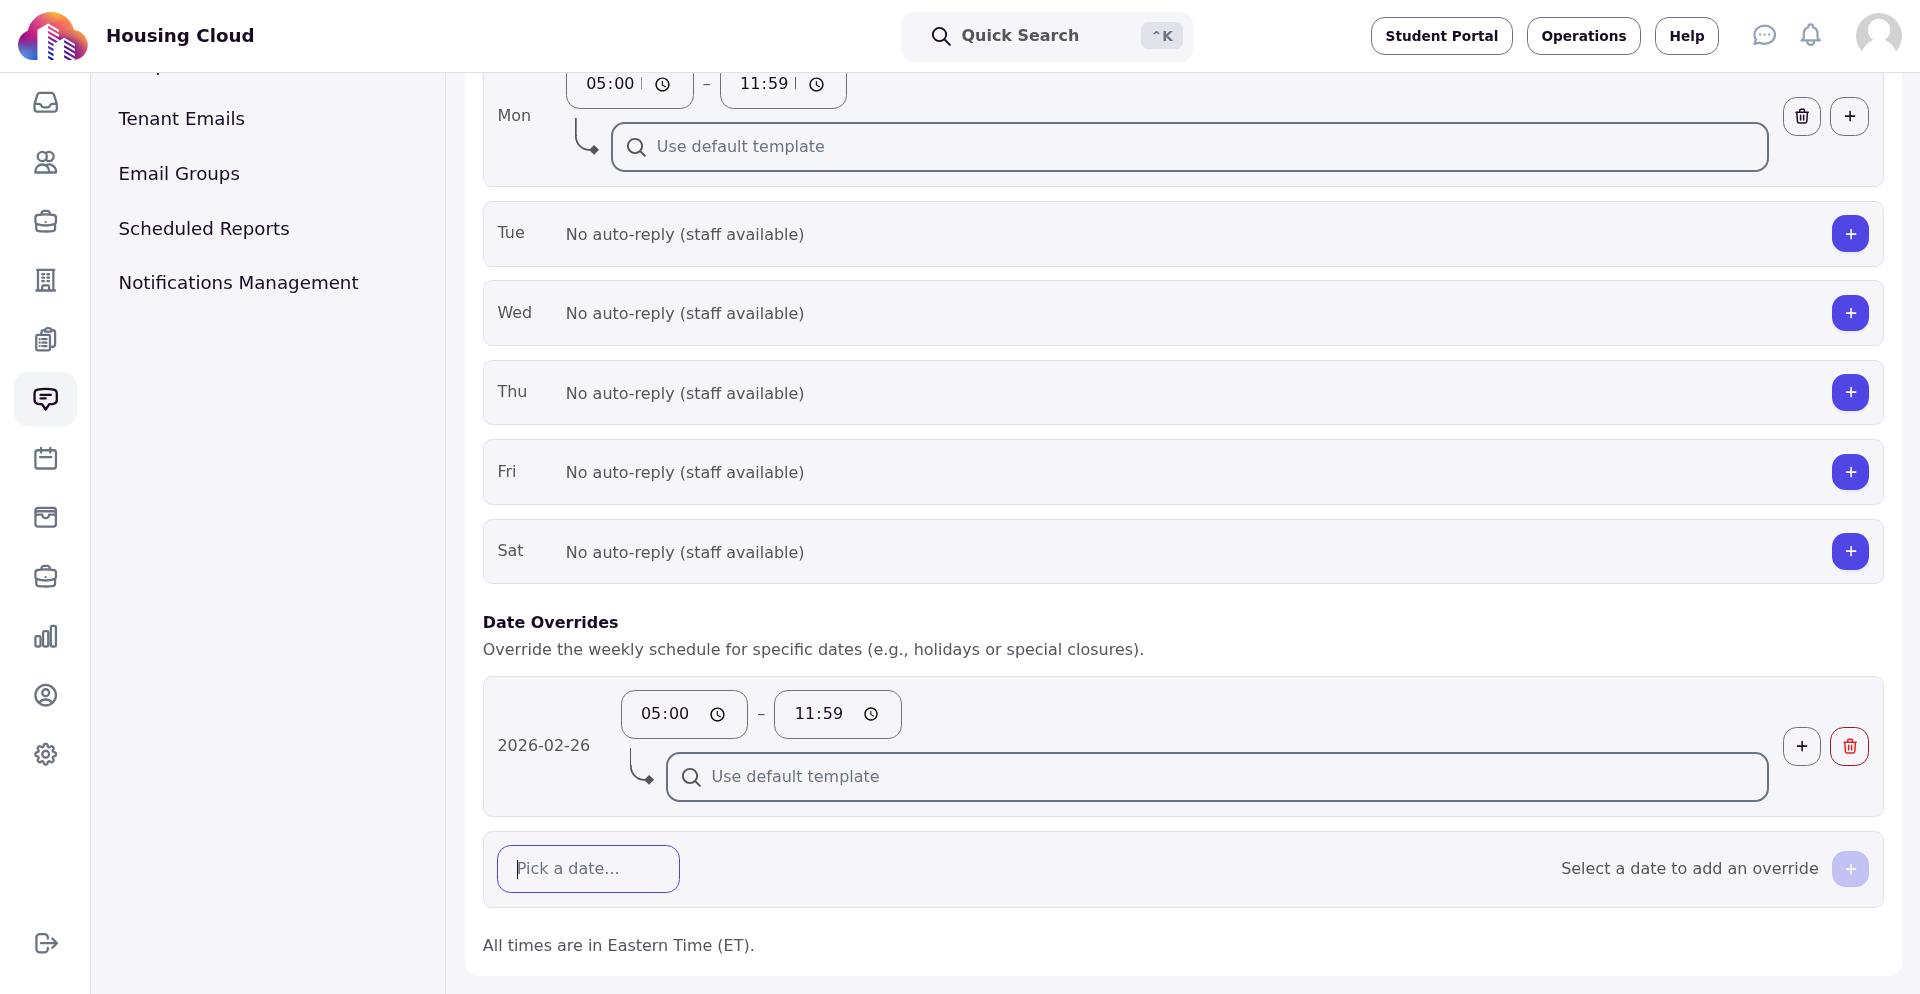
Add date overrides for holidays (Optional)
Date overrides let you modify auto-reply behavior for specific dates like holidays or special closures, temporarily replacing your weekly schedule.
Click Pick a date... and select a future date.
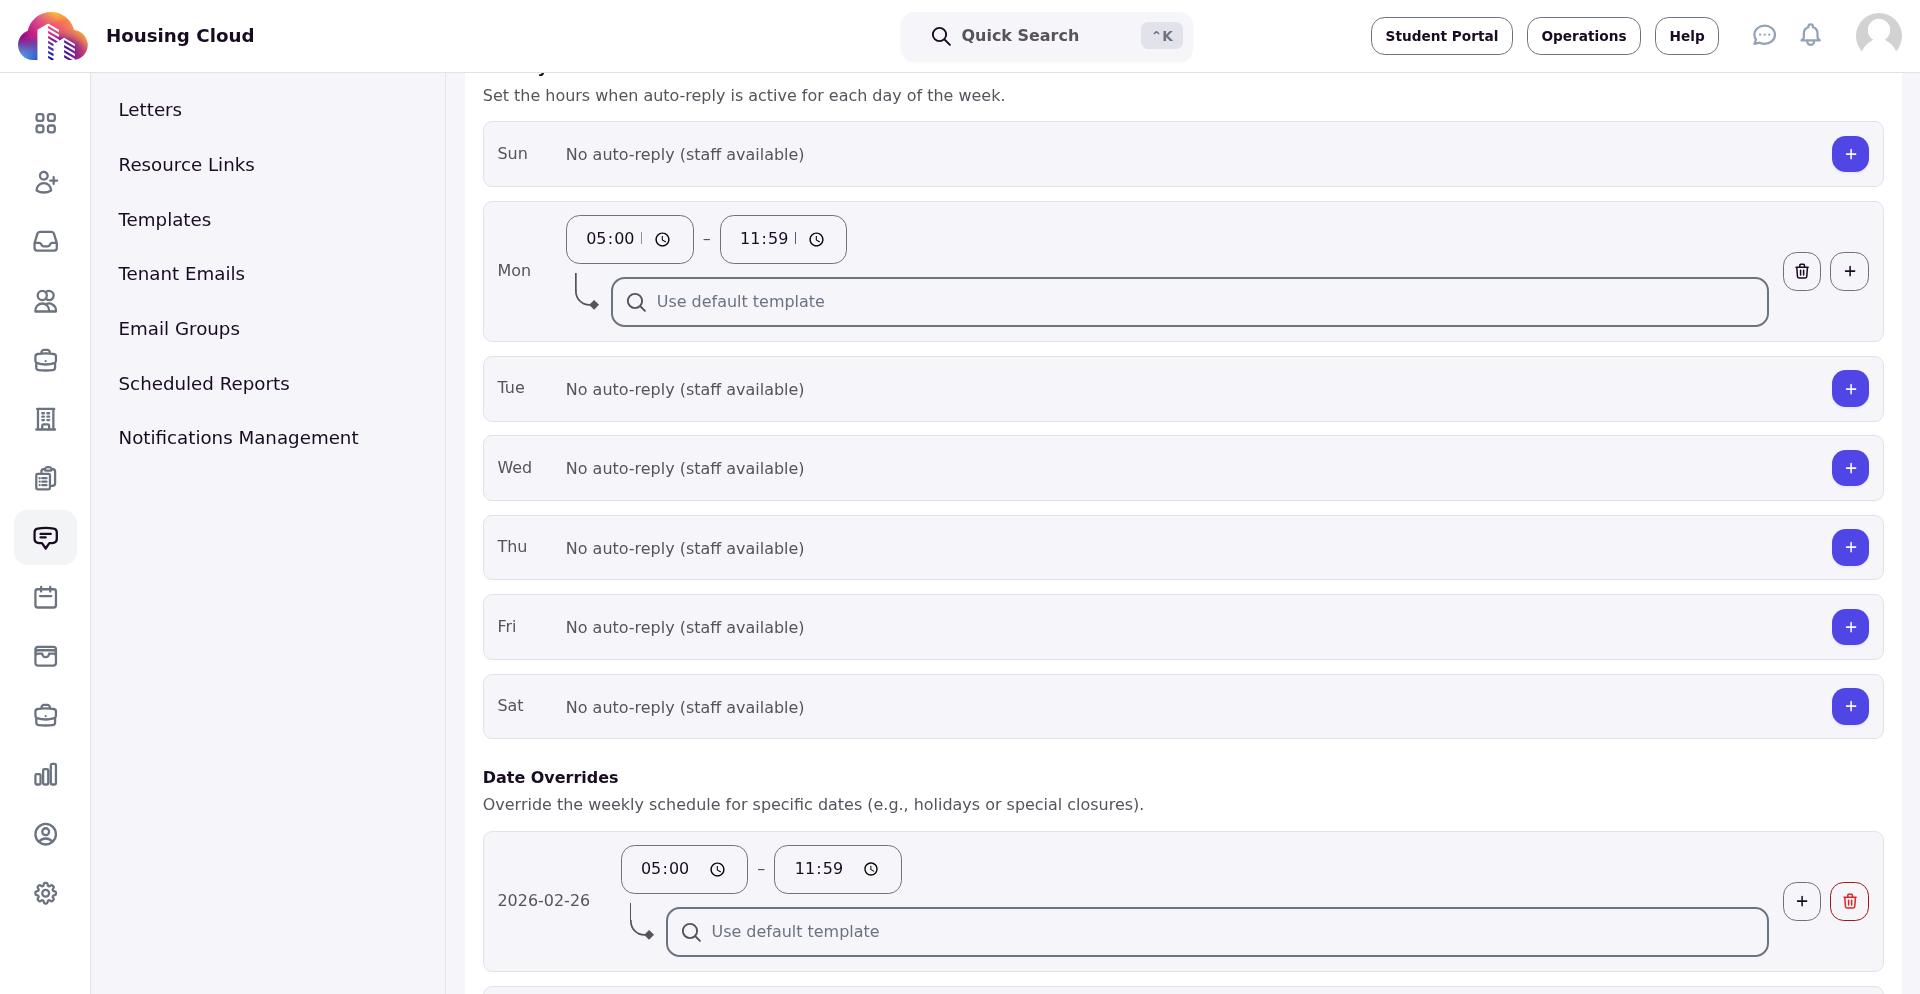
Configure time slots for the override date the same way you did for weekly schedule. You can also choose a different template for specific dates.
Save your configuration
Click Save at the bottom of the page to activate your auto-reply settings.
A confirmation message appears when your configuration is saved successfully.
Auto-replies will now be sent according to your schedule. The system enforces a limit of one auto-reply per contact per 24-hour period to prevent duplicate messages.