Connect Custom Email Domains for Outbound Email
Last updated: August 28, 2026
Overview
Authenticate your institution's email domain to send emails from Housing.Cloud using your own domain (e.g., [email protected]) instead of the default housing.cloud address. This improves email deliverability, builds trust with recipients, and ensures messages won't show "via SendGrid" warnings.
This process involves adding DNS records to verify domain ownership and enable DKIM/SPF authentication for outbound emails sent through the platform.
Domain authentication is powered by SendGrid's domain authentication system. You'll need DNS management access to your institution's domain registrar to complete setup.
Prerequisites
Before starting, ensure you have:
- Admin access to Housing.Cloud with permissions to configure email settings
- DNS management access to your institution's domain registrar (e.g., GoDaddy, Cloudflare, AWS Route 53)
- Domain ownership of the email domain you want to authenticate (e.g., university.edu)
- Time for DNS propagation - DNS changes can take up to 48 hours to propagate globally
Use a subdomain (e.g., em.university.edu) rather than your root domain to isolate email sending from other services. This is a SendGrid best practice for managing DNS records.
Step 1: Enter Your Email Domain
Navigate to the Domain Settings page in the Housing.Cloud admin portal and initiate the domain authentication wizard.
- In the Domain field, enter your institution's domain (e.g., university.edu)
- Optionally, add a Subdomain for email sending (e.g., em or mail) - this creates em.university.edu for email authentication
- Click Continue to generate DNS records
The domain you enter must be one you own and have DNS management access to. You cannot authenticate domains you don't control (e.g., gmail.com, outlook.com).
Step 2: Add DNS Records to Your Registrar
Housing.Cloud will generate three DNS records required for domain authentication. You must add these records to your domain's DNS configuration through your registrar.
The system generates these record types:
MX Record (Mail Server)
- Type: MX
- Host: Typically @ or your subdomain (e.g., em)
- Value: Points to SendGrid's mail server (e.g., em760.housing.cloud)
- Purpose: Routes email through SendGrid's infrastructure
TXT Record (SPF - Sender Policy Framework)
- Type: TXT
- Host: Your subdomain (e.g., em760)
- Value: SPF record authorizing SendGrid (e.g., v=spf1 include:sendgrid.net ~all)
- Purpose: Verifies that SendGrid is authorized to send emails from your domain
TXT Record (DKIM - DomainKeys Identified Mail)
- Type: TXT
- Host: DKIM selector subdomain (e.g., s1._domainkey.em760)
- Value: Public DKIM key provided by SendGrid
- Purpose: Enables cryptographic email signature verification
Adding Records to Your DNS Provider
- Copy each record's Type, Host, and Value from the Housing.Cloud interface
- Log in to your domain registrar's DNS management console
- Create a new DNS record for each entry:
- Select the record type (MX or TXT)
- Enter the host/name exactly as shown
- Paste the value exactly as provided
- Set TTL to 3600 (1 hour) or your registrar's default
- Save each record
Copy values exactly as shown - any typos will cause verification to fail. Some DNS providers require different formatting (e.g., adding a period at the end of hostnames) - consult your registrar's documentation if unsure.
Common DNS Provider Instructions
GoDaddy: DNS Management → Add Record → Select type → Enter Name/Value → Save
Cloudflare: DNS → Add Record → Select type → Enter Name/Content → Proxy status off → Save
AWS Route 53: Hosted Zones → Select domain → Create Record → Simple routing → Define record → Save
Step 3: Verify Domain Authentication
After adding DNS records, wait for propagation and verify the domain in Housing.Cloud.
- Wait at least 15-30 minutes after adding records for initial propagation (full propagation can take up to 48 hours)
- In the Housing.Cloud domain authentication interface, click Refresh Status to check DNS records
- If records are detected and valid, status changes from Pending to Verified
- Click Continue to Verification to complete the process
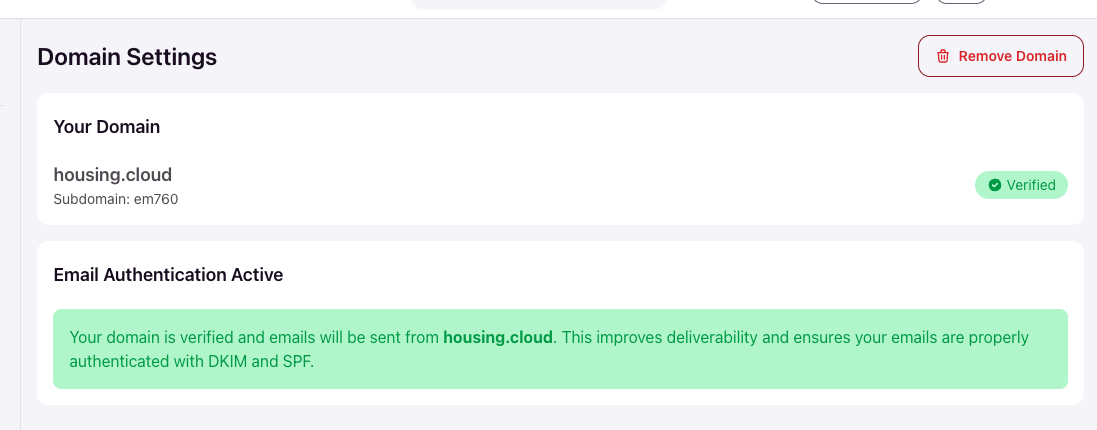
Once verified, you'll see a green confirmation banner:
- Email Authentication Active - DKIM and SPF are configured
- Emails sent from housing.cloud will have improved deliverability
- Messages will no longer show "via SendGrid" warnings to recipients
Your domain is now authenticated! Emails sent from Housing.Cloud will use your custom domain in the FROM address, improving deliverability and recipient trust.
Using Your Authenticated Domain
After authentication completes, Housing.Cloud automatically uses your authenticated domain for outbound emails. Emails will be sent from addresses like:
- [email protected] (or your configured subdomain)
- [email protected] (if using subdomain)
Recipients will see your institution's domain in the sender field instead of housing.cloud, and email clients will verify DKIM/SPF signatures to improve inbox placement.
You can authenticate up to 3,000 domains per account. Most institutions only need one authenticated domain for all Housing.Cloud email sending.
Troubleshooting
DNS Records Show "Pending" After 48 Hours
Cause: DNS records haven't propagated or contain errors.
Solution:
- Use a DNS checker tool (e.g., MXToolbox.com, DNSChecker.org) to verify records are visible globally
- Check for typos in host or value fields - even extra spaces cause failures
- Verify you added records to the correct domain (root vs. subdomain)
- Ensure TTL isn't set too high (use 3600 or lower for faster updates)
- Contact your DNS provider if records appear in their UI but aren't propagating
SPF Record Validation Fails
Cause: SPF record conflicts with existing SPF or incorrect syntax.
Solution:
- Check if you already have an SPF record for the domain - you can only have one SPF record per domain
- If an SPF record exists, merge SendGrid's include (include:sendgrid.net) into the existing record instead of creating a new one
- Ensure the SPF record includes the ~all or -all mechanism at the end
- Example merged record:
v=spf1 include:_spf.google.com include:sendgrid.net ~all
DKIM Record Not Found
Cause: DKIM TXT record host is incorrect or missing the _domainkey selector.
Solution:
- Verify the host includes the full selector path (e.g., s1._domainkey.em760.university.edu or just s1._domainkey.em760 depending on your registrar)
- Some DNS providers automatically append the domain - if so, only enter the subdomain portion (s1._domainkey.em760)
- Check that the DKIM value is enclosed in quotes if your DNS provider requires it for long TXT records
Emails Still Show "via SendGrid"
Cause: Domain verification incomplete or emails sent before authentication finished.
Solution:
- Confirm domain status shows "Verified" in Housing.Cloud Domain Settings
- Wait 10-15 minutes after verification for changes to take effect in SendGrid's system
- Send a test email and check headers - look for DKIM-Signature and SPF pass in email headers
- If still showing via SendGrid, contact Housing.Cloud support to verify domain configuration
MX Record Conflicts with Existing Email Server
Cause: Your domain uses a different mail server (e.g., Google Workspace, Microsoft 365) and adding MX records creates conflicts.
Solution:
- Use a dedicated subdomain for Housing.Cloud emails (e.g., em.university.edu) separate from your primary mail domain
- Subdomains can have independent MX records without affecting your primary email service
- Never add MX records to your root domain if you're using it for receiving emails through another provider
Use online DNS propagation checkers to verify records are published correctly across multiple DNS servers worldwide. Tools like whatsmydns.net show real-time propagation status.
Security Best Practices
- Use subdomains: Authenticate em.university.edu instead of university.edu to isolate email sending and avoid conflicts with existing mail services
- Keep DKIM keys private: The public key is in DNS, but never share the private key stored in SendGrid
- Monitor SPF record limits: SPF has a 10 DNS lookup limit - if you include many services, you may hit this limit and cause authentication failures
- Set up DMARC: After DKIM/SPF are working, add a DMARC record (_dmarc.university.edu) to specify how receivers should handle authentication failures
- Test before deployment: Send test emails to multiple providers (Gmail, Outlook, Yahoo) to verify deliverability and check for spam folder placement
- Document DNS changes: Keep records of DNS modifications for IT team handoffs and future troubleshooting
Technical Details
DNS Record Specifications
Housing.Cloud uses SendGrid's automated security mode, which generates CNAME-based records for easier management and automatic key rotation. The system creates:
- 1 MX record for mail routing
- 2 TXT records for SPF and DKIM authentication
TTL (Time to Live) recommendations:
- Initial setup: 3600 seconds (1 hour) for faster propagation testing
- After verification: 86400 seconds (24 hours) for stability and reduced DNS queries
SendGrid API Integration
Domain authentication uses SendGrid's /v3/whitelabel/domains API endpoint. Housing.Cloud handles the integration automatically, but IT teams can reference the official documentation for advanced troubleshooting:
SendGrid Domain Authentication API Reference
Housing.Cloud manages the SendGrid API integration automatically. You don't need to make API calls directly - the UI handles domain submission, record generation, and verification polling.
Related Resources
- SendGrid Domain Authentication API Documentation
- MXToolbox DNS Checker - Verify DNS record propagation
- DNS Checker - Global DNS propagation tool