Create Visitor Invitations (For Staff)
Last updated: October 8, 2026
Front desk, security, and housing operations staff create visitor invitations from the Expected visitors page of the operations portal. Click New Visitor to complete the invitation yourself, or Request invitation when you want the hosting resident to complete their own invitation. Both buttons sit at the top of the Expected visitors page.
Use New Visitor when the desk has the visitor's details on hand and will create the invitation directly. Use Request invitation when a resident's guest arrives without an invitation and the desk wants the resident to fill it in. Residents can also create invitations on their own before a visit, which is covered in Inviting Guests and Visitors (For Students).
Before you start
You need access to the Expected visitors page of the operations portal.
Have the visitor's name, email, and date of birth ready. The phone number is optional unless your institution requires it.
Complete the Create Invitation form
New Visitor opens a dialog headed Create Invitation. It asks for, in order:
On Behalf Of (required): search for the resident hosting the visitor. The invitation is created for that resident.
Visitor Name (required)
Visitor Email (required)
Phone Number (optional unless your institution requires it)
Date of Birth (required)
Visit Start Date & Time (required)
Visit End Date & Time (required): the end must fall after the start and within your institution's maximum invitation duration.
A line under the date fields shows which timezone the times use.
Special Instructions For Your Visitor
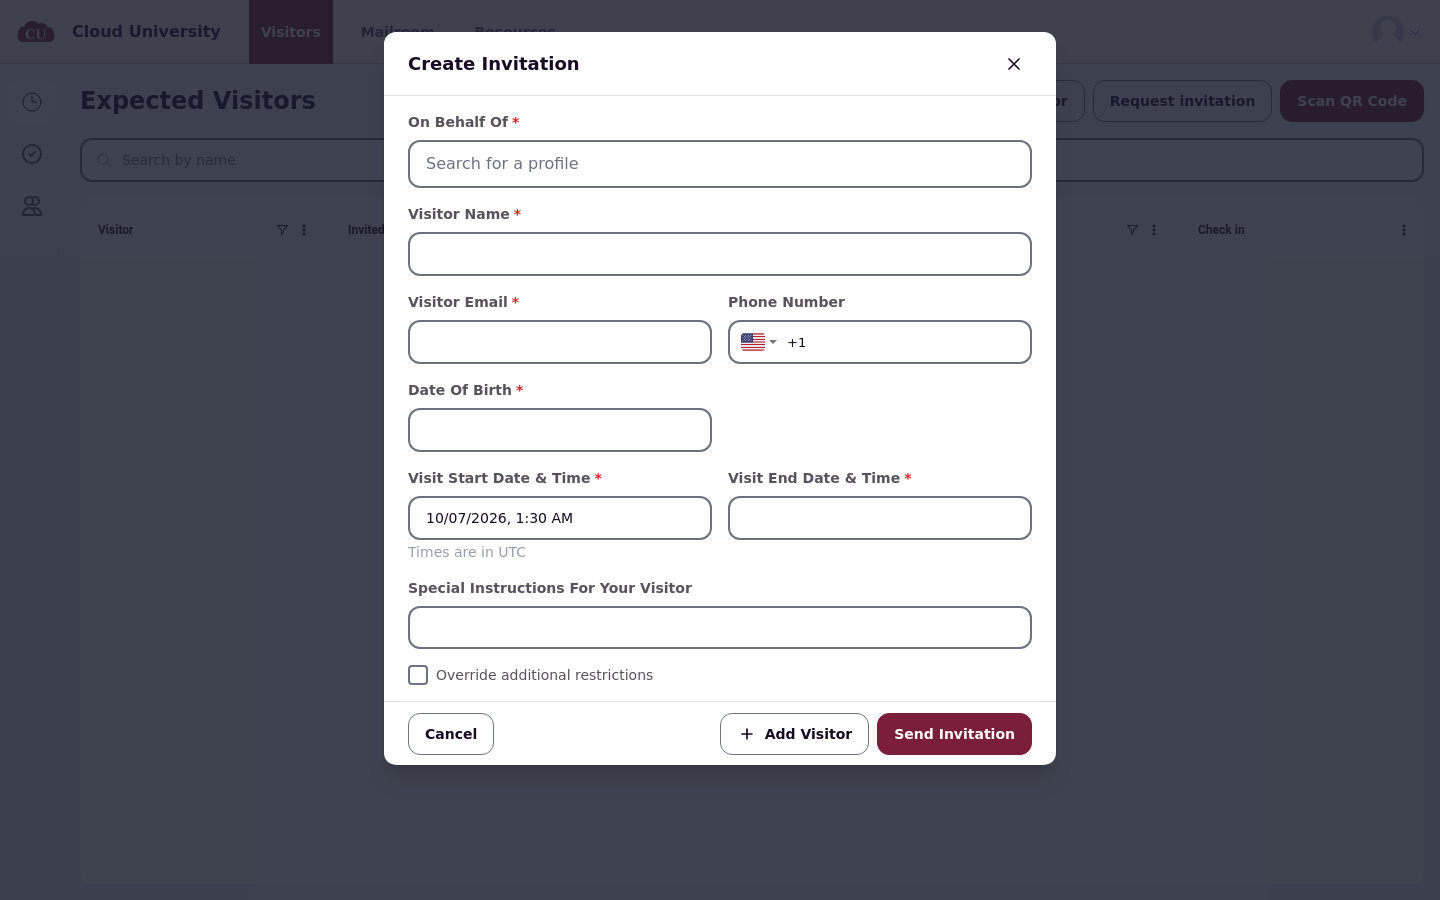
The dialog footer has three buttons: Cancel, Add Visitor, and Send Invitation. Send Invitation sends the invitation to the visitor.
Keep the visit inside your institution's rules
The date pickers only offer dates and times inside your institution's visiting hours, block the dates your institution has marked unavailable, and stop you from setting a visit longer than the maximum invitation duration. If the visitor's age falls outside your institution's rules, the form shows a message stating the age the visitor must be, such as a minimum age.
Your institution's invitation permissions, visiting hours, and other restrictions are described in Guest Invitation Permissions and Restrictions (For Students).
Add more visitors
Add Visitor adds another visitor card to the same invitation. Each visitor is submitted as a separate visitor with their own details. Once your institution's limit on visitors per invitation is reached, the button is disabled.
Request an invitation from the resident
When a resident's guest arrives without an invitation and the desk wants the resident to create it, click Request invitation on the Expected visitors page. The button appears on desktop only; it is not shown on mobile. The dialog explains that this sends a notification to the resident to complete an invitation for a visitor without one.
Search for and select the resident in the student selector. The send control stays disabled until a resident is selected. After you send, the portal shows the toast Invitation requested.
What happens after you send
The invitation appears in the Expected visitors queue, and the visitor receives the invitation email with their QR code. Verify the invitation on the Expected visitors page. When the visitor arrives, check them in as described in Check Visitors In and Out (For Staff).