Configure Student Portal Key Dates and Next Steps
Last updated: October 2, 2026
The Student Portal Key Dates and Next Steps tab in the cycle editor lets you control when each phase becomes visible to students on their timeline and what tasks they need to complete. You set an Available Date per phase to decide when students become aware of that phase, and you can add checklist items that map directly to the student's action list.
Where to find it
In the cycle editor, click the Student Portal Key Dates and Next Steps tab. It is listed alongside other cycle tabs such as General, Application Settings, and Roommate Settings.
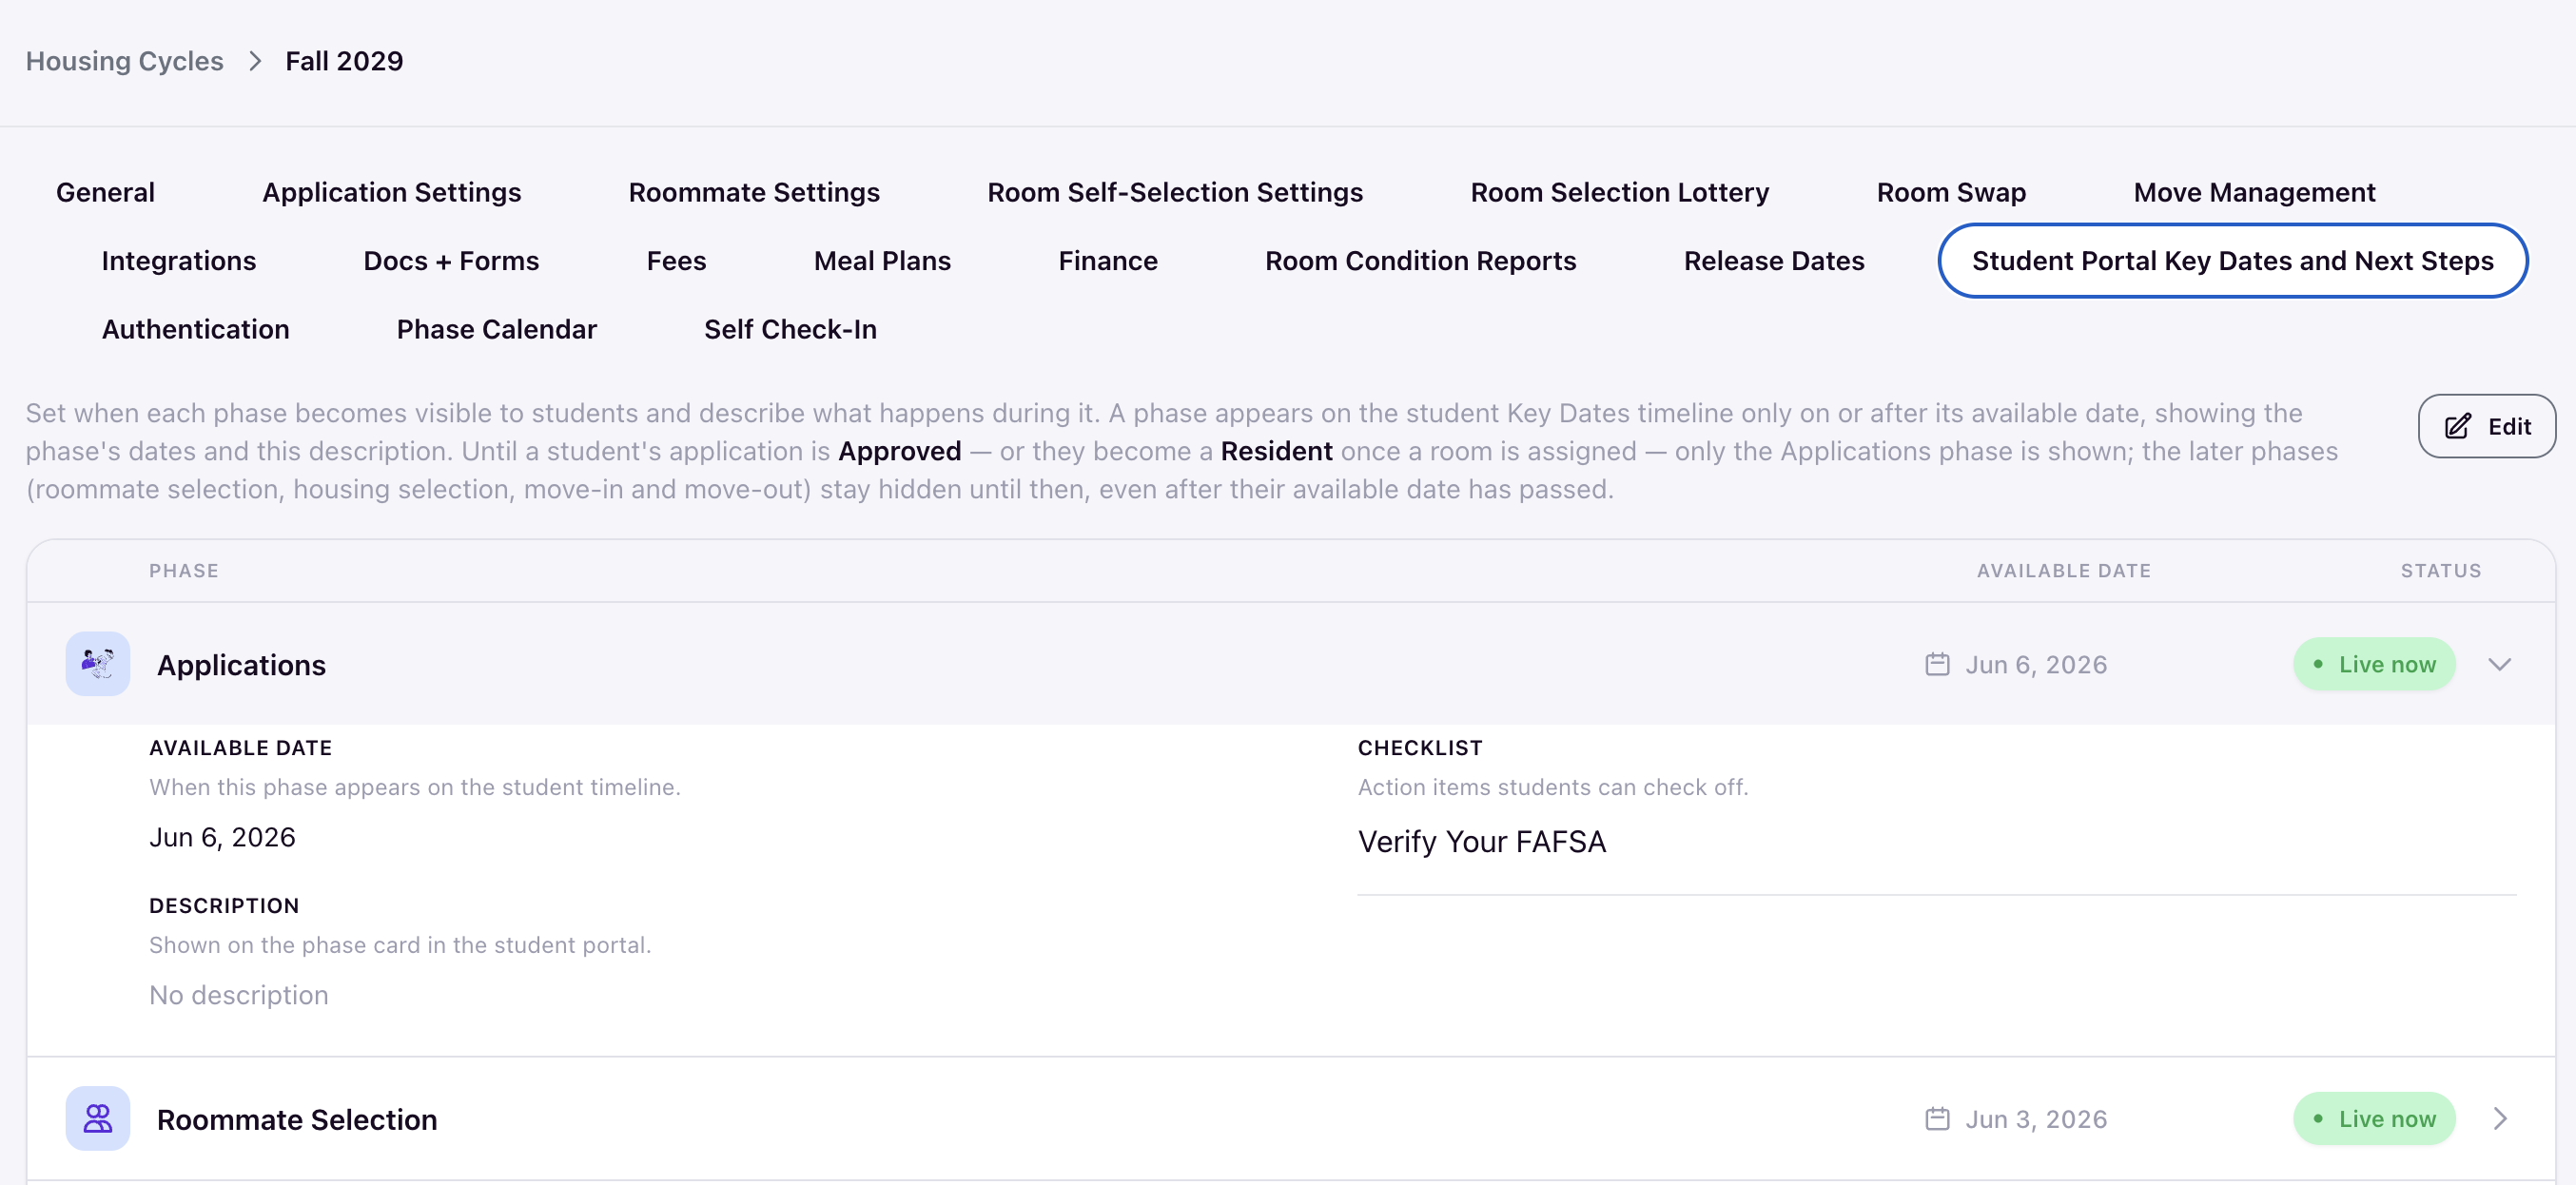
What the tab shows
The tab displays a list of every phase in your cycle, such as Applications, Roommate Selection, Housing Selection, Meal Plans, Move In, Room Swap, and Move Out. Each row has three columns:
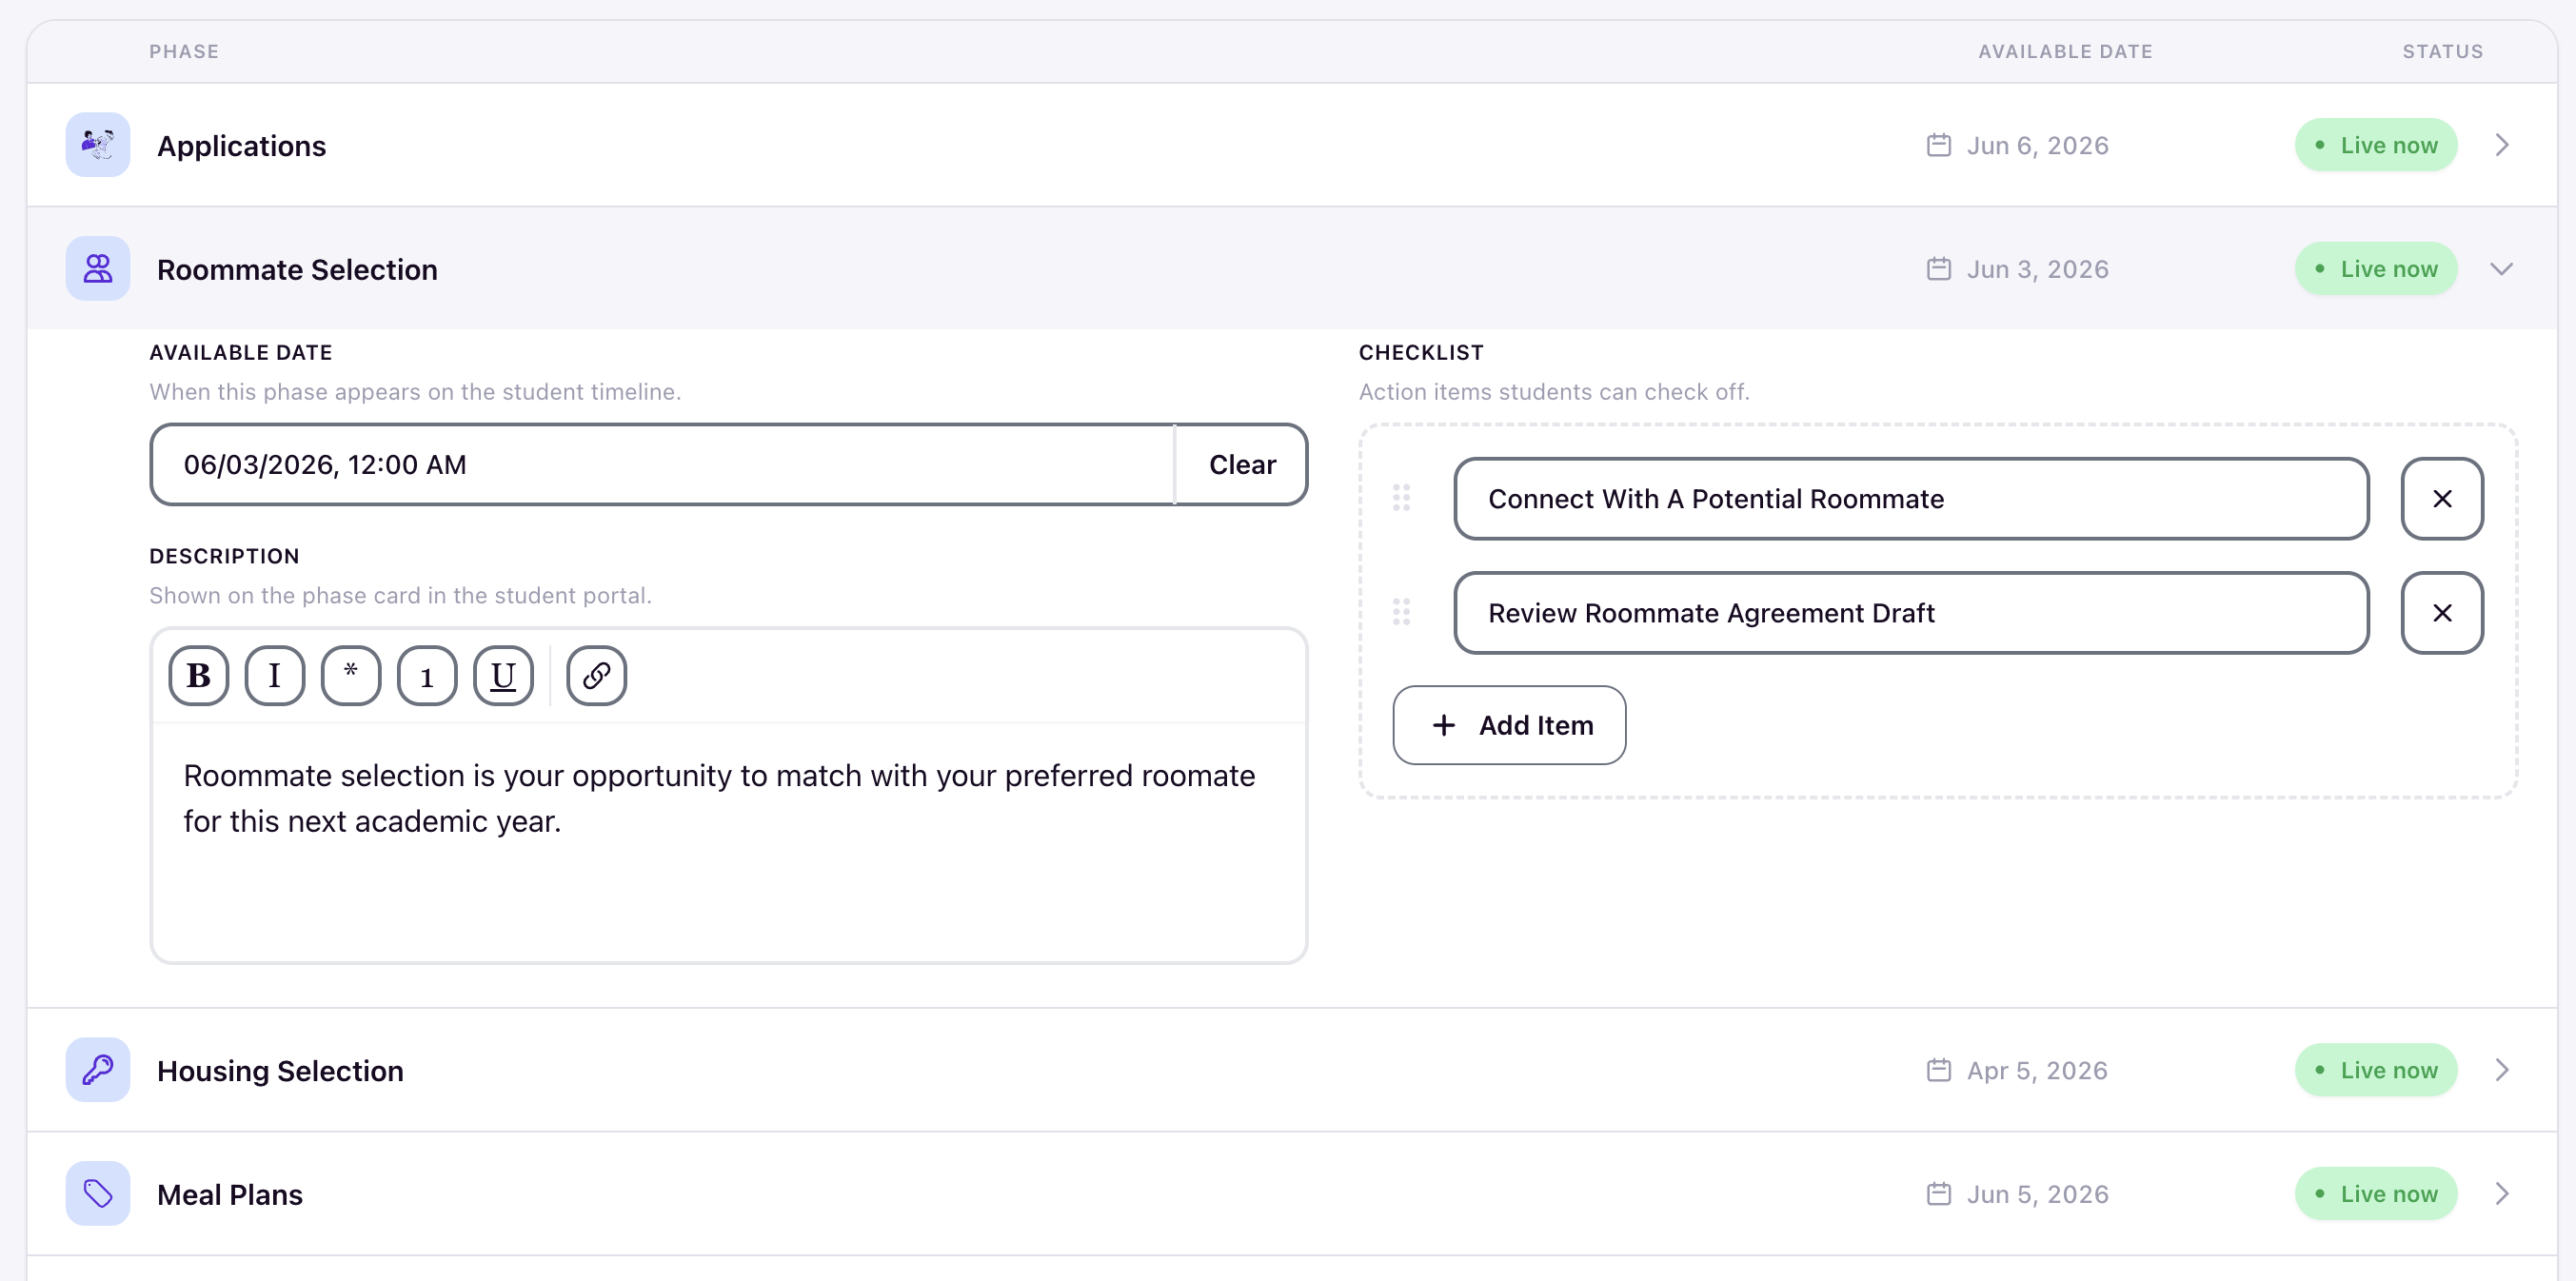
- Phase — The phase name with an icon and a chevron to expand or collapse the row.
- Available Date — The date when this phase appears on the student timeline.
-
Status — A pill showing how the Available Date relates to today. Values include Live now (date has passed), In X days (date is in the future), or Not set (no date entered).
Setting an Available Date
Click the chevron to expand a phase row. On the left side, enter an Available Date in the date field. The helper text reads: When this phase appears on the student timeline.
Use the Available Date to plan ahead. Set it before the phase actually opens so students can see the phase coming and prepare. For example, set the Available Date for Roommate Selection to two weeks before the roommate phase opens, so students know it is upcoming and can review their preferences.
If you do not set an Available Date, the status shows Not set and the phase does not appear on the student timeline.
Writing a phase description
Next to the Available Date is a Description field with a rich text editor. The helper text reads: Shown on the phase card in the student portal. Use this to explain what students should do during the phase, what to expect, or where to go for help. The editor supports bold, italic, lists, links, and underline formatting.
Adding checklist items
On the right side of the expanded phase row is a Checklist section. Add items that students will see under Your checklist in the Action items view of the student portal. Each item maps directly to a task students check off.
When a student checks an item off, the response is saved to their record and persists across sessions.
System Managed Items
System Managed Items appear automatically in the student portal based on the student's actual progress. They are read-only and cannot be edited or removed from this tab.
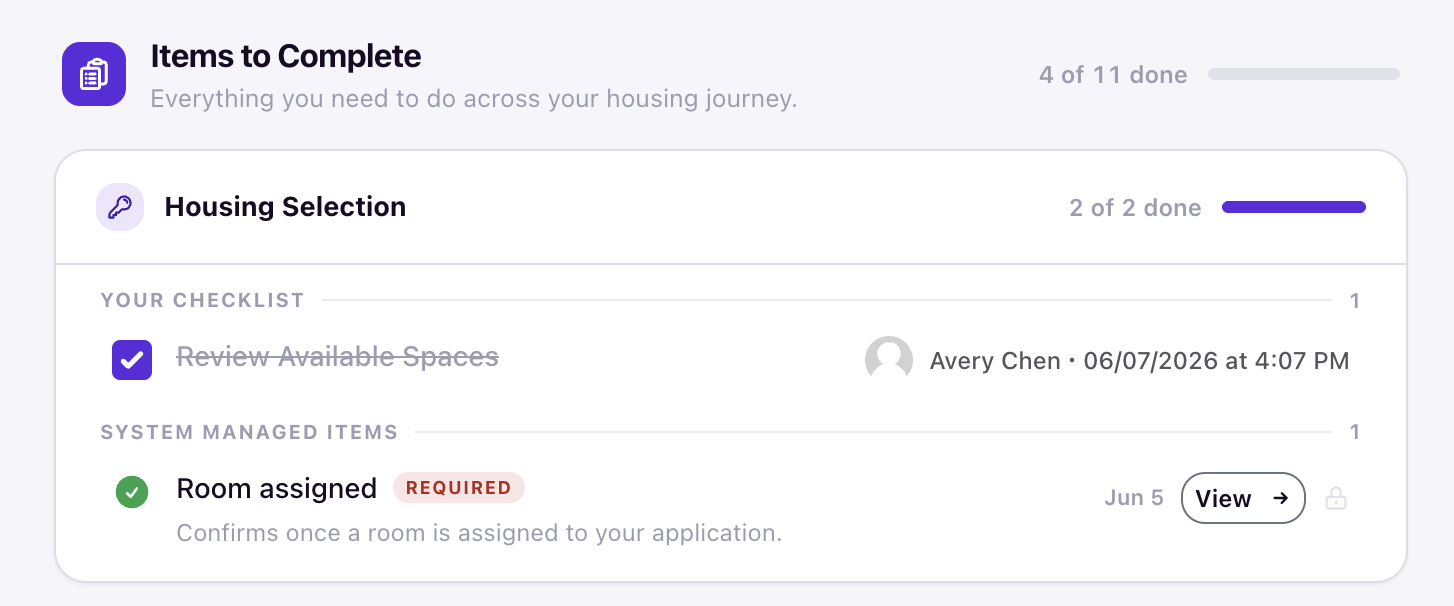
They are generated by the system for milestones such as:
- Housing application submitted
- Housing deposit received
- Documents signed
- Roommate group formed
- Room assigned
- Move-in time reserved
- Moved out
Each item shows a Required or Optional badge to students. Some items include a View button that links to the relevant portal page, such as the application or room assignment page.
How students see your configuration
On the student Key Dates and Next Steps page, students toggle between two views:
- Key dates — A timeline showing phases that have become visible based on their Available Date. Each phase card shows the date range, status badge (such as Active now or Upcoming), and countdown text (such as Closes in 2 days).
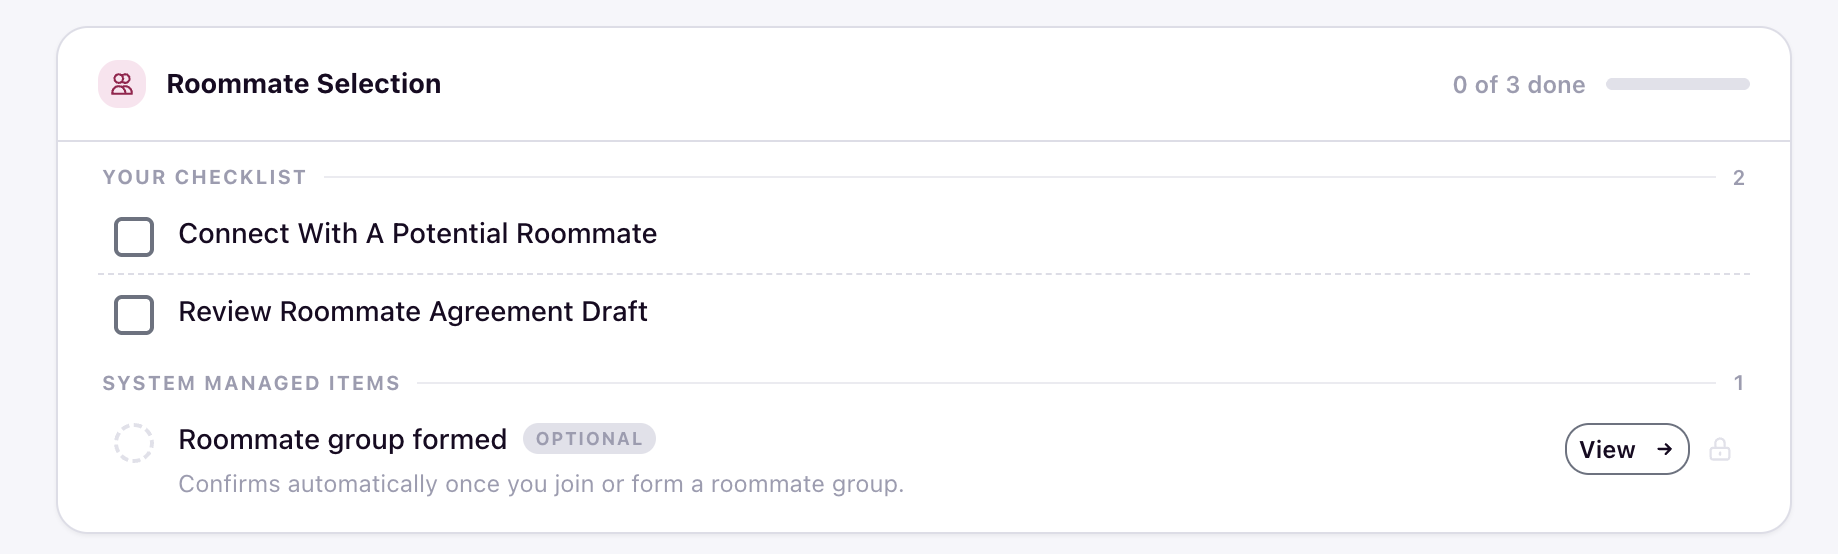
- Action items — A checklist of Items to Complete grouped by phase. Each phase shows a progress count like 1 of 2 done or 0 of 3 done. The tab shows a total count of remaining items, such as Action items 5.
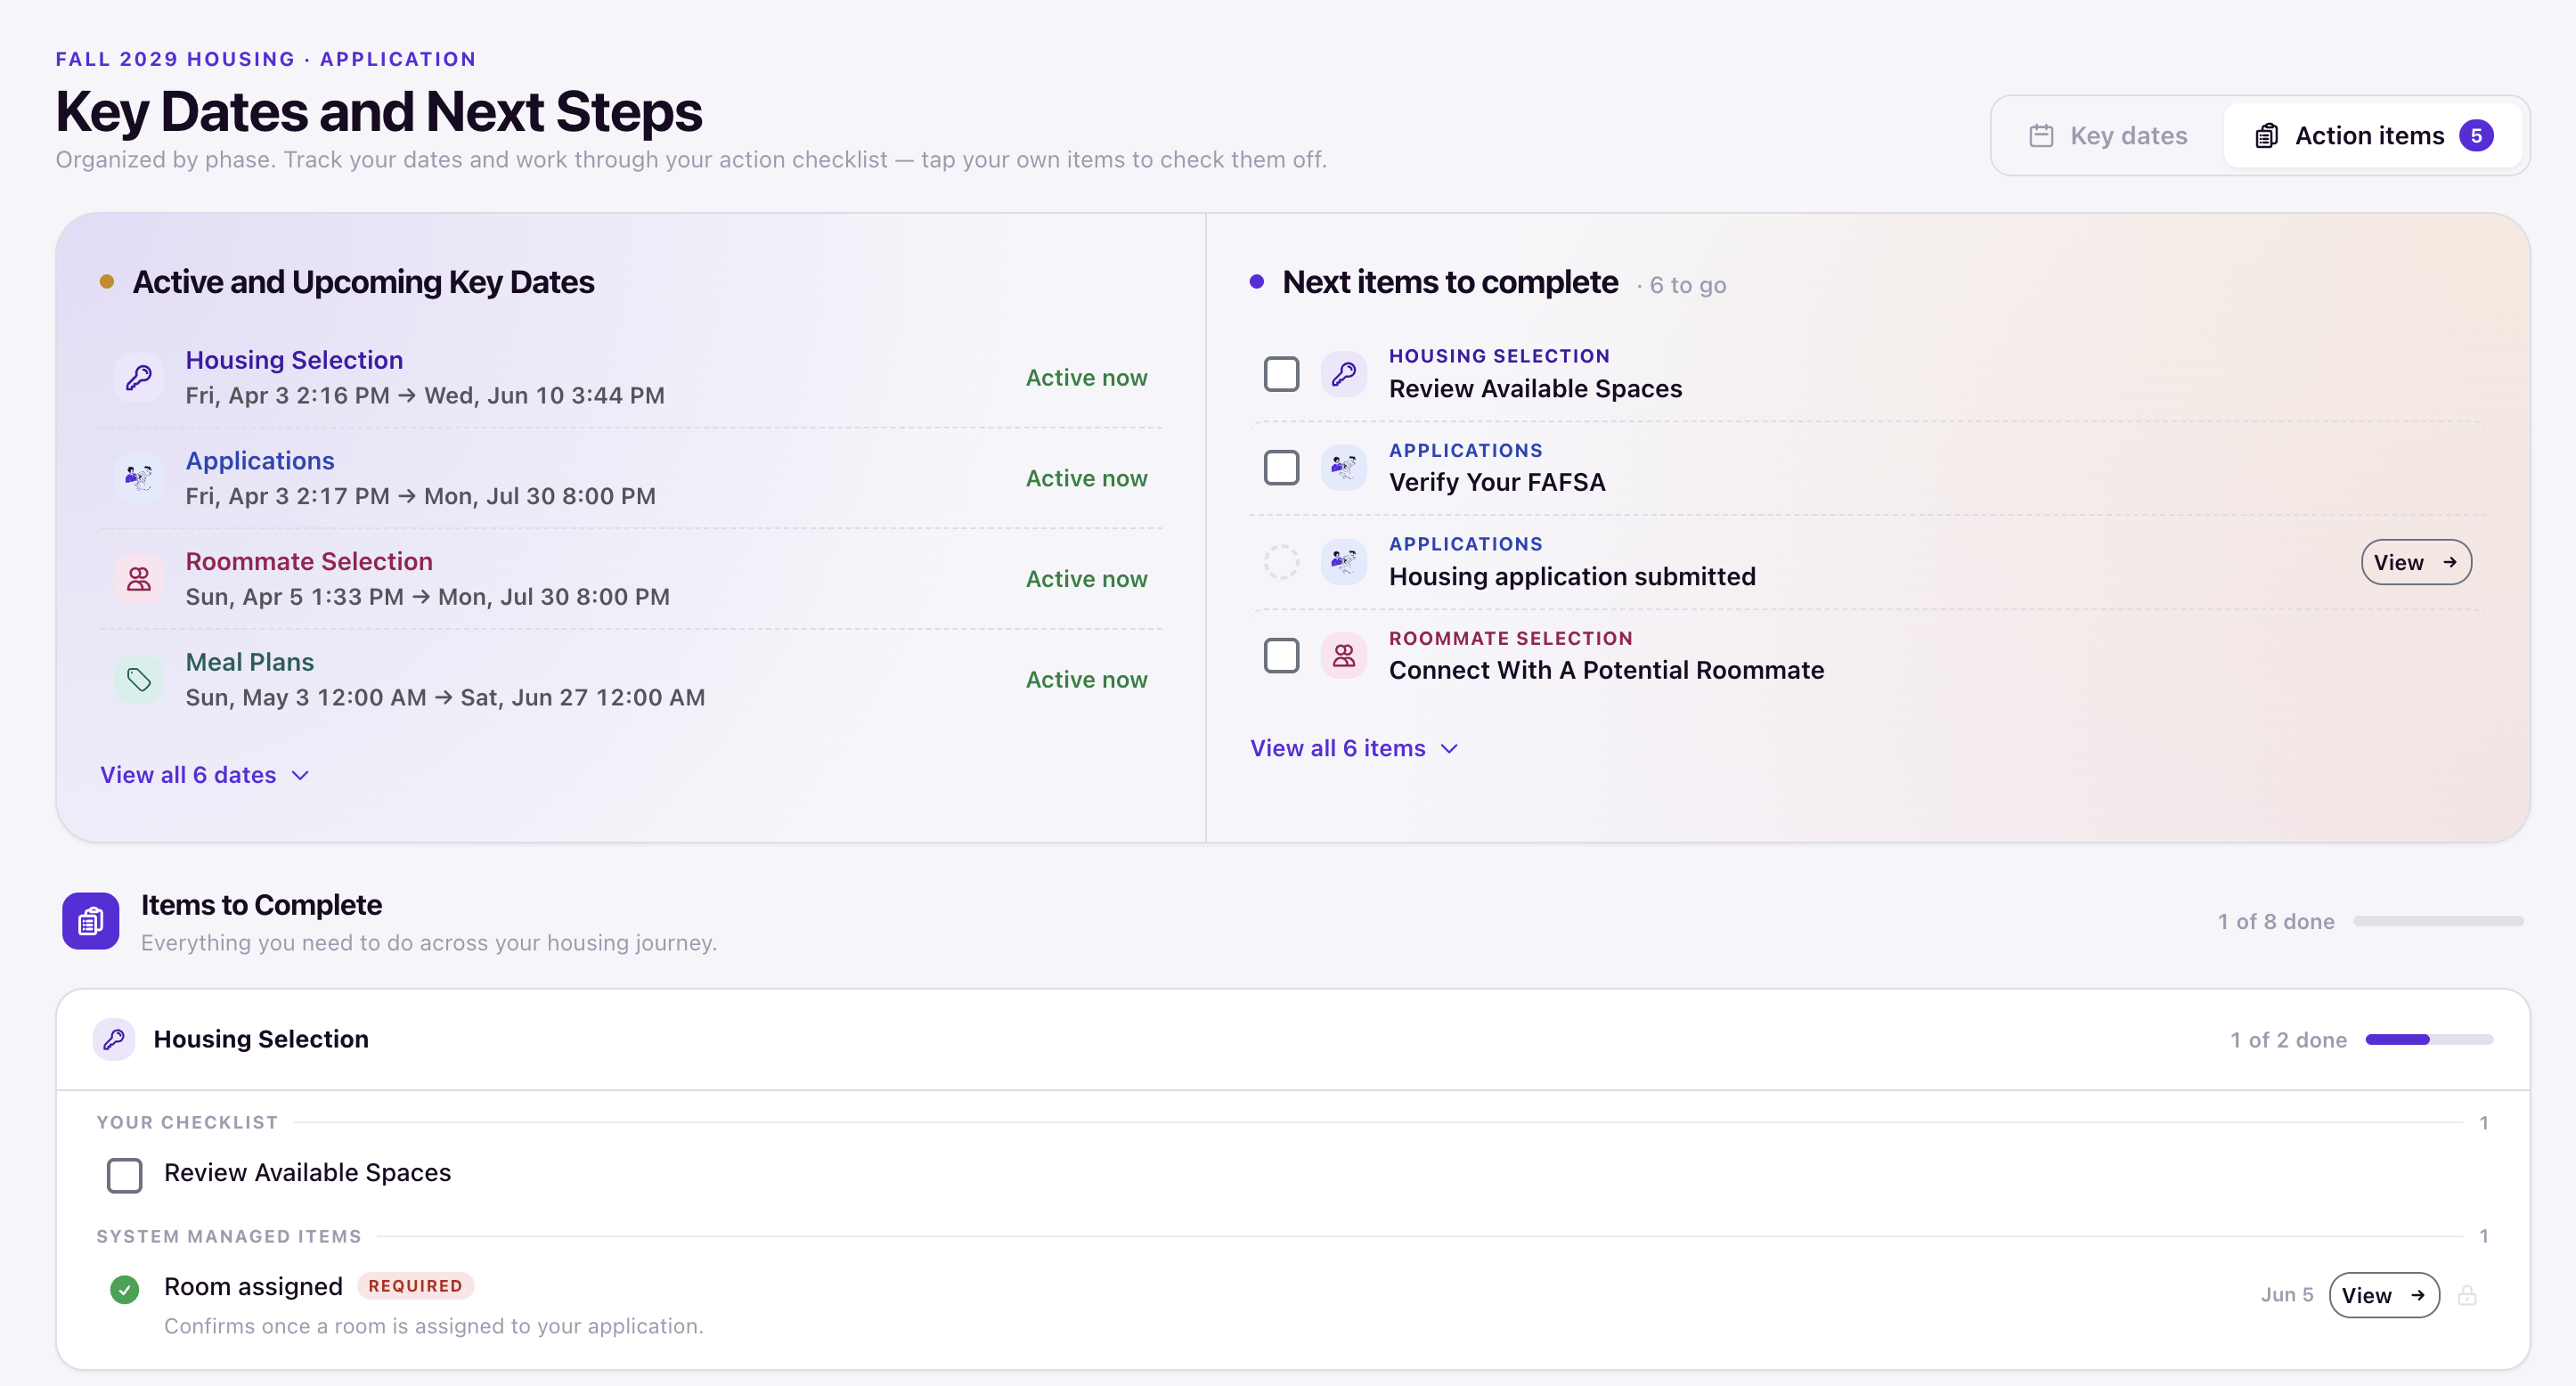
The checklist items you configure in this tab become the Your checklist items in the student's Action items view. The system-managed items populate automatically based on the student's state.
Preview the student view
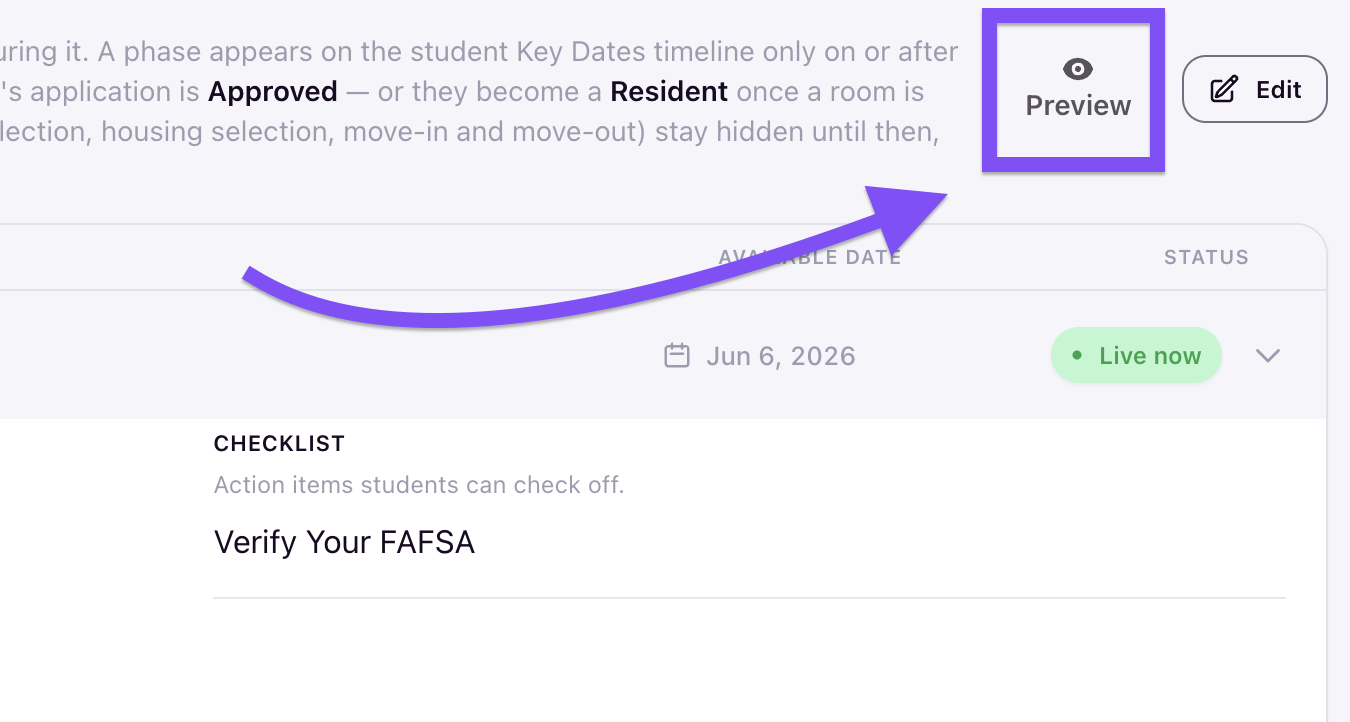
Click the Preview button in the upper right of the tab to open the student Key Dates and Next Steps page in a new tab. The preview renders the exact student experience based on your current configuration, so you can verify phase visibility, descriptions, and checklist order before the cycle is live.
When the preview opens, a sidebar shows simulation controls. Use the Application Status toggle and Preview Date field to change the simulated student state and time. The preview updates immediately so you can see how the timeline and action items look on different dates and for students at different stages in the cycle.
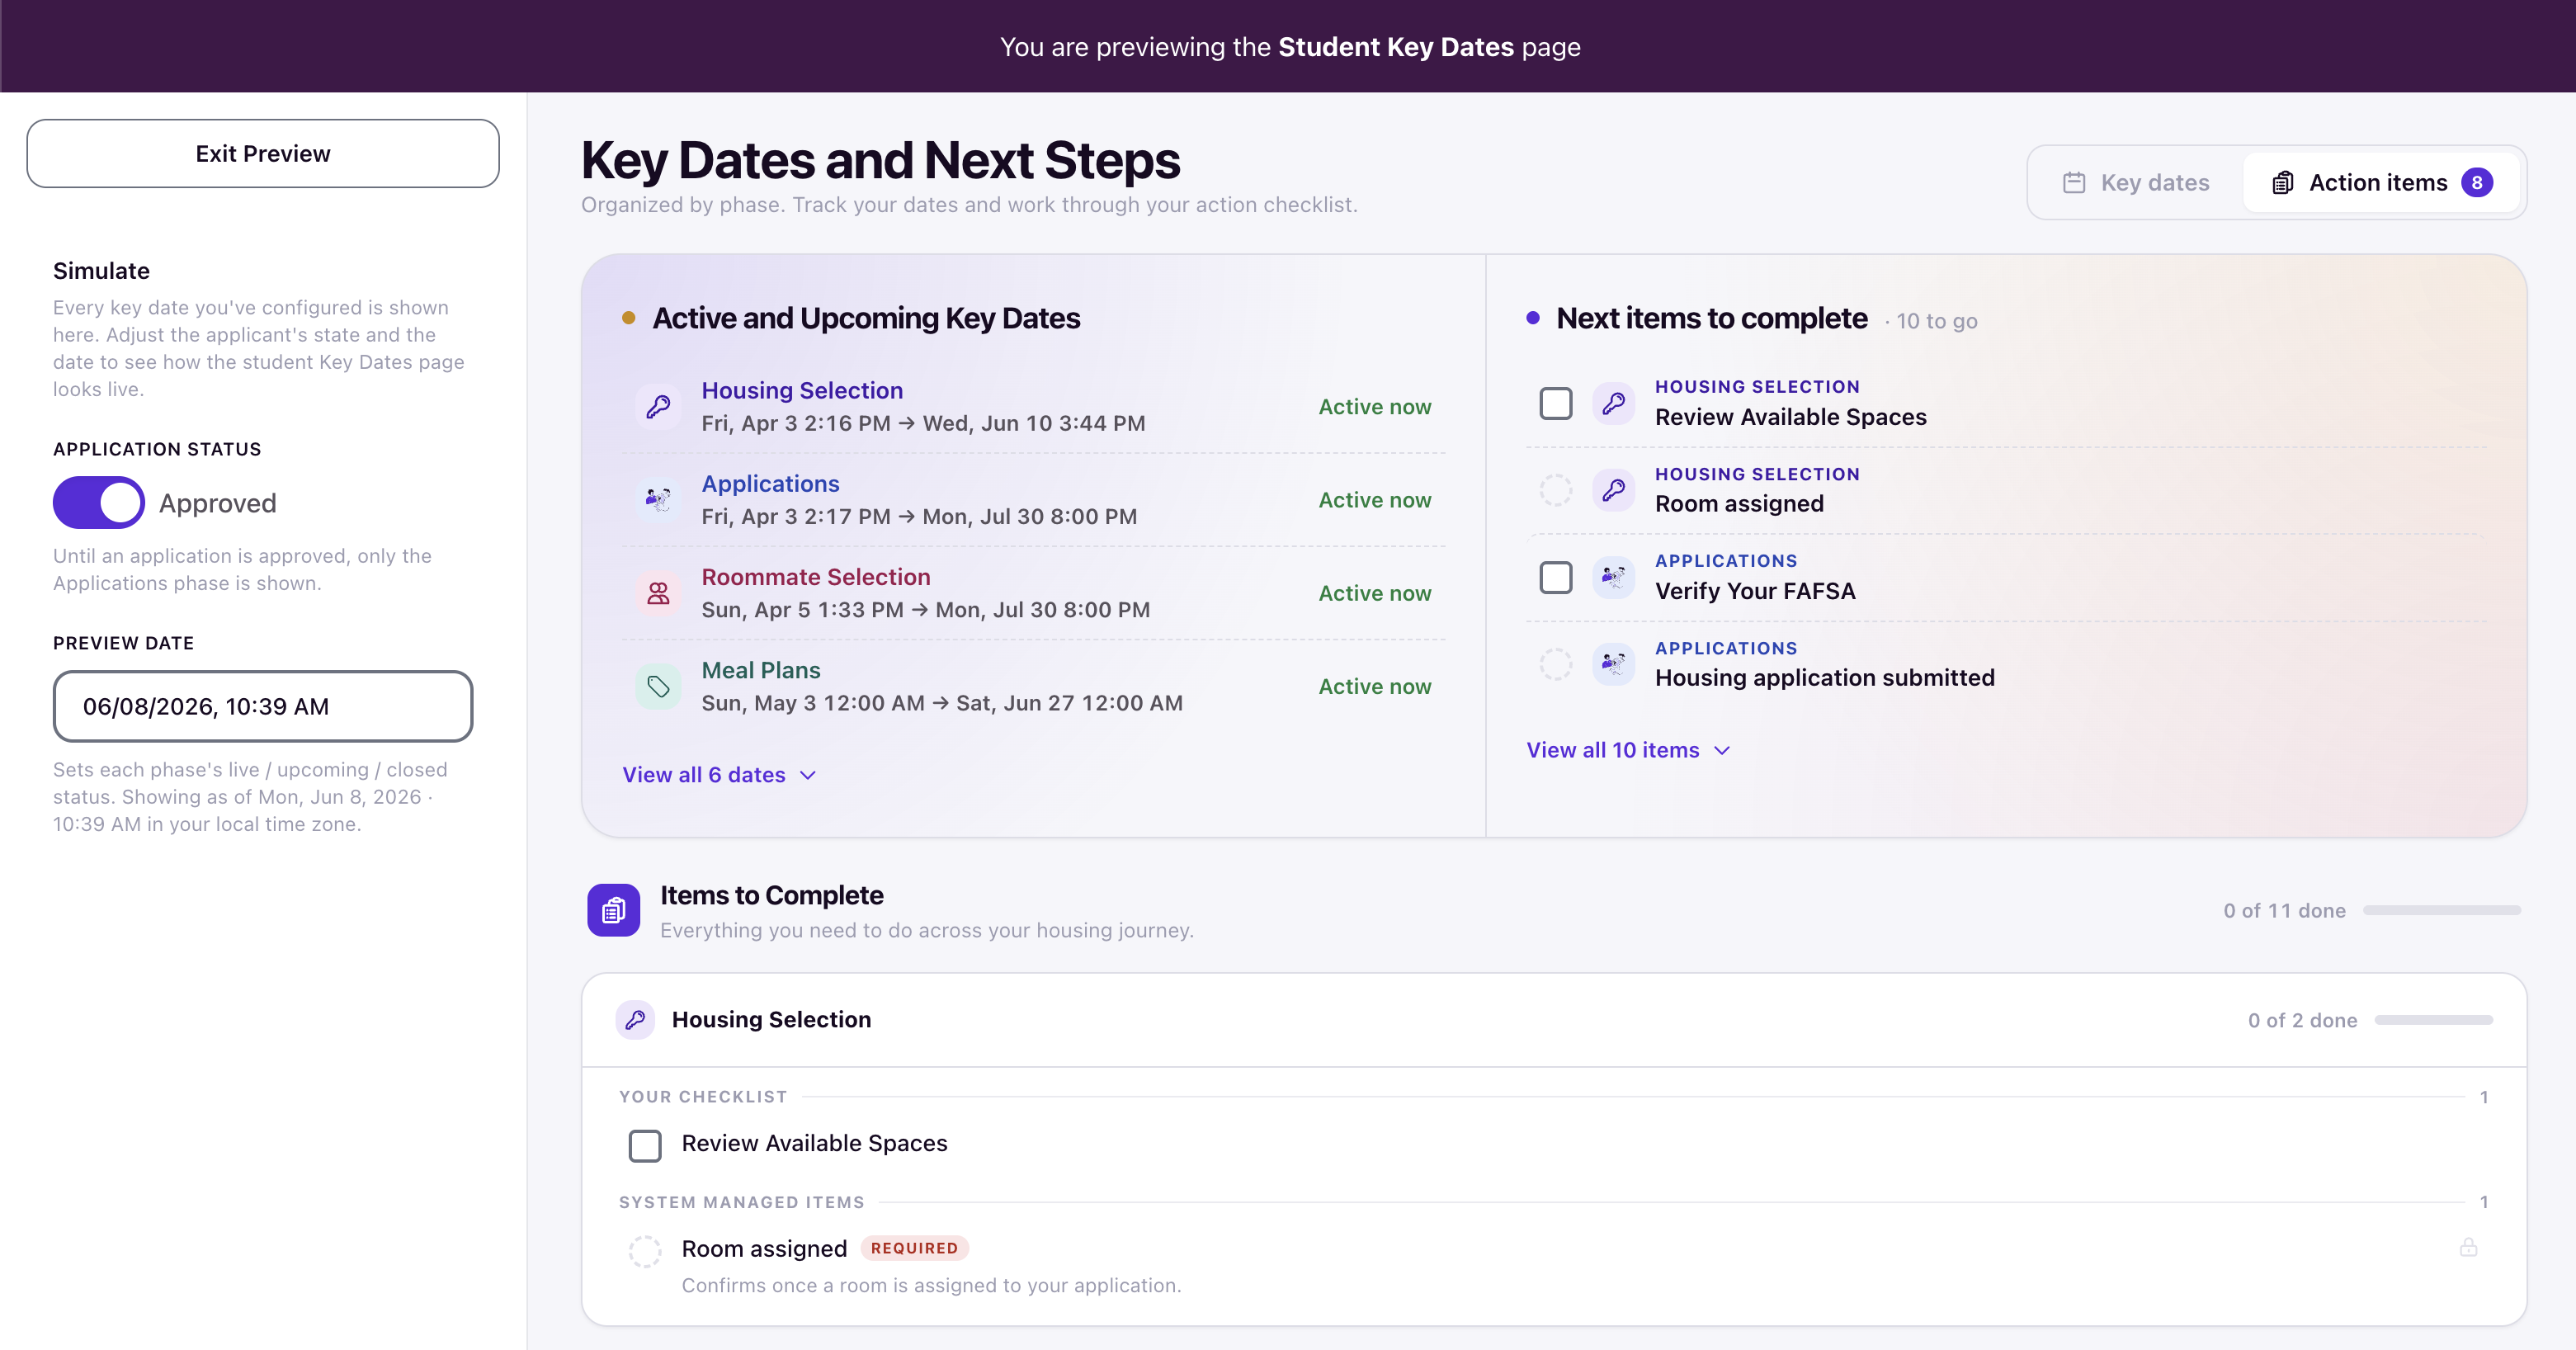
Click Exit Preview in the sidebar to return to the editor.
Best practices
- Set Available Dates early to give students time to plan. Phases that appear on the timeline before they open let students see what is coming and prepare their documents, preferences, or roommate strategies. Do not wait until the phase opens to set the Available Date.
- Write clear descriptions that explain what the phase is for and what students should do next. This reduces support tickets from students asking when a phase starts or what it means.
- Keep checklist items focused on one action per item. Students check them off individually, so broad or vague items create confusion about what is actually required.
FAQ
Can I set different Available Dates for different phases?
Yes. Each phase has its own Available Date. Set them independently so students become aware of phases at different times.
What happens if I don't set an Available Date for a phase?
The phase does not appear on the student timeline. The status shows Not set in the admin list. Students will not see that phase in the Key dates view, and related checklist items may not appear in the Action items view.
Can I reorder checklist items?
Yes. You can drag and drop checklist items to reorder them in the admin editor. Arrange them in the order students should complete them.
Why does a phase show Live now even though the phase dates are in the future?
Live now refers to the Available Date, not the phase start date. A phase shows Live now when its Available Date has passed, meaning students can see it on their timeline. The phase may still be upcoming and not yet open for action.
Why don't all phases appear on a student's timeline right away?
Until a student's application is Approved — or they become a Resident once a room is assigned — only the Applications phase is shown. The later phases (roommate selection, housing selection, move-in and move-out) stay hidden until then, even after their available date has passed.