Assigning an Applicant to a Room Manually
Last updated: October 5, 2026
The assignment of an applicant to a room depends on the institution's policies, and there are various methods for making these assignments. Housing.Cloud offers three options for room assignments: student selection, auto-assignment, and manual assignment. This guide focuses on how to perform manual room assignments.
Steps to Manually Assign an Applicant to a Room
Follow these steps to assign a room:
Note: Rooms can only be assigned to applicants whose applications have been approved.
- Click Applications in the navigation panel.

- Click Approved for only approved applications to show up on the list.

- Click on the profile to which you want to assign a room manually.

- On the applicant profile page, scroll down to find the Current Assignment card and click Assign Bed.

- An Assign Bed for This Application pop-up shows all the available rooms along with filters. Each room card shows key information like room number, building name, max occupancy, bed types, and costs. Each bed ID is shown in the occupancy section of every room card. Green IDs are unoccupied and available for assignment; grey IDs are already occupied.
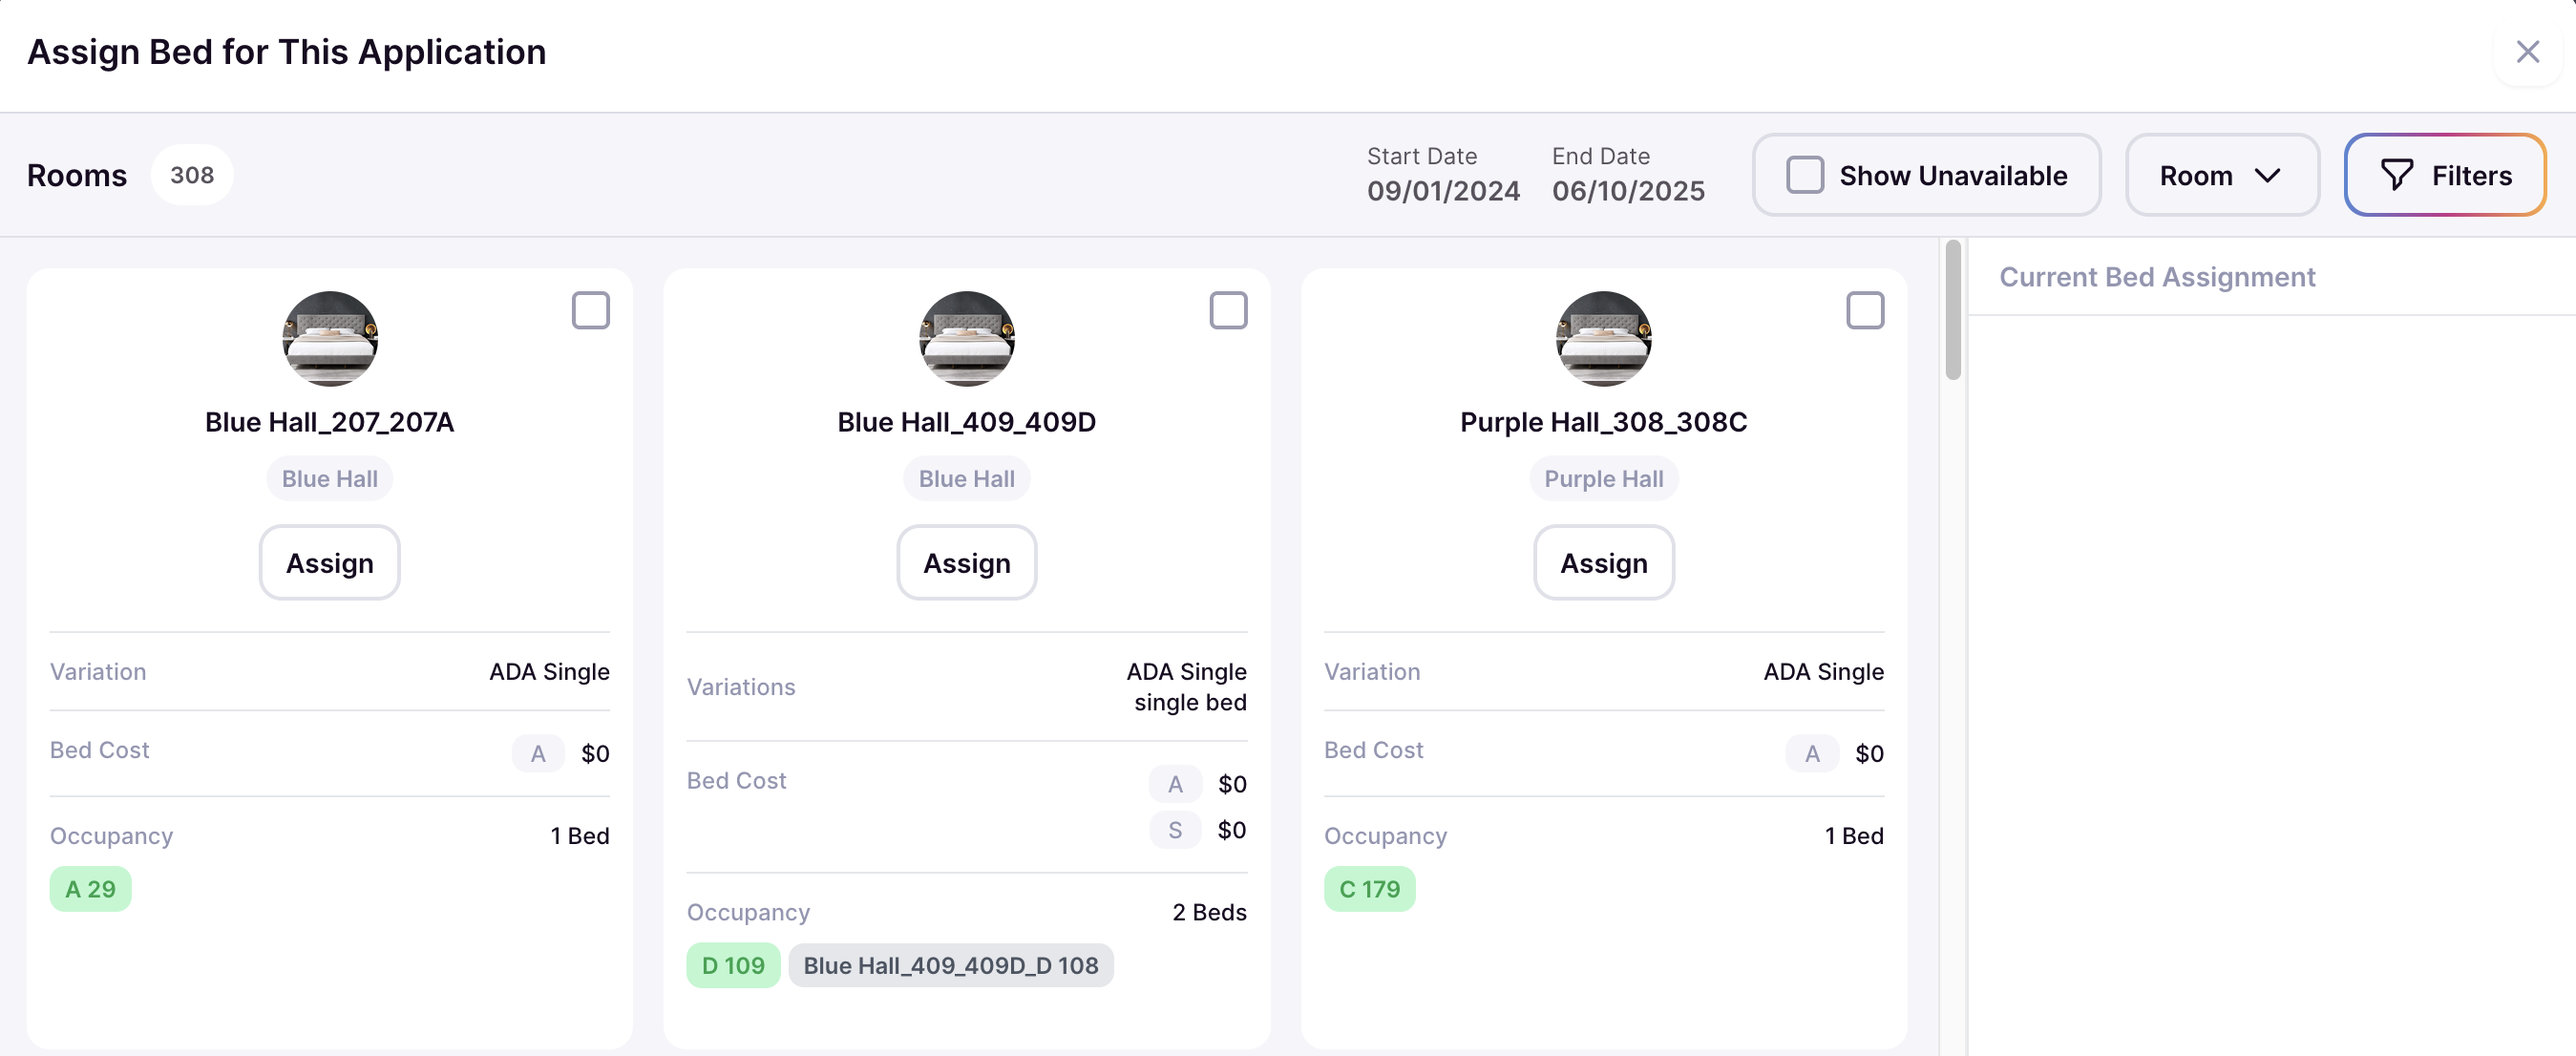
Hover/click over an occupied bed to see the name of the assigned resident, and click on the green card to view the unassigned room.
These are the options available for filtering rooms: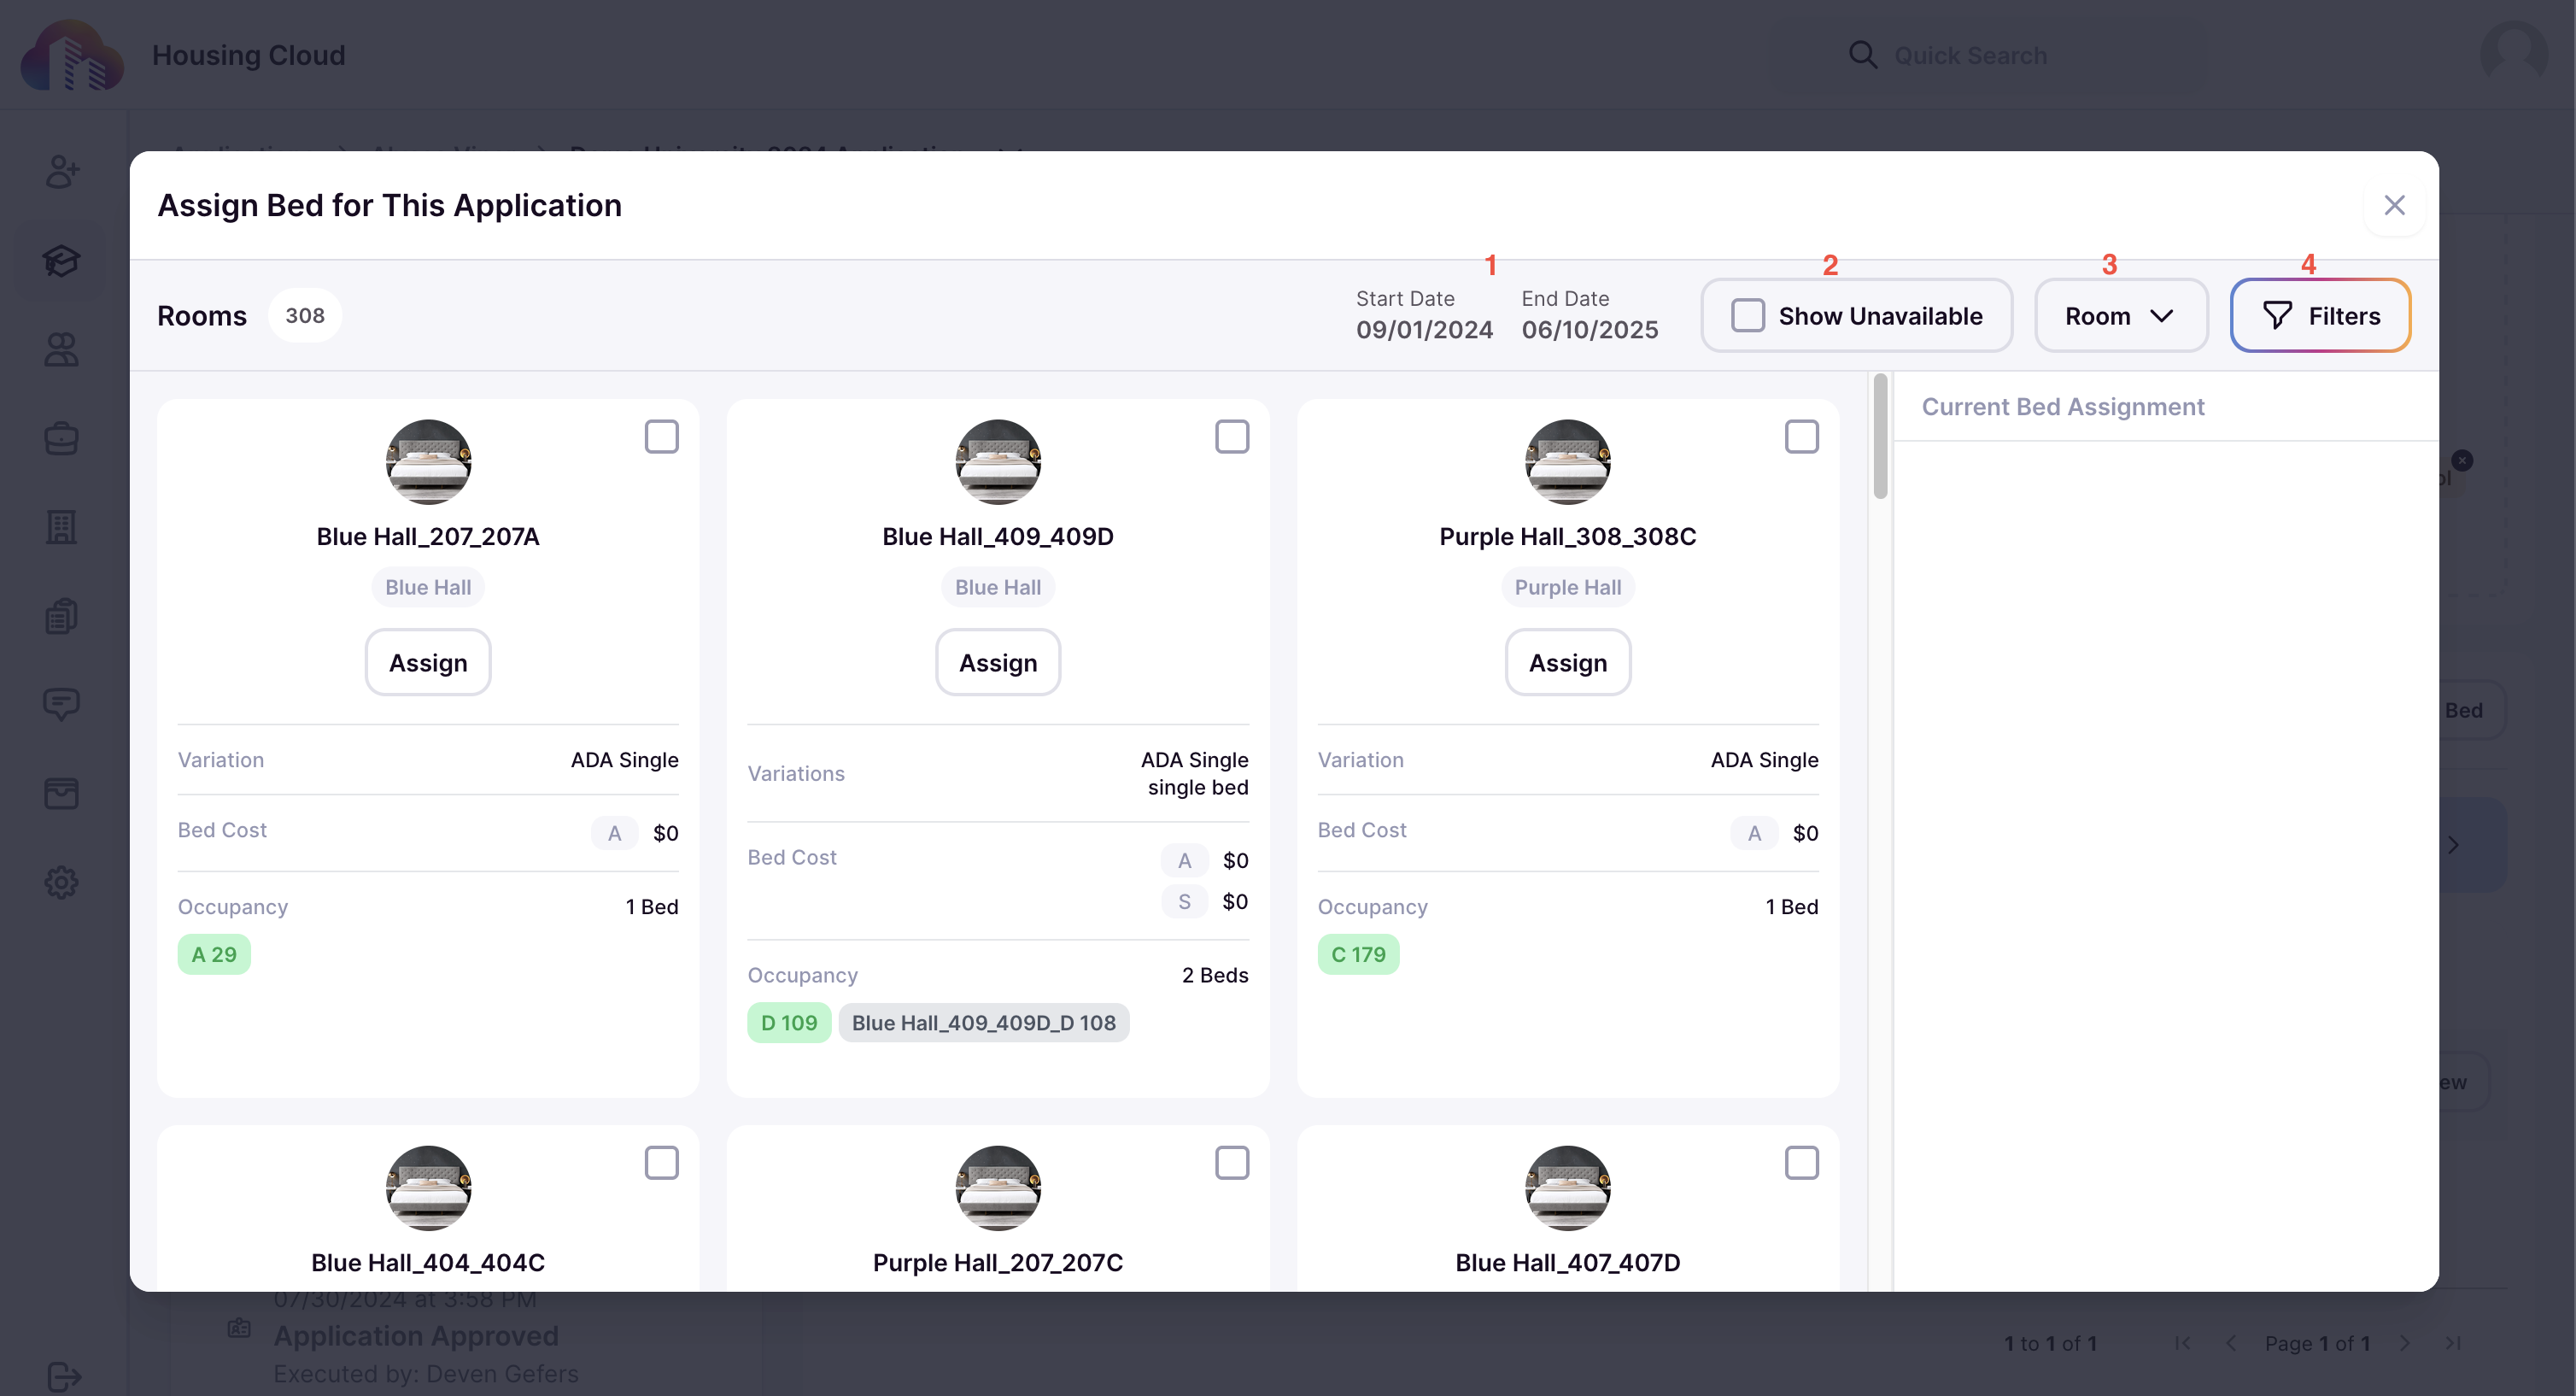
- Start and End date: The admin decides the start and end date per the institution's academic calendar and policies. These rules are set in the housing cycles. The dates are noneditable in this window.
-
Show unavailable: Checking this box displays rooms that are not available.
-
Room: The room dropdown has room type options to choose from. Example: Room, Suite, etc.
-
Filters: Filters help you filter rooms based on room type, building, inventory tags, individual rooms, etc. This is filters in action:
- Once the filters are set and you have found the perfect room, click Assign.

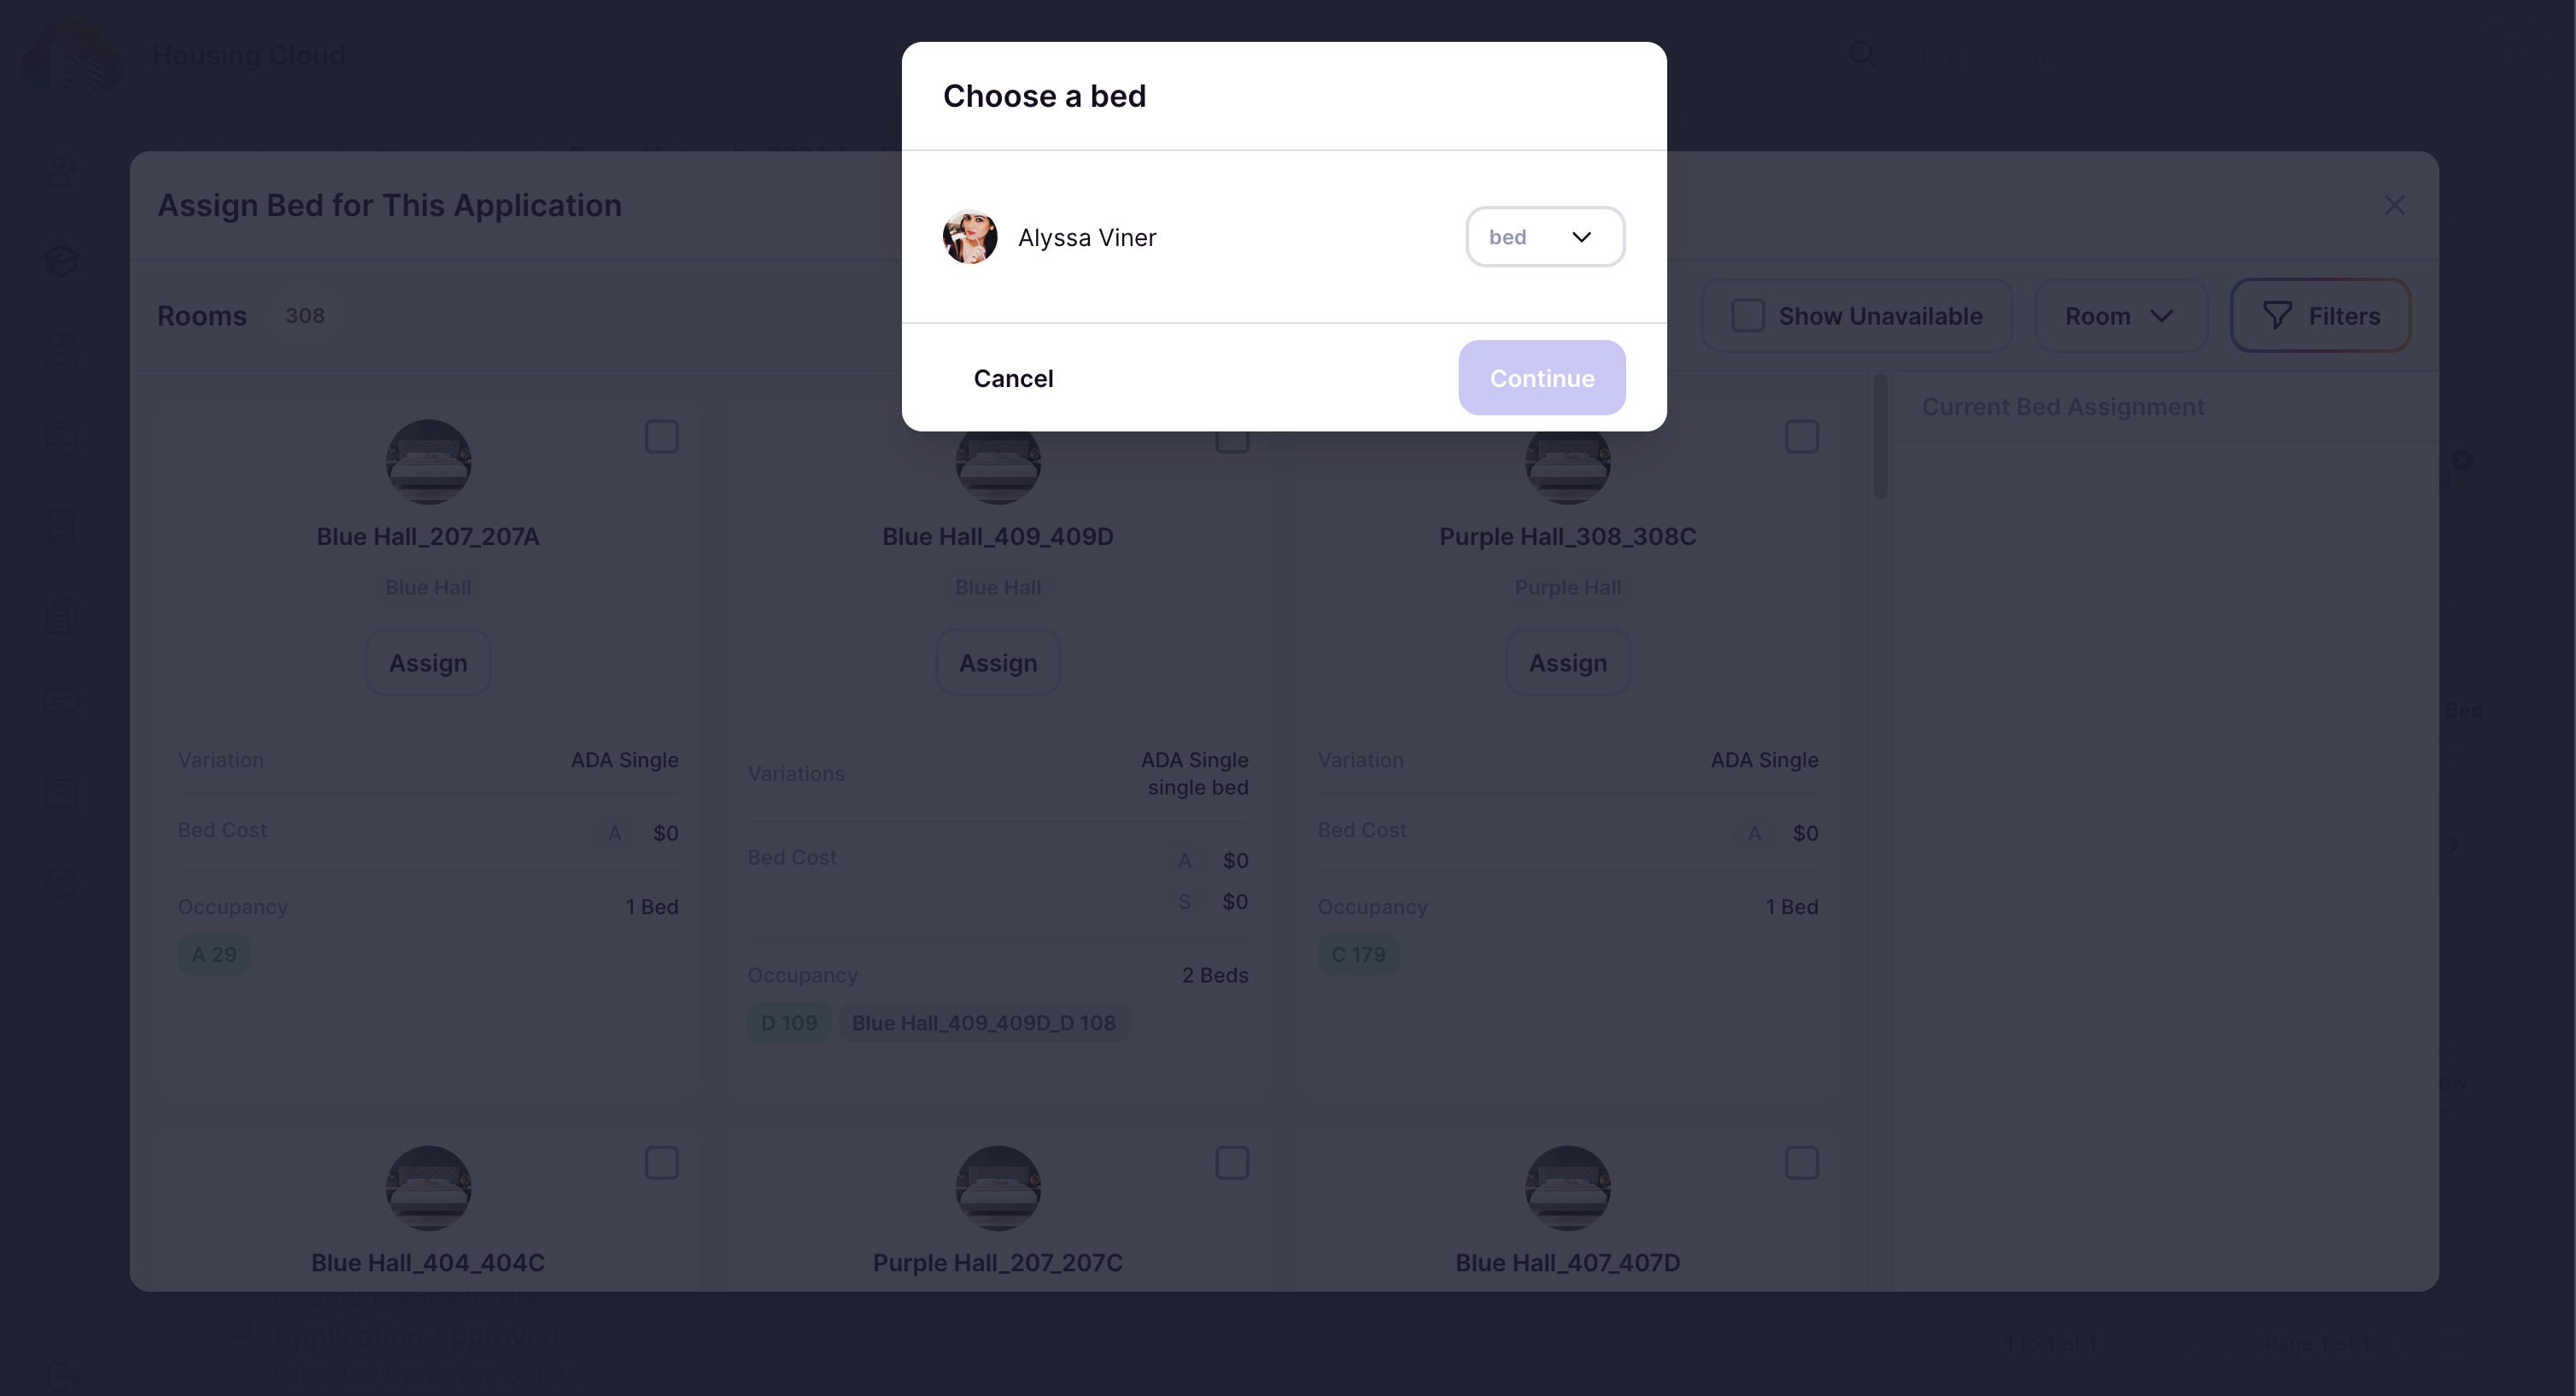
- In the Choose a Bed pop-up, all beds in the room will be displayed. Select the desired bed, then click Continue:
- On the Transaction pop-up, confirm the proper charge code and amount for this assignment (default values will pre-populate according to the charge codes setup under Settings for your institution). Write a description for the assignment; it is a required field. To pro-rate charges, check that box and provide a start and end date for the assignment to calculate the charge. Click Add a Charge to add more charges (the input fields remain the same). Click Continue.

- Finally, confirm the assignment details on the last pop-up and click Confirm to complete the assignment.


The applicant you just assigned will now be available as an incoming resident in the Residents section of the admin portal.