Create and Assign Furniture To Inventory
Last updated: August 28, 2026
Furniture records represent physical inventory items—desks, chairs, bed frames, dressers—attached to locations in your housing inventory. The system distinguishes between:
- Furniture Types — templates configured in Setup that define defaults for name, description, and categorization.
- Furniture Items — actual records created from those types and attached to suites, rooms, or beds.
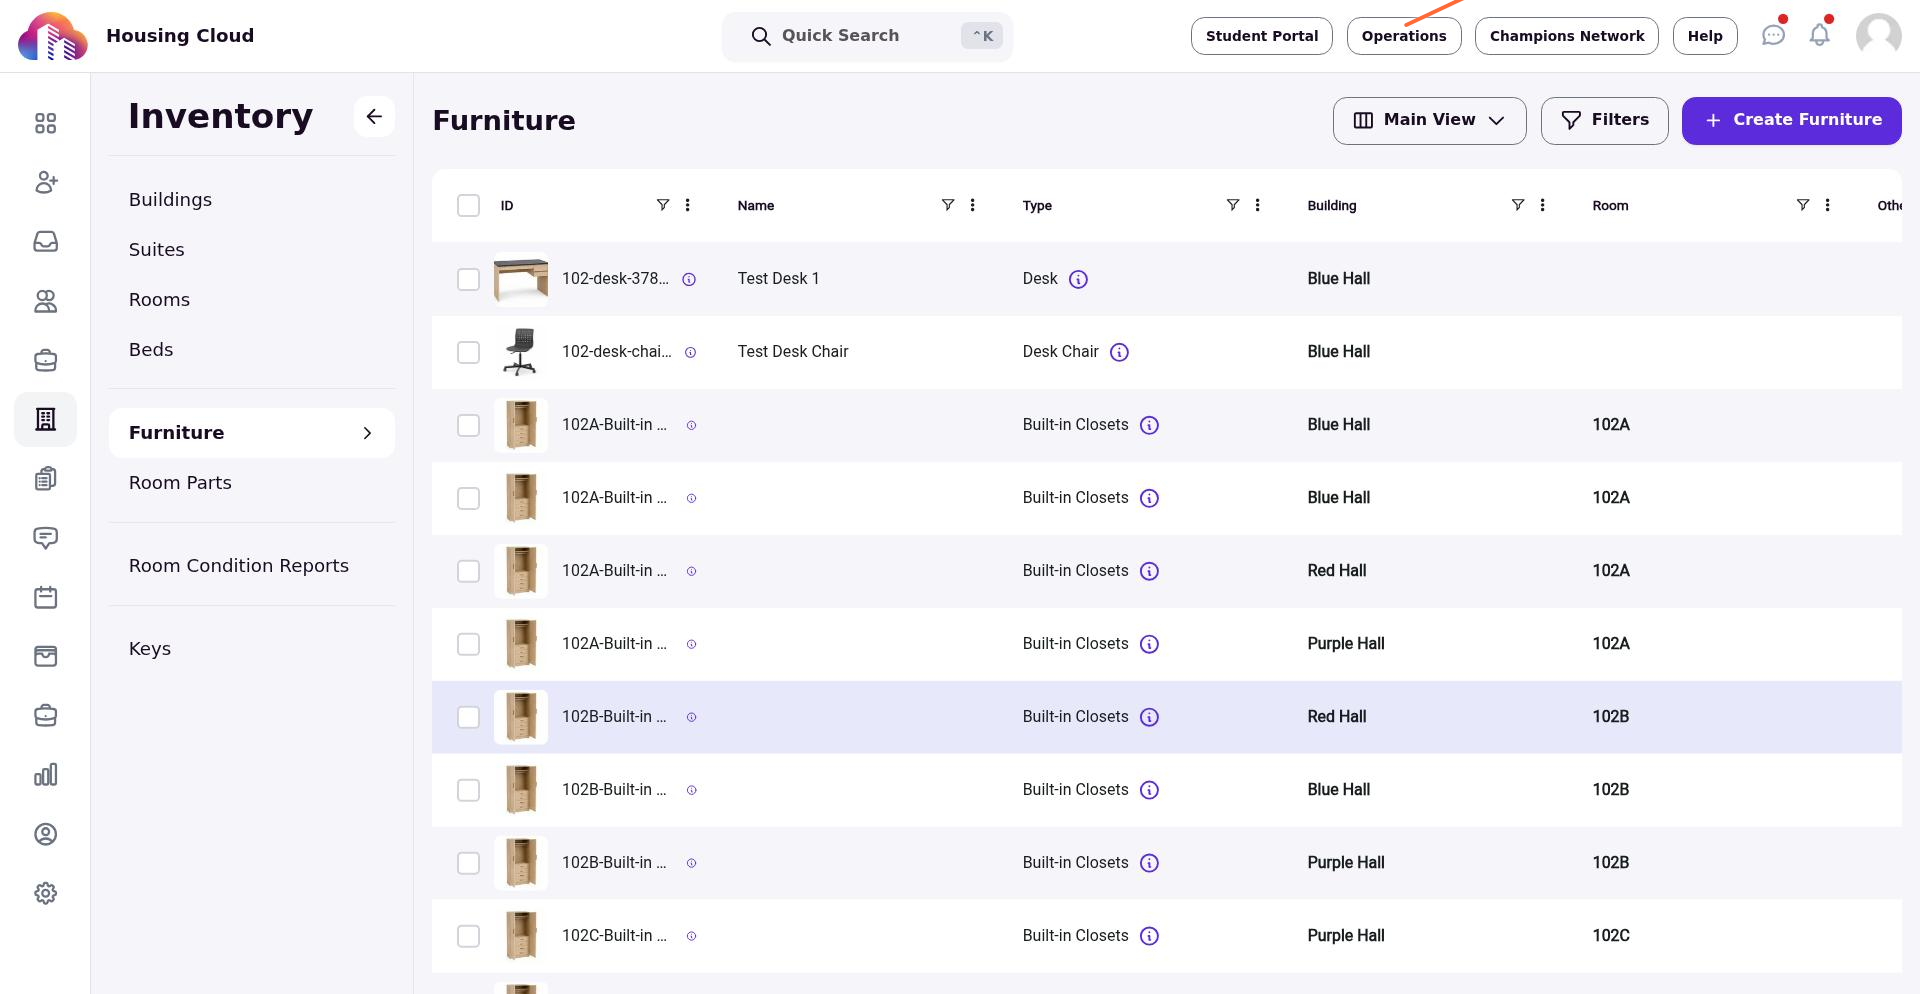
This article covers bulk creation of furniture items from Inventory → Furniture using the Create Furniture modal.
Before You Begin
- Furniture Types must exist. Types are configured in Setup before you can create items. If the Type dropdown is empty, set up your types first.
- Target locations should exist. The suites, rooms, or beds where you want furniture should already be in inventory.
- Furniture items cannot be deleted directly in the product. Use caution when creating records and verify your selections reflect your actual inventory configuration before confirming.
The Create Furniture Workflow
From Inventory → Furniture, click Create Furniture to open a four-step modal.
Step 1: Define Items
Specify the furniture items you want to create. The modal uses three tabs—Suite, Room, and Bed—to organize items by attachment level. You can define items at one level, two levels, or all three in the same batch.
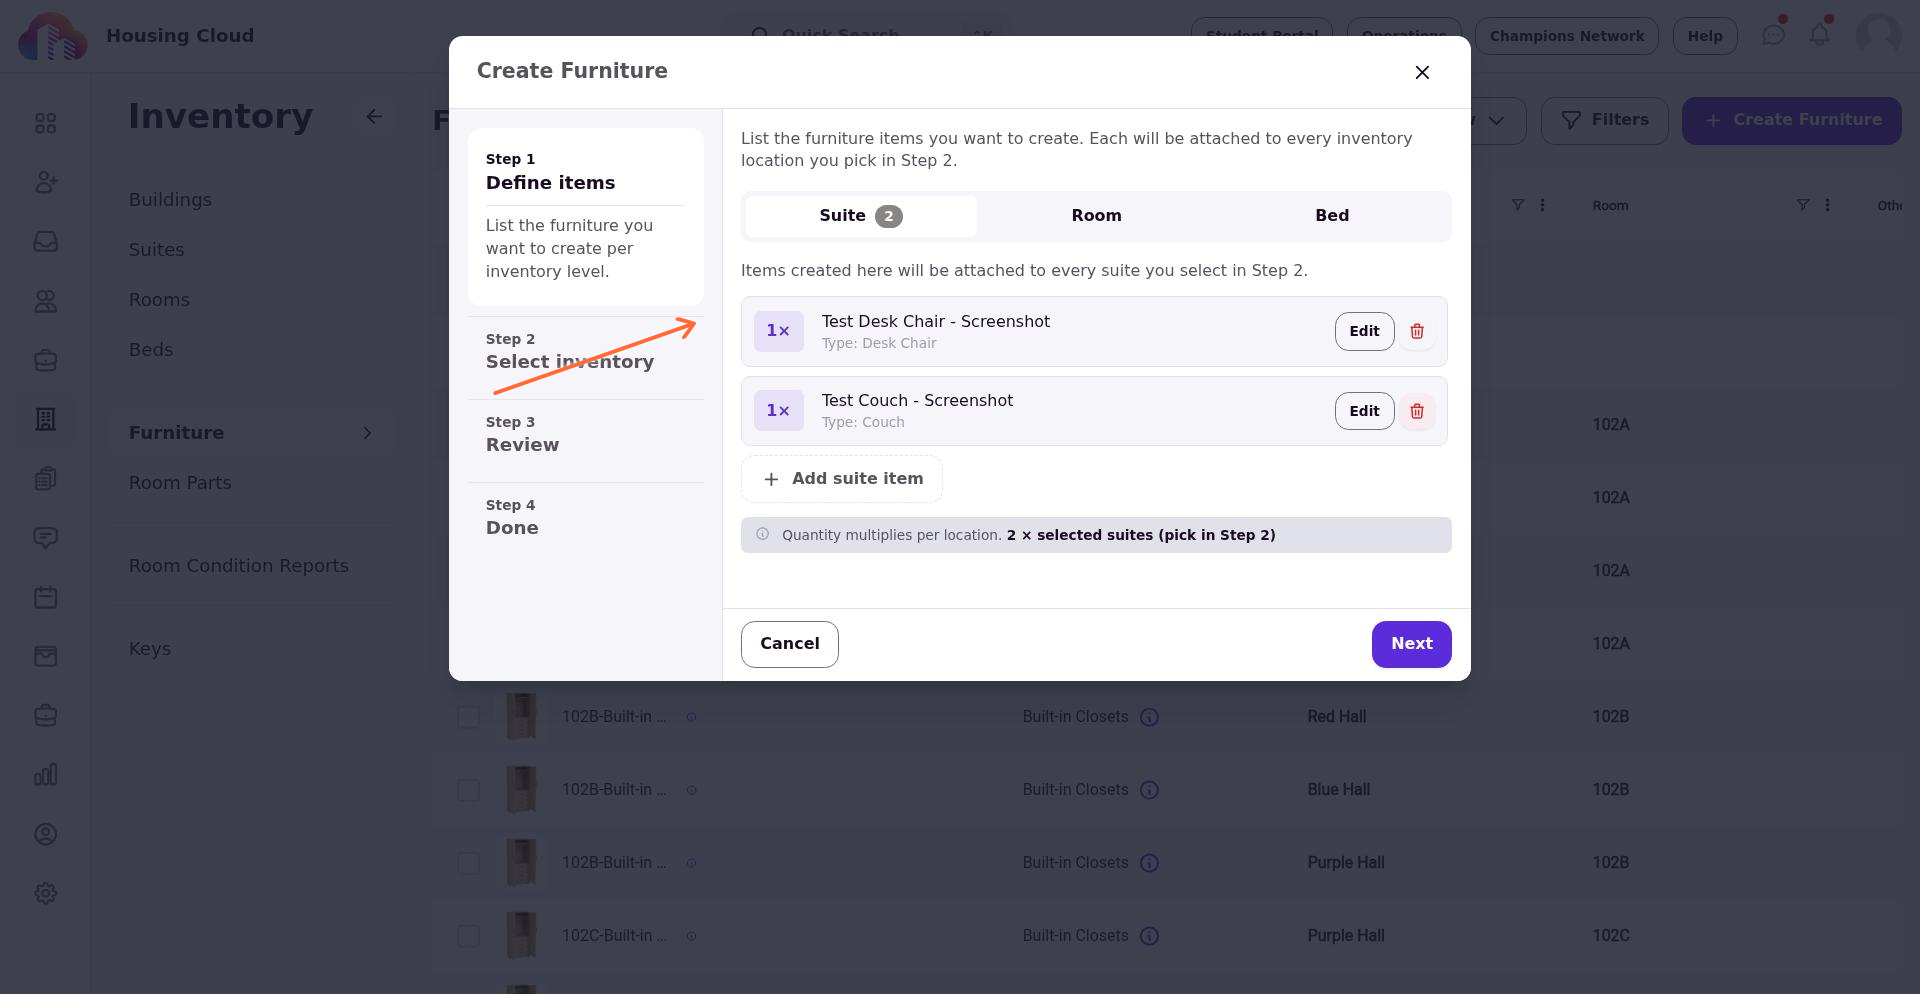
Each item row has:
- Type (required) — Select from your configured Furniture Types. This determines the category and provides default values for name and description.
- Name (optional) — A specific label for this item. Leave blank to use the type name as the default.
- Description (optional) — Additional details. Leave blank to use the type description as the default.
- Quantity — How many of this item to create at each selected location. Range is 1–100. For example, quantity 2 with 10 selected locations creates 20 records.
Click Add [level] item to add more item rows. Each row represents a distinct furniture configuration that will be attached to every matching location you select in Step 2.
The info bar below the items shows how quantity multiplies: if you have 2 item rows and select 10 locations, you'll create 20 furniture records.
Step 2: Select Locations
Stage the locations where you want furniture created. The list shows buildings, suites, rooms, and beds with buttons that depend on the level:
- Buildings have + all — stages all suites, rooms, and beds inside.
- Suites have Add for the suite only, or + all to also include all rooms and beds inside.
- Rooms have Add for the room only, or + all to also include all beds inside.
- Beds have Add only.
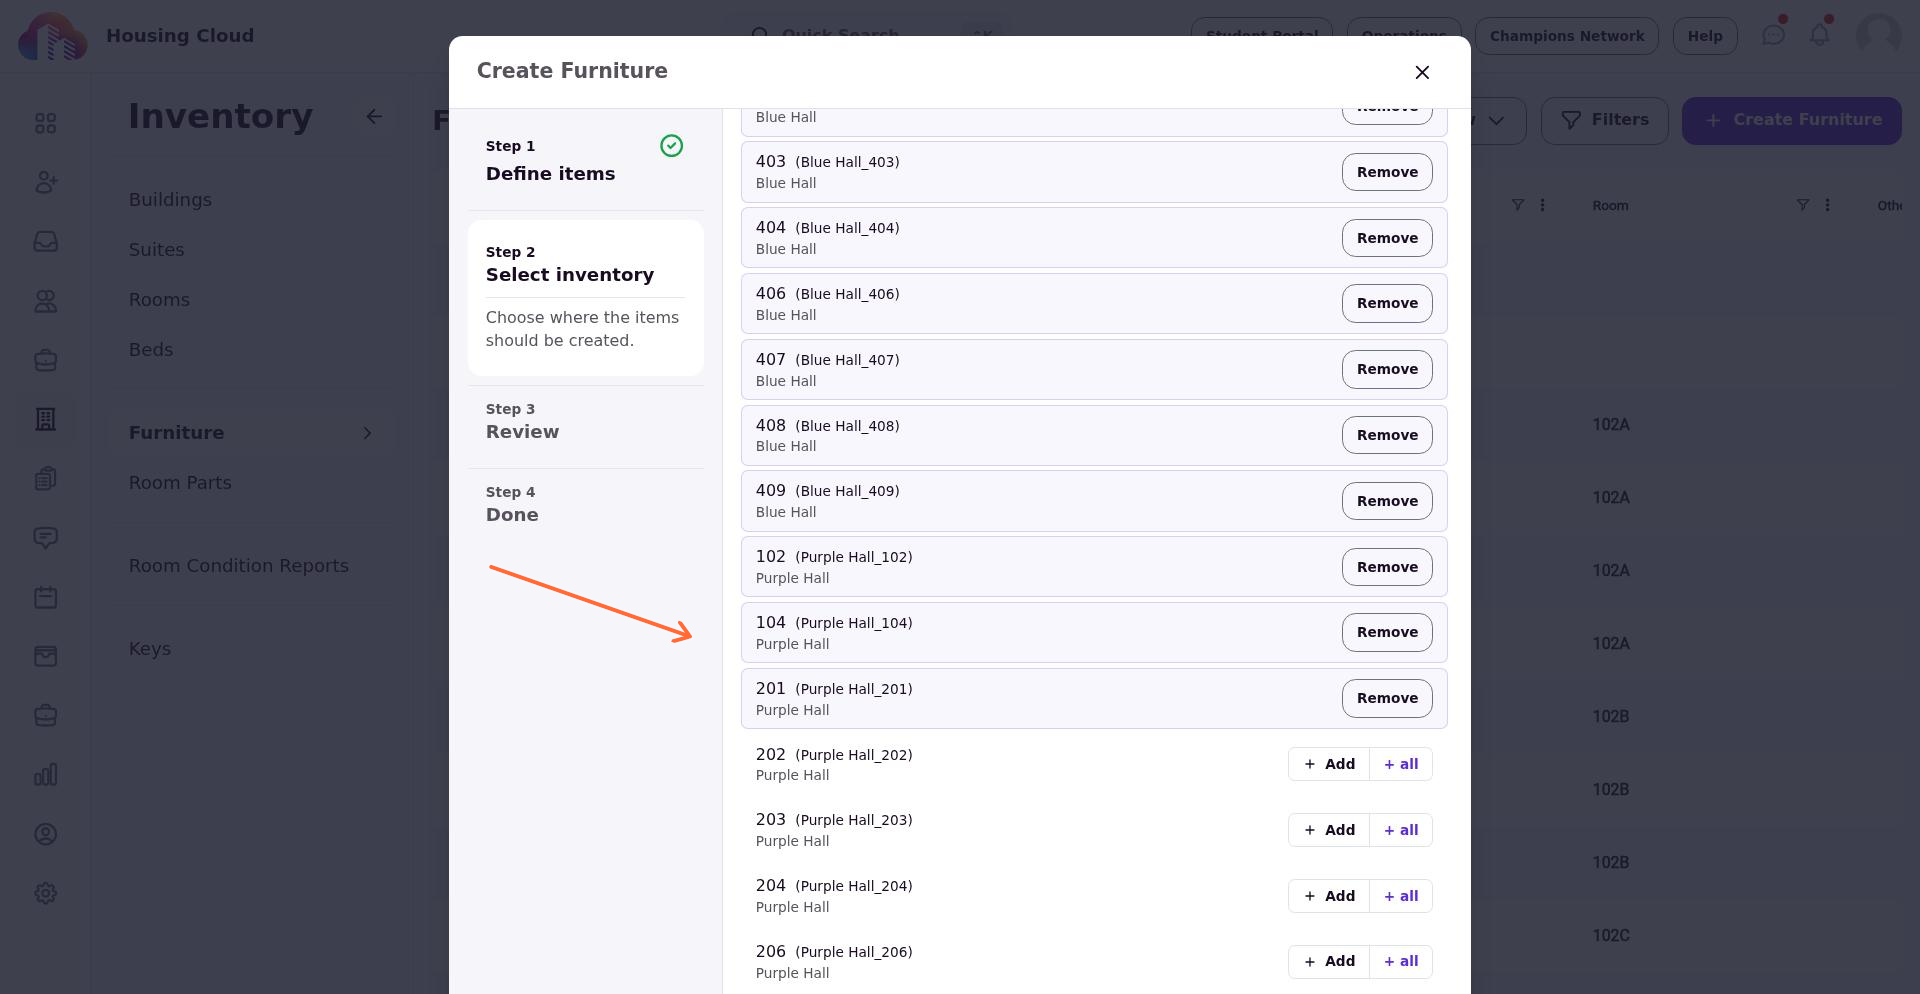
Staged locations show a Remove button. Click Clear all to reset the entire selection.
Furniture is created at the level you defined in Step 1—suite-level items at staged suites, room-level items at staged rooms, bed-level items at staged beds. If a staged location doesn't have that level (like a building with no suites), those items are skipped automatically. The review step shows the final count.
Step 3: Review
The review step shows what will be created:
- Total items — the sum of all furniture records that will be created.
- Location breakdown — how many suites, rooms, and beds are in your selection.
- Item list — each furniture definition with its type.
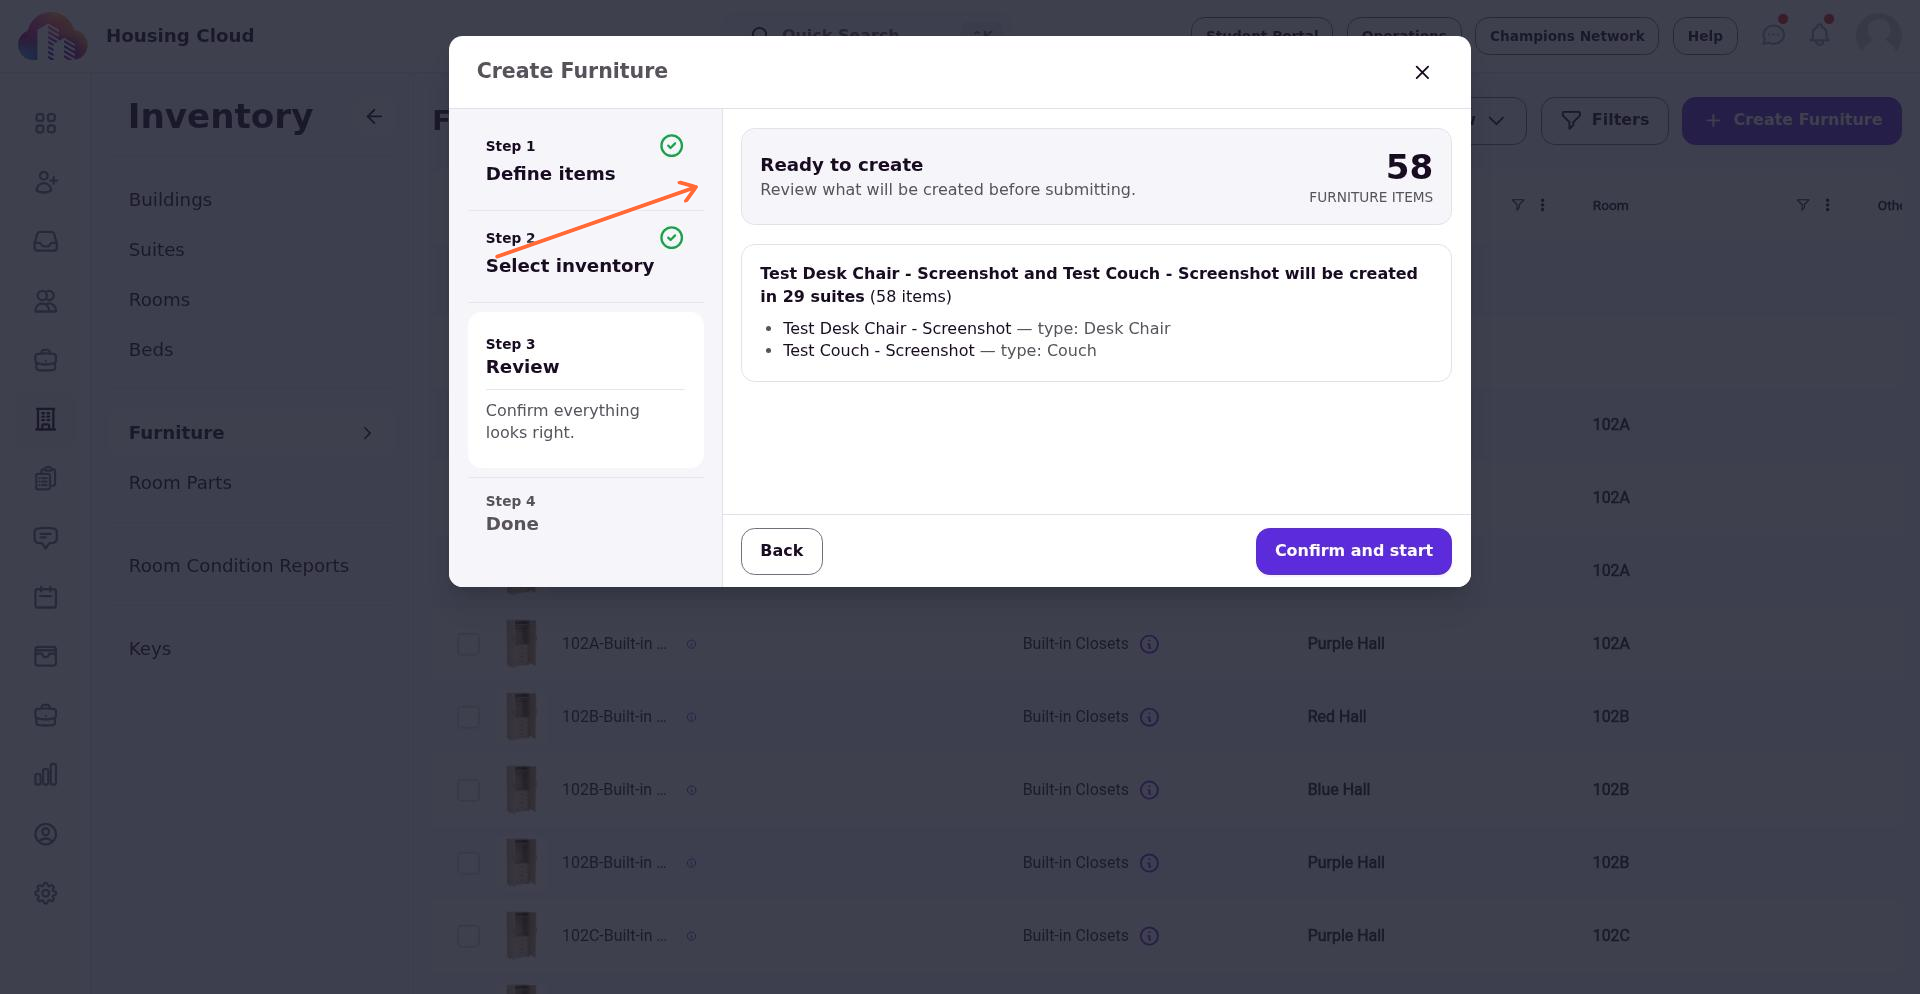
Click Confirm and start to submit the creation job.
Step 4: Job Started
Furniture creation runs as a background job, not instant record creation. The modal shows Job started with confirmation that the job is processing.
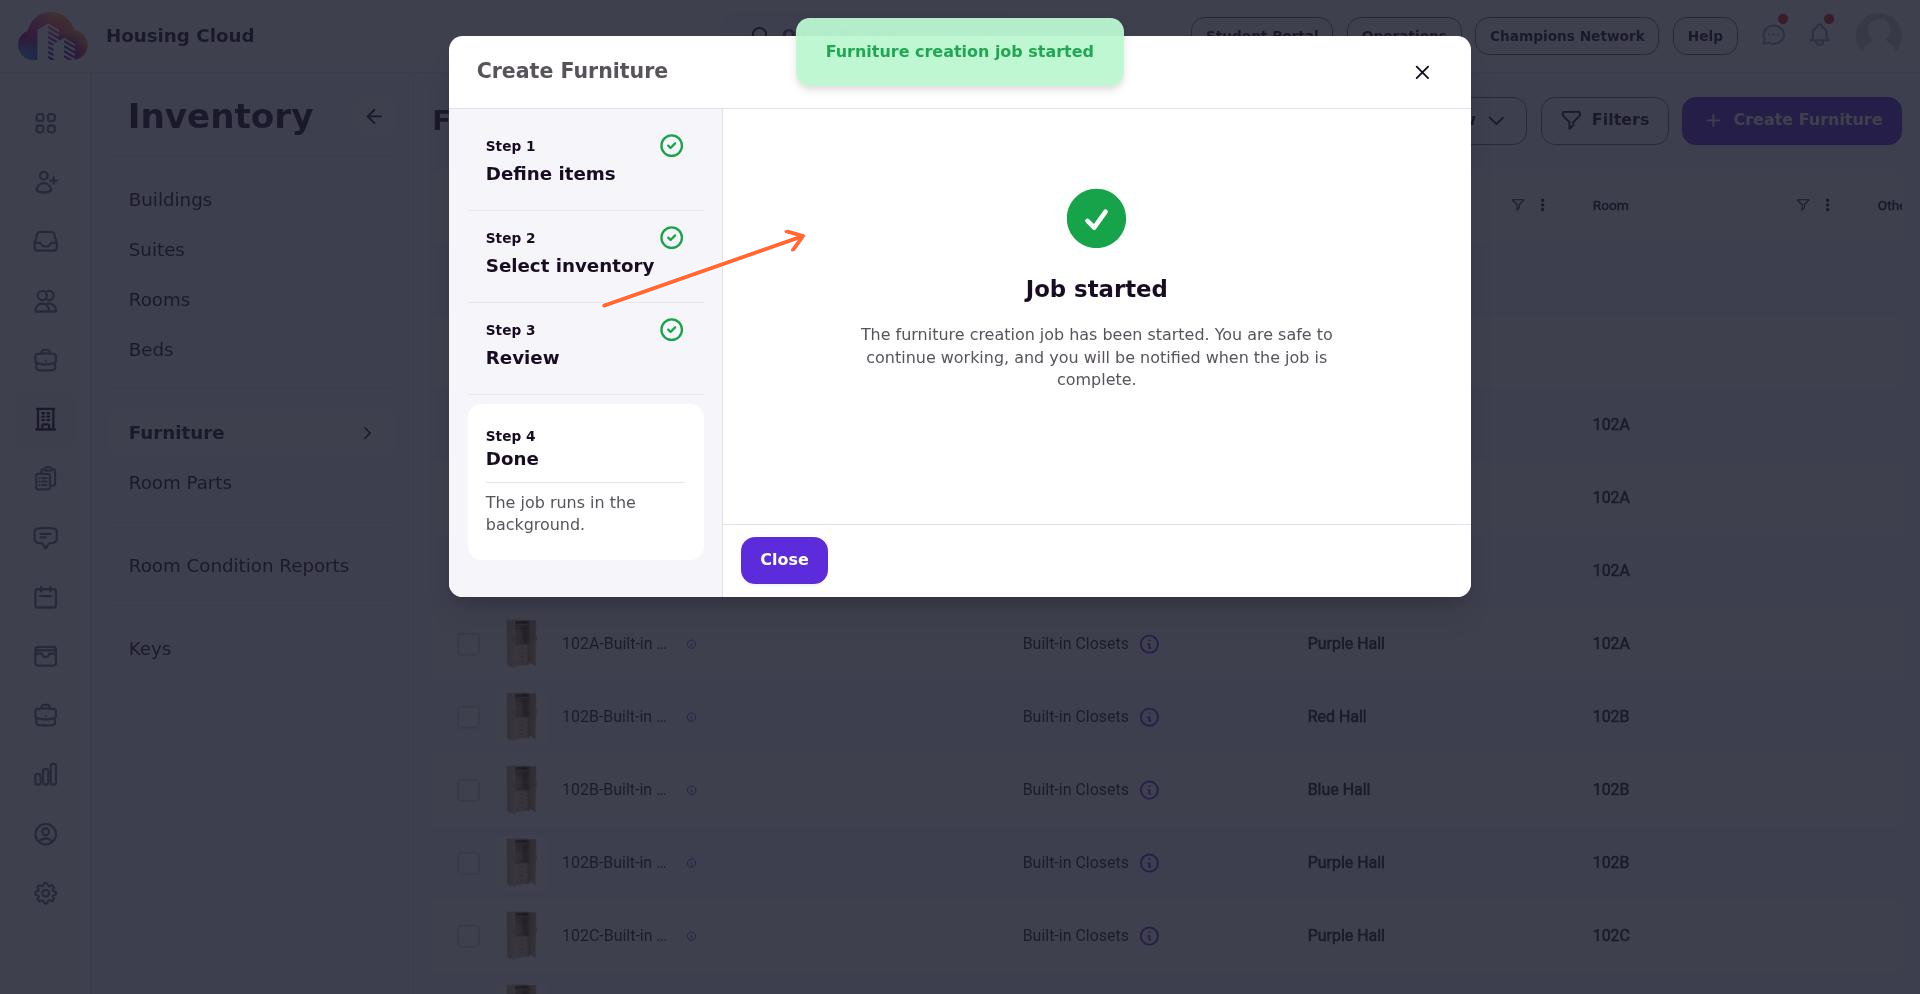
You can close the modal and continue working. You'll be notified when the job completes. New furniture records appear in the Furniture Inventory table after the job finishes—refresh the page if needed.
Tracking Physical Space Conditions
You can also use furniture records to track the condition of physical spaces—not just movable items. Create Furniture Types for components like Walls, Flooring, Ceiling, Windows, or Cleanliness. Then create furniture items attached to rooms or beds to log their condition during inspections or turn-over.
This gives you a consistent way to track and report on space condition alongside furniture inventory.
Choosing the Right Attachment Level
When defining items, choose the level that matches how you track furniture:
- Suite level — Use when furniture is shared across the suite or tracked at the suite level. Items move with the suite.
- Room level — Use when furniture is assigned to a specific room. Items stay with the room regardless of bed assignments.
- Bed level — Use when you need item-level tracking tied to a specific bed. Items move with the bed assignment.
You can mix levels in one batch—define some items at Room level and others at Bed level, then select locations that include both rooms and beds.
Tips
- Use + all for bulk setup. Staging a building with + all adds all child locations at once—efficient for campus-wide furniture rollouts.
- Check the review counts. The total shows actual creations after accounting for skipped locations.
- Use quantity for multiples per location. If each room needs 2 identical desks, set quantity to 2 on one row rather than creating duplicate rows.
- Override defaults intentionally. The Name and Description fields default to the type values. Only fill these when you need item-specific overrides.