View Classic Scheduled Reports and Create Schedule Reports in Reports v2
Last updated: August 27, 2026
Open Communications > Scheduled Reports to view existing Classic scheduled reports, then create and manage new schedules from the Reports library in Reports v2. New schedule creation attaches to a saved report and delivers CSV or Excel exports on a fixed cadence by email, SFTP, or both.
Use Classic schedules only as a reference for what still runs from the legacy system. Recreate each one in Reports v2, then pause the Classic version so recipients do not get duplicate emails.
Classic schedules can no longer be edited. The only remaining Classic actions are Pause and Resume.
Before you start
You need access to reporting features and Report Builder v2 before you can open the Reports library or create schedules.
- Your role must include reporting access.
- You need at least one saved report in the Reports library before you can create a schedule. Schedules always attach to a specific saved report.
View Classic scheduled reports
Open Communications > Scheduled Reports in the admin portal. When Report Builder v2 is enabled, this page no longer hosts the old scheduling editor. It shows the moved notice and, when legacy schedules exist, a reference list of Classic schedules.
Moved notice
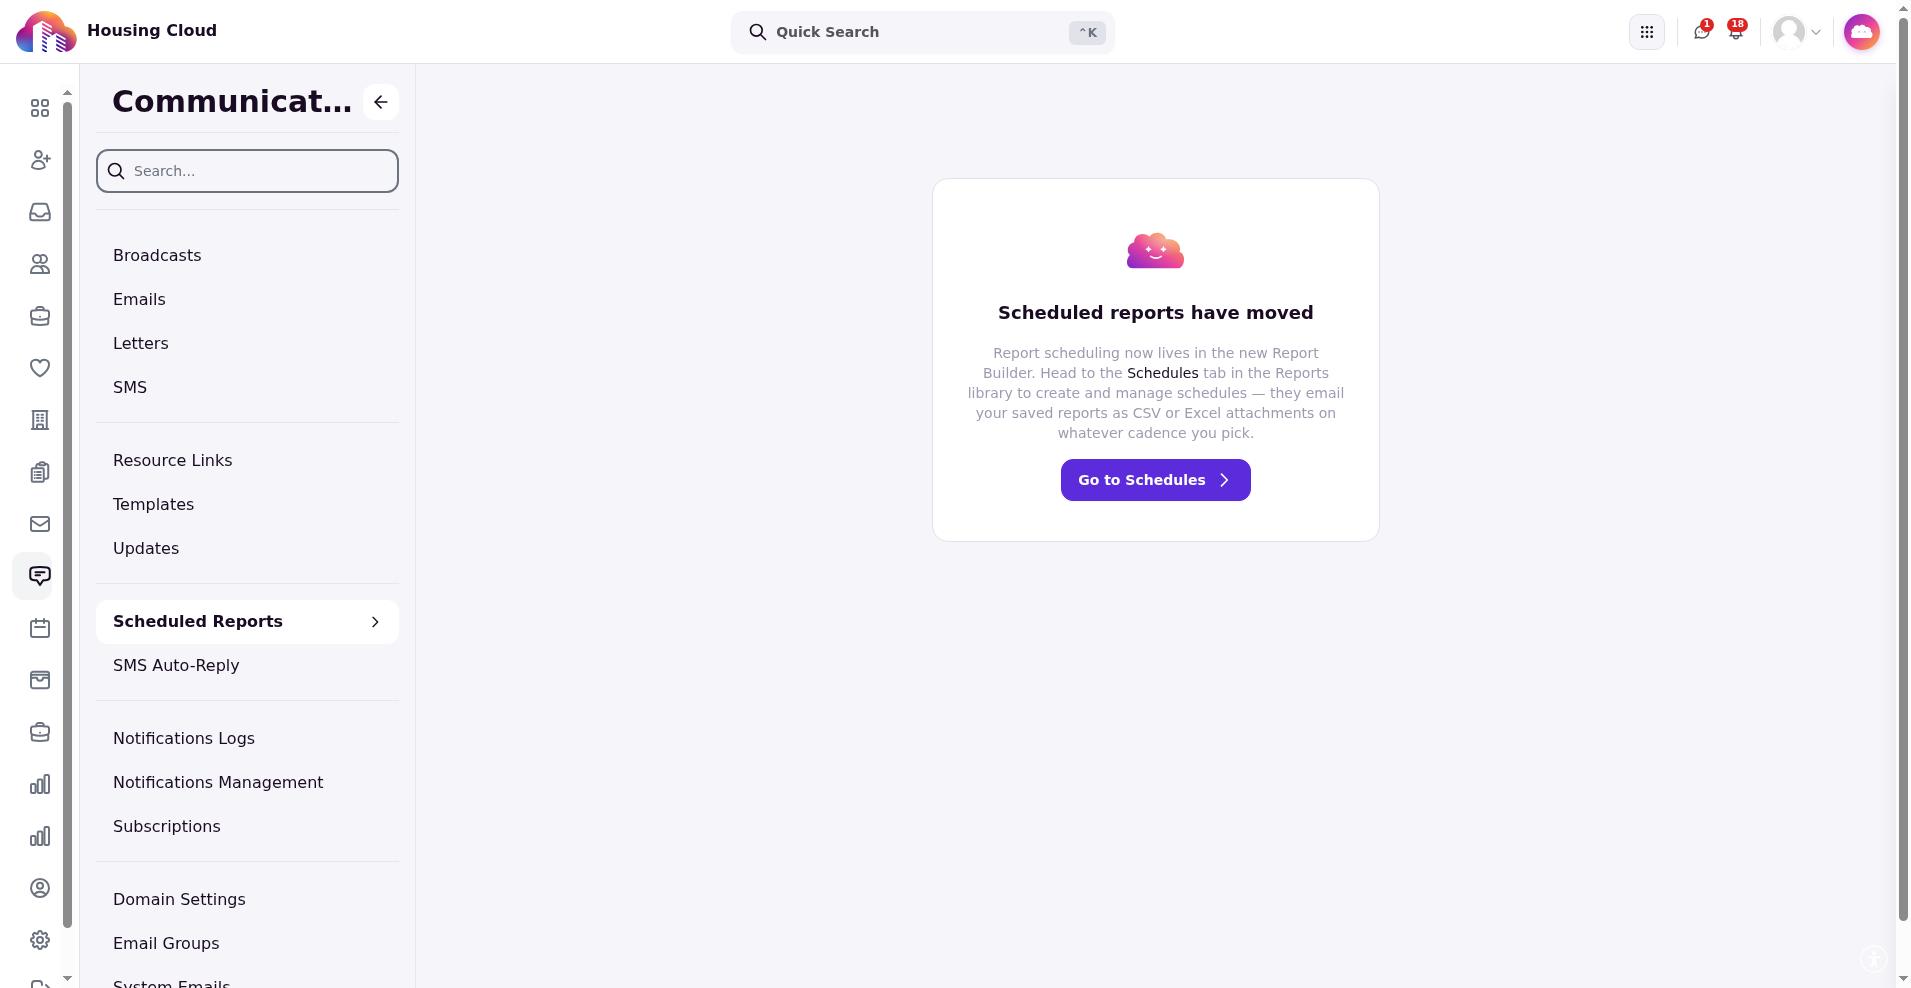
The page displays Scheduled reports have moved. The notice states that report scheduling now lives in the new Report Builder and that you should use the Schedules tab in the Reports library to create and manage schedules.
Choose Go to Schedules to open the Reports library Schedules view. That view is for managing Reports v2 schedules, not for editing Classic schedules.
Your existing Classic schedules
When Classic schedules still exist, the page shows Your existing Classic schedules. Use this table as a reference while you recreate each schedule in Reports v2.
The table includes:
- Schedule — subject line, export formats, and send time
- Report — the report the schedule is tied to
- Cadence — how often it sends (for example, Daily, Weekly on Monday, Monthly (First Day), Monthly (Last Day), Biweekly, or Monthly (Day N))
- Recipients — recipient email addresses
- Status — Active or Paused
- Last sent — the last send date, or a dash when none is recorded
If no Classic schedules remain, only the moved notice appears.
Pause or resume a Classic schedule
In the Classic schedules table, use Pause or Resume on the schedule row. Editing and creating from the Classic surface are retired.
After a successful change, the system confirms with Classic schedule updated. Pause a Classic schedule after you recreate it in Reports v2 so the same recipients do not receive both deliveries.
Open the Reports v2 Schedules view
Open the Reports library, then select Schedules in the left rail. You can also arrive here with Go to Schedules from the Classic moved notice.
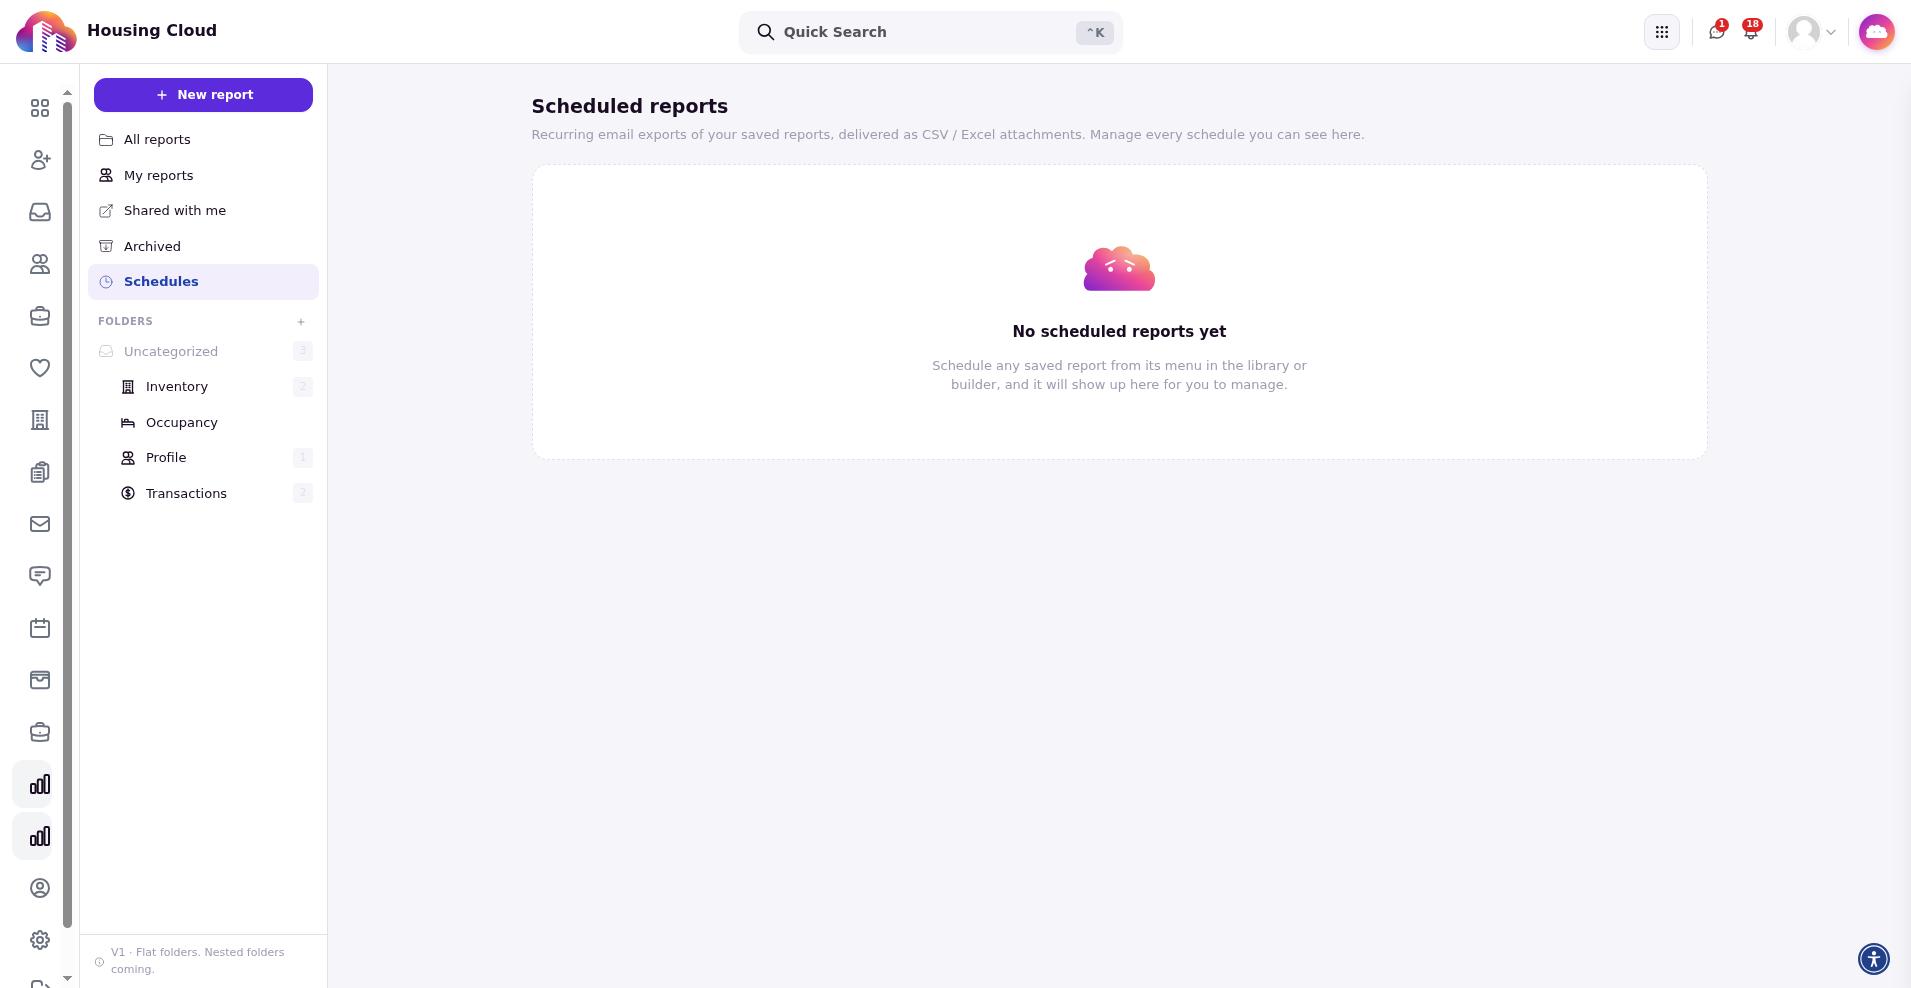
The Schedules view is titled Scheduled reports. It lists recurring email exports of your saved reports and is where you manage every Reports v2 schedule you can see.
The table columns are Schedule, Report, Frequency, Recipients, Status, and Last run. Status values are Active or Paused. When a schedule has never run, the last-run value can show Never run.
If no Reports v2 schedules exist yet, the empty state says No scheduled reports yet and explains that schedules created from a saved report menu in the library or builder appear here for management.
Create a scheduled report in Reports v2
Create a schedule from a saved report in the Reports library. The Schedules view manages existing schedules; it does not start the create flow by itself.
Open the schedule dialog from a saved report
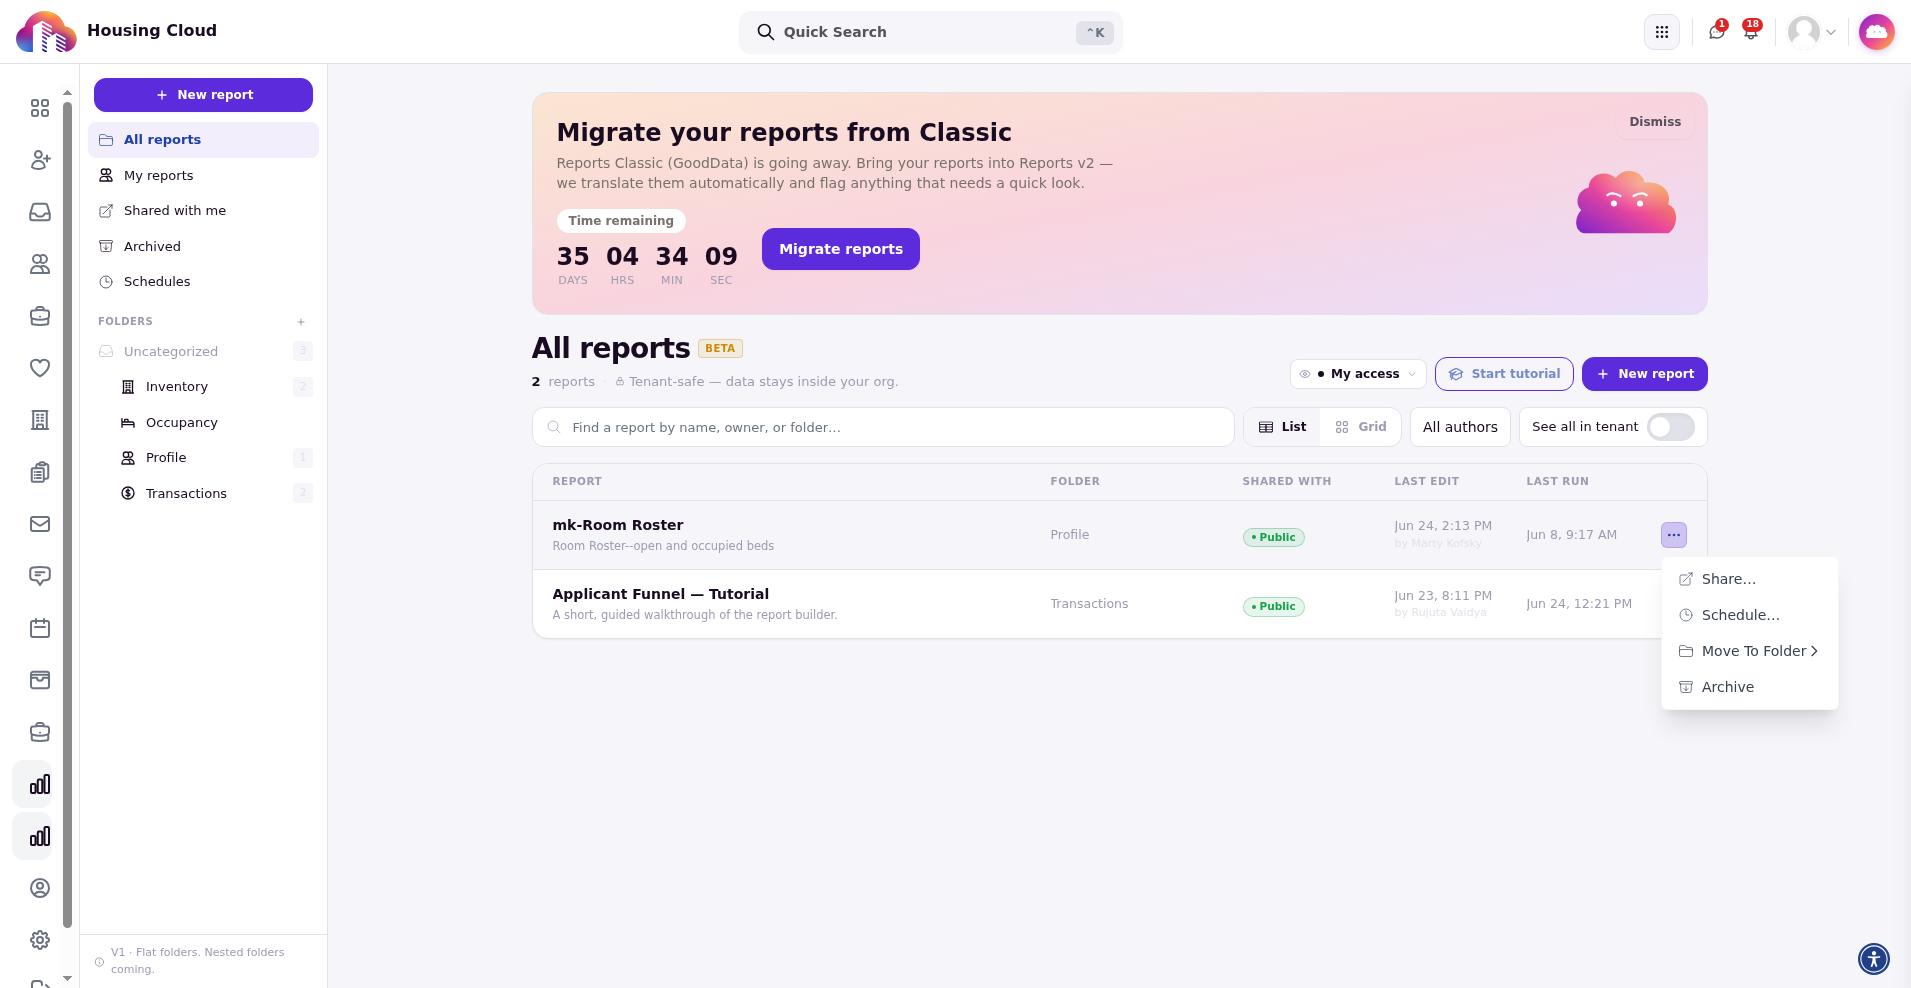
In the Reports library left rail, open a report list such as All reports or My reports. Find the saved report you want to send on a schedule.
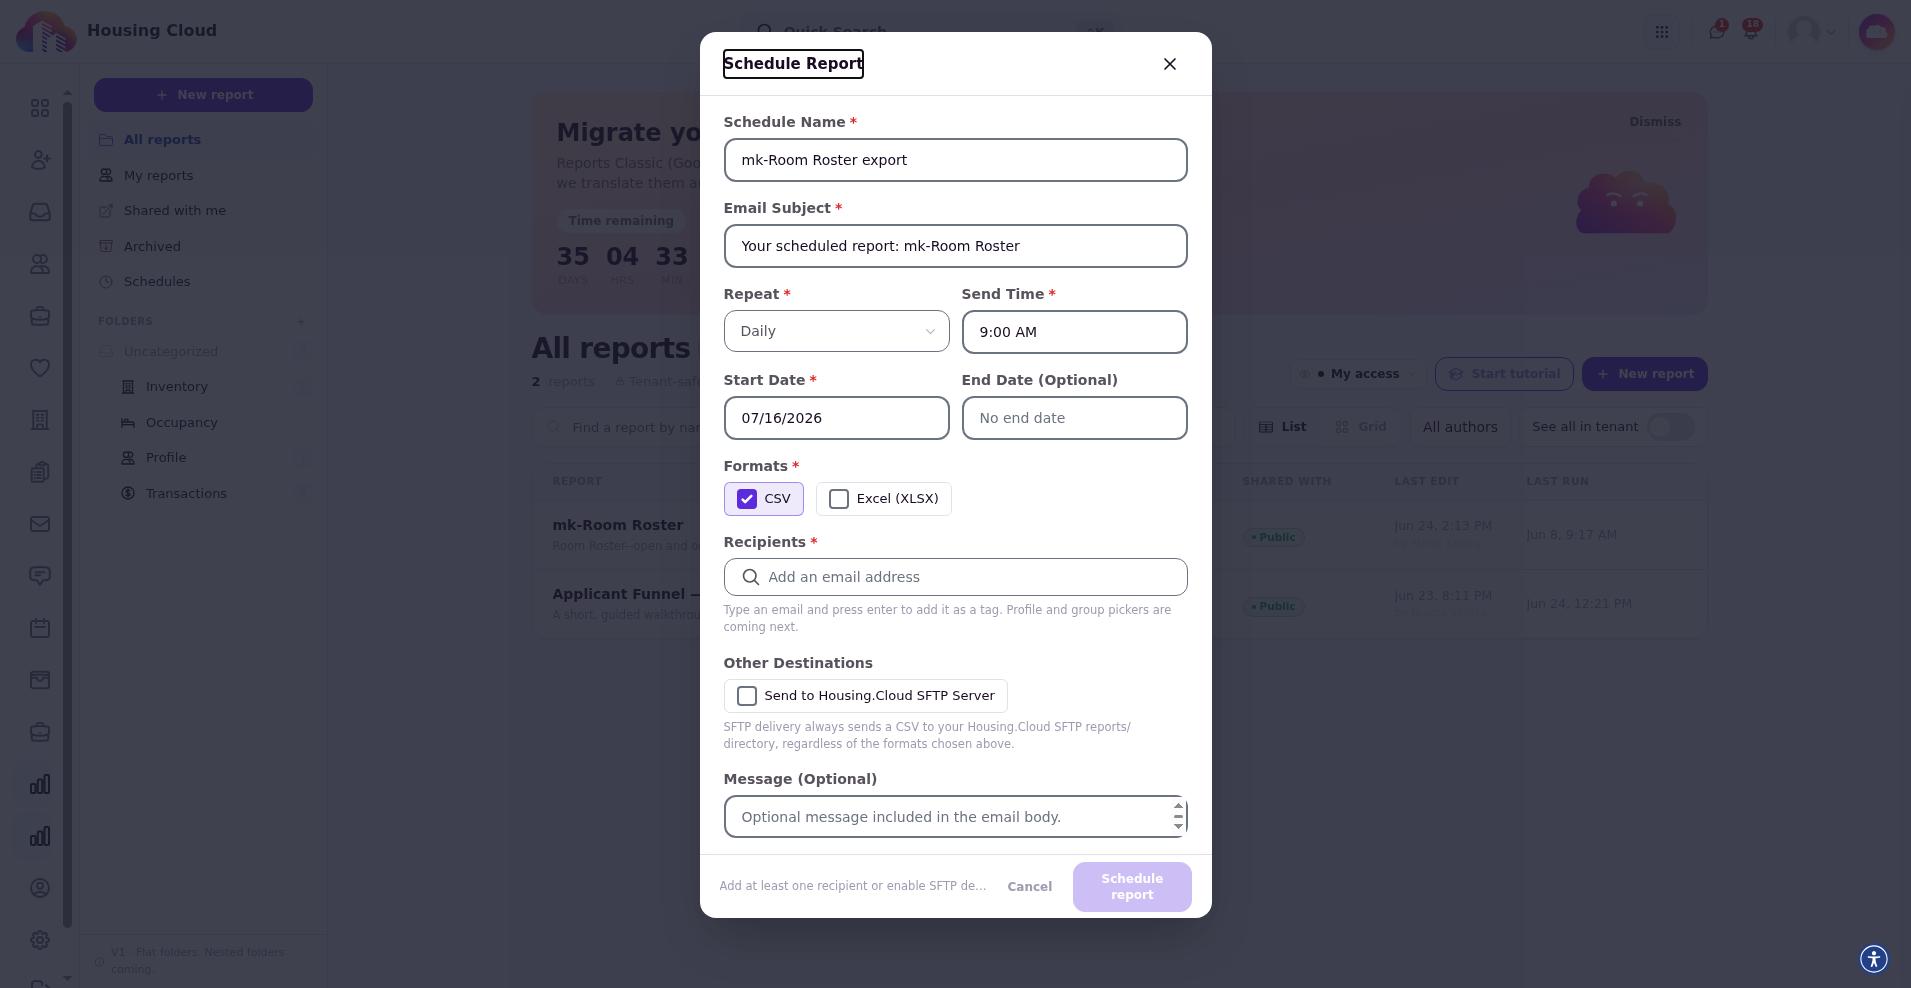
Open the report row actions menu, then choose Schedule…. The Schedule report dialog opens for that specific saved report. The new schedule is always linked to the report you selected.
Fill in schedule details
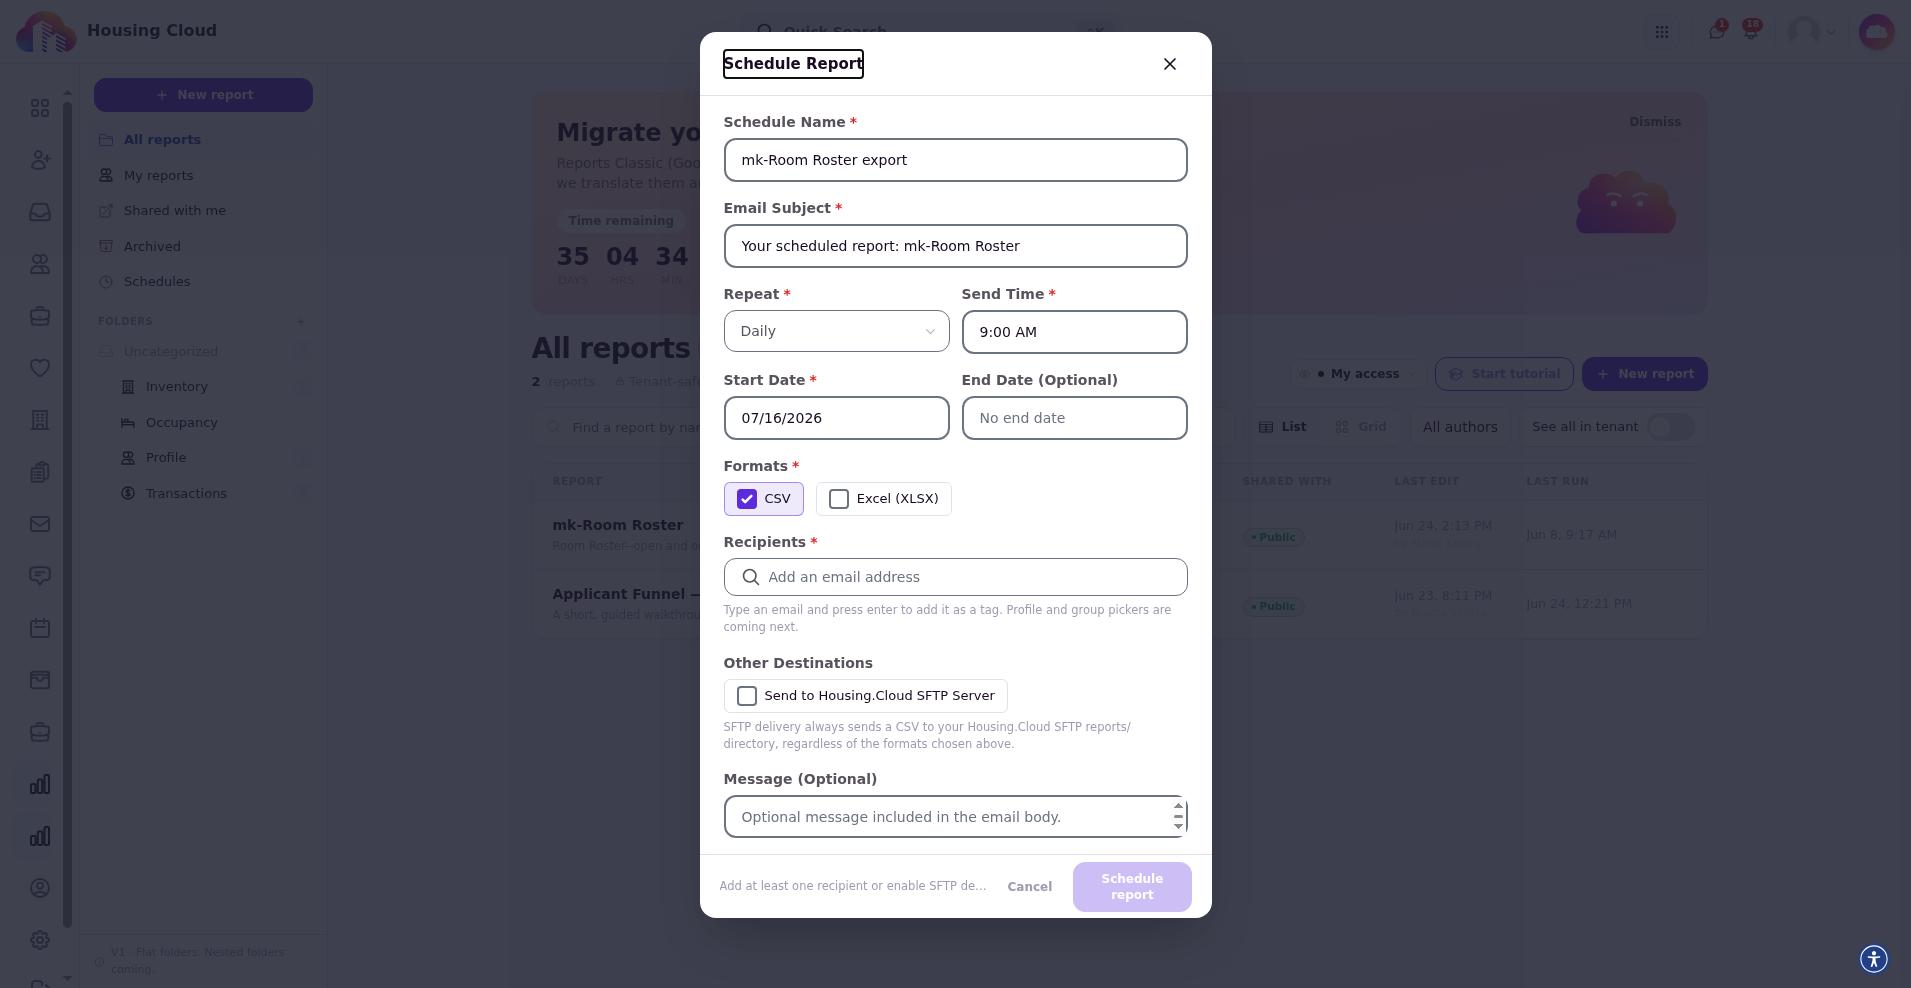
Complete the fields in the Schedule report dialog:
- Schedule name
- Email subject
- Repeat
- Send time
- Start date
- Formats
- End date (optional)
- Message (optional)
Repeat supports these fixed options only:
- Daily
- Every Monday
- Every Tuesday
- Every Wednesday
- Every Thursday
- Every Friday
- Every Saturday
- Every Sunday
- On the 1st of every month
- On the last day of every month
Under Formats, select one or both of CSV and Excel (XLSX). Those are the only schedule export formats currently available.
Add recipients or SFTP delivery
Under Recipients, type an email address and press Enter to add it as a tag. Recipients are required unless you enable SFTP delivery.
Under Other destinations, you can enable Send to Housing.Cloud SFTP Server. When SFTP is enabled, email recipients become optional. SFTP delivery always sends a CSV to your Housing.Cloud SFTP reports/ directory, regardless of the formats selected above.
Save the schedule
Confirm with Schedule report. On success, the system shows Schedule created. The new schedule appears in the Schedules view for ongoing management.
Manage Reports v2 schedules after creation
In the Schedules view, open a schedule’s row actions when you have manage access. Available actions are Edit, Pause or Resume, Send now, Run history, and Delete.
- Edit reopens the dialog as Edit schedule. Save with Save changes to get Schedule updated.
- Pause or Resume updates the schedule status and confirms with Schedule updated.
- Send now queues an immediate delivery and confirms with Send queued — recipients will get it shortly.
- Run history opens run history for that schedule. Run statuses include Running, Sent, Partial, and Failed. If the schedule has never fired, the history shows No runs yet — this schedule has not fired.
- Delete removes the schedule and confirms with Schedule deleted.
Run history is always available. Edit, Pause/Resume, Send now, and Delete appear only when you can manage that schedule.
After you finish
Classic schedules remain visible on Communications Reports until you pause them or they no longer exist. New and managed schedules live under Schedules in the Reports library.
Verify a new schedule in the Scheduled reports list: confirm the linked report, frequency, recipients, and Active status. After the first run, check Last run and open Run history if you need delivery detail.