How to Check-in a Resident Early
Last updated: October 5, 2026
Admins can check-in an applicant/resident early if:
- The applicant/resident has submitted all the documents, and a room and bed are assigned.
- The assigned room is available for early check-in
- The admin has permission to check in the resident early.
Note: Early check-in can incur extra charges based on the institution's rules.
Steps to Check-in a Resident Early
Follow these steps to check-in a resident early:
1. Click Residents on the navigation panel.

2. Click on the resident you want to check-in early. You can use the global search or filters to find the resident.

3. Scroll down to find the Residence Details section.

4. Click Early Check-In Available.

5. A Check Student In pop-up appears. Choose the new early check-in date and time.

6. Click Continue.

7. In the next pop-up, an early check-in warning displays. Enter the specific reason for early check-in.

8. Click Begin residency/billing date from this point, if applicable, based on the institution's rules. This will change the start date of the residency to this new date.

9. Click Continue.

10. In the next pop-up, you can add a charge for the student if applicable. Click Add a Charge to add a charge for the early check-in. You can add more than one charge.

11. Search for the charge code, and the respective amount will be populated. Admins predetermine charge codes. Learn how to set the charge codes here.

12. Add a description of the charge code (required).

13. Check the Pro-rate charges box if you want to charge the student on a flat rate basis.

15. Enter the start and end dates.

16. Click Continue.

17. In the next pop-up box, check if the room has already been assigned a key in the Keys assigned to the room. If so, you may check the box to assign the key to the resident. You can also search for an existing key in the search box Issue a specific key on the right.
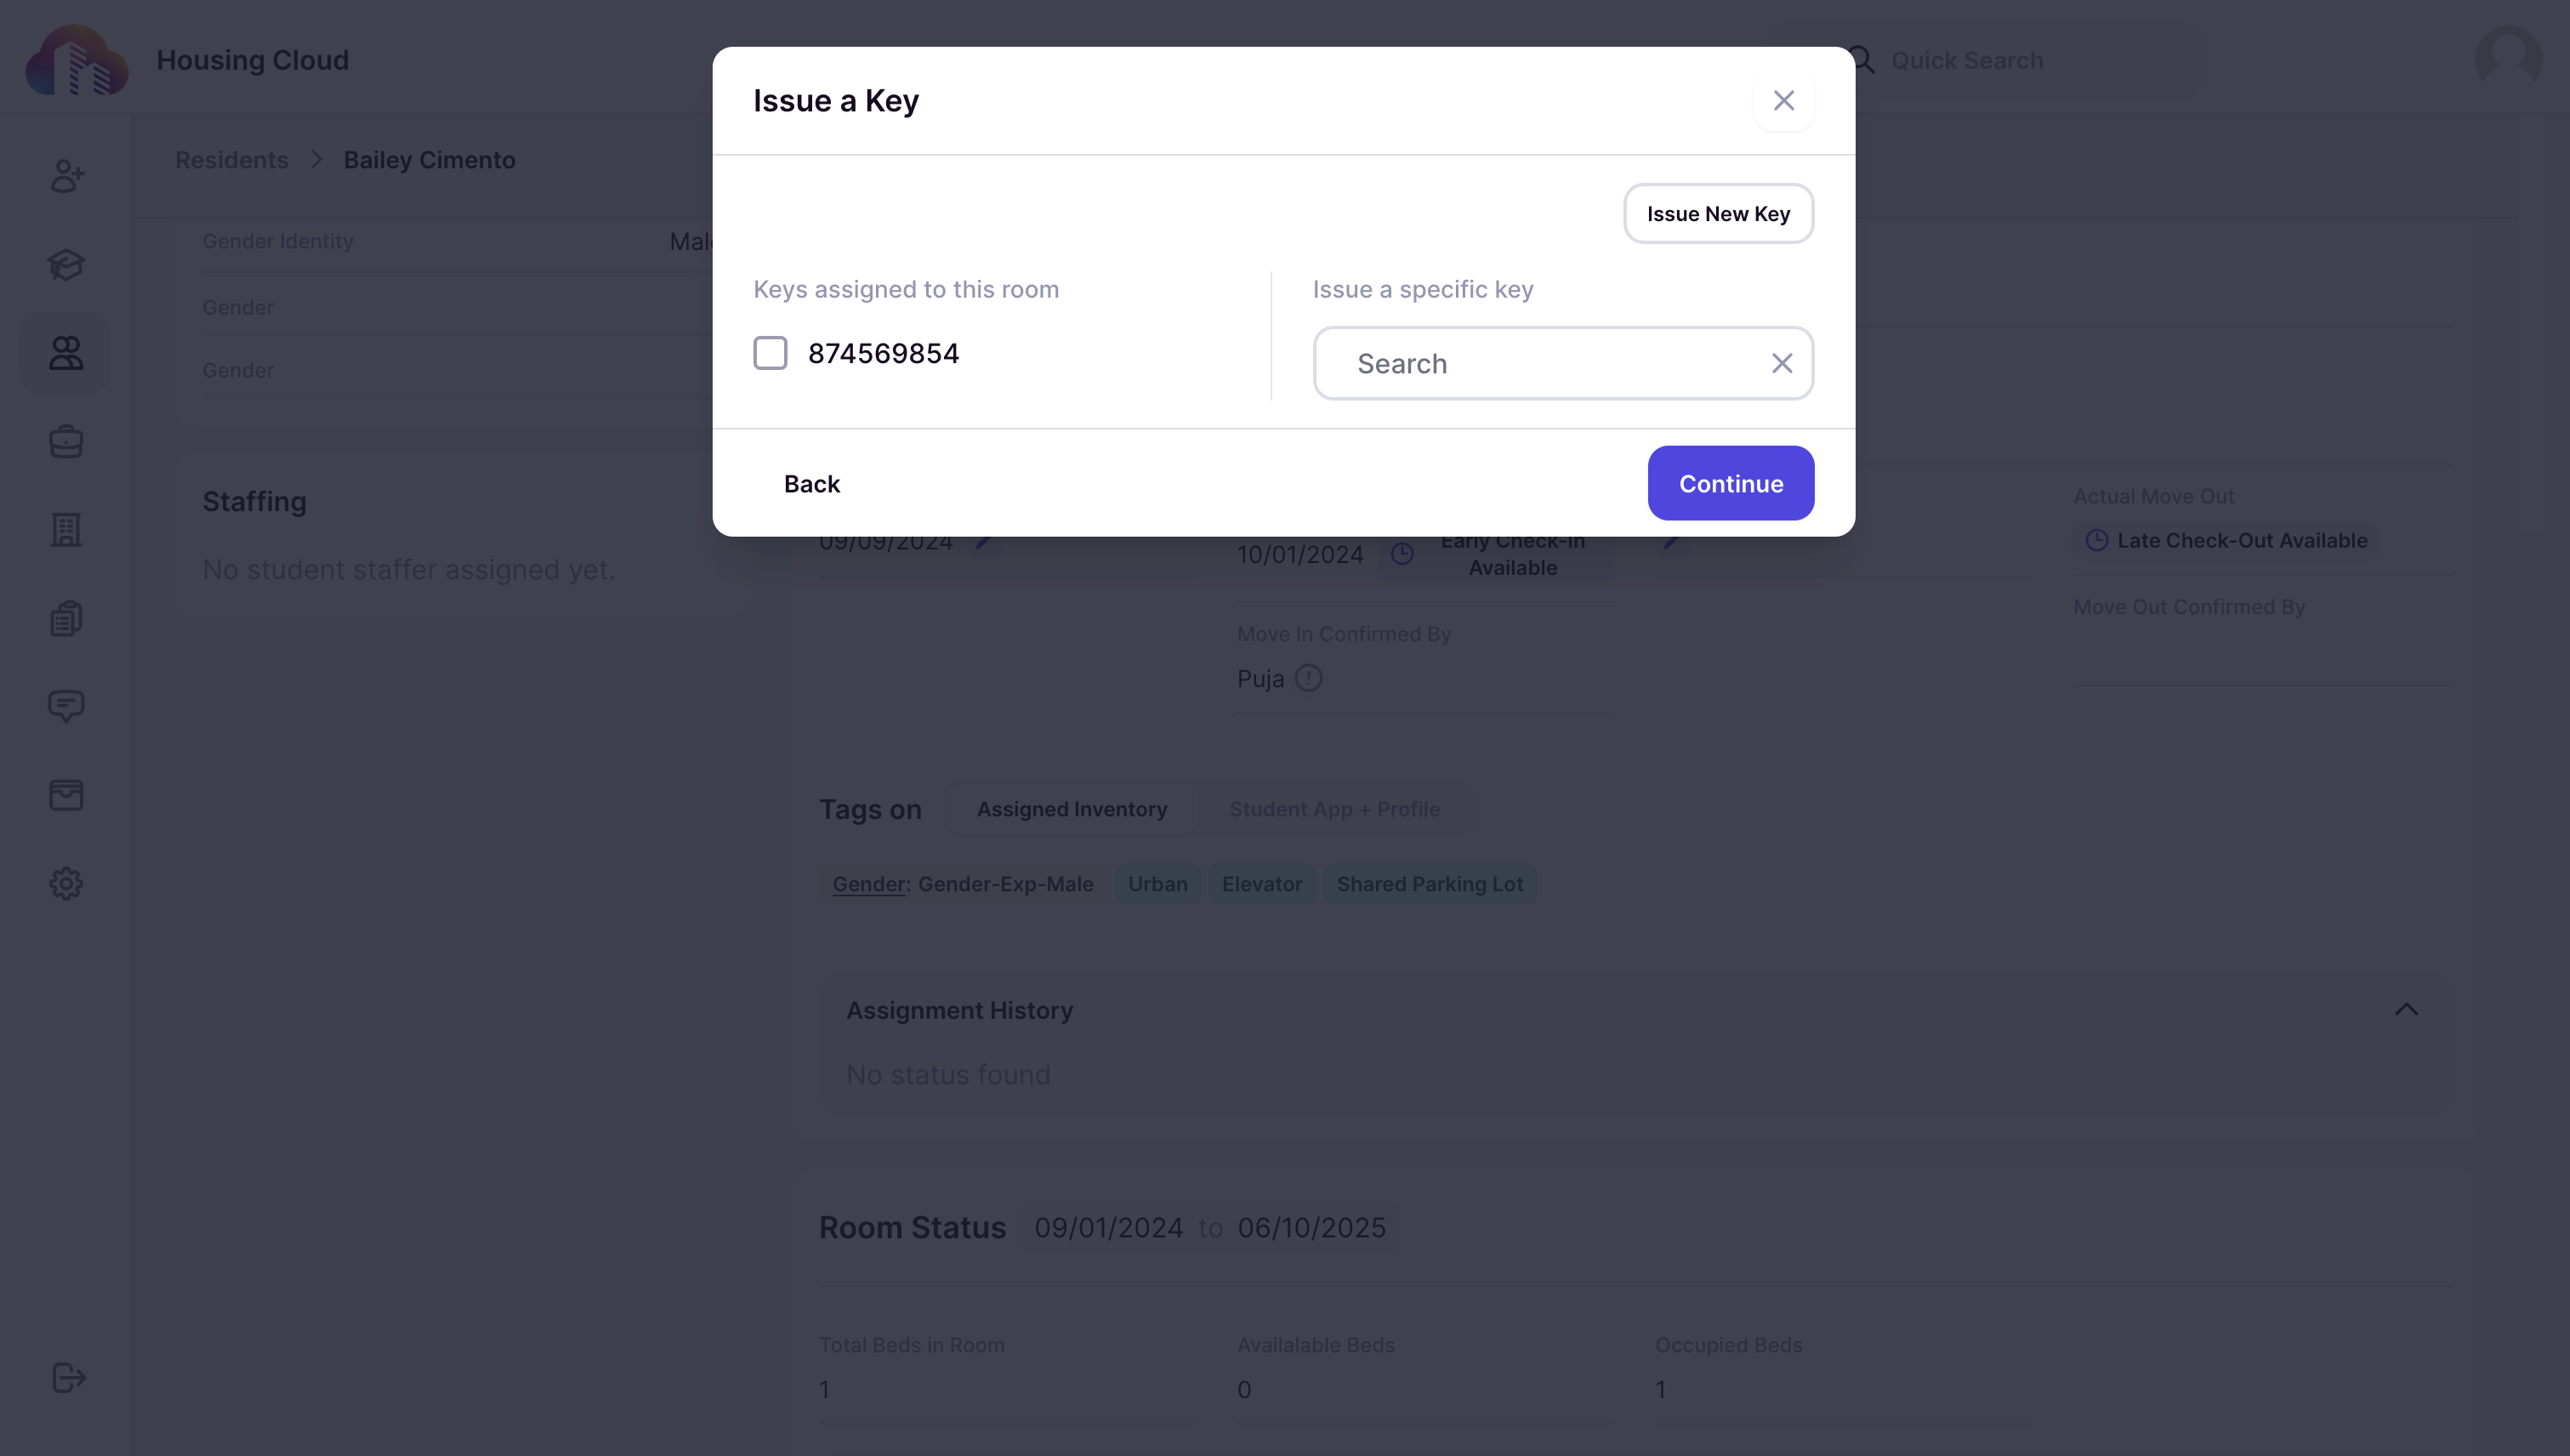
If not, Click Issue New Key to issue a new key. Follow the steps in this article to create a new key.

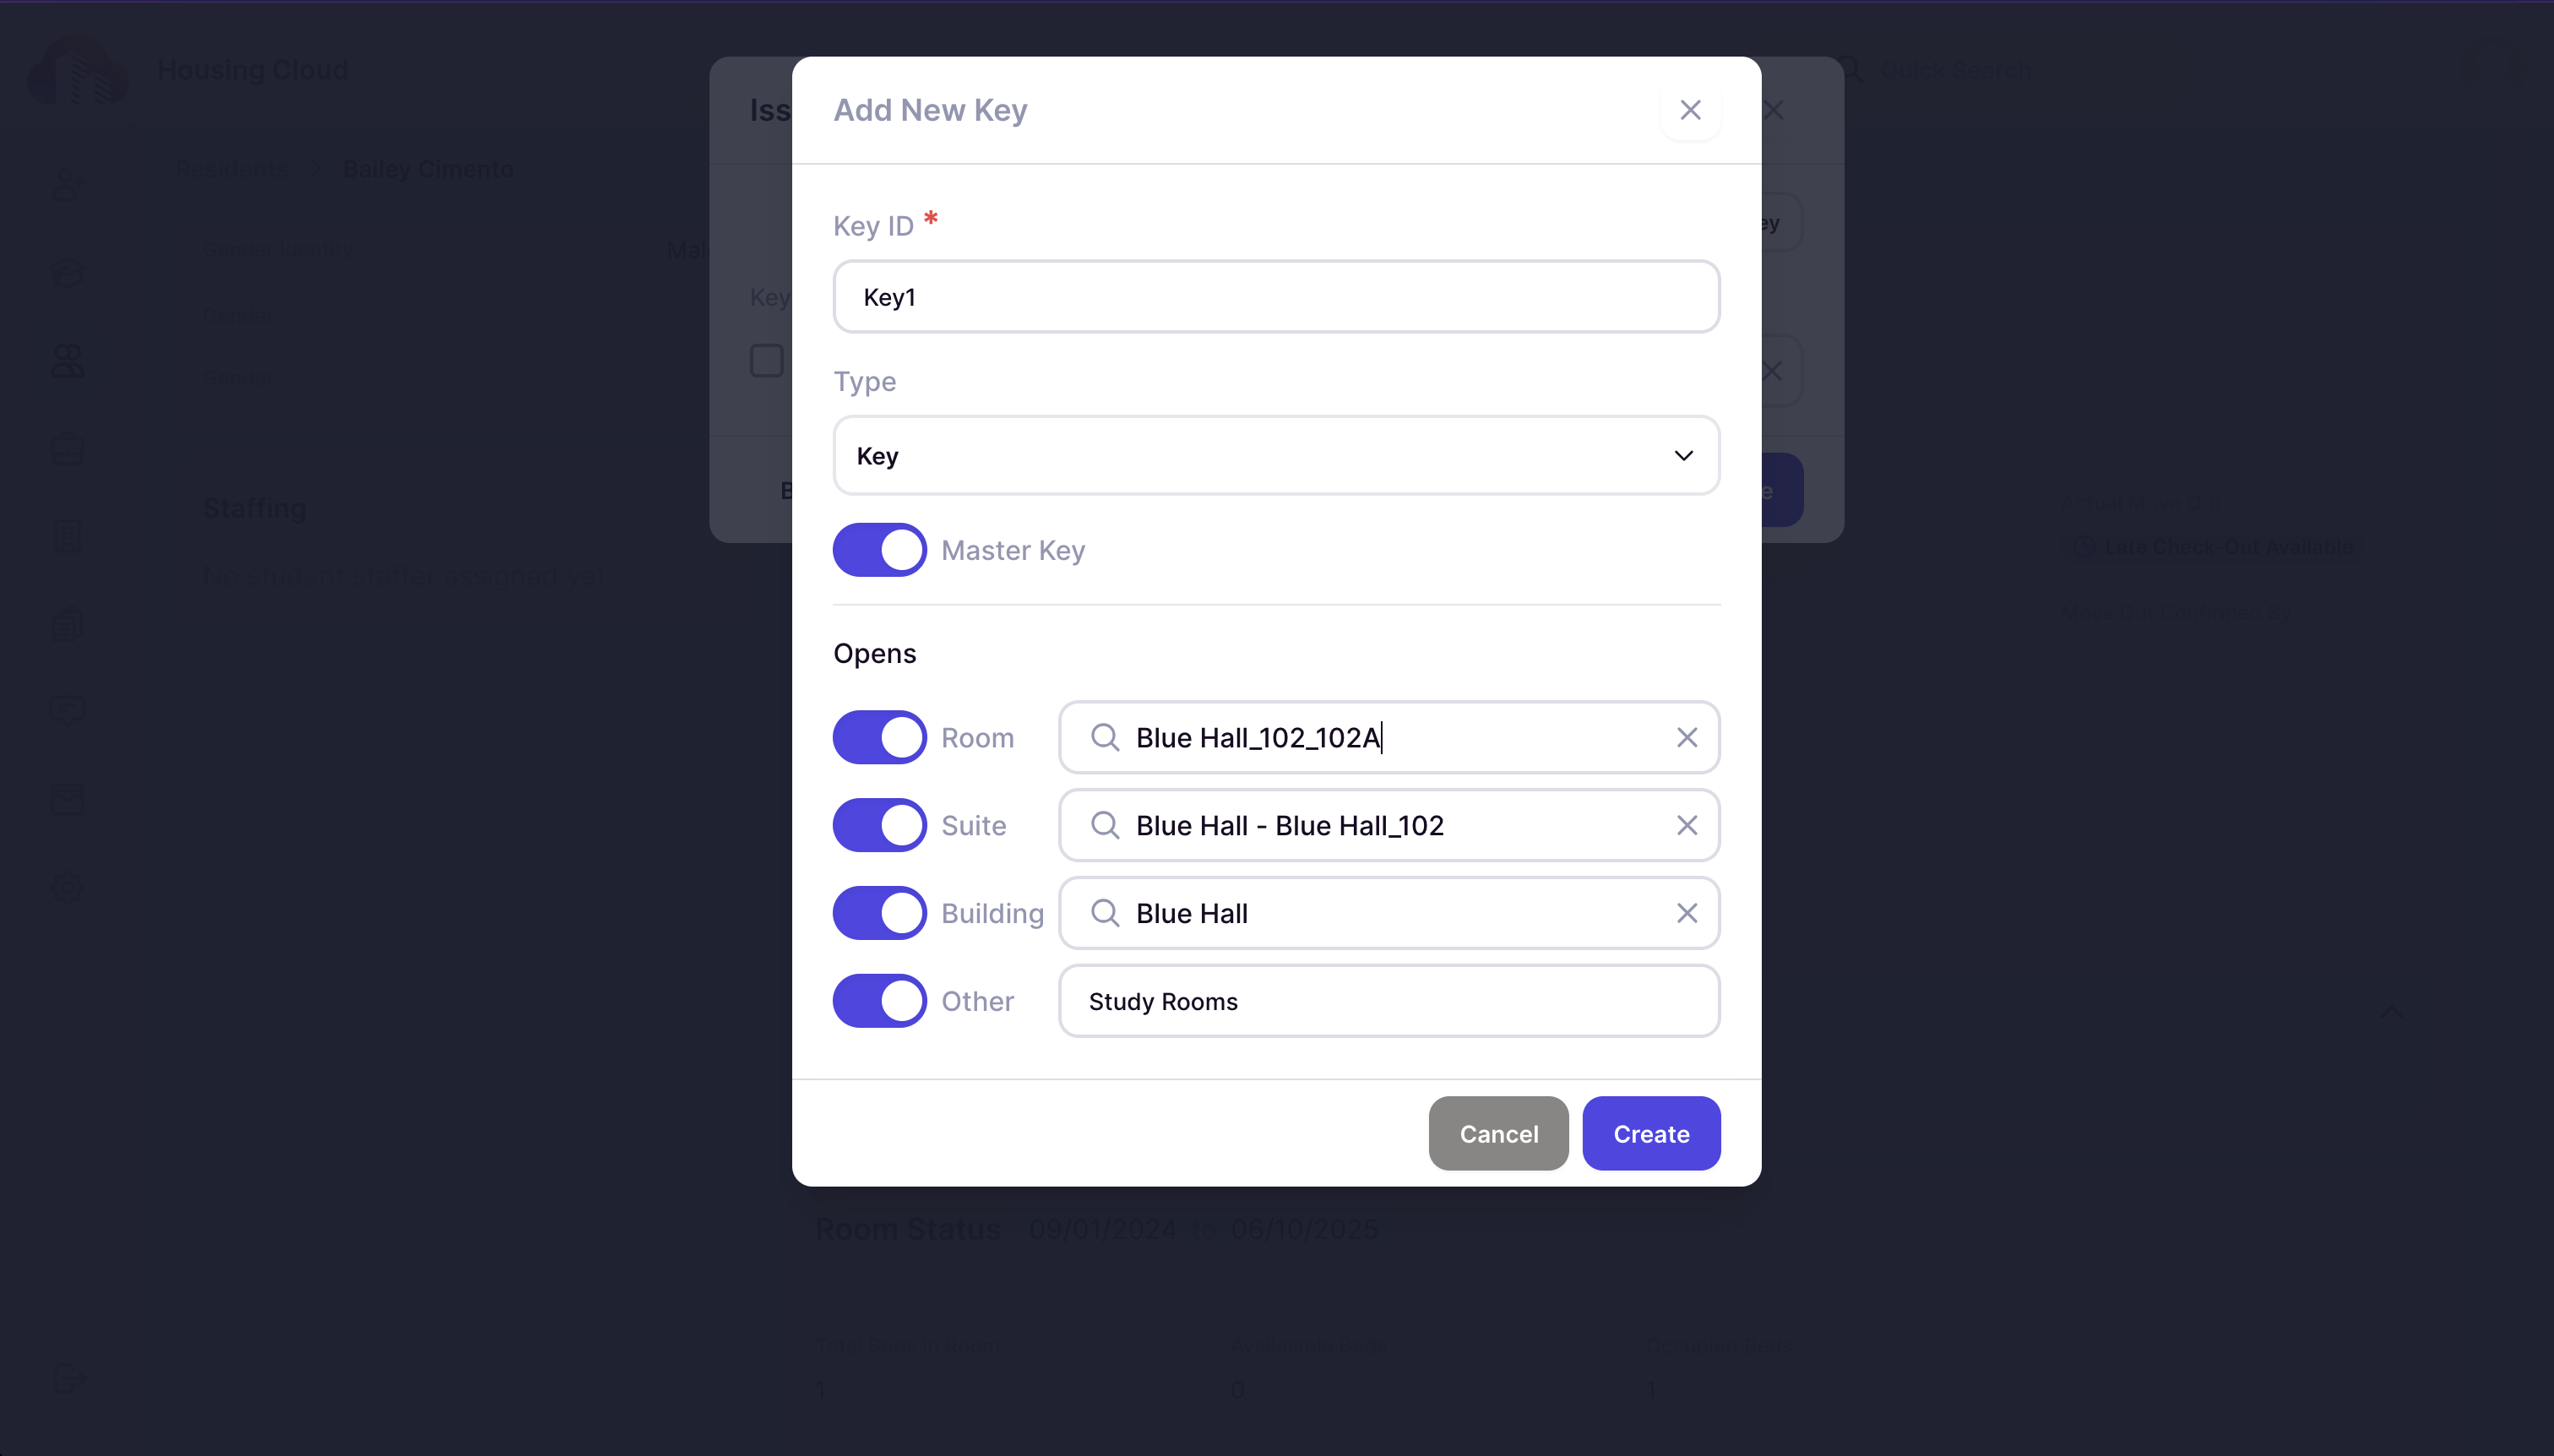
18. To add a new key:
- Enter the Key ID (required).
- Choose the type of key: key/card/fob/digital (optional).
- Toggle the Master Key option to make this key a master key (a master key opens several locks).
- Set the access to rooms with this key by toggling the sliders next to the rooms (optional). Enter the specific room/suite, building, and other rooms wherever applicable
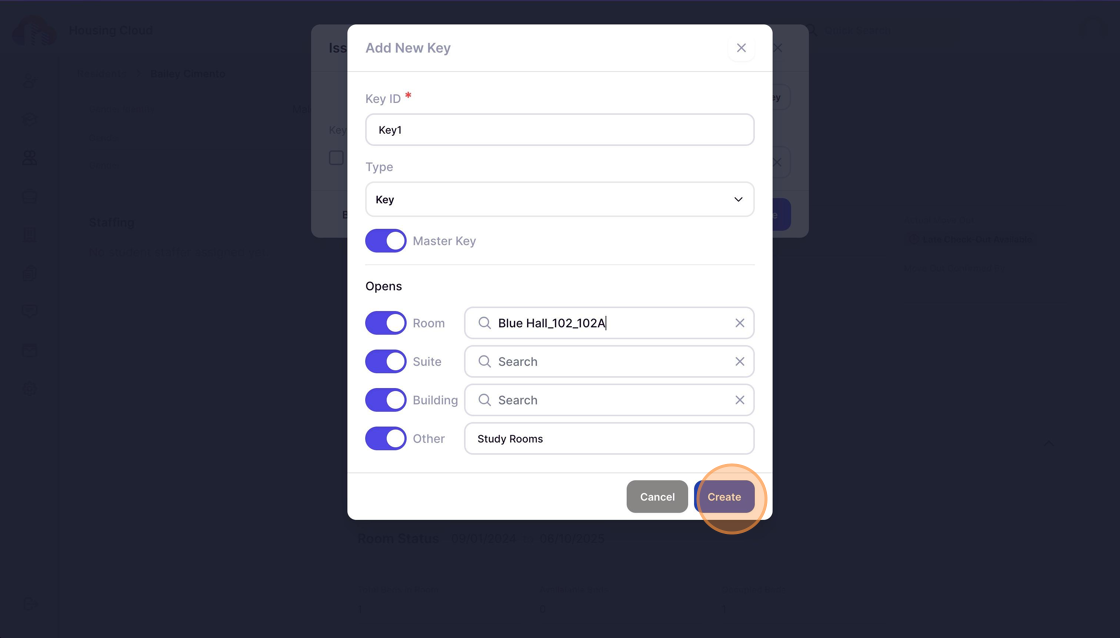
19. Click Create.
20. Click Continue.

21. Add an optional note for the early check-in process and click Confirm. This note is visible on the student profile.

You can see that the check-in date has been revised on the resident's profile.

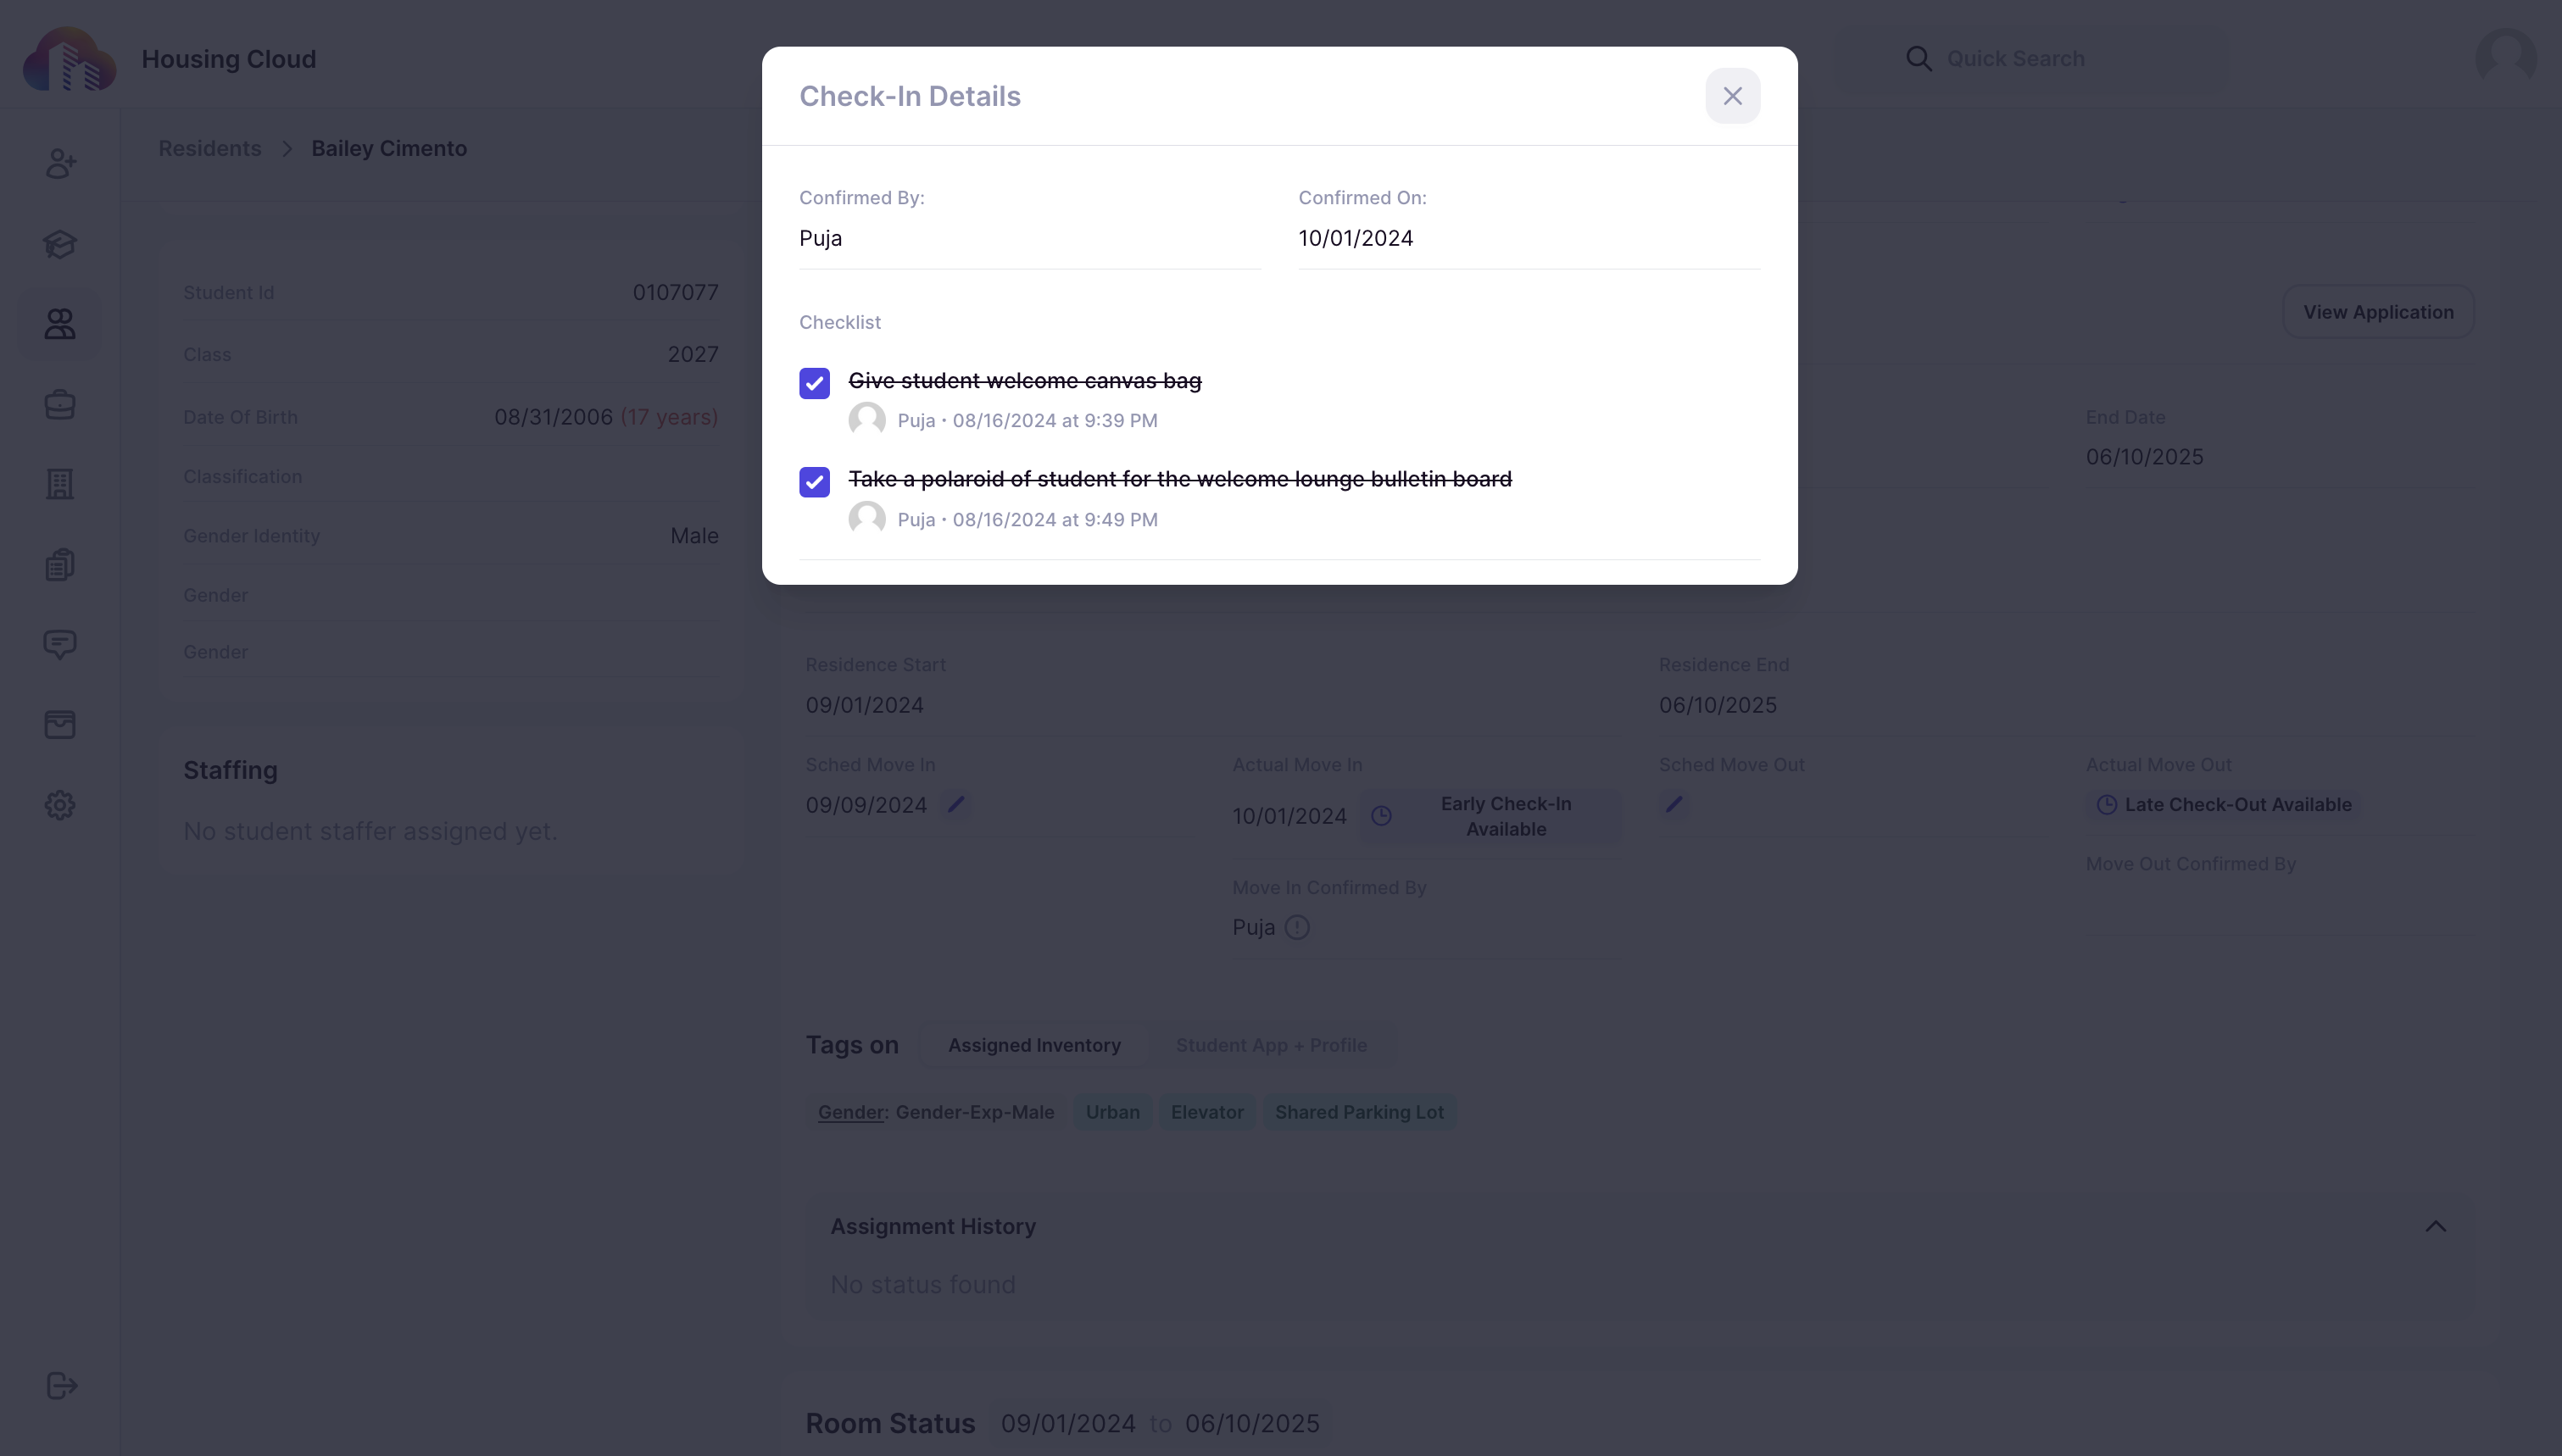
Click on i next to Move in Confirmed By to view the check-in details like confirmed by, confirmation date, and checklist items.
As a next step, learn how to manage the check-in and check-out of residents.