Create and Edit Signable Documents
Last updated: October 2, 2026
Housing.Cloud allows admins to create, configure, and manage signable document templates for students. These templates streamline processes like housing contracts, roommate agreements, and other required forms, eliminating repetitive work by enabling reusable templates. Admins can tailor templates to their needs, ensuring documents are easy to complete and track.
To use this feature, you must have a pre-created PDF document ready to upload. The system uses your uploaded PDF as the foundation for the template, ensuring a smooth and customizable setup. Signable documents support required and optional fields, ensuring admins receive all necessary data. Notifications are sent for unsigned documents, helping admins track outstanding signatures without interrupting workflows.
Once created, templates can be distributed in several ways:
- Asynchronous Sending: Send directly to one or multiple students via the Residents or Applications tables.
- Application Cycles: Integrate the document into the housing application process.
- Individual Profiles: Distribute documents manually from a resident’s profile or application page.
In Housing.Cloud, a signature packet allows you to bundle multiple documents, such as contracts and agreements, into one group that residents can sign in a single session. For example, in the Fall 2023 cycle, you might include a roommate agreement, housing contract, and meal plan commitment in one packet. This method simplifies the signing process and billing, as you are charged per packet rather than per document, regardless of the number of documents included.
Create a New Document Template
Click Setup on the navigation panel.

Click Document Templates in the next navigation panel.

Click New Document Template to start creating a new template.

In the pop-up, enter a name for the document and upload your PDF file that will serve as the template. Both fields are required.

Click Create to proceed to the document editor.

Document Template Set-up
The template editor displays your uploaded document and tools to configure your document fields.

Note: The editing and e-signature functionalities are powered by Anvil, a third-party e-signature software that is securely integrated in Housing.Cloud.
Click on the tips and guidelines link in the yellow banner for helpful instructions prior to using the editor.

Review the tooltips and guidelines to ensure your template is formatted correctly. Click the x icon to exit the guide.

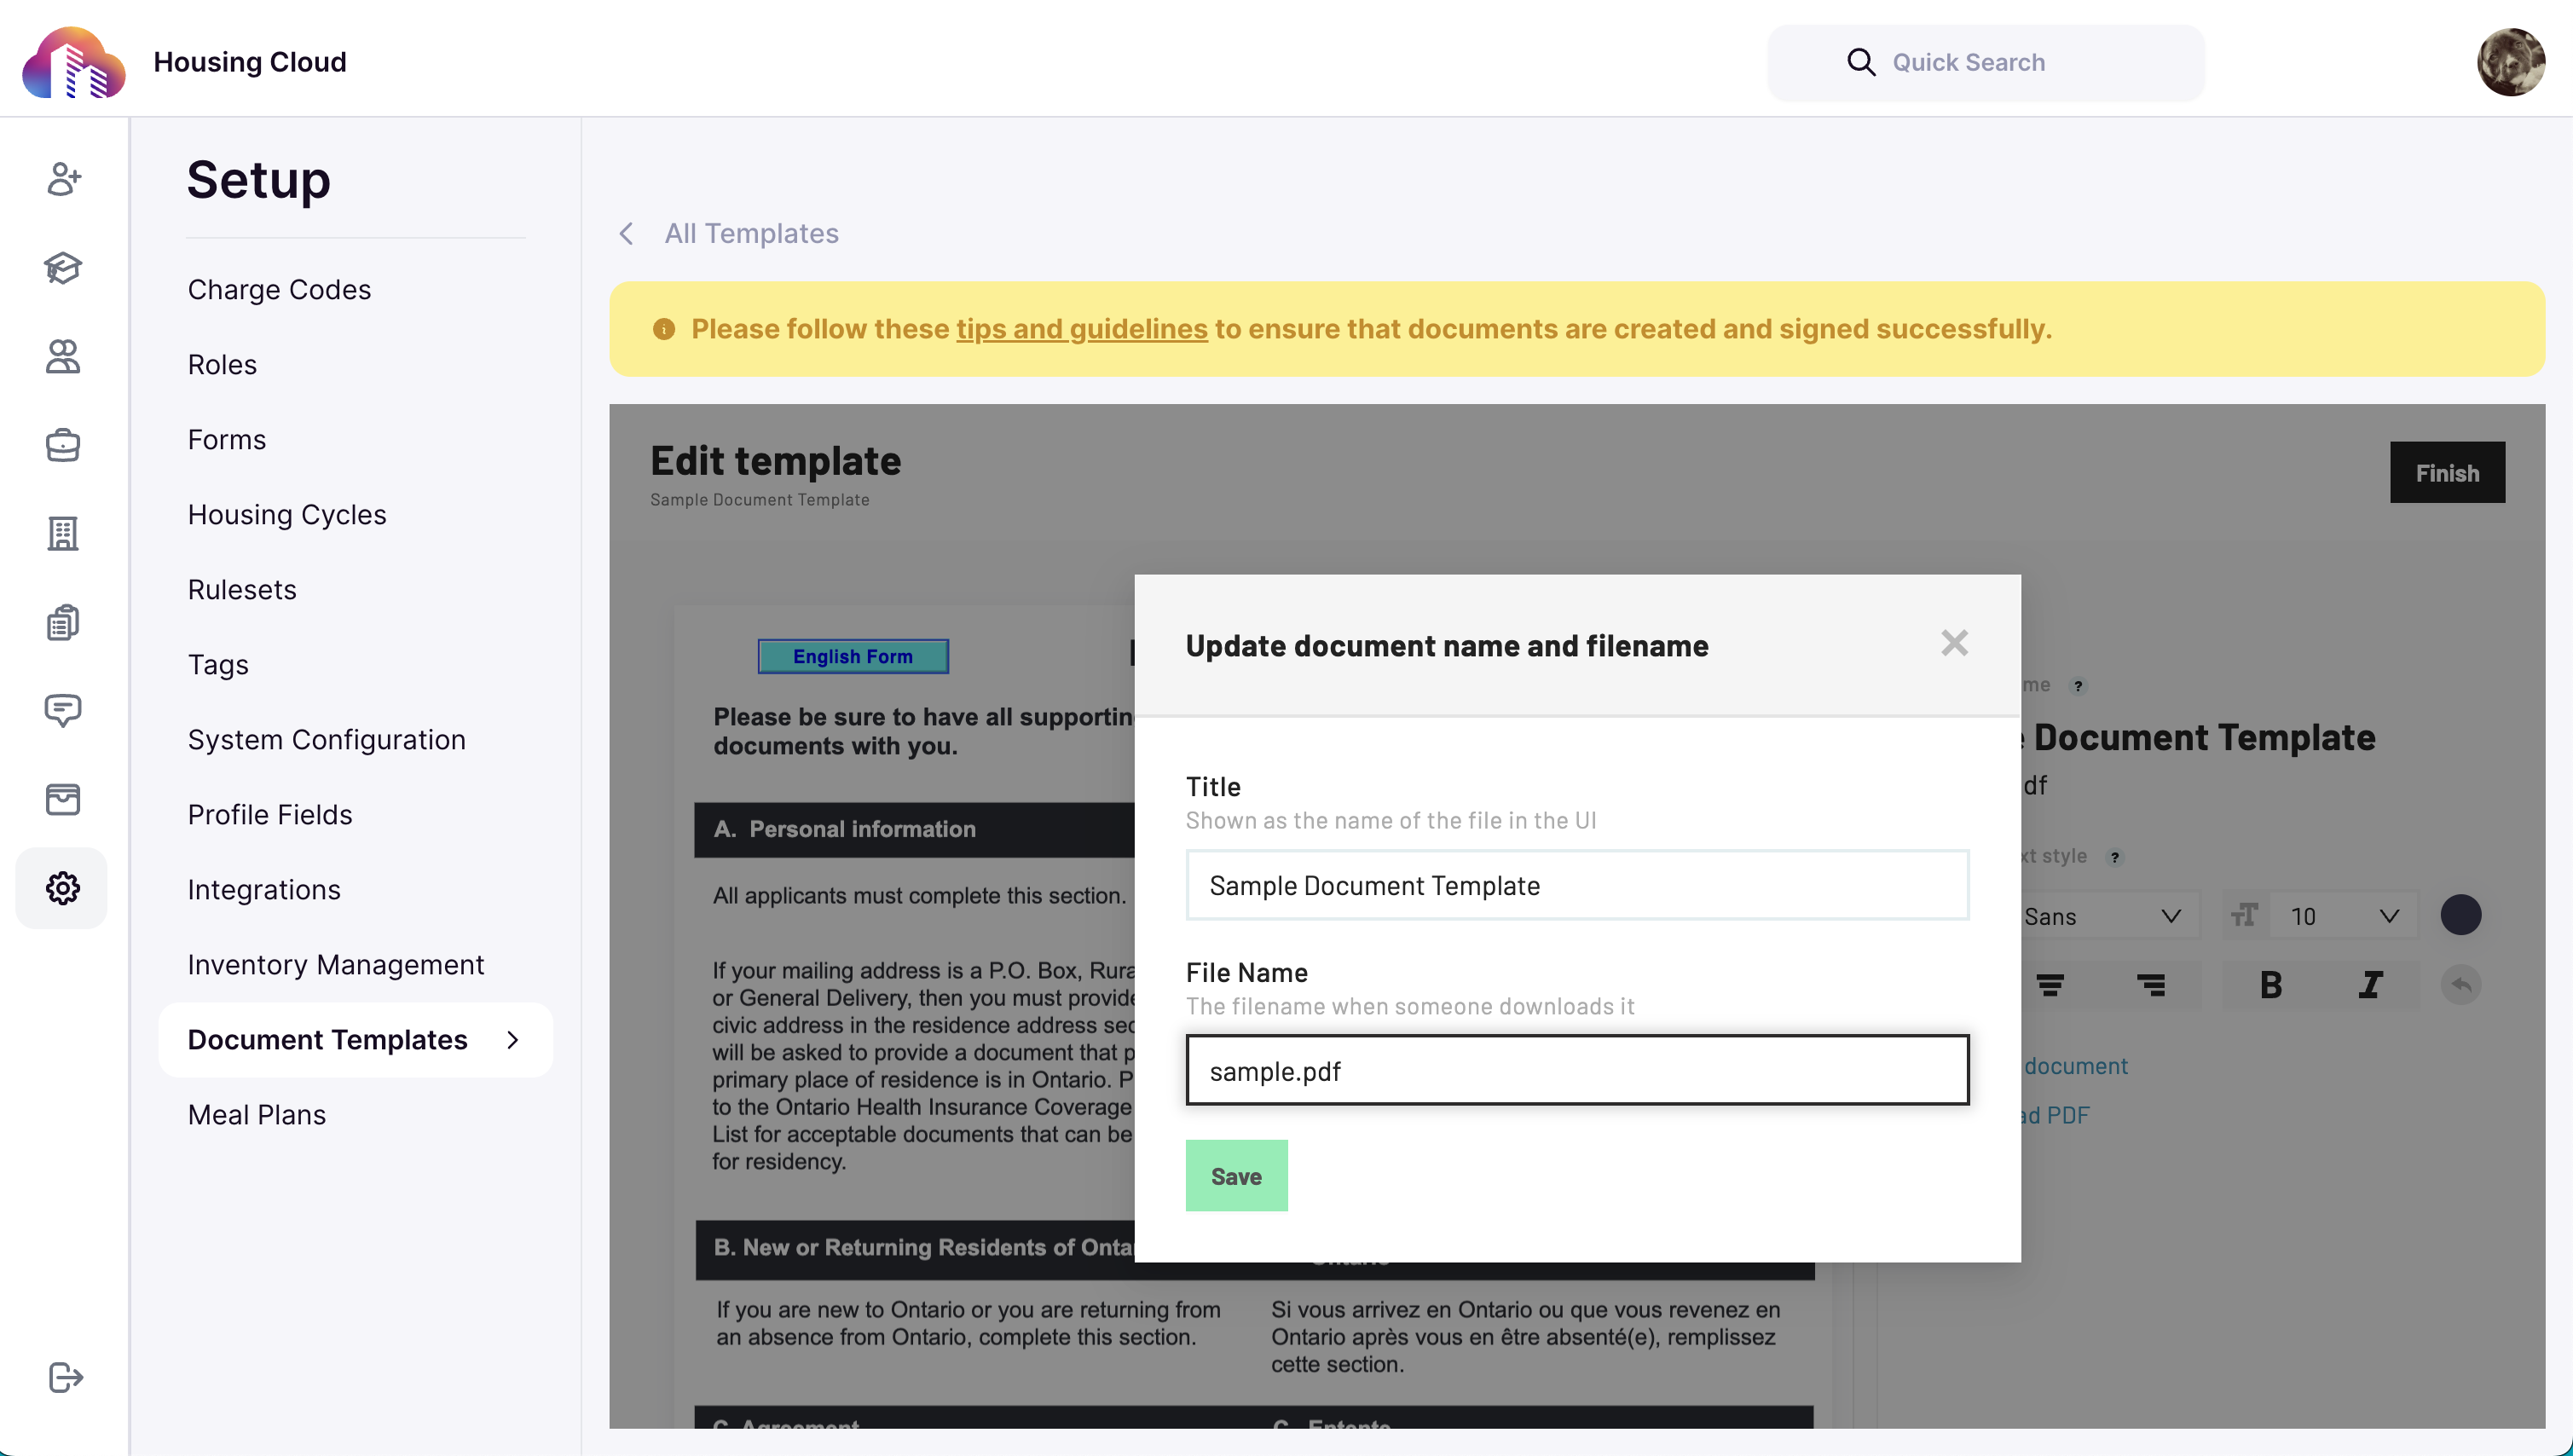
Click the pencil icon next to the document name to edit the file title (visible in the Resident Portal) and file name (used for downloaded copies).
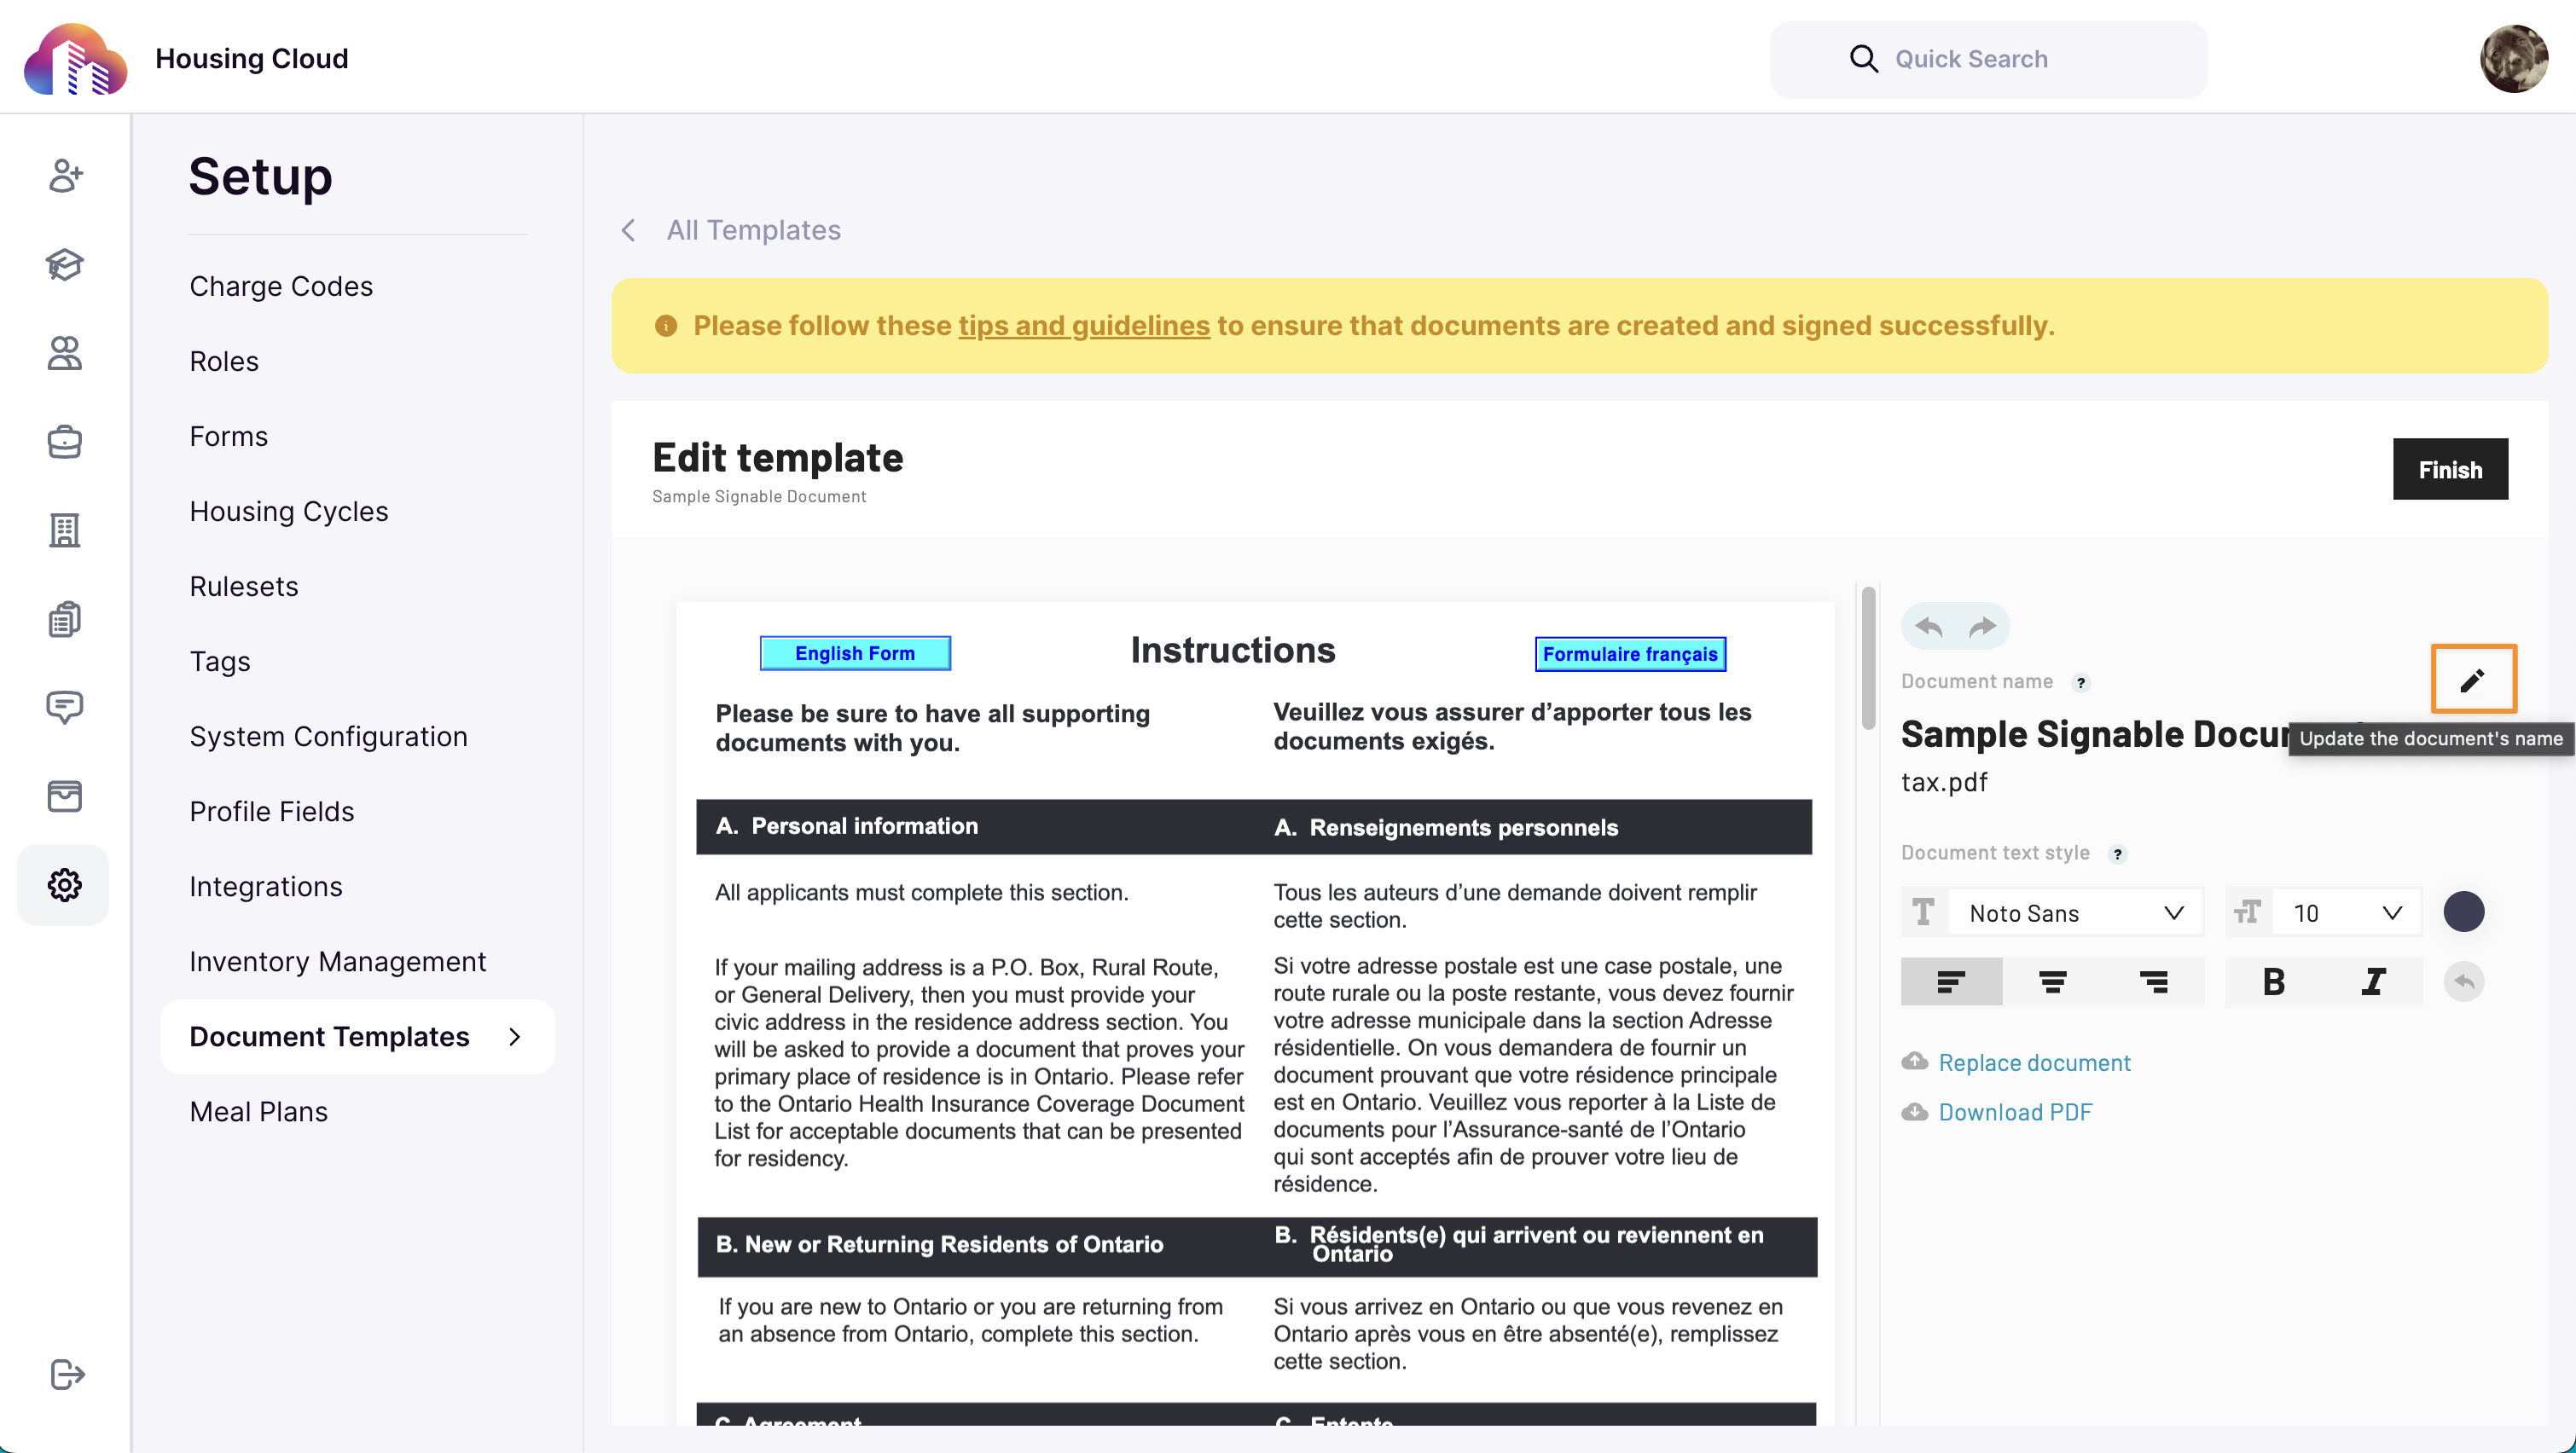
Optional: Click Replace Document replace the current file with another. This is useful if after uploading an incorrect file in error.
Click Save after editing the required fields.
Review Detected Fields
The system automatically detects and highlights probable fields on the document (e.g., name, date, email). These fields are designed to collect specific types of data from users and are associated with particular data points.

Note: A field might be designated for entering a name, selecting a date, providing a signature, or choosing from predefined options in a dropdown menu. You can edit these fields to match your requirements or replace them as needed.
Edit Detected Fields
Click on any highlighted field to open editing options in the right-hand panel. Update the field type (e.g., text, date, email) and field name to ensure accurate data entry by residents.
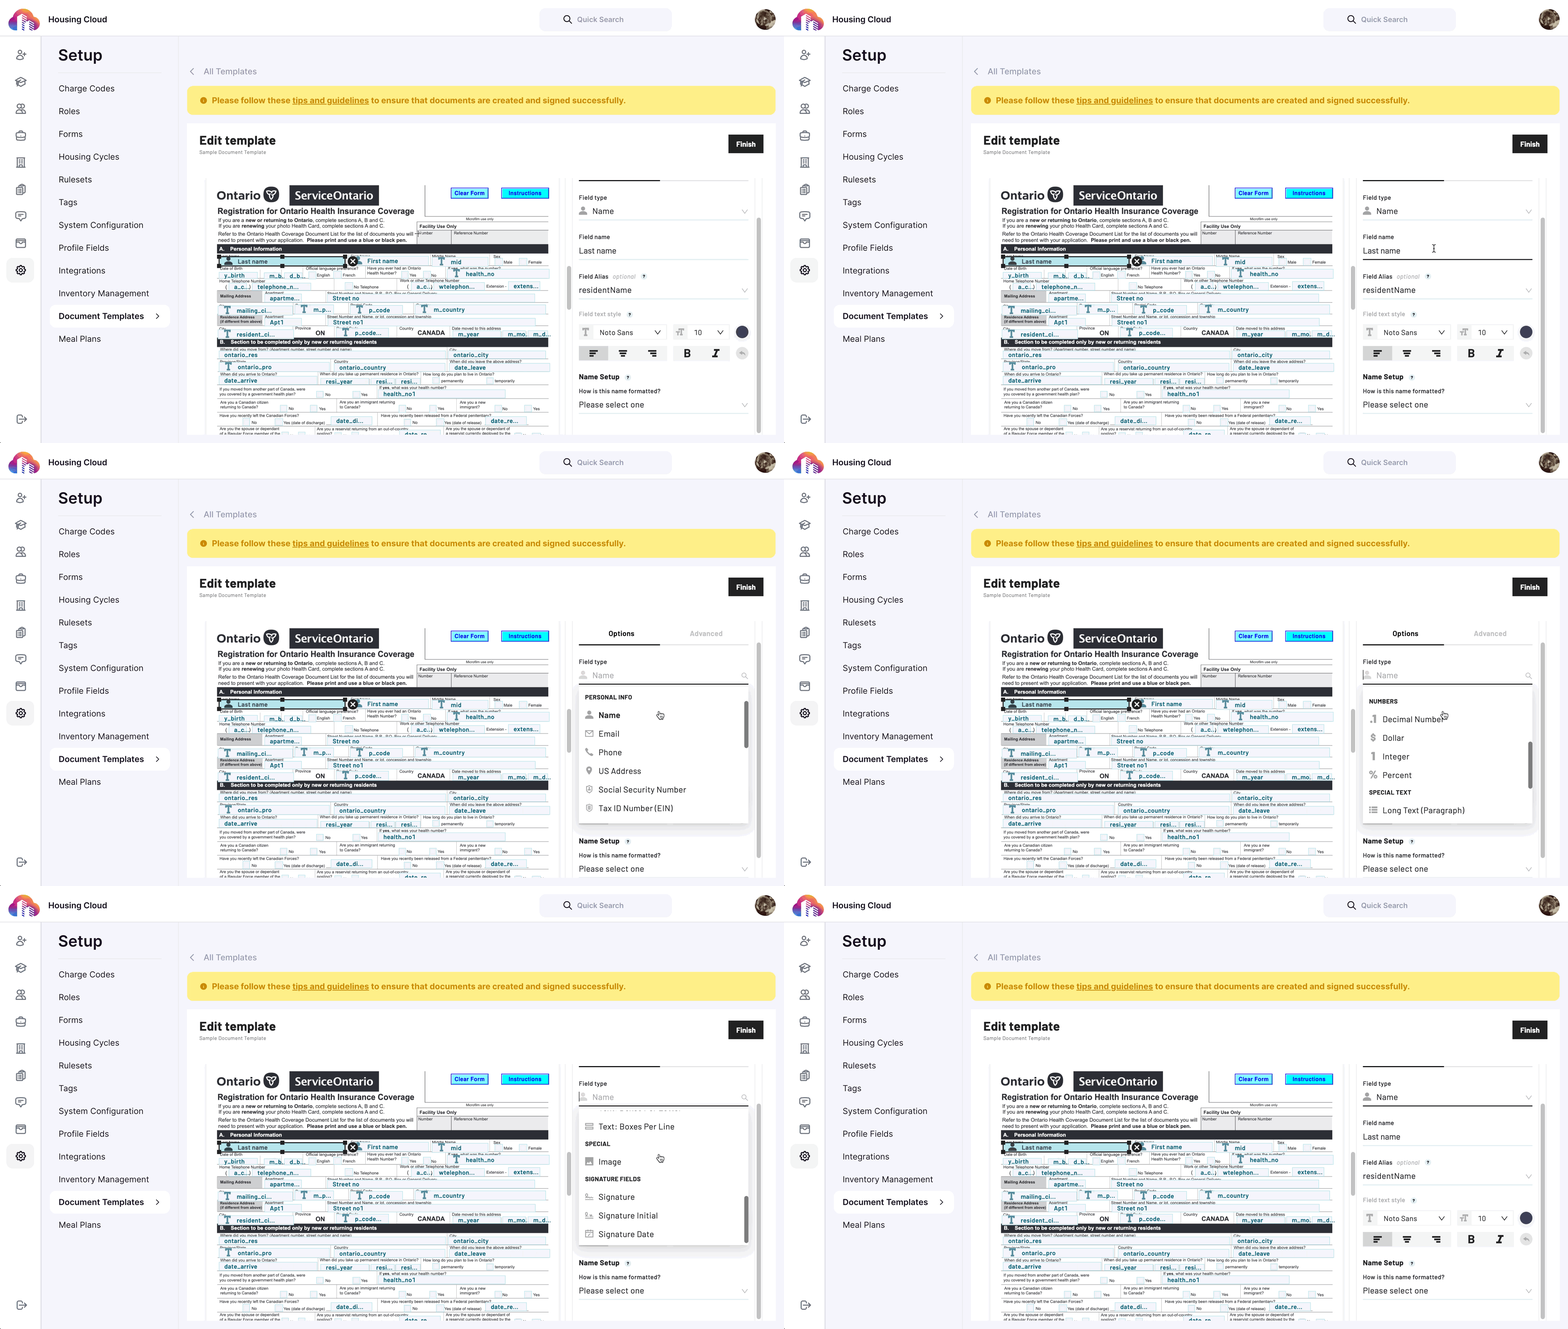
Note: Selecting the appropriate field type is essential for minimizing errors when residents complete forms. For instance, choosing the “Email” field type ensures that the information entered is validated as a properly formatted email address, reducing the chance of incorrect data entry.
Optional: Assign a field alias, such as guardianSignature, to uniquely identify the field for system processes. Aliases are used for referencing the field later and are especially useful for API integrations, allowing users to assign their own IDs for easier data population.
Configure name fields (e.g., first name, last name) to either group the full name into a single box or separate it into multiple boxes. This flexibility allows you to tailor the format to your institution’s specific data collection needs.
 Optional: The advanced sections allow you to create complex data types like arrays to group multiple fields together.
Add New Fields
To add a new field, click on the document where you want the field placed, drag the cursor to create a resizable rectangular area, and release to insert the field.
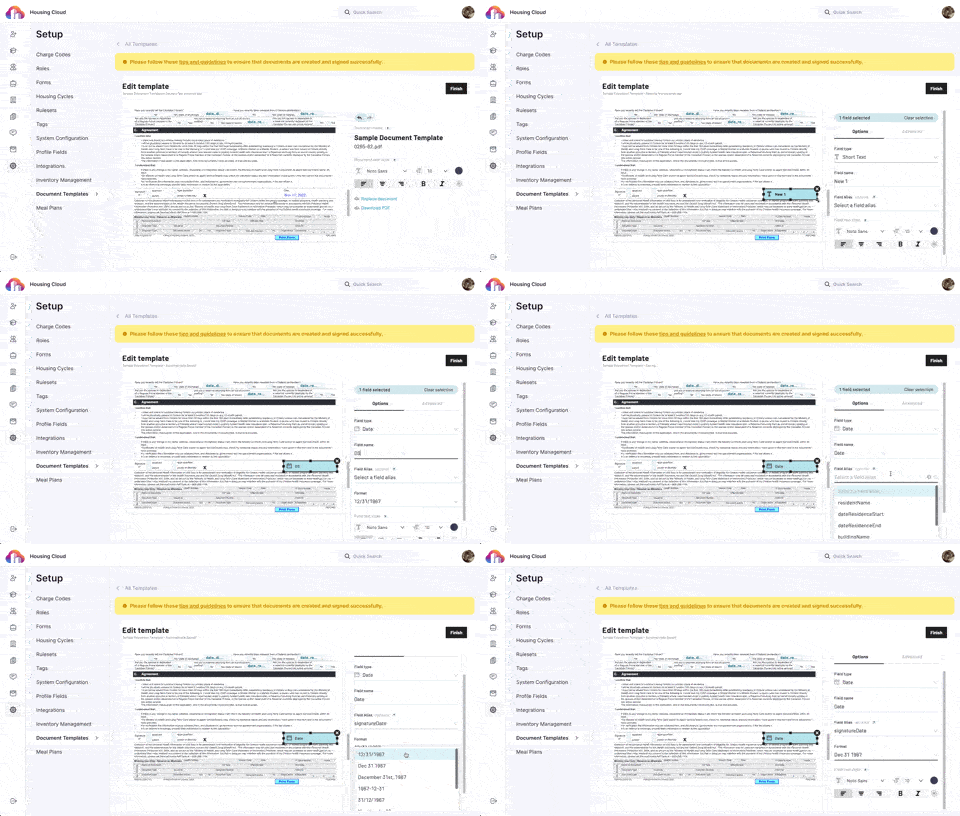
The rest of the process of naming the field, defining the field type, alias, and formatting remains the same as before (refer to point number 11 for details).
Format Fields
Use the formatting tools in the right-hand panel to adjust font style, size, alignment, and other visual elements.

Configure Document Signatures
To set up a signature field in the document, draw a rectangle in the area where the signature is required. Once placed, select Signature as the field type to designate this space specifically for digital signing.

Ensure you assign a signature type as the field alias (e.g., guardianSignature for guardian-required documents).

Alert: Assigning a specific alias to signature fields is crucial as it uniquely identifies the field within the system, enabling automated recognition and processing of signature data in Housing.Cloud’s backend. Without this association, the document template will not function correctly.
Guardian Signature Requirements
Guardian signatures ensure that underage residents meet required authorization standards by involving their guardians in the document signing process. Housing.Cloud supports this functionality by linking specific signature fields to guardian information, ensuring compliance and accurate processing.
To enable guardian signatures, administrators must set up document templates with appropriate field aliases, configure cycle settings, and ensure that guardian information is uploaded into the system. This process guarantees a seamless signing experience for both residents and their guardians.
Learn more about setting up and managing guardian signatures here.
Finalize the Document Template
Review all fields and configurations to ensure accuracy. Click Finish at the top-right of the editor.

Activate the Document Template
Click Activate to make the template available for use. You must activate the document before it can be accessed.

If needed, click Deactivate to recall the document template.
