How to View Tasks and Create Custom Views
Last updated: October 2, 2026
Here are the steps admins can follow to view tasks:
1. Click on Tasks in the navigation panel.

2. Click on the task you want to view.

3. The task detail view will appear.

4. To make changes or update the task status, click the Edit button.

5. Make any changes and click the Save button. You may also delete the task by clicking the Delete button.

How to Bulk Update Task Status
To edit the status of multiple tasks at the same time, follow these steps.
On the tasks dashboard, click the checkbox beside the desired tasks, then click the kebab menu. Select "assign a status".

How to Export Tasks
You can export the task view into CSV or Excel. To export, click on Export and select CSV or Excel. The file would be available locally.

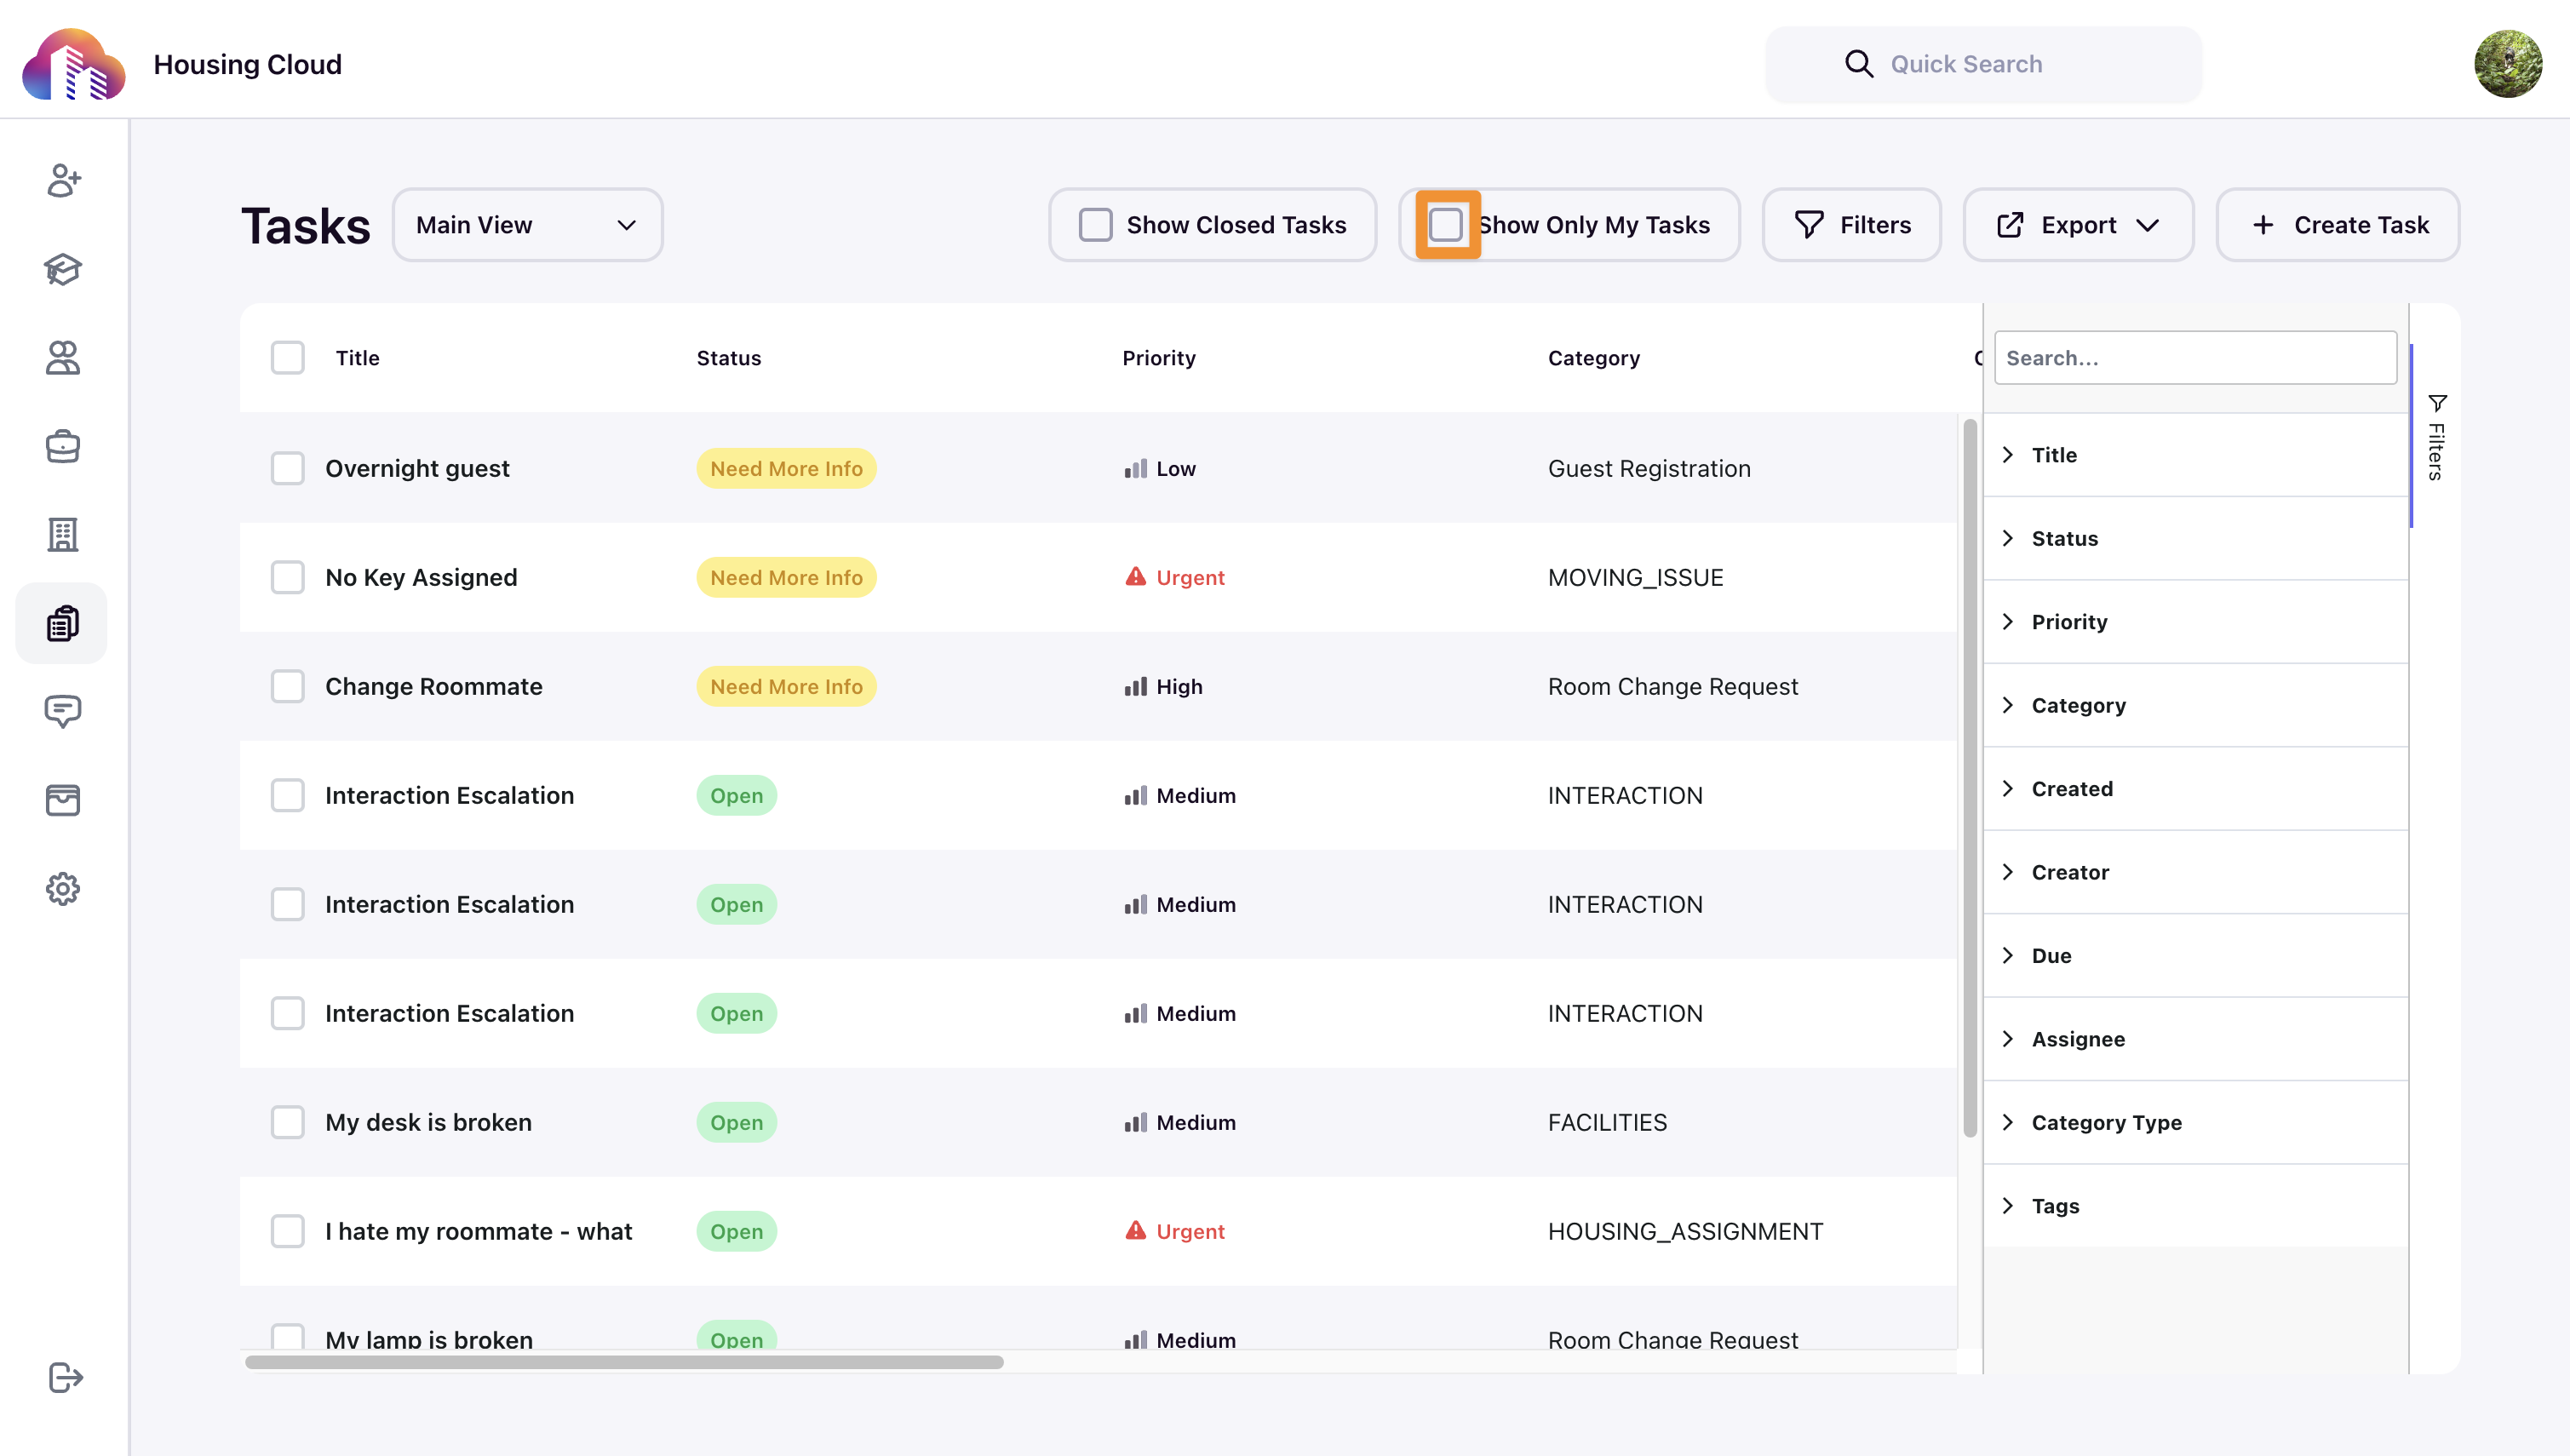
1. To narrow down your task view, you can apply filters. Click on Filters to apply various filters to tasks.

2. These are the filters available.

3. You can view only the tasks assigned to you by checking the Show Only My Tasks box.
Creating Custom Task Views
You can create custom task views in this way:
1. Click on filters and apply filters as needed.

2. For example, tasks with the status "Need more info".

3. Go to the view dropdown and click on Create View.

4. Give this view a name.

5. Click on the Save button.

6. This is the new custom view. You can copy the URL to this view by clicking the copy icon. These URLs are handy when you want to share this view with someone.

7. You can delete this view by clicking on the delete icon.

8. Click Delete to confirm.
